D-Link DAP-X1860 User manual

DAP-X1860
User Manual
AX1800 Mesh Wi-Fi 6 Range Extender
Version 1.00 | 2020/12/21

iD-Link DAP-X1860 User Manual
D-Link reserves the right to revise this publication and to make changes in the content hereof without obligation to notify any
person or organization of such revisions or changes.
Manual Revisions
Hardware Revision Date Description
A1 v1.00 21 December, 2020 Initial release
Trademarks
D-Link and the D-Link logo are trademarks or registered trademarks of D-Link Corporation or its subsidiaries in the United States or other countries.
All other company or product names mentioned herein are trademarks or registered trademarks of their respective companies.
Apple®, Apple logo®, Safari®, iPhone®, and Macintosh® are trademarks of Apple Inc., registered in the U.S. and other countries. App StoreSM is a service
mark of Apple Inc.
Chrome™ browser, Google Play™ and Android™ are trademarks of Google Inc.
Internet Explorer®, Windows® and the Windows logo are trademarks of the Microsoft group of companies.
Copyright © 2021 by D-Link Corporation. All rights reserved. This publication may not be reproduced, in whole or in part, without prior expressed
written permission from D-Link Corporation.
Preface

iiD-Link DAP-X1860 User Manual
Table of Contents
Preface................................................................................. i
Product Overview..............................................................1
Package Contents......................................................................... 1
System Requirements................................................................. 2
Introduction ................................................................................... 3
Features....................................................................................3
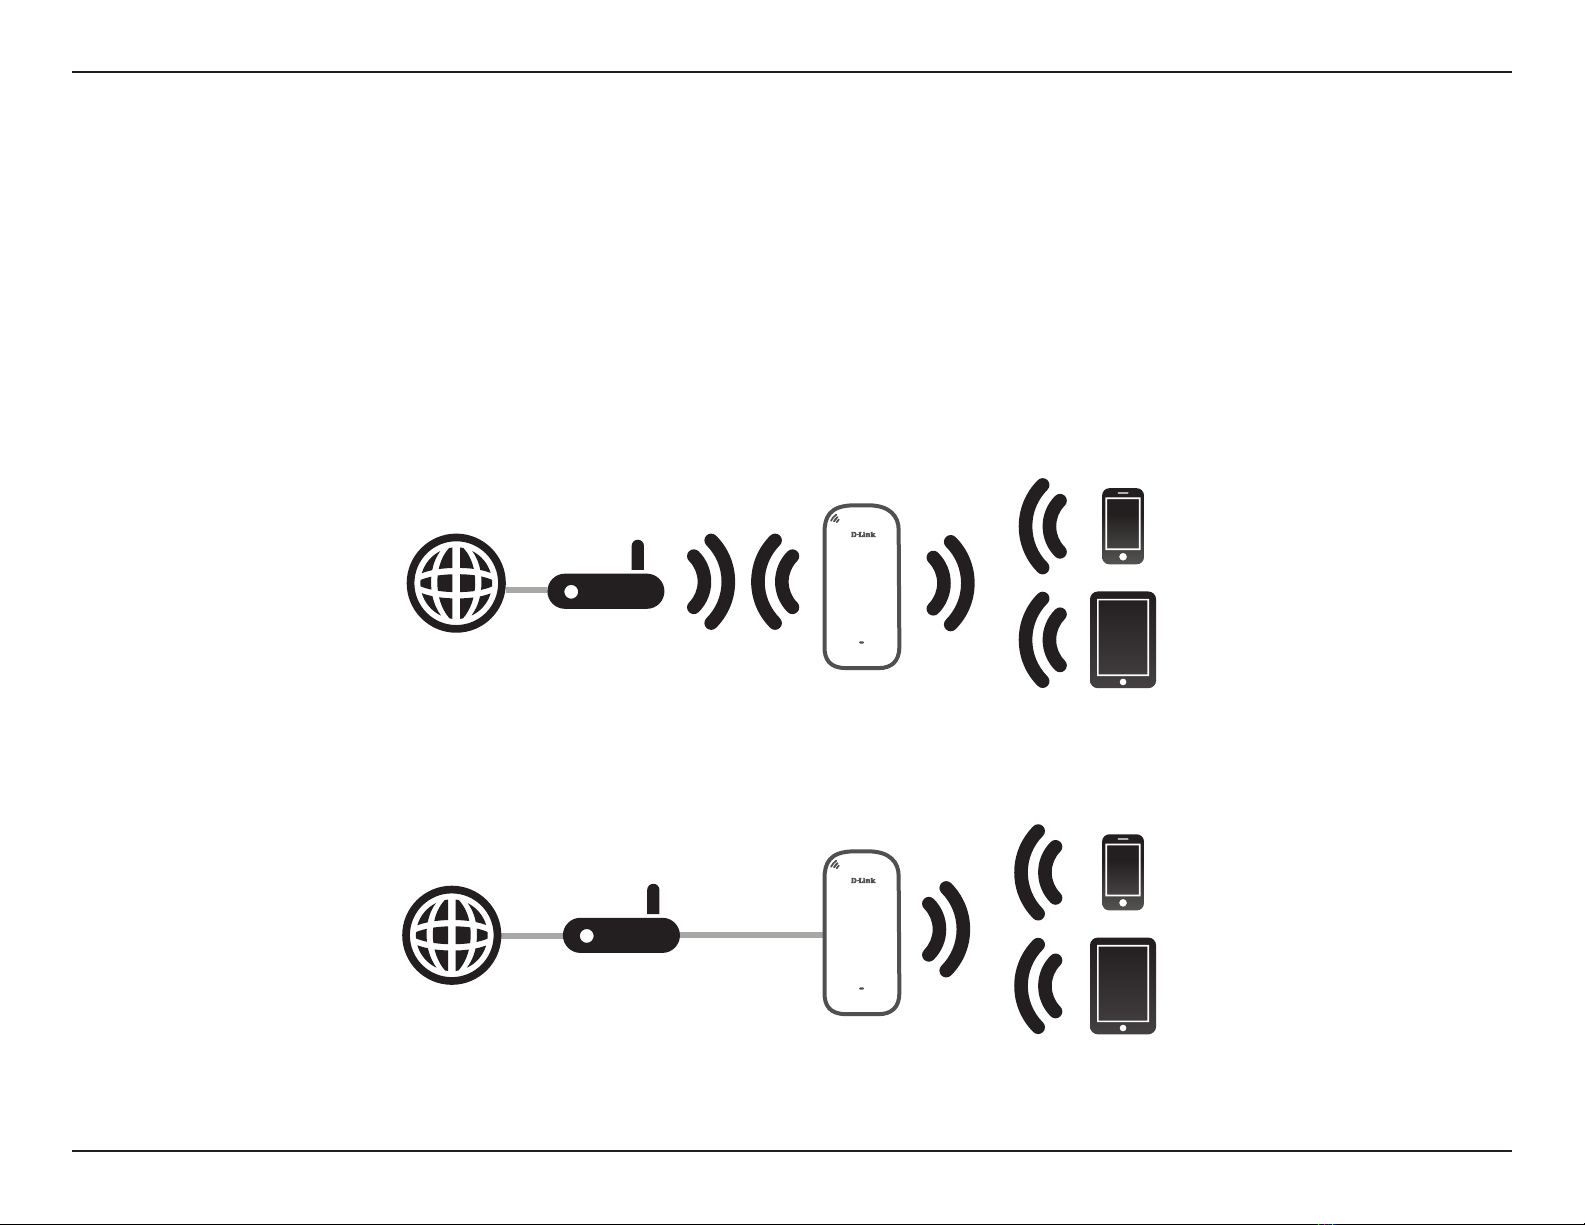
What is a Wireless Extender? ............................................ 4
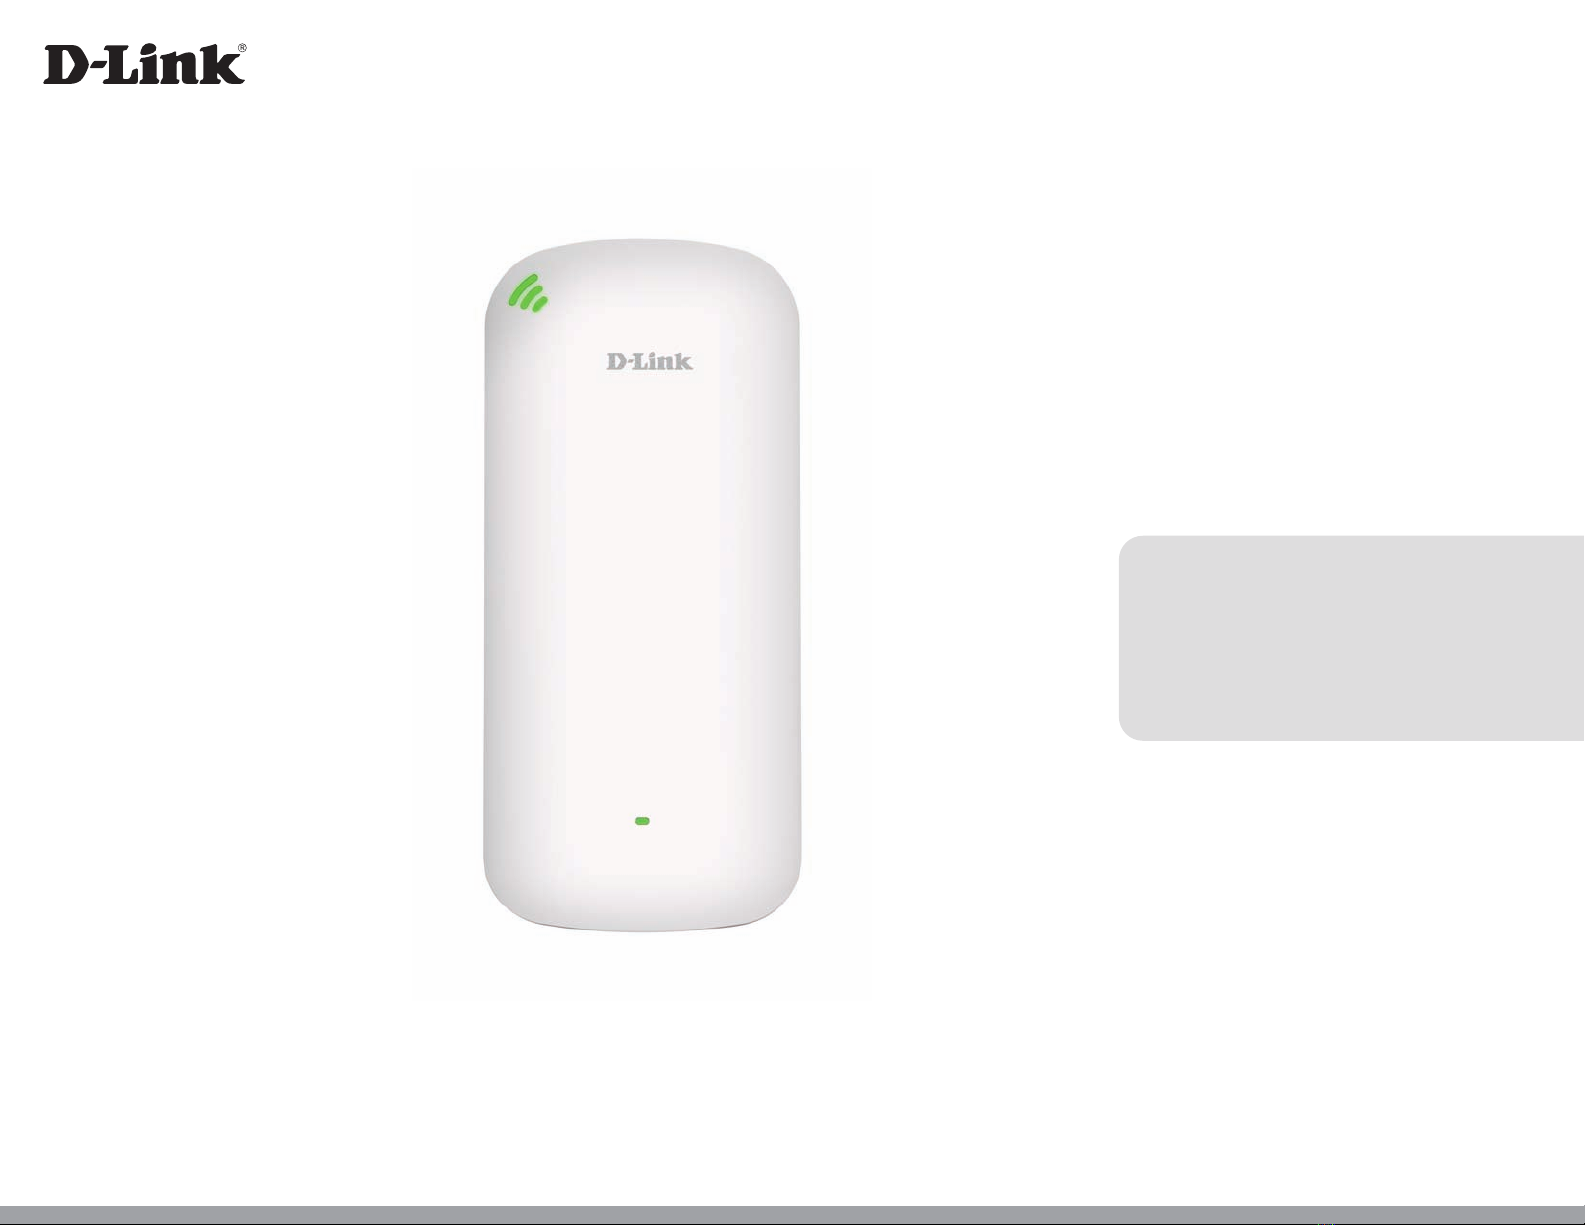
Hardware Overview.....................................................................5
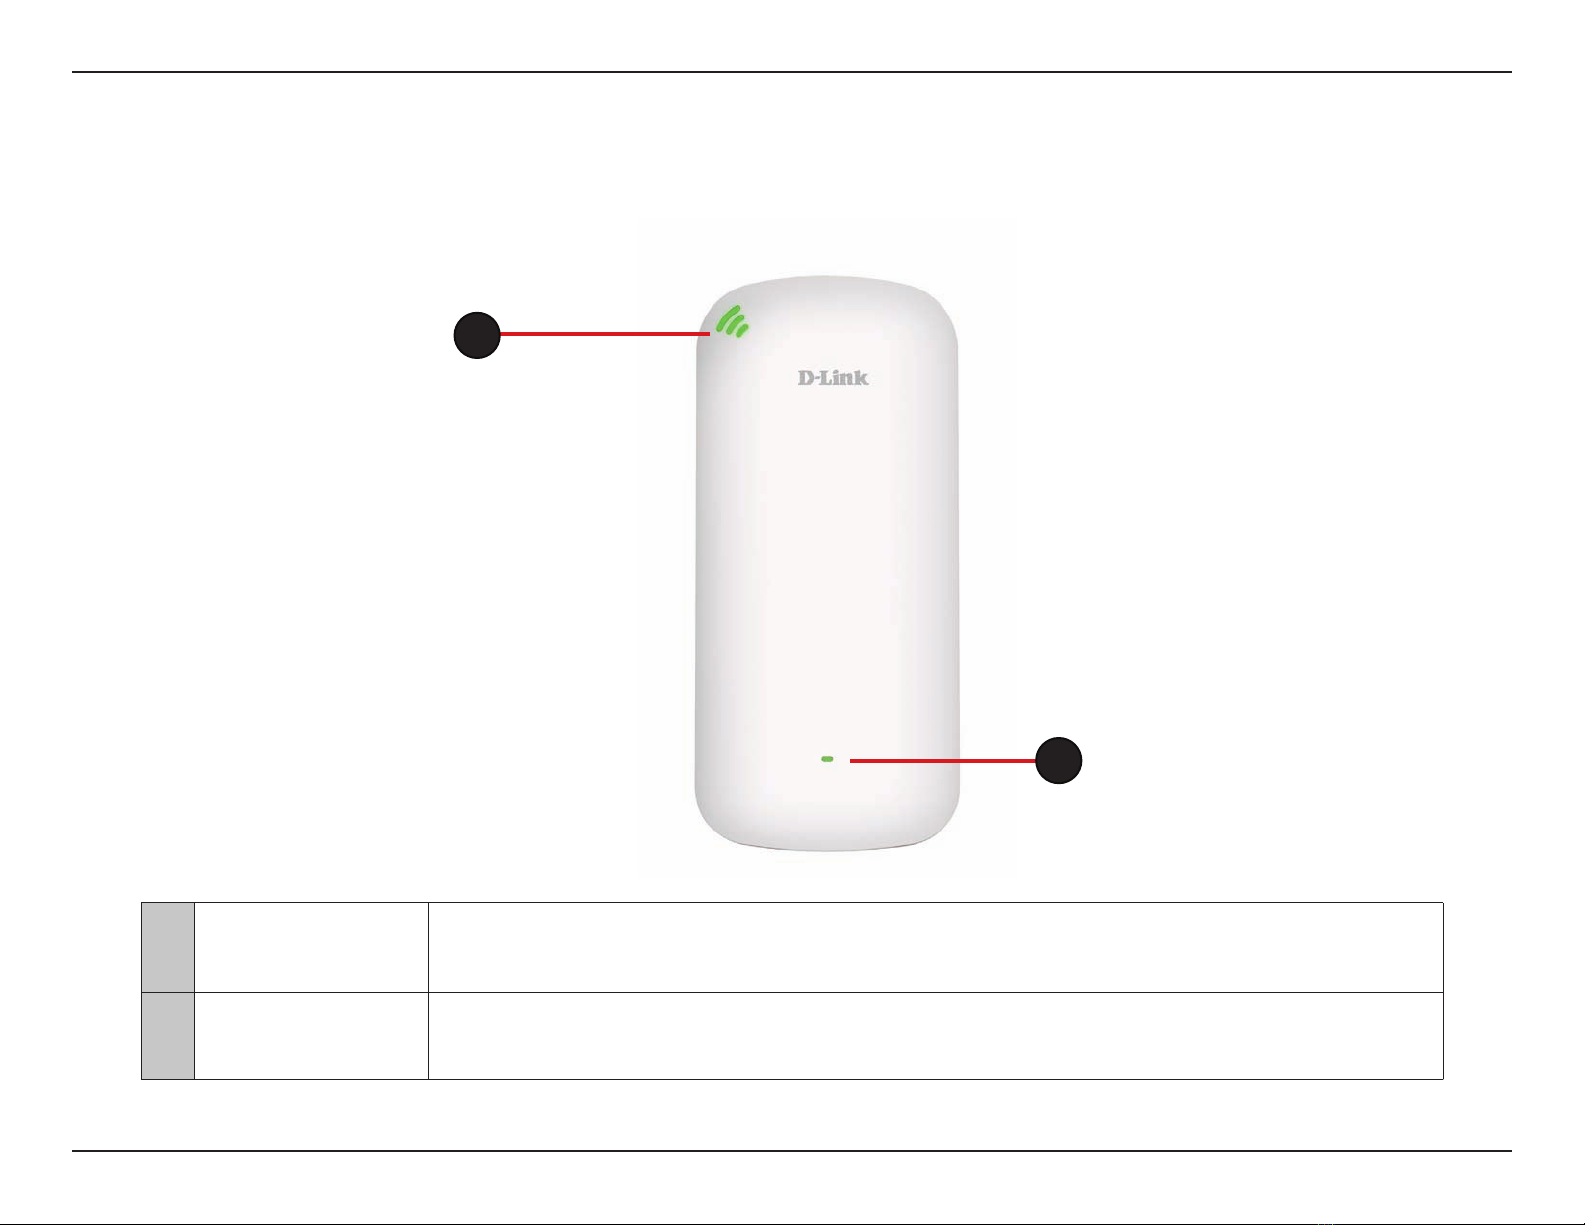
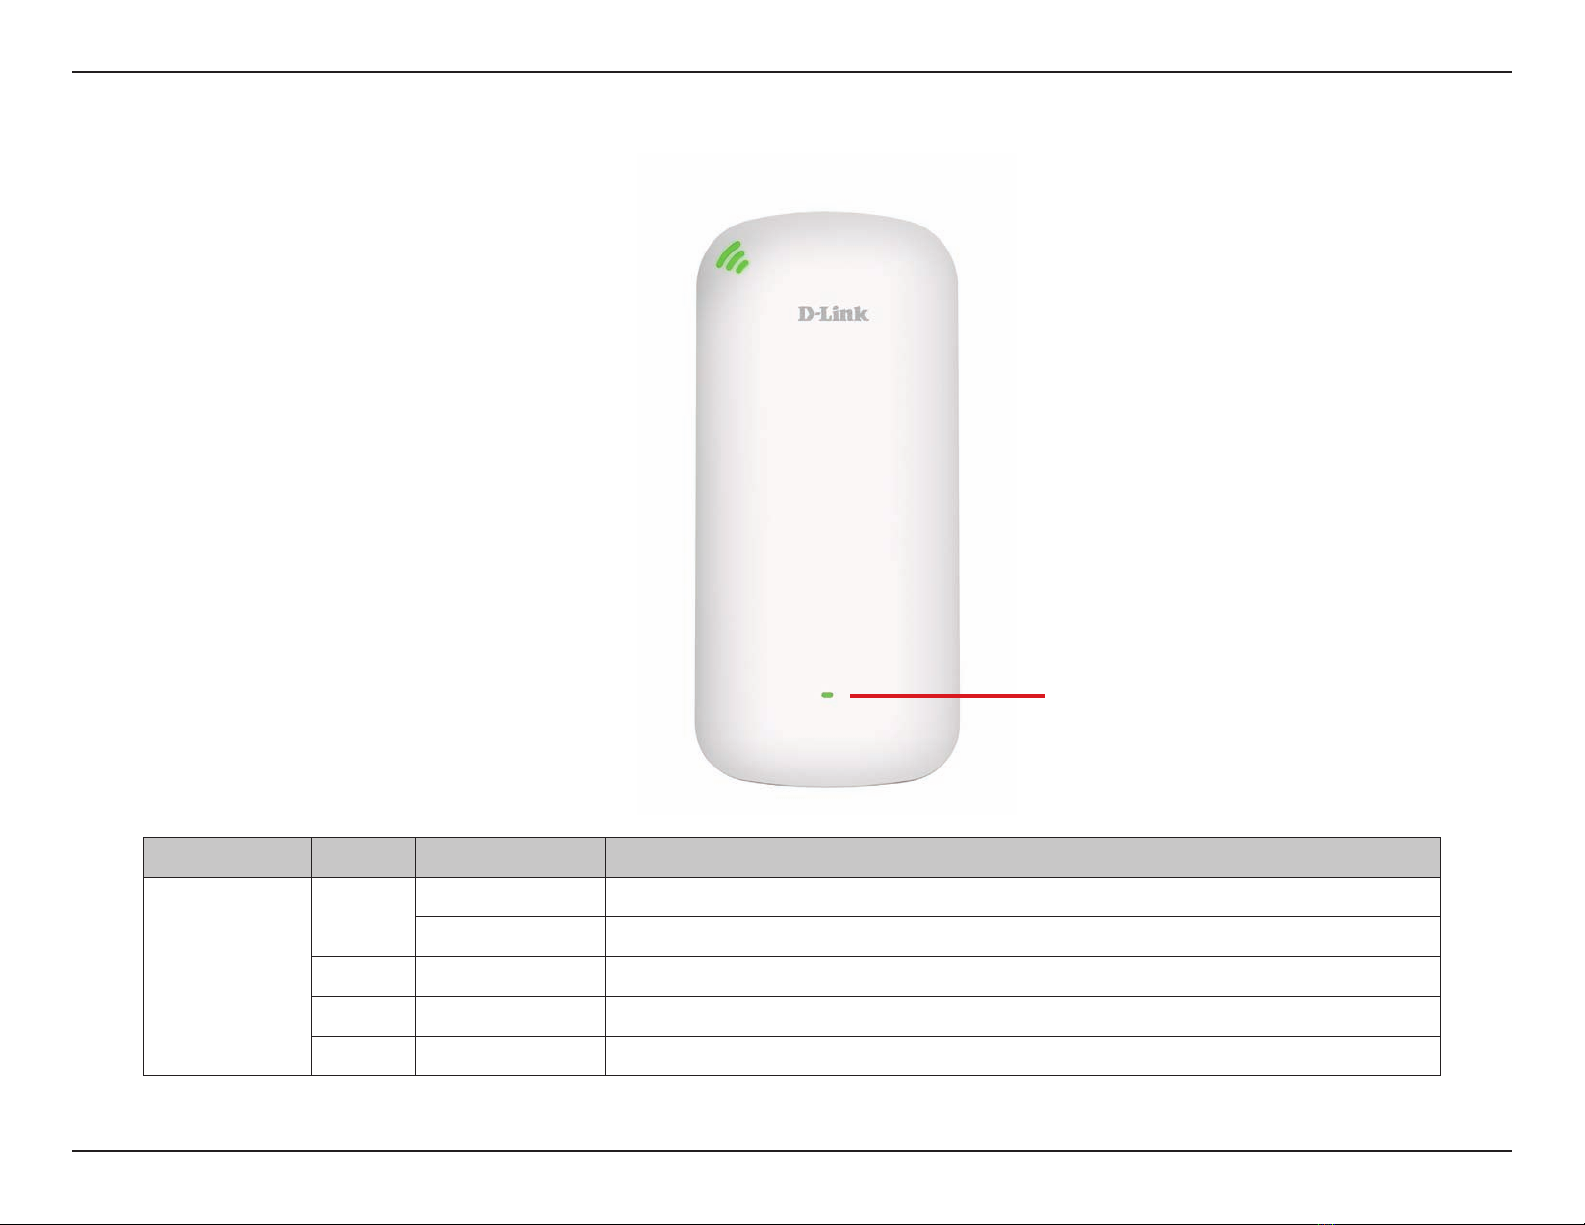
Front .......................................................................................... 5
Status/WPS LED Indicator..................................................6
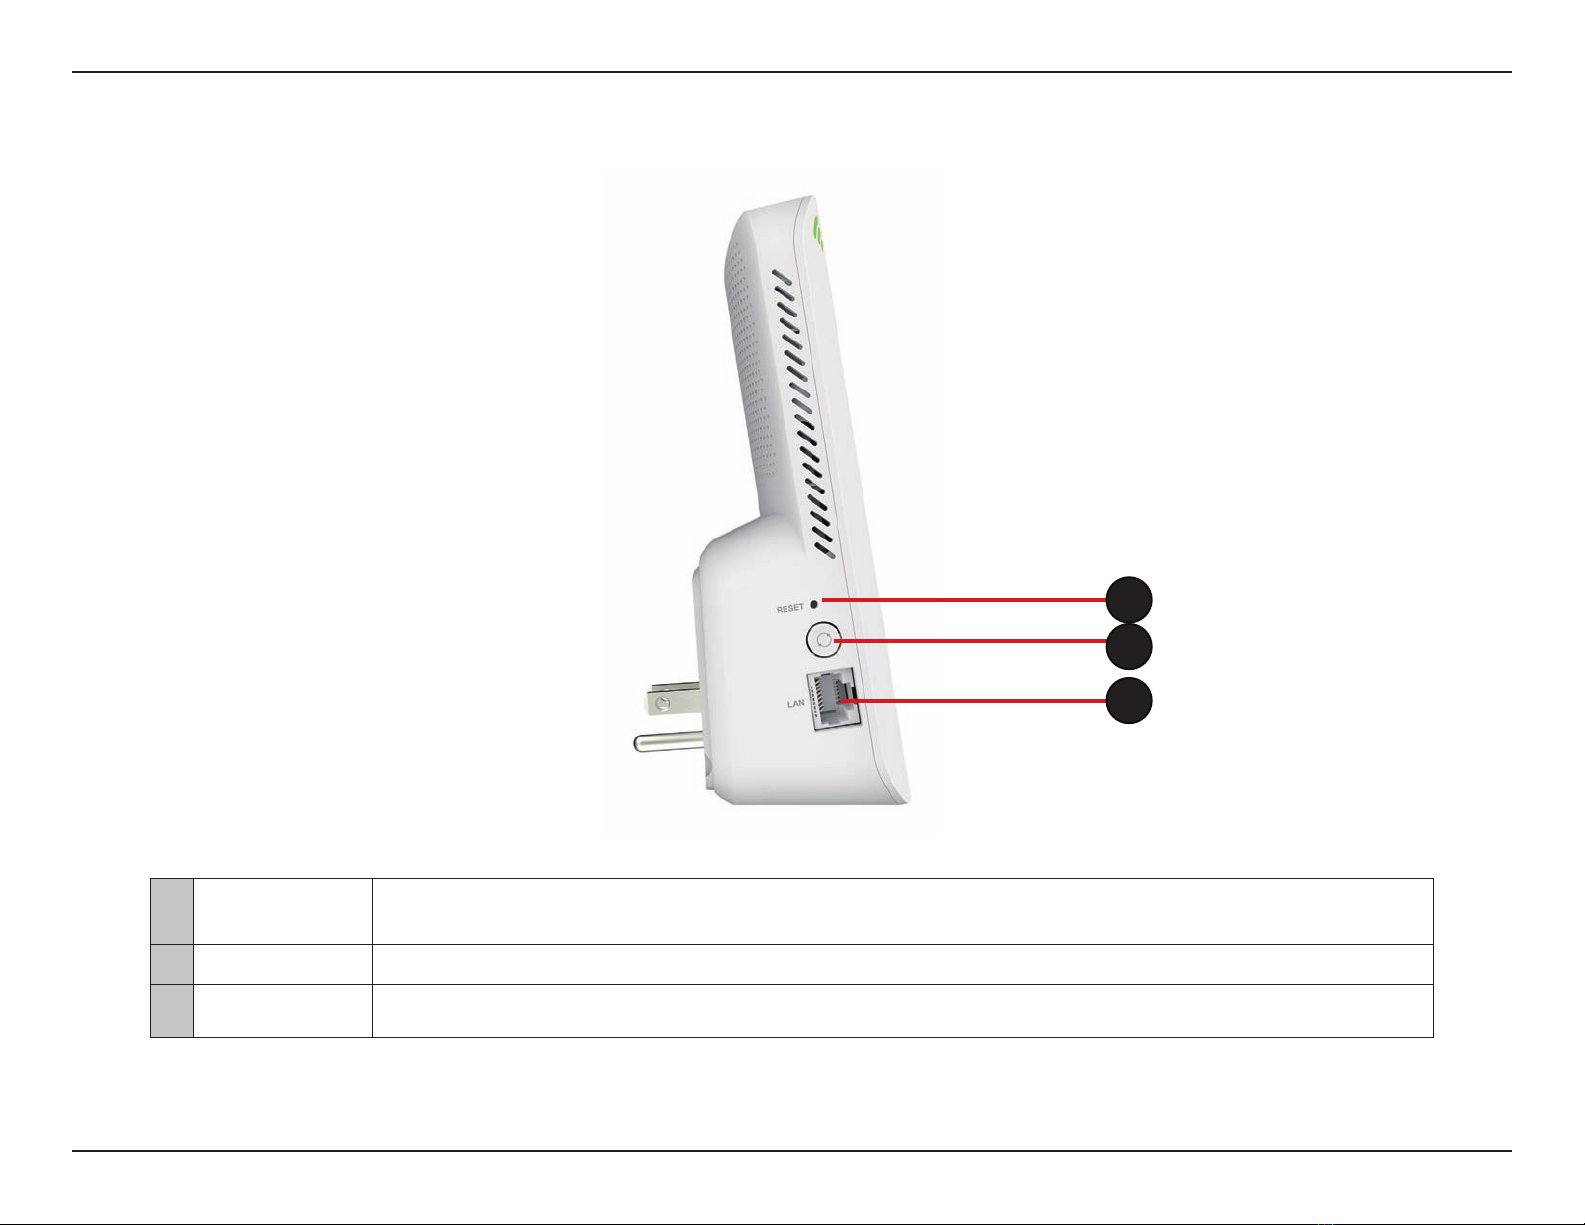
Left Side....................................................................................7
Back............................................................................................8
Installation.........................................................................9
Wireless Installation Considerations......................................9
Hardware Setup ..........................................................................10
Getting Started................................................................11
WPS-PBC Conguration ...........................................................12
Assessing Uplink Signal Strength .........................................13
D-Link Wi-Fi App Setup.....................................................14
Wireless Setup Wizard...............................................................16
Access Point Mode Settings....................................................23
Conguration...................................................................24
Home ..............................................................................................24
Home - Connected to a Wi-Fi Mesh Router.......................27
Settings ..........................................................................................28
Extender Settings ...............................................................28
Existing Network............................................................29
Smart Connect................................................................30
Network Settings ................................................................32
Management................................................................................34
Time.........................................................................................34
Schedule ................................................................................35
Admin .....................................................................................36
System ....................................................................................37
Upgrade .................................................................................38
Statistics.................................................................................39
Wi-Fi Mesh Setup .............................................................40
Setup Using the D-Link Wi-Fi App........................................41
Setup Using an Ethernet Cable .............................................42
Connecting Wireless Clients to the Extender ................43
WPS Button...................................................................................43
Windows® 10................................................................................44
Windows® 8 - WPA/WPA2.........................................................45
Troubleshooting..............................................................47
Wireless Basics.................................................................49
Tips...................................................................................................50
Technical Specications..................................................51
GPL Code Statement........................................................52
Regulatory Statements ...................................................67
Table of Contents

1D-Link DAP-X1860 User Manual
Section 1 - Product Overview
If any of the above items are missing, please contact your reseller.
QIC Quick Install Card
Simple Setup Guide
Product Overview
Package Contents
DAP-X1860
AX1800 Mesh Wi-Fi 6 Range Extender

2D-Link DAP-X1860 User Manual
Section 1 - Product Overview
Network Requirements
• A wireless router with an active Internet connection.
• IEEE 802.11ac, 802.11n, 802.11g, 802.11b, or 802.11a
wireless clients/devices
Web-based Conguration
Utility Requirements
A Computer or Mobile Device with the following:
•Windows®, Apple® Mac OS®, or Linux-based operating system
• Wireless adapter or Wi-Fi functionality
• An Apple® iPhone®, iPad®, or Android™ device
Browser Requirements:
• Internet Explorer® 10 or later
• Firefox® 28 or later
• Safari® 6.0 or later
• Google Chrome™ 28 or later
D-Link Wi-Fi App
Requirements
• iOS® or Android™ device (Please refer to the app’s store page to
check whether your device is compatible.)
System Requirements

3D-Link DAP-X1860 User Manual
Section 1 - Product Overview
Introduction
Features
High-speed Wireless Performance With Wireless 802.11ac Technology
Thanks to the latest wireless AC technology, the DAP-X1860 provides a wireless connection at up to 2000 Mbps* with other 802.11ac wireless
devices.This feature lets you participate in real-time activities online, such as video streaming, online gaming, and real-time audio with
smooth performance.
Compatibility
The DAP-X1860 is fully compatible with the latest 802.11ac standard, but is also backwards compatible with IEEE 802.11n/g/b/a wireless
devices, so you can use your existing devices without sacricing performance.
Compact, Convenient Design
The DAP-X1860 is a compact device that is ideal for use at home or a small oce, as it does not take up much space and is ready to use by
simply plugging it in. The bright Signal Indicator LED makes nding a suitable location a cinch. Its diminutive wall-plug design easily saves you
the hassle of dealing with a power cord.
LatestWireless Network Security and Encryption
The DAP-X1860 supports wireless security features to prevent unauthorized access from the wireless network. Support for WPA/WPA2
standards ensure that you’ll be able to use the best possible encryption methods with your compatible wireless devices.
Extend and Customize Your High-speed Wireless AC Network withWi-Fi Mesh
D-Link’s Wi-Fi Mesh is a scalable solution that allows you to easily increase the coverage of your wireless AC network when connected to a
D-Link Wi-Fi Mesh router. Setup is eortless; conguration of multiple DAP-X1860’s can be done in minutes as settings can be passed on to
other access points once the rst is congured.
Easy to Set Up, Easy to Use
Setting up the AX1800 Mesh Wi-Fi 6 Range Extender is simple. You can use the supported D-Link Wi-Fi app on your compatible iOS or Android
device to utilize the built in set up wizard. The DAP-X1860 can also receive automatic over-the-air rmware updates, which ensures the best
protection and the latest features for your device.
* Maximum wireless signal rate derived from standard IEEE specications. Actual data throughput will vary. Network conditions and environmental factors, including volume of network trac,
building materials and construction, and network overhead may lower actual data throughput rate. Environmental conditions will adversely aect wireless signal range.

4D-Link DAP-X1860 User Manual
Section 1 - Product Overview
What is a Wireless Extender?
The DAP-X1860 acts as a repeater to extend the range of an existing wireless network to provide a better signal for parts of your
home or oce that may have poor or no reception. Your existing wireless signal will be re-broadcast by the DAP-X1860, allowing
you to reach the farthest corners of your home or oce.The extended network can simply use the same network credentials as the
existing network, or you can specify a dierent network name and password, giving you the exibility to control network access.
You may also use the DAP-X1860 as a wireless access point by connecting an Ethernet cable.
Extend Your Wireless Network using Wi-Fi
Extend Your Wireless Network using Ethernet
Router
Internet DAP-X1860 Wireless Devices
Router DAP-X1860
Internet Wireless Devices

5D-Link DAP-X1860 User Manual
Section 1 - Product Overview
Hardware Overview
Front
1Status LED This LED indicates the current status of the DAP-X1860, as detailed on the next page
2Signal Indicator
LED
The more lit green bars on the Signal Indicator LED, the better the wireless signal to the host network. A
single solid orange LED indicates a weak Wi-Fi signal.
2
1

6D-Link DAP-X1860 User Manual
Section 1 - Product Overview
LED Indicator Color Status Description
Power/Status
Green Solid The DAP-X1860 is receiving power and connected to a host network.
Blinking WPS mode is active and is searching for another WPS device.
Red Solid The DAP-X1860 is booting or an error has occurred.
Orange Blinking The DAP-X1860 is not connected to a host network.
None O Device is not receiving power. Check the power outlet.
Status/WPS LED Indicator

7D-Link DAP-X1860 User Manual
Section 1 - Product Overview
Left Side
1Reset Button Use an unfolded paperclip to press and hold the reset button on the bottom of DAP-X1860 for 10 seconds
to restore to factory default settings.
2WPS Button Press to establish a connection with another WPS compatible device.
3LAN Connect an Ethernet cable if you are adding wireless to wired network.
2
1
3

8D-Link DAP-X1860 User Manual
Section 2 - Installation
You may locate the Wi-Fi name (SSID) and password for your DAP-X1860.This information is printed on the specication sticker on
the back of the device. You will need this information to connect your computer or mobile device to the default network (SSID) of
your DAP-X1860. This information is also provided on the Quick Install Card.
Back

9D-Link DAP-X1860 User Manual
Section 2 - Installation
Installation
Wireless Installation Considerations
The DAP-X1860 lets you extend your existing wireless network’s coverage as long as it is within range of the uplink network. Keep in
mind that the DAP-X1860’s extension network’s range may be limited by the number, thickness and location of walls, ceilings, or other
objects that the wireless signals must pass through.Typical ranges vary depending on the types of materials and background RF (radio
frequency) noise in your home or business. The key to maximizing wireless range is to follow these basic guidelines:
1. Keep the number of walls and ceilings between the D-Link extender and other network devices to a
minimum - each wall or ceiling can reduce your adapter’s range from 3-90 feet (1-30 meters.) Position your
devices so that the number of walls or ceilings is minimized.
2. Be aware of the direct line between network devices. A wall that is 1.5 feet thick (0.5 meters), at a 45-degree
angle appears to be almost 3 feet (1 meter) thick. At a 2-degree angle it looks over 42 feet (14 meters) thick!
Position devices so that the signal will travel straight through a wall or ceiling (instead of at an angle) for
better reception.
3. Building materials make a dierence. A solid metal door or aluminum studs may have a negative eect on
range. Try to position extenders, access points, wireless routers, and computers so that the signal passes
through drywall or open doorways. Materials and objects such as glass, steel, metal, walls with insulation,
water (sh tanks), mirrors, le cabinets, brick, and concrete will degrade your wireless signal.
4. Keep your product away (at least 3-6 feet or 1-2 meters) from electrical devices or appliances that generate RF
noise.
5. If you are using 2.4 GHz cordless phones or X-10 (wireless products such as ceiling fans, lights, and home
security systems), your wireless connection may degrade dramatically or drop completely. Make sure your 2.4
GHz phone base is as far away from your wireless devices as possible. The base transmits a signal even if the
phone is not in use.

10D-Link DAP-X1860 User Manual
Section 2 - Installation
Hardware Setup
Plug in the DAP-X1860 to a power outlet. Verify that the power LED is blinking orange before continuing with conguration.
OUTLET

11D-Link DAP-X1860 User Manual
Section 3 - Conguration
There are several conguration tools you can use to set up your DAP-X1860.
• WPS PBC - To easily extend an existing wireless network refer to “WPS-PBC Conguration” on page 12 for setup
instructions.
• D-Link Wi-Fi App - Use your compatible iOS or Android device to congure your extender. Refer to “D-Link Wi-Fi” on
page 14”on page 11 for setup instructions.
• Web-based Wireless Setup Wizard - This wizard will launch when you log into the extender’s web conguration utility
for the rst time. Refer to“Wireless Setup Wizard”on page 16 for setup instructions.
• Access Point Mode Settings-This section will go through how to setup your extender as an access point. Refer to“Access
Point Mode Settings”on page 23.
Getting Started

12D-Link DAP-X1860 User Manual
Section 3 - Conguration
WPS-PBC Conguration
Step 1 - Initiate WPS Mode
While the Status/WPS LED is blinking orange, push the WPS button on the source
wireless router or AP, and then push the WPS button on the DAP-X1860. The
Status/WPS LED will start to ash green. Please allow up to two minutes for the
process to nish. The Status/WPS LED will turn solid green when the DAP-X1860
has connected successfully to the source wireless router or access point.
Step 2 - Connecting Devices to the DAP-X1860
The DAP-X1860 is now ready to share the extended Wi-Fi network with your PCs
and mobile devices.You may use the WPS method to connect devices to the
extended network created by the DAP-X1860 using the following network names
(SSID). The password will be the same as the wireless network you are extending.
• (Your router’s SSID)-EXT
The Smart Connect feature will present a single wireless network. When
connecting clients to the extended network, they will be automatically added to
the best band, either 2.4 GHz or 5 GHz. To disable the Smart Connect feature and
individually congure 2.4 GHz and 5 GHz SSIDs, refer to“Extender Settings”on
page 28.
Wireless Protected Setup (WPS) makes connecting your DAP-X1860 easy. To use WPS, rst make sure the source router or access
point features a WPS Button or has a virtual WPS Button.

13D-Link DAP-X1860 User Manual
Section 2 - Installation
Assessing Uplink Signal Strength
Poor Ok Good Best
The Status/WPS LED will turn solid green when the DAP-X1860 has connected successfully to a wireless network and is extending
that network. If the Smart Signal LED has a single orange bar after the connection process has nished, the DAP-X1860 has
established a poor quality connection. The more lit bars on the Signal Indicator LED, the better the wireless signal.To improve the
connection quality, the DAP-X1860 should be relocated closer to the source wireless router. Using the 5 GHz extension network
is recommended in order to achieve the fastest wireless speeds. If the extender has been congured as an Access Point and is
connected via Ethernet cable to an uplink network, the Smart Signal LED will not be lit.

14D-Link DAP-X1860 User Manual
Section 2 - Installation
D-Link Wi-Fi App Setup
The D-Link Wi-Fi app allows you to install and congure your DAP-X1860 from your compatible Android or iOS device.
Note: The screenshots may be dierent depending on your mobile device’s OS version. The following steps show the iOS interface
of the D-Link Wi-Fi app. If you are using an Android device, the appearance may be dierent from that of the screenshots, but the
process is the same.
Step 3
Tap on the Install New Device button at the middle of the screen.
Step 1
Search and install the free D-Link Wi-Fi app available on the App Store or on
Google Play. You can also scan the QR code on the right, which will take you
to the respective D-Link Wi-Fi app store page.
Step 2
Launch the D-Link Wi-Fi app from the home screen of your device.
D-Link Wi-Fi

15D-Link DAP-X1860 User Manual
Section 3 - Conguration
Step 5
Slide the product options to AP and select DAP-X1860 from the list of available
devices. Click Next to continue.
Step 6
You will now be guided through a step-by-step process for setting up your
device. Simply follow the on-screen instructions to complete the installation and
DAP-X1860 conguration process.
Step 4
Click Yes if you have the setup QR code with you to scan the QR code and
proceed to step 6. If not, click No and proceed to step 5.

16D-Link DAP-X1860 User Manual
Section 3 - Conguration
Wireless Setup Wizard
To access the setup utility for the DAP-X1860
AX1800 Mesh Wi-Fi 6 Range Extender on your PC, rst connect to the DAP-X1860
wirelessly using the Wi-Fi name (SSID) and password located on the back of your
DAP-X1860.Then open a web browser and enter http://dlinkap.local./ in your
browser’s URL eld. You may also enter the IP address* of the DAP-X1860.
*The default IP address is 192.168.0.50. Once your DAP-X1860 connects to the host network,
it will be assigned a new IP address based on your network’s DHCP settings.You will need
to log in to your router to see what IP address is assigned to your DAP-X1860. For multiple
DAP-X1860s, go to http://dlinkapxxxx.local. as shown on the included Quick Installation
Card, with “xxxx” being the last four digits of the DAP-X1860’s MAC address.
If this is your rst time logging in to the extender and no connection has been
established, the setup wizard will automatically appear. If the setup process was
not previously completed, then log in to the interface by leaving the password
eld blank.
The setup wizard is designed to guide you through a step-by-step process to congure your new DAP-X1860
AX1800 Mesh Wi-Fi 6 Range Extender to extend your wireless network and connect to the Internet via a wireless setup process. To
set your DAP-X1860 using an Ethernet cable, please refer to“Access Point Mode Settings”on page 23.

17D-Link DAP-X1860 User Manual
Section 3 - Conguration
This wizard will guide you through conguring your new DAP-X1860 by wireless
means.
Click Next to begin.
Agree to the Terms of Use and Privacy Policy to continue.
Other manuals for DAP-X1860
1
Table of contents
Other D-Link Extender manuals

D-Link
D-Link DHP-W306AV User manual

D-Link
D-Link DAP-1720 User manual

D-Link
D-Link DAP-1620 User manual

D-Link
D-Link COVR-P2502/E User manual

D-Link
D-Link DAP-1320 User manual

D-Link
D-Link DAP-X1870 User manual

D-Link
D-Link DAP-1530 User manual

D-Link
D-Link DAP-1635 User manual

D-Link
D-Link DAP-1330 Manual

D-Link
D-Link DMG-112A User manual

D-Link
D-Link N300 DAP-1320 User manual

D-Link
D-Link DAP-1325 User manual

D-Link
D-Link DAP-1620 User manual

D-Link
D-Link DAP-1950 User manual

D-Link
D-Link DAP-1520 User manual

D-Link
D-Link DAP-1860 Manual

D-Link
D-Link POWERLINE DHP-W313AV User manual

D-Link
D-Link DAP-1330 User manual

D-Link
D-Link DAP-1325 User manual

D-Link
D-Link DAP-1620 User manual