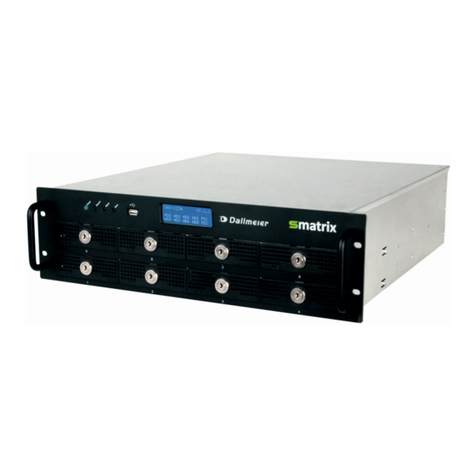
dallmeier SMatrix DMX2400 Assembly instructions

English
Rev. 1.0.1 / 2012-01-19
Service
Hybrid VideoIP-Appliance
DMX 2400

DMX 2400
www.dallmeier.com 2
Information about Copyright, Trademarks, Design Patents
© 2012 Dallmeier electronic
The reproduction, distribution and utilization of this document as well as the communication of
its contents to others without express authorization is prohibited. Offenders will be held liable for
the payment of damages. All rights reserved in the event of the grant of a patent, utility model or
design.
We reserve the right to make technical modications.
The manufacturer accepts no liability for damage to property or pecuniary damages arising due
to minor defects of the product or documentation, e.g. print or spelling errors, and for those not
caused by intention or gross negligence of the manufacturer.
Dallmeier electronic GmbH & Co.KG
Cranachweg 1
93051 Regensburg, Germany
www.dallmeier.com
info@dallmeier.com
All trademarks identied by ® are registered trademarks of Dallmeier electronic.
All trademarks identied by *) are trademarks or registered trademarks of the following owners:
Third-party trademarks are named for information purposes only.
Dallmeier electronic respects the intellectual property of third parties and always attempts to ensure the complete identication of third-party
trademarks and indication of the respective holder of rights. In case that protected rights are not indicated separately, this circumstance is
no reason to assume that the respective trademark is unprotected.

DMX 2400
www.dallmeier.com 3
Table of Contents
1 Introduction...................................................................................................4
1.1 Validity.............................................................................................................4
1.2 Documents......................................................................................................4
1.3 Conventions....................................................................................................4
2 Safety Instructions........................................................................................6
3 Login ..............................................................................................................8
3.1 Local Login......................................................................................................8
3.2 Remote Login..................................................................................................9
4 Licenses.......................................................................................................11
5 Update..........................................................................................................13
6 System Parameters.....................................................................................14
6.1 Default Parameters.......................................................................................14
6.2 Parameters Export........................................................................................14
6.3 Parameters Import ........................................................................................15
7 Hard Disk Drives .........................................................................................17
7.1 Identication..................................................................................................17
7.1.1 Information Dialogue.....................................................................................17
7.1.2 Display ..........................................................................................................18
7.2 Procedure .....................................................................................................18
7.2.1 With RAID-System........................................................................................19
7.2.2 Without RAID System ...................................................................................20
7.3 Exchange......................................................................................................21
8 Power Supply Modules...............................................................................24
8.1 Identication..................................................................................................24
8.1.1 Display ..........................................................................................................24
8.1.2 Information Dialogue.....................................................................................24
8.1.3 Status LED....................................................................................................25
8.2 Deactivation ..................................................................................................26
8.3 Exchange......................................................................................................26
9 Cleaning.......................................................................................................28
DMX 2400
www.dallmeier.com 4
1 Introduction
1.1 Validity
This documentation applies to the videoIP appliance DMX 2400. The descriptions in this
document are based on version 7.3.5.
1.2 Documents
Datasheet
The document Datasheet contains the technical specications, features and data of the
device.
The target audience of this document is trained and authorized professionals (“installers”).
Commissioning
The document Commissioning contains detailed instructions on mounting, connection
assignment and commissioning of the device.
The target audience of this document is trained and authorized professionals (“installers”).
Conguration
The document Conguration contains detailed descriptions on the conguration of the de-
vice. In addition it contains safety instructions and general instructions.
The target audience of this document is trained and authorized professionals (“installers”).
Service (this document)
The document Service includes detailed instructions for maintenance and cleaning of the
device.
The target audience of this document is trained and authorized professionals (“installers”).
1.3 Conventions
Various warning words and symbols indicate potential sources of danger.
DANGER
DANGER indicates a hazardous situation which, if not avoided, will result
in death or serious injury.
WARNING
WARNING indicates a hazardous situation which, if not avoided, could re-
sult in death or serious injury.

DMX 2400
www.dallmeier.com 5
CAUTION
CAUTION indicates a hazardous situation which, if not avoided, could re-
sult in minor or moderate injury.
NOTICE
NOTICE indicates practices for preventing property damage, incorrect con-
gurations or faulty operations
The following symbols and various character formats are used to increase the clearness
of the document:
This arrow indicates an instruction.
Expressions in bold and italics indicate a control element on the device (switches or la-
bels) or on its user interface (buttons, menu entries).
Paragraphs in italics contain information on basic principles, special features and efcient
procedure.

DMX 2400
www.dallmeier.com 6
2 Safety Instructions
Only use this device if it is technically in proper working order, to the intended purpose and
while keeping safety and potential dangers in mind.
Qualied Personnel
Installation, mounting, connection, commissioning and conguration of the unit may only
be carried out by qualied personnel. This also applies to the maintenance, testing and re-
pair, whereat the regulations of the DIN VDE 0701 series of standards (repair, modication
and inspection of electrical appliances) must be followed.
Regulations
The use of video and audio surveillance systems in general is strictly regulated. Inform
yourself about the applicable laws and regulations regarding data, working and environ-
mental protection before using the unit and ensure compliance with them.
System Components
Only use internal components that have been tested and approved by Dallmeier. Inappro-
priate internal components can cause malfunctions, damages and data loss and can result
in loss of warranty.
RAID System
Devices that are congured with a RAID system for redundant recording always must be
supplied with power via an uninterruptable power supply (UPS). A sudden voltage drop can
damage the RAID system.
Modications
Do not make any modications to the hardware or software that has not been tested and
approved by Dallmeier. Inappropriate modications can cause malfunctions, damages and
data loss and can result in loss of warranty.
Documentation
Carefully and completely read the documents included in delivery. Always observe the
contained instructions, notes and warnings.
Condensation Water
If the unit is brought from a cold to a warm environment, resulting condensation water
can cause malfunctions and damages. In this case wait (up to 8 hours) until the unit has
reached room temperature before commissioning.
Operating Conditions
Unfavourable operating conditions can shorten the life of the unit and can cause malfunc-
tions, damages and data loss and can result in loss of warranty. Observe the specications
given in the technical data, the operating condition requirements and the maintenance
instructions.
Shocks
Shocks can cause malfunctions and damages. The unit may not be moved while in opera-
tion.

DMX 2400
www.dallmeier.com 7
Foreign Bodies
If objects or liquids get into the unit, immediately disconnect it from the power supply (pull
out the power plug). Contact the sales partner responsible for your area.
Burnt Smell
If you notice burnt smell or formation of smoke from the unit, immediately disconnect it from
the power supply (pull out the power plug). Contact the sales partner responsible for your
area.
Opening
The housing of the unit may only be opened by qualied personnel for inspection, mainte-
nance and repair.
Disposal
Disconnect the unit from the power supply. Remove all connected devices. Return the unit
to your respective sales partner.

DMX 2400
www.dallmeier.com 8
3 Login
For the following service steps a login is required. This can be done locally directly on the
recorder or over the network with the software NetCong2.
3.1 Local Login
After the start (up to about 5 minutes) the recorder is ready for the local login. The back-
ground image of the conguration screen is displayed.
Fig. 3-1
Left-click the background.
The Recorder login dialogue is displayed.
Enter the Username.
Enter the Password.
Click the OK button.

DMX 2400
www.dallmeier.com 9
The graphical conguration interface of the recorder is displayed.
Fig. 3-2
Make the required settings (see below).
3.2 Remote Login
After the start (up to about 5 minutes) the recorder is ready for remote configuration over
the network with the software NetCong2.
Start the NetConfig2 software.
The NetCong Login dialogue is displayed.
Fig. 3-3
Set the required Mode.
Enter the required IP address.
Enter the required Password.
Confirm with Login.
The connection to the recorder is established.

DMX 2400
www.dallmeier.com 10
The graphical conguration interface of the recorder is displayed.
Fig. 3-4
Make the required settings (see below).

DMX 2400
www.dallmeier.com 11
4 Licenses
Certain properties and functions of the recorder are optional. They are only available if they
were ordered when the system has been purchased.
Properties and functions can generally also be licensed and activated retrospectively. It
may be necessary to purchase some additional hardware together with an license code for
this purpose.
Open the License Code dialogue via System > Service > License.
Fig. 4-1
Enter the licence code.
Conrm with OK.
After the activation of additional features and functions the recorder requires a restart. The
restart is usually automatic. If this is not the case, restart the recorder manually.
Open the Licences dialogue via System > Info > Licences.
Fig. 4-2

DMX 2400
www.dallmeier.com 12
Make sure that the property or function is marked as active.
Check the operation of the property or function.
Note that further adjustments may be required.

DMX 2400
www.dallmeier.com 13
5 Update
The recording software of the device can be updated., if necessary.
Open the Software Update dialogue via System > Service > Software Update.
Fig. 5-1
Select the storage device as Source.
Click Load.
Select the relevant Update File.
Conrm with OK.
Follow the instructions of the subsequent dialogues.

DMX 2400
www.dallmeier.com 14
6 System Parameters
The conguration of the device is stored in parameter les. They can be reset to default
settings as well as exported and imported.
6.1 Default Parameters
The original conguration of the device can be restored by resetting to default system pa-
rameters.
NOTICE
All recordings and recording settings will be lost when the recorder is reset
to default system parameters.
Open the System Parameters dialogue via System > System Parameter > Default.
Fig. 6-1
Select the relevant track mode.
Conrm with OK.
6.2 Parameters Export
The system parameters can be stored and adopted to special requirements after an export.
Open the Save Conguration dialogue via System > System Parameters > Save
Conguration.

DMX 2400
www.dallmeier.com 15
Fig. 6-2
Select the storage medium as Target.
Conrm with OK.
Various log and protocol les are stored on the USB Stick besides the system parameters.
6.3 Parameters Import
Stored or modied system parameters can be imported in order to restore the device con-
guration.
NOTICE
Improper or faulty modied system parameters can lead to a loss of the
recordings and to a permanent disruption of the device.
Open the Restore Conguration dialogue via System > System Parameters > Re-
store Conguration.

DMX 2400
www.dallmeier.com 16
Fig. 6-3
Observe the detailed explanations in the dialogue.
Select the storage medium as Source.
Select the relevant import option.
Conrm with OK.

DMX 2400
www.dallmeier.com 17
7 Hard Disk Drives
The devices of the DMX series can be operated with multiple hard drives and a RAID
system. The procedure of a hard disk exchande differs for devices with or without RAID
system.
Proceed as described below, to replace a defective hard disk drive.
7.1 Identication
All hard disks are easily accessible on the front side of the device. First, the defective hard
disk drive must be identied. There are two options available for this purpose.
7.1.1 Information Dialogue
In the information dialogue of the device, comprehensive information about the current
status of the hard disk drives (HDDs) are displayed.
Open the Info dialogue via System > Info.
Select the HDD Status tab.
The HDD Status tab is displayed.
Fig. 7-1
• Empty HDD holders are displayed in gray.
• Active HDDs are displayed in green.
• Defective HDDs are displayed in red.
• Spare HDDs are displayed in yellow.
• HDDs in the recovery process are displayed in orange.
Check the status of the hard disk drives.
Identify the defective hard disk drive.

DMX 2400
www.dallmeier.com 18
7.1.2 Display
The status of each hard disk drive is displayed on the display on the front side of the device
as well.
Fig. 7-2
HDD = Active HDD
SSS = Spare HDD
Fig. 7-3
XXX = Defective HDD
ooo = HDD in recovery process
Check the status of the hard disk drives.
Identify the defective hard disk drive.
7.2 Procedure
The procedure of a hard disk exchande differs for devices with or without RAID system.

DMX 2400
www.dallmeier.com 19
7.2.1 With RAID-System
The integrated RAID technology allows continuous recording when a hard disk drive fails.
The defective hard disk drive can be replaced during operation (hot-swap).
Proceed as described below, to ensure the highest possible data security:
Note that
• new HDDs must be tested and released for mounting by Dallmeier (HDD whitelist in the
Partner Forum).
• new HDDs may not be formatted or partitioned.
• HDDs from other Smatrix devices may not be used.
• the number of sectors is decisive for the capacity of a HDD, not the usually specied
gross capacity (GB).
The capacity of a new HDD must be the same as the capacity of the replaced HDD (or
larger).
Recommended procedure for the case of service
In case of disk failure, the spare hard disk drive is recovered and the recording is continued
on the remaining hard disk drives.
Identify the defective hard disk drive (XXX).
Fig. 7-4
Replace the defective hard disk drive (see below).
The new hard disk drive is used as the spare hard disk drive (SSS). The recovery of the
previous spare hard disk drive (ooo) and the recording continues.
Fig. 7-5
Note the information on the display.
Note that recovering of a 500 GB hard disk drive can last up to 15 hours.

DMX 2400
www.dallmeier.com 20
7.2.2 Without RAID System
The devices of the DMX series can be operated without a RAID system as well. When a
hard disk drive failes, the corresponding recordings are lost. But recording is continued on
the remainingg hard disk drives. The replacement of the hard disk is not possible during
operation.
In the case of service it is recommended to make a backup of essential recordings rst.
After replacing the hard disk drive, all tracks have to be initialized and in this process all
recordings will be lost. The settings of the device are completely preserved.
Note that
• new HDDs must be tested and released for the installation by Dallmeier (HDD-Whitelist
in the partner forum).
• new HDDs should not be formatted and not be partitioned.
Recommended procedure in the case of service
In the case of a hard disk failure the recording is continued.
Identify the defective hard disk drive (XXX).
Fig. 7-6
Shut down the device.
Disconnect the device from the power supply.
Replace the hard disk (see bellow).
Note that the capacity of a new HDD may not differ from the exchanged HDD.
Connect the device to the power supply.
Note the messages displayed during the boot process.
The initialization of the tracks is required after the boot process is completed.
NOTICE
Data loss!
During the initialization of the tracks all recordings have to be deleted.
Log on to the conguration interface as described above.
Open the Harddisk Management dialogue via System > Recording > Harddisk
Management.
Other manuals for SMatrix DMX2400
1
Table of contents
Other dallmeier Measuring Instrument manuals

dallmeier
dallmeier VideoNetBox III Guide

dallmeier
dallmeier DMS 2400 MK3 User manual

dallmeier
dallmeier DLS 4 Operating and maintenance instructions

dallmeier
dallmeier DMS 160 Bank Instruction Manual

dallmeier
dallmeier DLS 4 User manual

dallmeier
dallmeier DMX 800 Smartix Quick guide

dallmeier
dallmeier SMatrix DMX2400 Guide