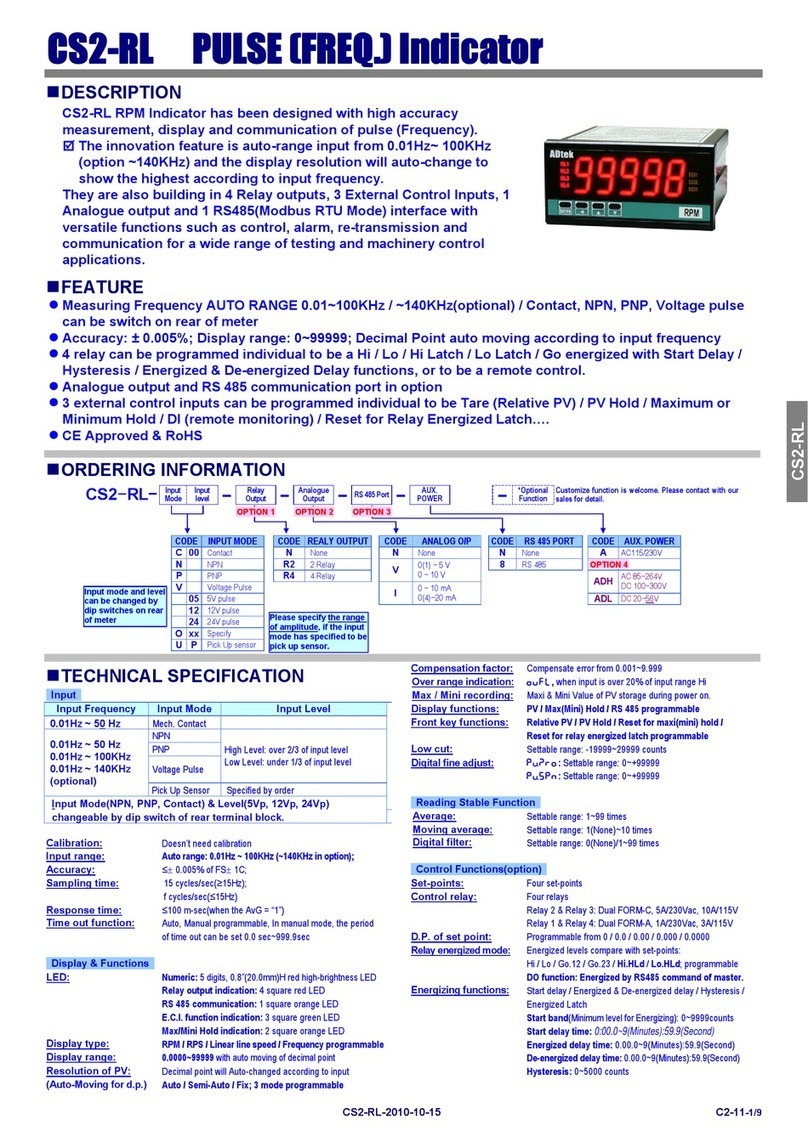
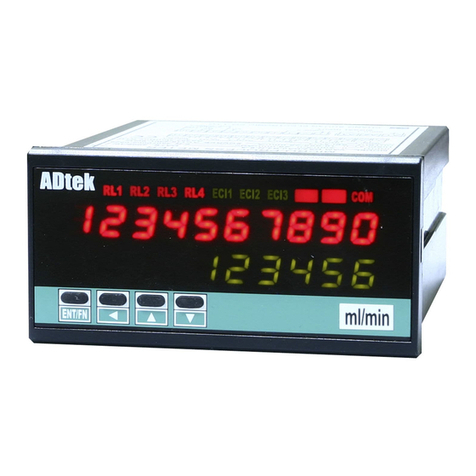
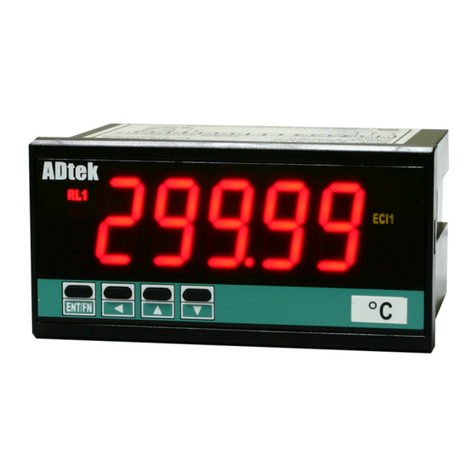
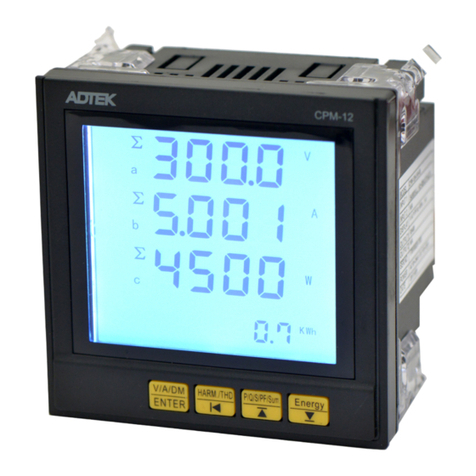
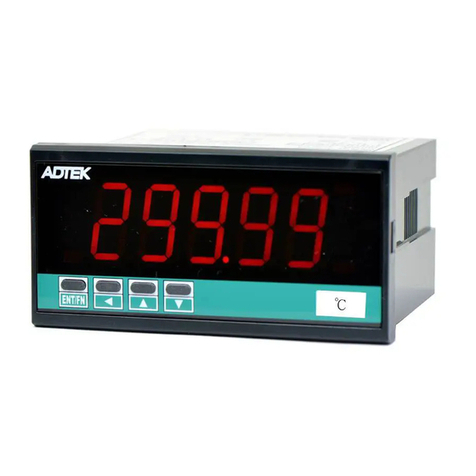
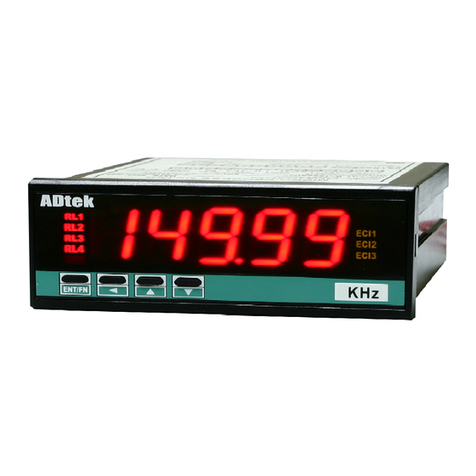
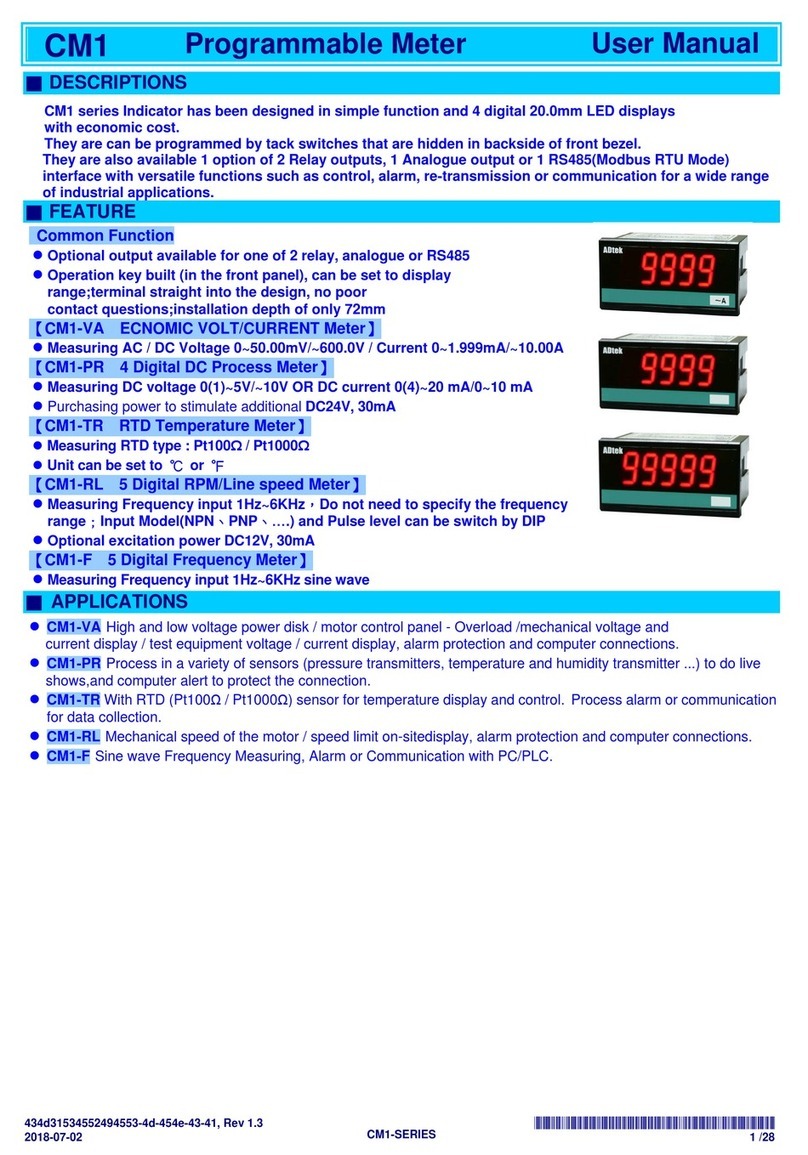
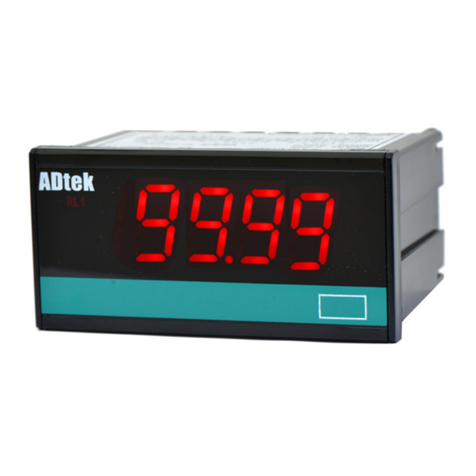
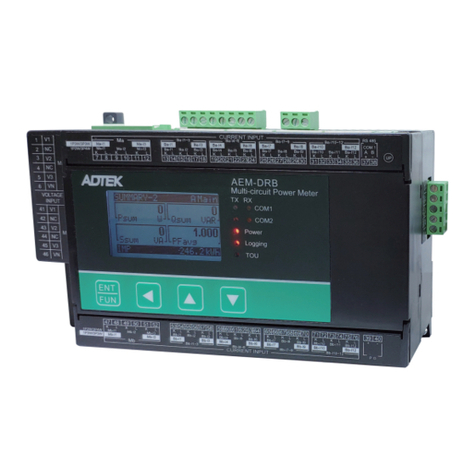
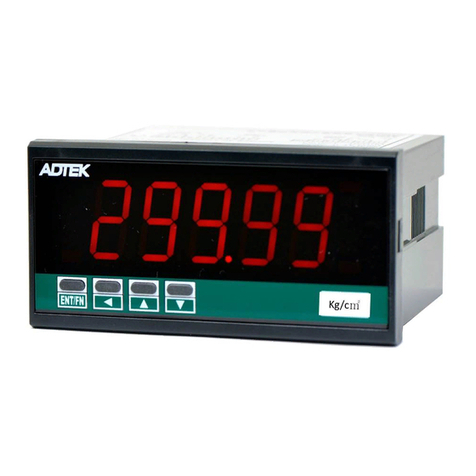
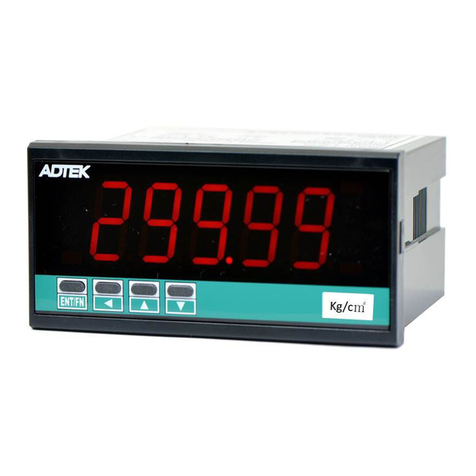
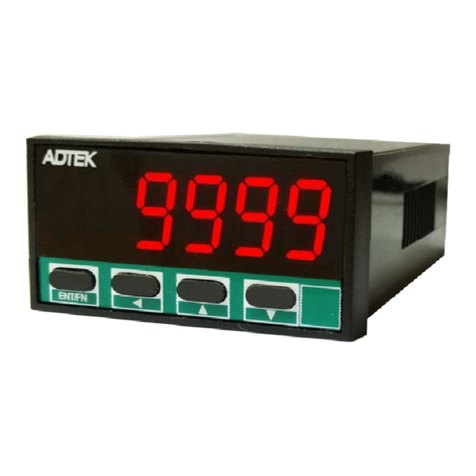
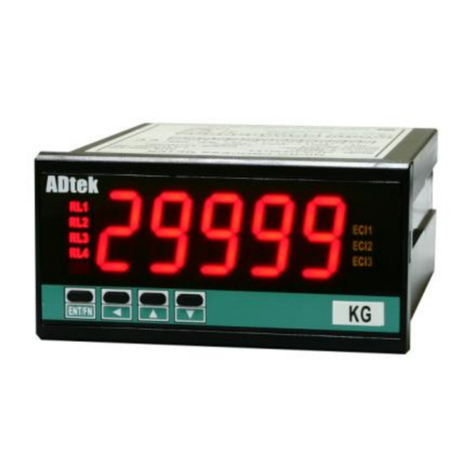
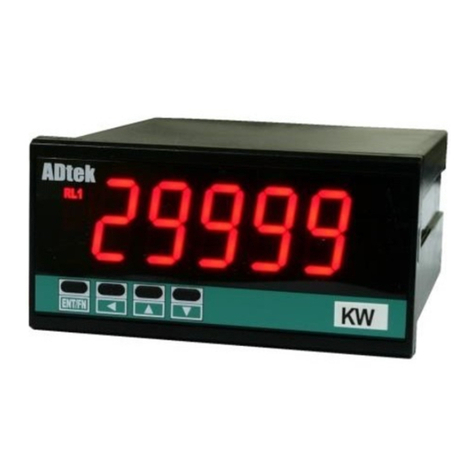
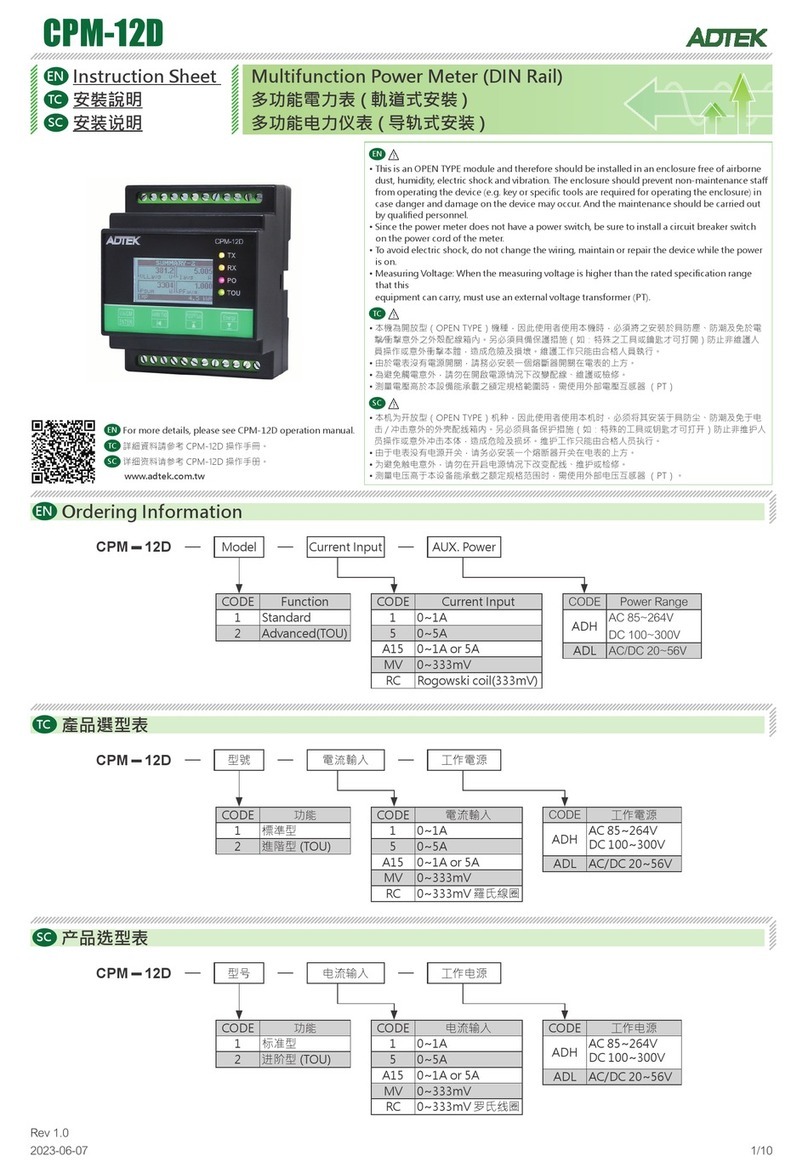
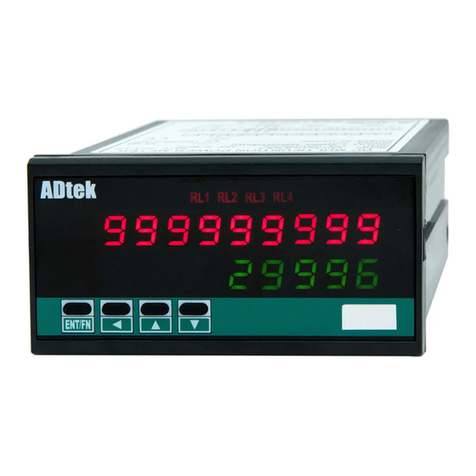
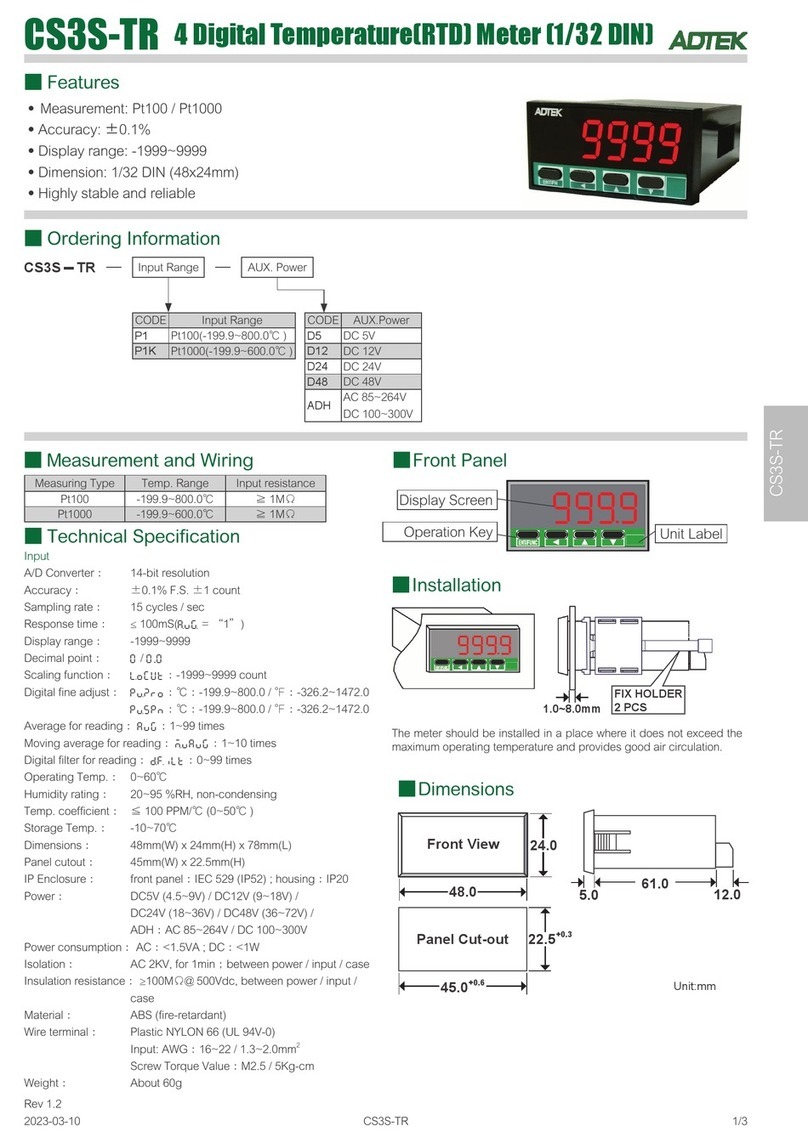
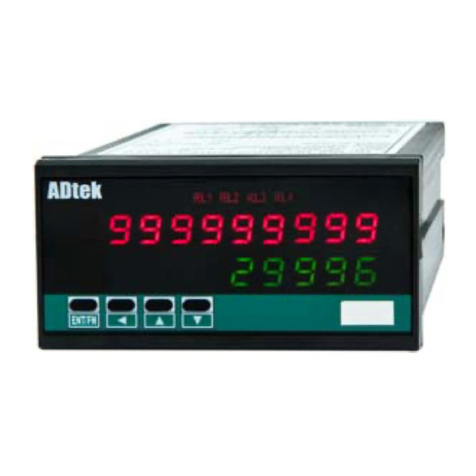
ADTEK CS1 Series User manual

CS1 SERIES–OPERATION MANUAL(EN)-2013-01-04
1 / 31
CS1-VA
VOLTAGE/CURRENTMETERS
CS1-PR
DCSIGNAL(20mA/10V)INDICATOR
CS1-SG
STRAINGAUGE/LOADCELLINDICATOR
CS1-PM
POTENTIOMETERINDICATOR
CS1-RS
RESISTANCE(2W)INDICATOR
CS1-T
TEMPERATUREINDICATOR
OPERATIONMANUAL
■
DESCRIPTION
For the various measuring requirement, the CS1 series indicator provide simple and low cost
with high accuracy measurement, display, control or communication (Modbus RTU mode) such
as
AC voltage/Current, DC process signal 0~10V/4~20mA, Strain Gauge/Load Cell, Potentiometer,
Resistance, Temperature and so on.
They have been designed optional 1 of 3 kinds for 1 Relay, 1 Analogue or 1 RS485 port with
flexible display function such as max/mini hold, PV hold relative PV…..etc that very useful in
testing equipment and others.
■
FEATURES
●
1 relay, 1 Analogue output or RS 485 communication port can be selected
one in option
●Relay for Hi / Lo energized with Start Delay / Hysteresis / Energized &
De-energized Delay / Relay Energized Latch…etc functions
●CE Approved
[ CS1-VA VOLT / CURRENT METER ]
●Measuring Voltage 0~600V or Current 0~10A ; DC / AC / TRMS
●Accuracy: AC:
±
0.1% f.s.; DC:
±
0.04% f.s.; Display Range: -19999~+29999
[ CS1-PR DC SIGNAL INDICATOR ]
●Measuring DC 0~10V or 0(4)~20 mA in one indicator(input code: AV)
●Accuracy:
±
0.04% f.s.; Display Range: -19999~+29999
[ CS1-SG S TRAIN GAUGE INDICATOR ]
●Measuring ranges of Load Cell or Strain Gauge from 0~1.0/~2.0/~4.0 mV/V or
0~10.0/~20.0/~40.0 mV/V and specified with excitation supply DC 5V or 10V,
40mA
●Accuracy:
±
0.04% f.s. ; Display Range: -19999~+29999
●Field calibration of load cell or strain gauge to meet the system requirement
with high/low calibrations which it saved test time and keep accuracy
[ CS1-PM POTENTIOMETER INDICATOR ]
●Measuring Potentiometer 0~50Ω/~2.0KΩ; 0~2.0KΩ/~100.0KΩ (3 wire)
●Accuracy:
±
0.04% f.s. ; Display Range: -19999~+29999
●Field calibration of potentiometer to meet the system requirement with
high/low calibrations which it saved test time and keep accuracy
[ CS1-RS RESISTANCE INDICATOR ]
●Measuring Resistance 0~200.00Ω/2000.0Ω/20.000KΩ/200.00KΩ (2 wires)
●Accuracy:
±
0.04% f.s. ; Display Range: -19999~+29999
●Field calibration of resistance to meet the system requirement
with high/low
calibrations which it saved test time and keep accuracy
[ CS1-T TEMPERATURE INDICATOR ]
●Measuring Pt100Ω; T/C: K,J,E,T(the range will be fix, pleases specified the
exactly input type in ordering)
●Accuracy: Pt100:
±
0.1% f.s.; T/C:
±
0.2% f.s.; Display Range:
-19999~+29999(according to the seneor type)

CS1 SERIES–OPERATION MANUAL(EN)-2013-01-04
2 / 31
■
APPLICATIONS
Models
●CS1-VA Switch Boards / Motor Control / Machinery / Testing Equipments
●CS1-PR Machinery Control / Process Control Systems for pressure, level,……..sensing transducers
Automation System / Testing Equipments
●CS1-SG Weighting indication, control and Alarm / Machinery Control / Tension and others test equipment
●CS1-PM Position indication, control and Alarm / Machinery Control / Angle of Value Control
●CS1-RS Resistance test as like as coil / Tap of transformor indication
●CS1-T Temperature measuring
Functions
●Safty & Protection Hi or Lo alarm and latch(
hIhld
/
lOhld
)
●Testing & Measuring Maximum/Minimum hold(
maXh
/
minIh
), PV hold(
pVhld
), Relative PV/Tare/∆PV(
reLpv
),
Field calibration with sensor
●Remote Monitoring RS485 communication port, Display function(
rs485
),
■
FUNCTION DEFINE
■
Character Symbol
■
Display Functions
A b C d E F G H i J K L M
a b c de f gh i j kl m
n o P q r S t U v W X y Z
no p qr s t u v w x y z
1 2 3 4 5 6 7 8 9 0 / .
1234567 8 90/.
Max / Mini recording:
In order to review & trace the drifting PV, the meters
will keep the values of maximum and minimum in
[user
level]
during power on.
Display function
[dsply]
for display screen
The
[dsply]
function in
[input group]
can be set
to show present value
pv
, Maximum Hold
maXhd
or Minimum Hold
miNhd
or Remote display by RS485
command
rs485
. Please refer to following for detail.
●Present value
pv
Display screen will show the value that is relative to
input and
[ lOsc]
(Low scale) and
[ hIsc]
(High scale)
setting.
●Max. Hold
maXhd
or Mini. Hold
miNhd
for PV
When the
[dsply]
function in
[input group]
set to
be
maXhd
(Max. Hold) or
miNhd
(Mini. Hold), that the
meter will still display the values of PV in maximum(or
minimum) and the relative square orange LED will be
bright during power on, until manual reset by front key in
[user level]
or Down Key function has been done.
The meter will update immediatelly new max./mini.
values after press Down Key again.
Please paste the sticker1
M.H
on the right side of
orange square LED to identify the status of display.
Max. ( Mini.) Hold & Reset
maXh
[dsply]
Mrst
[dNkey]
Reset the Max
(Mini) Hold by
Front Key
Edge
Trigger
Maximum Hold
Present
Value
●Remote display by RS485 command
In past, The meter normally receive 4~20mA or
0~10V from AO card or BCD card of PLC. We built-in a
new solution by RS485 which it can save costs of AO
and wiring connecting to PLC simultaneously.
■
Input & Scaling
Input type
[aItyp]
for CS1-PR
Programming range: Voltage:0~10V/0~5V/1~5V;
Current: 4~20mA/0~20mA/0~10mA
It supports dual type input 0~10V and 0(4)~20mA
between 3 terminals in one meter. Please specify the
ordering code AV for input range. And, programming
the function
[aItyp]
to co-ordinate with the input range
and wiring terminals.
Scaling Function
[ lOsc]
&
[ hIsc]
Setting the
[lOsc]
(Low scale) and
[hIsc]
(High
scale) in
[input group]
are relative to input signal.
Reverse scaling will be done too. Please refer to the
figure as below,
Default: [lOsc]: )00, [hIsc]: 10)00
Change to [lOsc]: 5)00, [hIsc]: 19(99
SCALE
INPUT
)00
19(99
10)00
5)00
Reverse slop
[hIsc]
[hIsc]
[lOsc]
[lOsc]
%
)00
%
5)00
%
10)00
*Lower display resolution may caused by more narrow
scale.

CS1 SERIES–OPERATION MANUAL(EN)-2013-01-04
3 / 31
When the
[dsply]
function set to be
rs485
, the
LED display no longer appear the input signal on the
meter then the PV screen will show the data from
RS485 command.
PV(Present value) Hold
pVhld
When the
[dNkey]
(Down key function) set to be
pVhld
(PV Hold) function in
[input group]
, The
display will be hold, when the down key has been
pressed until the down key pressed again.
Please paste the sticker
PV.H
ECI
on the right side of
green square LED of ECI to identify the status of display.
PV Hold & Reset
Edge
Trigger
[dNkey]
Present
Value
Reset Data
Hold by
Front Key
PV Hold
1
2
3
4
5
pVhld
Low Cut
[lOcut]
Settable range from -19999~+29999 digits.
The users can set the value range.
1)if set the positive value (X1) here to display "0" which
it expressed to be low-cut the PV between "+X1
(plus)" & "-X1(minus)" /absolute value
PV< l Setting value (X1) l, the display will be shown 0
EX: Low Cut is set for 0.50. If the display is from
-0.50~+0.50, that will be 0.
Low Cut set to be +0.50
Low Cut is set for 0.50, if the PV is
from -0.50~+0.50, that display will be 0.
PV according
to input signal
Present
Value
Low cut
function
0.50
-0.50
)50
[lOcut]
X1
-X1
2)If set the negative value (X2) here to display "X2"
which it expressed to be low-cut the PV that it's under
the X2 setting value;
PV< Setting value(X2), the display will be shown X2.
EX: Low Cut is set for -0.01. If the display is < -0.01,
and all the display will be -0.01.
Low Cut set to be -0.10
-0.10
Low cut
function
Low Cut is set for -0.10, if the PV is
under (< = -0.10), that display will be -0.10.
Present
Value
PV according
to input signal
-)10
[lOcut]
X2
Digital Fine Adjustment
[pVzro]
&
[pVspn]
Settable range from -19999~+29999 ;
Users can get "Fine Adjustment PV" by front key on
the meter for lower and/or higher points. “Just Key-In”
the value, if user wants to show the value in input
signals currently.
Especially, the
[pVzro]
&
[pVspn]
are not only in
zero & span of PV, but also randomly lower point in
function
[pVzro]
& randomly higher point in function
[pVspn]
. The meter will be auto-linearization for full
scale.
The adjustment can be cleared in function
[ZSclr]
.
Default Input: [lOsc]: )00, [hIsc]: 19(99
Digital fine adjustment:
input 2.75V, [pVzro]set to be 8)00
input 9.00V, [pVspn]set to be 17)00
Display: Low point from 55.00 to 80.00
Hig h point from 180.00 to 170.00
SCALE
INPUT
0V
10V
5V
2.75V
9.00V
19(99
[hIsc]
[lOsc]
)00
10)00
18)00
5%00
8)00
17)00
■
Front Key Functions
Users can set the
down key of front panel to be
the functions as like as Relative PV(Tare) / PV Hold /
Reset for max(mini) hold / Reset for relay energized
latch.
Ex. The
[dNkey]
function set to be
reL.pv
in
[input
group]
. When user presses
Key, the PV will show
relative value until press
Key again.
■
Reading Stable Functions
Average Display update
Settable range: 1~99 times;
Jittery Display caused by the noise or unstable
signal. User can set number to average the readings to
get smoothly display.
Remark: The higher average setting will impact the
response time of Relay and Analogue output
slower.
The meter’s sampling is 15cycle/sec. If the
[ avg]
(Average) set to be
3
, the meter will express
the sampling 3 readings and calculating the average
then update the display once. At meantime, the display
update will be 5 times/sec.
Average set to be 3
…….
Sample 1
Sample 2
Sample 3
Sample 4
Sample 5
Sample 6
…….
Display Update Value =
(Sample 1 + Sample 2 + Sample 3)/3
Display Update Value =
(Sample 4 + Sample 5 + Sample 6)/3

CS1 SERIES–OPERATION MANUAL(EN)-2013-01-04
4 / 31
Moving Average update
Settable range: 0(no function)/1~10 times;
Jittery Display caused by the reasons as like as
noise or unstable signal. User can set number to
average the readings, and get smoothly display.
Remark: The higher moving average setting wouldn’t
impact the response time of Relay and Analogue
output slower after first 3 samples.
The meter’s sampling is 15cycle/sec. If the
[mVavg]
(Moving Average) set to be
3
, in the first
cycle will be same as average function. In following
cycle, the function will get a new fourth reading and
throw away first reading to be newer 3 reading, and
calculating the average then update display. At
meantime, the display update will be 15 times/sec.
Moving Average set to be 3
Sample 1
Sample 2
Sample 3
Sample 4
Sample 5
Sample 6
…….
In first 3 samples, Display Update Value
= (Sample 1 + Sample 2 + Sample 3)/3
Display Update Value
= (Sample 2 + Sample 3 + Sample 4)/3
Display Update Value
= (Sample 3 + Sample 4 + Sample 5)/3
Display Update Value
= (Sample 4 + Sample 5 + Sample 6)/3
…….
Digital filter
[Dfilt]
Settable range from 0(None)/1~99 times.
The digital filter can reduce the influence of spark
noise by magnetic of coil.
If the values of samples are over digital filter
band(fixed in firmware and about 5% of stable reading)
3 times (Digital Filter set to be 3) continuously, the
meter will admit the samples and update the new
reading. Otherwise, it will be as treat as a noise and skip
the samples.
Digital Filter set to be 3
Digital Filter Band
The values of samples are
two times only, so that the
reading will admit the
samples.
Digital Filter Function
The values of samples are
over the filter band and three
times, so that the reading will
accept the samples, and
update the reading.
Digital Filter Function
Present
Value
Hi / Lo Relay Energized
Fig.1
hi
lo
[ry_.sp]
[ry_.sp]
[ry_.md]
Hi Setting
Hi Relay Energized
ON
Lo Setting
Lo Relay Energized
ON
●Hi alarm & latch / Lo alarm & latch (
hIhld
/
lOhld
)
The relay energized with latched function is for
electrical safety and human protection.
For example, a current meter relay installed for the
over current alarm of motor. Generally, over current of
motor caused by over load, mechanical dead lock
, aging
of insulation and so on. Above cases will alarm in the
meter, if the user doesn't figure out the real reason and
re-start the motor. It may damage the motor. The
functions of Hi.HLD & Lo.HLD are designed must be
manual reset the alarm after checking out and solving
the issue. It's very important idea for electrical safety
and human protection.
As the PV Higher (or lower) than set-point, the relay
will be energized to latch except manual reset by from
key in
[
user level
]
or reset by down key, if the
[dNkey]
function in
[input level]
has been set to
rYrst
.
Relay Energized Latch & Reset
Hi. HLd(Hi Latch)
Relay Energized
ON
Reset Relay Latch
by down Key func.
ON
Level Trigger
Hi Setting
hIhld
[ry_.md]
rYrst
[ dNkey]
[ry_.sp]
Start delay band
[ rYsb]
and Start delay time
[ rYsd]
The functions have Been designed for,
●To avoid starting current of inductive motor (6 times of
rated current) with alarm.
●If the
ry_.md
relay energized mode had been set to be
lo
(Lo) or
lOhld
(Lo & latch). As the meter is power on
and no input to display the "0" caused the relay will be
energized. User can set a band and delay time to inhibit
the energized of relay.
●Start band
[ rYsb]
(Fig.2-
):
Settable range from 0~9999 Digits
●Start delay time
[ rYsd]
(Fig.2-
):
Settable range from
0.0(second)~9(minutes)59.9(seconds);
Start Delay
Fig.2
Start Delay Time
Start Band
Hi Setting
Relay
Energized
ON
Inhibit
Inhibit
[ rYsb]
[ry_.sp]
[ rYsd]
■
Relay Functions
CS1 series offer the 1 relay output with flexible and
versatile functions. They can be programmed in
[relay
group].
Please refer to the description as following;
Relay energized mode Hi / Lo / Hi.HLd / Lo.HLd
●Hi(Fig.1-
) (
hi
): Relay will be energized,
when PV > Set Point
●Lo(Fig.1-
) (
lo
): Relay will be energized,
when PV < Set Point

CS1 SERIES–OPERATION MANUAL(EN)-2013-01-04
5 / 31
Hysteresis
[ ry_,hy]
(Fig.3-
)
Settable range from 0~5000 Digits
As the display value is swing near by the set point to
cause the relay on and off frequently. The function is to
avoid the relay on and off frequently such as
compressor…….etc.,
User can set a band to prevent from the relay on and off
frequently
Relay energized delay
[ ry_,rd]
(Fig.3-
)
Settable range from
0.0(second)~9(minutes)59.9(seconds);
The function is to avoid the miss action caused by
noise. Sometime, the display value will swing caused by
spark of contactor…………etc.. User
can set a period to
delay the relay energized.
Relay de-energized delay
[ ry_,fd]
(Fig.3-
)
Settable range from
0.0(second)~9(minutes)59.9(seconds)
Energized / De-energized
Delay & Hysteresis
Fig.3
ON
Hysteresis
De-energized
delay time
Hi Setting
Relay
Energized
[ry_.sp]
[ry_.hy]
[ry_.rd]
[ry_.fd]
Energized delay time
Default: [aOls]: )00, [aOhs]: 10)00
Change to [aOls]: 5)00, [aOhs]: 19(99
SCALE
OUTPUT
0%
100%
50%
[aOhs]
[AOls]
)00
19(99
[aOhs]
10)00
5)00
*The interval between
[ aOhs]
and
[ aOls]
should be
with minimum over 20% of span; otherwise, it will
reflect the less resolution of analogue output.
●Fine Zero & Span Adjustment for Analogue Output
Users can get Fine Adjustment of analogue output
by front key on the meter. Please connect standard
meter to the terminals of analogue output for measuring
the output value. To press the front key(up or down key)
of meter for adjusting and checking the output.
●Fine Zero Adjustment for Analogue Output
[aOzro]
: Settable range: -38011~27524;
●
Fine Span Adjustment for Analogue Output
[aOspn]
: Settable range: -38011~27524;
■
RS 485 Communication
CS1 series can be used as Remote Terminal Unit
(RTU) for monitoring and controlling in a SCADA
(Supervisor Control And Data Acquisition) system.
●Protocol: Modbus RTU Mode
●Baud Rate
[ baud]
:
Programmable 1200/2400/4800/ 9600/ 19200/ 38400
●Data Bits: 8 bits
●Stop Bits: Programmable 1 bit or 2 bits
●Parity
[prity]
: Programmable Even / Odd / None
●Device Number
[adres]
: Settable 1~255
Remote Display function
[rs485]
CS1 series has been built in an innovation function
call remote display function.
When the
[dsply]
function set to be
rs485
, At
meantime, the display is no longer according to the input
signal. The PV screen will show the number from RS485
command & data.
In past, The meter normally receive 4~20mA or
0~10V from AO card or BCD card of PLC. We support a
new solution by RS485 writing in so that can save cost
of AO and wiring into PLC.
CS1 APPLICATION FOR REMOTE DISPLAY FROM RS485 COMMAND
RS 485 Modbus RTU Mode (up to 38400bps)
RS485 wiring 1.2KM maximum
Terminate Resistor:
RL1
COM
CI11
ENT/FN
◄
▲
▼
Kg
M.H
M.H
RL1
COM
CI11
ENT/FN
◄
▲
▼
RPM
M.H
M.H
►The display will be shown
-----
when the data can
not to be sent to the meter due to the communication
error.
■
Analogue Output Functions
Please specify the output type either 0~10V or
4(0)~20mA in ordering code. The output low and high
can be programmable which it's related with various
display values. Reverse slope output is decided by
reversing point positions.
Output range selection (
[aOtyp]
)
●Voltage output specified
Programming :
V0-10
(0~10V) /
V0-5
(0~5V) /
V1-5
(1~5V)
●Currnet output specified
Programming :
A4-20
(4~20mA) /
A0-20
(0~20mA) /
A0-10
(0~10mA)
Low Output corresponds to Low display value
[ aOls]
Settable range: -19999~+29999;
Setting the Low Display value versus Low output range
(as like as 4mA in
A4-20
).
High Output corresponds to High display value
[ aOhs]
Settable range: -19999~+29999;
Setting the High Display value versus High output range
(as like as 20mA in
A4-20
)

CS1 SERIES–OPERATION MANUAL(EN)-2013-01-04
6 / 31
■
Field Calibration (for CS1-SG / CS1-PM / CS1-RS)
In pass time, the engineers have to take a lot of time to adjust and calibrate meters or converters which the
purpose of co-coordinating with zero and span of machinery structure for the Load Cell or Potentiometer measuring.
Now, our CS1-SG, CS1-PM and CS1-RS with innovation functions against above to make the engineer operated easily
and smoothly that it's called “Field Calibration”. The procedures are descripted as below;
●Enter the right pass code
[Fcode]
and access to the Field Calibration Level.
●Adjust the structures of machinery or & equipments to be "lower status".
●The low calibration of machinery structure is not need the exactly "zero" to calibrate, because of the "field calibration"
function could be calibrate any lower point.
●Move next page to the
[caLlo]
and waiting for the value till stable, then pressed
Key to read the signal low of
sensing device.
●Waiting for above reading stable (around 3~5seconds), press
Key again to complete the calibration lower point,
and go to
[caLls]
.
●
[caLls]
is the page of low scale setting that is relative to the calibration low point.
●Press
Key to next function index
[caLhi]
.
●Adjust the structures of machinery or & equipments to be "higher status".
●The high calibration of machinery structure is not need the exactly "span" to calibrate because of the "field calibration"
function could be calibrating any higher point.
●In
[caLhi]
page, waiting for the value till stable, then pressed
Key to to read the signal high of sensing device.
●Waiting for above reading stable (around 3~5seconds), Press
Key again to complete the calibration higher point,
and go to
[caLhs]
.
●
[caLhs]
is the page of high scale setting that is relative to the calibration high point.
●Press
Key to next functions
[ Csel]
to select
field
.
●
[ Csel]
(Calibration parameter selection): Field calibration wouldn’t change the default calibration. After user
completing the field calibration, it can also select default calibration if the user wants.
►As the user finished the procedures of field calibration, the field calibration datum has been saved in EEProm and it
can't change the default(factory) calibration datum. Even the field calibration has been done, the user can still select
either default calibration or field calibration.
►If the user select field calibration, the
[ lOsc]
(step A-2) and
[ hIsc]
(A-3) will be replaced by
[caLls]
and
[caLhs]
which it can not to be changed by anyone. If user has to change the scaling, it's the only way to access field
calibration level to set in
[caLls]
(step F-2) and
[caLhs]
(step F-4).
►After selecting the
deflt
or
field
, please double check the
[ lOsc]
(step A-2) and
[ hIsc]
(A-3) whether are
corrected or not?
Please according to the numbers to do the field
calibration ( )
Potentiometer 0~1.0Kohm
RL1
COM
ENT/FN
?
?
?
mm
Low End
High End
2
caLlo
caLls
3
5
caLhi
caLhs
6
1
4
1
2
3
4
5
6
■
ORDERING INFORMATION

CS1 SERIES–OPERATION MANUAL(EN)-2013-01-04
7 / 31
CS1−VA−
DC/AC/
TRMS
Input
Signal
−
Optional
Output
−
Aux.
Powered
CODE VOLT INPUT CODE
CURRENT
CODE OPTIONAL O/P CODE AXU. POWER
D
DC measuring
D
DC measuring
N
None
A
AC 115/230 V
A
AC measuring
A
AC measuring
R1
1 Relay
T
TRMS measuring
T
TRMS measuring
ADH*
AC/DC 85~264V
V1
0 ~ 199.99 mV
A1
0 ~ 199.99 μA
V
0(1) ~ 5 V /
0 ~ 10 V
ADL*
AC/DC 20~56V
V2
0 ~ 1.9999 V
A2
0 ~ 1.9999 mA
V3
0 ~ 19.999 V
A3
0 ~ 19.999 mA
I
0 ~ 10mA
0(4)~20 mA
V4
0 ~ 199.99 V
A4
0 ~ 199.99 mA
8
RS 485
V5
0 ~ 300.0 V
A5
0 ~ 1.9999 A
V6
0 ~ 600.0 V
A6
0 ~ 1.0000 A
VA
0~50 mV
A7
0 ~ 5.000 A
Relay, Analogue Output
or RS485 Port can be
selected one only
VB
0~60 mV
A8
0 ~ 10.000 A
VC
0~100 mV
AO
Specify A input
VO
Specify V input
OPTION
OPTION 4
* It means RoHS
version.
CS1−PR−
Input
Signal
−
Optional
Output
−
Excitation
Supply
−
Aux.
Powered
CODE
INPUT RANGE
CODE
OPTIONAL O/P
CODE
EXCIT. SUPPLY
CODE
AXU. POWER
A1
0(4) ~ 20mA / 0 ~ 10mA
N
None
N
None
A
AC115/230V
V1
0 ~ 10V / 0(1) ~ 5V
R1
1 Relay
E24
DC 24V
AV
0~10V/0(4)~20mA(all in one)
EO
Specify
ADH*
AC/DC 85~264V
AO
Specify A input
V
0(1) ~ 5 V
0 ~ 10 V
ADL*
AC/DC 20~56V
VO
Specify V input
I
0 ~ 10 mA
0(4)~20 mA
8
RS 485
* ADH* & ADL* can
not support the
excitation supply
Relay, Analogue Output
or RS485 Port can be
selected one only.
OPTION 4
* It means RoHS
version.
OPTION
CS1−SG−
Input
Signal
−
Optional
Output
−
Excitation
Supply
−
Aux.
Powered
CODE
INPUT
CODE
INPUT
CODE
OPTIONAL O/P
CODE
EXCITATION
CODE
AXU. POWER
S1
1.0mV/V
S8
10.0mV/V
N
None
E05
DC 5V
A
AC 115/230 V
S2
2.0mV/V
S9
20.0mV/V
R1
1Relay
E10
DC 10V
S3
4.0mV/V
SA
40.0mV/V
EO
Specify
ADH*
AC/DC 85~264V
SO
Specify
V
0(1) ~ 10 mA
0 ~ 10 V
ADL*
AC/DC 20~56V
I
0 ~ 10 mA
0(4) ~ 20 mA
8
RS 485
* ADH* & ADL* can
not support the
excitation supply
Relay, Analogue Output
or RS485 Port can be
selected one only
* It means
RoHS
version.
OPTION
OPTION 4 OPTION 4
CS1−PM−
Input
Signal
−
Optional
Output
−
Aux.
Powered
CODE
INPUT RANGE
CODE
OPTIONAL O/P
CODE
AXU. POWER
P1
0~50Ω/~2.0 KΩ
N
None
A
AC 115/230V
P2
0~2.0KΩ/~100.0KΩ
R1
1 Relay
PO
Specify input
ADH*
AC/DC 85~264V
V
0(1) ~ 5 V
0 ~ 10 V
ADL*
AC/DC 20~56V
I
0 ~ 10 mA
0(4) ~ 20 mA
8
RS 485
Relay, Analogue Output or
RS485 Port can be
selected one only
* It means
RoHS
version.
OPTION
OPTION 4 OPTION 4
CS1−RS−
Input
Signal
−
Optional
Output
−
Aux.
Powered
CODE
INPUT RANGE
CODE
OPTIONAL O/P
CODE
AXU. POWER
R1
0.00Ω~ 200.00 Ω
N
None
A
AC 115/230V
R2
0.0Ω~ 2000.0 Ω
R1
1 Relay
R3
0.000Ω~ 20.000 KΩ
ADH*
AC/DC 85~264V
R4
0.00Ω~ 200.00 KΩ
V
0(1) ~ 5 V
0 ~ 10 V
ADL*
AC/DC 20~56V
RO
Specify
I
0 ~ 10 mA
0(4) ~ 20 mA
The ranges can be
changeable by dip switch.
8
RS 485
Relay, Analogue Output
or RS485 Port can be
selected one only
OPTION
* It means
RoHS
version.
OPTION 4 OPTION 4

CS1 SERIES–OPERATION MANUAL(EN)-2013-01-04
8 / 31
CS1−T
Input
Signal
−
Optional
Output
−
Aux.
Powered
CODE
INPUT RANGE
CODE
INPUT RANGE
CODE
OPTIONAL O/P
CODE
AXU. POWER
P1
Pt100Ω-50.00~199.99 °C
K1
Type K 0.0~1200.0
°C
N
None
A
AC 115/230V
P2
Pt100Ω-150.0~800.0 °C
J1
Type J 0.0~750.0
°C
R1
1 Relay
E1
Type E 0.0~1000.0
°C
ADH*
AC/DC 85~264V
T1
Type T 0.0~400.0
°C
V
0(1) ~ 5 V
0 ~ 10 V
ADL*
AC/DC 20~56V
R1
T/C type R 400~1600
°C
S1
T/C type S 400~1600
°C
I
0 ~ 10 mA
0(4) ~ 20 mA
B1
T/C type B 400~1800
°C
8
RS 485
Relay, Analogue Output
or RS485 Port can be
selected one only
* It means
RoHS
version.
OPTION
OPTION 4
OPTION 4

CS1 SERIES–OPERATION MANUAL(EN)-2013-01-04
9 / 31
■
INSTALLATION
Please check the specification, wire diagrams and functions on the label of the meter before
installation.
■
Dimensions & Panel Cut Out
■
Installation
96.0
48.0
92.0
+0.2
44.0
+0.2
PANEL CUT-OUT
FRONT VIEW
Unit: mm
8.0
12.0
60.0
Dimensions: 96mm x 48mm x 72mm
Panel Cutout: 92mm x 44mm (advise)
1.0~8.0 mm
FIX HOLDER:
63 mm(L) / W M3
R
COM
ENT/FN
?
?
?
PANEL CUT-O U T:
92+0.2(W) x 44+0.2(H) mm
■
Wiring Diagram
Please check the voltage of
power supplied first, and then
connect to the specified
terminals. Herein,
recommended that power
supplied with protection by a
fuse or circuit breaker to the
meter.
Connector
CS1-VA: #A1~A3(Signal Input): 20A/300Vac,
M3.5, 12~22AWG;
Max torque: 13Kg-cm
Others: 10A 300Vac, M2.6, 16~22AWG,
Max torque: 5Kg-cm
Please use cord end terminal.
7.0mm max
7.0mm max
2.0mm max
Please set the torque of
automotive screwdriver to match the
limited of terminals.
For input and RS485 wiring,
it's recommended to use twin
with shielding wire.
RS485 Communication Port
RS485 Port
4
5
6
A
B
Max. Distance: 1200M
Terminate Resistor
(at latest unit):
120~300ohm/0.25W
(typical: 150ohm)
[CS1-VA V oltage / Current Meter Relay] [CS1-RS Resistance Indicator]
FG
7
8
9
10
5
6
4
Relay
b
c
a
Relay, Analogue o/p
or RS485 port can be
selected one only.
Terminal blocks:
10A/300Vac, M2.6,
1.3~2.0mm
2
(22~16AWG)
A3
A1
A2
SIGNAL INPUT
RS 485 port
A
B
Analogue
output
ADH
AC/DC86~265V
AC/DC 20~56V
AC230V
AUX. POWER
AC115V
ADL

CS1 SERIES–OPERATION MANUAL(EN)-2013-01-04
10 / 31
[CS1-PM Potentiometer Indicator] [CS1-T Temperature Indicator]
Dip-Switch
1
2
3
4
5
0~50.0Ω/
~2.0KΩ
O
N
O
N
0~2.0KΩ/
~100.0KΩ
O
N
O
N
11
12
14
15
13
16
7
8
9
10
5
6
4
Relay
b
c
a
Relay, Analogue o/p
or RS485 port can be
selected one only.
Terminal blocks:
10A/300Vac, M2.6,
1.3~2.0mm
2
(22~16AWG)
FG
D-S
Dip-Switch
POTENTIO-
METER
Ohm(3W)
INPUT
RS 485 port
A
B
Analogue
output
ADH
AC/DC86~265V
AC/DC 20~56V
AC230V
AUX. POWER
AC115V
ADL
[CS1-PR DC Process (10V/20mA) Indicator] [CS1-SG Strain Gauge / Load Cell Indicator]
11
12
14
15
13
16
SIGNAL INPUT
0~10V
0~20mA
Excit.
Supply
DC24V
7
8
9
10
5
6
4
Relay
b
c
a
Relay, Analogue o/p
or RS485 port can be
selected one only.
Terminal blocks:
10A/300Vac, M2.6,
1.3~2.0mm
2
(22~16AWG)
FG
RS 485 port
A
B
Analogue
output
ADH
AC/DC86~265V
AC/DC 20~56V
AC230V
AUX. POWER
AC115V
ADL
11
12
14
15
13
16
Excit.
Supply
7
8
9
10
5
6
4
Relay
b
c
a
Relay, Analogue o/p
or RS485 port can be
selected one only.
Terminal blocks:
10A/300Vac, M2.6,
1.3~2.0mm
2
(22~16AWG)
mV/V
SIGNAL
INPUT
FG
RS 485 port
A
B
Analogue
output
ADH
AC/DC86~265V
AC/DC 20~56V
AC230V
AUX. POWER
AC115V
ADL
2 wire Transmitter connection 4(0)~20mA Input connection
11
12
14
15
13
24Vdc
Excit.S
4~20mA
Input
11
12
14
15
13
24Vdc
Excit.S
4~20mA
Input
4~20mA
Load Cell connection
11
12
14
15
13
10Vdc
Excit.S
mV Input
Load Cell
Output
+
-
Output
-
VE.S.
+
VE.S.

CS1 SERIES–OPERATION MANUAL(EN)-2013-01-04
11 / 31
■
OPERATIONS
■
Front Panel
RL1
COM
CI11
ENT/FN
?
?
?
~A
Comm. status
Relay status
Indication
Operation Key
Front Key
function status
Engineer Unit
Display screen
M.H
Max. Hold status
M.H
Mini. Hold status
Numeric Screens
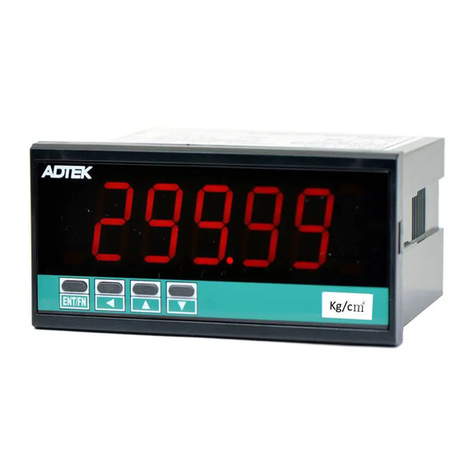
0.8”(20.0mm) red high-brightness LED for 4 2/3 digital
present value.
I/O Status Indication
●Relay Energized: 1 square red LED
RL1
display when Relay 1 has been energized;
●RS485 Communication: 1 square orange LED
COM
will flash when the meter is receive or send data,
and
COM
flash quickly means the data transient quicker.
●Max/Mini Hold indication: 2 square orange LEDs
CO
M.H
displayed: When the display function has been
selected in Maximum or Minimum Hold function.
Stickers:
Each meter has a sticker what are functions and
engineer label enclosure.
Functions stickers
●Relay energized:
Hi
Hi Energized
Lo
Lo Energized
Hi.H
Hi Energized & Latch
Lo.H
Lo Energized & Latch
●Front key functions:
PV Hold
Tare
Digital Input
Maximum or Minimum Reset
Reset fo Relay Latch
●
Engineer Label: over 80 types.
Operating Key: 4 keys for
Enter(Function) /
Shift(Escape) /
Up key /
Down key
Pass Code: Settable range:0000~9999;
User must key-in the exactly pass code for access
to
[
Programming Level
]
. Otherwise, the meter will
return to measuring page. If user forgets the pass
code, please contact with your service window.
Function Lock: There are 4 levels programmable.
●None(
none
): no lock at all. User can access to all
level for checking and setting.
●User Level(
user
): User Level lock. User can access
to User Level for checking, but can not setting.
●Programming Level(
eng
): Programming level lock.
User can access to programming level for checking,
but can not setting.
●ALL(
all
): All lock. User can access to all level for
checking but can not setting.
Front Key Function
The
Down Key can be set to be function as like as
Relative PV(Tare) / PV Hold / Reset for max(mini)
hold / Reset for relay energized latch.
Ex. The
[dNkey]
function set to be
reL.pv
in
[input
group]
. When user presses
Key, the PV will show
relative value until press
Key again.
■
Error Masage
BEFORE POWER ON, PLEASE CHECK THE SPECIFICATION AND CONNECTION AGAIN.
SELF-DIAGNOSIS AND ERROR CODE:
DISPLAY
DESCRIPTION
REMARK
ovfl
Display is positive-overflow (Signal is over
display range)
(Please check the input signal)
-ovfl
Display is negative-overflow (Signal is under
display range)
(Please check the input signal)
ovfl
ADC is positive-overflow (Signal is higher than
input 120%)
(Please check the input signal)
-ovfl
ADC is negative-overflow (Signal is lower than
input -120%)
(Please check the input signal)
eep
fail
EEPROM occurs error (Please send back to manufactory for repaired)
aiCng
pv
Didn’t execute the calibrate of Input Signal (Please process Calibrating Input Signal)
aic
fail
Input signal calibrated error (Please check Calibrating Input Signal)
aoCng
pv
Didn’t execute the calibrate of output Signal (Please process Calibrating Output Signal)
aoc
fail
Output Signal calibrated error (Please check Calibrating Output Signal)
■Operating Key
:

CS1 SERIES–OPERATION MANUAL(EN)-2013-01-04
12 / 31
*Please access to the Programming Level to check and set the parameters when users start to run the meter
Operating Key: 4 keys for
Enter(Function) /
Shift(Escape) /
Up key /
Down key
The meter has designed operation similar as PC's
and
Enter
. In any page, press
key means "enter" or
"confirm setting", and press
key means "escape(
Esc
)" or "shift".
In Programming Level, the screen will return to Measuring Page after do not press any key over 2 minutes, or press
for 1 second.
Function Index
Setting Status
(=
)
Enter/Fun key (1) In any page, press
to access the level or
function index
(2) From the function index to access setting status
(3) Setting Confirmed, save to EEProm and go
to next function index
(=
)
Shift key
(Escape Key)
(1) In measuring page, press
for 1 second to
access user level.
(2) In function index, press
for 1 second to go
back upper level.
(3) In function group index, press
for 1 second
to go back measuring page
(4) In setting status, press
to Shift the
setting position.
(5) In setting status, press
for 1 second to
abort setting and go back this function
index.
(=
)
Up key (1) In function index, press
to go back to
previous function index (2) In setting status for function, press
to
select function
(3) During number Setting, press
can roll
the digit up
(=
)
Down key (1) In Function Index Page, press
will go to the
next Function Index Page. (2) In setting status for function, press
to
select function
(3) During number Setting, press
can roll
the digit down.

CS1 SERIES – OPERATION MANUAL (EN) -2013-01-04
13 / 31
■OPERATING FLOW CHART: Plesae refer to operating manual for detail description
Power ON
88888
Self-diagnosis
cs!va
Display the model
cs!va
: Volt/Current
cs!pr
: DC 10V/20mA
cs!sg
: Strain Gauge
cs!pm
: Potentiometer
cs!rs
: Resistance
cs!t
: Rtd T/C
0−0−1
16*88
pv
This page will show
out, when
[dsply]
set to be
rs485
.
pv
: Present Value
0−3
min
)00
min
: the Minimum
value of PV saving
Checking only
0−6
cs!va
ver@0
model of the meter
firmware version
Checking only
ver@0
Show
the firmware version
ver@0
: Version 2.0
0−1
ry!sp
10)00
ry!sp
: Relay 1
Set-point
-19999~+29999
0−4
max
19(99
max
: the Maximum
value of PV saving
Checking only
0−0−1
16*88
pv
Cyclic to first page
16*88
MEASURING PAGE
Press
1sec
Access
Escape
Press
1sec
0−2
rYrst
no
rYrst
: Reset for
energized Latch of
Relay
yes
/
no
0−5
Mrst
no
Mrst
: Reset the
saved value of
Maximum & Minimum
yes
/
no
Pcode
enter
Enter the password to
access Programming
Level
Pass Code
Default:1000
input
group
INPUT GROUP
relay
group
RELAY GROUP
ao
group
ANALOGUE
OUTPUT GROUP
rs485
group
RS485 GROUP
User Level
Press
for 1 sec. to back Measuring Page
Programming Level
Press
for 1 sec. to back Measuring Page
NO
YES

CS1 SERIES – OPERATION MANUAL (EN) -2013-01-04
14 / 31
Pass Code
Default:1000
input
group
INPUT GROUP
relay
group
RELAY GROUP
ao
group
ANALOGUE
OUTPUT GROUP
rs485
group
RS485 GROUP
A−0
aItyp
A4-20
The function is for
CS1-PR only. It’ll be
hiden for other models
ai.typ
: Analogue Input
type and range selection
V0-10
/
V0-5
/
V1-5
/
A0-20
/
A4-20
/
A0-10
B−1
rYsb
0
rYsb
: Start band for
Relay energized
0~9999 digits
D−1
aOtyp
A4-20
aOtyp
: Analogue
Output type and
range selection
V0-10
/
V0-5
/
V1-5
/
A0-20
/
A4-20
/
A0-10
E−1
adres
1
adres: Device
number of the meter
1~255
A−1
pVdp
)00
pVdp
: Decimal Point of
PV
0
/
)0
/
)00
/
)000
/
0.0000
B−2
rYsd
)0)0
rYsd
: Start delay
time for Relay
energized
0:00.0~9(m):59.9(s)
D−2
aOls
)00
aOls: the low point
is relative to the
lowest of Analogue
output
-19999~+29999
E−2
baud
9600
baud: Baud rate
1200
/
2400
/
4800
/
9600
/
19200
/
38400
A−2
lOsc
)00
lOsc
: Low scale of PV
-19999~+29999
B−3
ry!md
hi
ry!md
: Relay 1
energized mode
off
/
lo
/
hi
/
lOhld
/
hIhld
/
do
D−3
aOhs
10)00
aOhs: the high point
is relative to the
highest of Analogue
output
-19999~+29999
E−3
prity
NstB2
prity: Parity
Nstb.1
/
Nstb.1
/
odd
/
even
A−3
hIsc
)00
hIsc
: High scale of PV
-19999~+29999
B−4
ry!hy
0
ry!hy: Relay 1
Hysteresis
0~5000counts
D−4
aOzro
)00
aOzro: Fine Zero
Adjustment for
Analog Low Output
-38011~+27524
A−4
pVzro
0
pVzro
: Fine Low point
Adjustment for PV
display
-19999~+29999
B−5
ry!rd
)0)0
ry!rd: Relay 1
energized delay time
0:00.0~9(m):59.9(s)
D−5
aOspn
)00
aOspn: Fine Span
Adjustment for
Analog High Output
-38011~+27524
A−5
pVspn
0
pVspn: Fine High point
Adjustment for PV
display
-19999~+29999
B−6
ry!fd
)0)0
ry!fd
: Relay 1
de-energized delay
time
0:00.0~9(m):59.9(s)
D−6
ZSclr
none
ZSclr
: clear fine
Zero / Span
Adjustment for
Analogue output
none
/
aOzro
/
aOspn
/
both
A−6
ZSclr
none
ZSclr: Clear Fine Zero /
Span Adjustment for PV
display
none
/
pVzro
/
pVspn
/ both
D−7
aOlmt
11)00
aOlmt
: Analog
Output High Limit
0.00~110.00%
Next Page
Next Page
Programming Level
Press
for 1 sec. to back Measuring Page
YES

CS1 SERIES – OPERATION MANUAL (EN) -2013-01-04
15 / 31
A−7
dsply
pv
dsply: Display
Function for PV screen
pv
/
min.Hd
/
maXhd
/
rs485
A−8
lOcut
)00
lOcut: Low Cut the PV
-19999~+29999
A−9
avg
5
avg: Average update
for PV
1(None)~99times
A−10
mVavg
1
mVavg: Moving
Average update for PV
1(None)~10times
A−11
Dfilt
0
Dfilt: Digital filter
0(None)/1~99times
A−12
dNkey
none
dNkey: Down key
function
none
/
reLpv
/
pVhld
/
reLpv
/
Mrst
/
rYrst
A−13
Pcode
0000
Pcode: Pass Code
setting for access to
Programming Level
0000~9999
A−14
Flock
none
Flock: Function Level
Lock
none
/
user
/
eng
/
all

CS1 SERIES – OPERATION MANUAL (EN) -2013-01-04
16 / 31
■FIELD CALIBRATION (The function is only for CS1-SG / CS1-PM / CS1-RS)
16*88
MEASURING PAGE
Pcode
enter
&
Enter the password to
access Programming
Level
enter
Fcode
Enter the password to
access
Field Calibration
Level
Pass Code
default=2000
Press
F−1
caLlo
00000
Adjust the structure to be a lower signal output status(or
any lower status) and keep it in stable.
caLlo
: Field Calibration Low
Press
to read signal of the lower status.
Press
again to finish the calibration lower point, and go to
next page.
F−2
caLls
00000
caLls
: the value to be set is relative to Field Calibration
lower point
Press
to set the value of lower scale
F−3
caLhi
00000
Adjust the structure to be a higher signal output status(or
any higher status) and keep it in stable.
caLhi
: Field Calibration High
Press
to read signal of the higher status
Press
again to finish the calibration higher point, and go to
next page.
F−4
caLhs
00000
caLhs
: the value to be set is relative to Field Calibration
higher point
Press
to set the value of Higher scale
F−5
Csel
deflt
Csel: Calibration parameter selection
Press
to access the function and stand by selection
Press
or
to select
(default:
defld
);
Settable:
defld
/
field
defld
(default calibration)
field
(Field calibration)
◘Once the user select field calibration, the
[lOsc]
(step A-2) and
[hIsc]
(A-3) will be instead of
[caLls]
and
[caLhs]
, and can
not to be change. If user has to change the scaling, it's the
only way to access field calibration level to set in
[caLls]
(step F-2) and
[caLhs]
(step F-4).
◘Please double check the
[lOsc]
(step A-2) and
[hIsc]
(A-3) are
correct after selection the
deflt
or
field
NO
YES

CS1 SERIES–OPERATION MANUAL(EN)-2013-01-04
17 / 31
■Operating Steps:
■User Level
INDEX
FUNCTION DESCRIPTION
PARAMETERS & SETTING
SET
POWER
ON
Please check the specification
and wiring diagrams firstly.
*****
Self-diagnosis (LED All bright)
cs!pr
Model
cs!va
: Amp / Volt
cs!rs
: Resistance
cs!pr
: 0~(5)10V / 0(4)~20mA
cs!sg
: Load Cell / Stran Gauge
cs!pm
: Potentiometer
cs!t
: Temperature
ver!0
Firmware version
168*8
Measuring Page
Press
for 1 second return to Measuring Page
0−0−1
pv
168*8
This page will be shown out when, when
[dsply]
(step A-07) function has not set to
be
pv
.
pv
(Pv): Present Value;
0−1
ry!sp
100)0
100)0
200)0
ry!sp
(rY1.SP):Relay 1 Set-point
Please confirm the energized mode of relay 1
before setting.
Settable range: -19999~+29999
Shift
Up
Down
Enter
0−2
rYrst
no
no
yes
rYrst
(rY.rSt): Reset for energizing latch of
Relay;
If the
[ry!md]
(step B-3) set to be
hIhld
or
lOhld
, and the present value(PV) reach to the
condition of relay energizing that the relay will
be energized and latching.
At mean time, user can reset the rel
ay latching
in here.
Programmable:
yes
/
no
yes
(Yes): reset the relay latching.
no
(No): abort to reset the relay
latching.
Up
Down
Enter
◘Be careful, the relay has been
energizing and latching again
even user had set here to reset
the relay latching.. if the PV still
reach to the condition of relay
energized,
0−3
min
)0
min
(Min): the Minimum value of PV saving;
The meter will save the minimum of PV during
power on, until reset in [
Mrst
](step 0-5
). It will
save newest minimum after reset.
Review only
0−4
max
299(9
max
(Max): the Maximum value of PV
saving;
The meter will save the maximum of PV during
power on, until reset in
[ Mrst]
(step 0-5).
It will
save newest maximum after reset.
Review only
0−5
Mrst
no
no
yes
Mrst
(M.rSt): reset the saved value of
Maximum & Minimum;
The values of maximum and minimum can be
reset in here
. It will save newest maximum and
minimum after reset.
Programmable:
yes
/
no
yes
(Yes): to reset the saved value
of maximum and minimum.
no
(No): abort to reset the saved
values of maximum and
minimum.
NEXT
PAGE

CS1 SERIES–OPERATION MANUAL(EN)-2013-01-04
18 / 31
0−6
cs!pr
ver!0
Model of the meter
cs!va
(CS1-VA): Volt/Currnt
cs!pr
(CS1-PR): DC 0~10V / 4~20mA
cs!sg
(CS1-SG): Strain Gauge / Load Cell
cs!pm
(CS1-PM): Potentiometer
cs!rs
(CS1-RS): Resistance
cs!t
(CS1-T): Rtd /Thermocouple
ver!0(Ver 1.0): Firmware version
Review only
It will be announce in our
website www.adtek.com.tw,
when it has been version
changed.
0−0−1
pv
168*8
Cyclic to first page
Press
for 1 second to back to
Measuring Page in any page.
■Programming Level
INDEX
FUNCTION DESCRIPTION
PARAMETERS & SETTING
SET
168*8
MEASURING PAGE
enter
Pcode
Default:1000
0000
1000
Enter the pass code to access
Programming Level
If user wants to change the pass
code, please go to step A-13 to
set. Please remind the new pass
code.
Pass Code
Enter the pass code to access
programming level.
INPUT
GROUP
RELAY
GROUP
ANALOGUE
OUTPUT
GROUP
RS485
GROUP
PRESS
TO ACCESS
PRESS
TO ACCESS
PRESS
TO ACCESS
PRESS
TO ACCESS
■Input Group
INDEX
FUNCTION DESCRIPTION
PARAMETERS & SETTING
SET
input
group
INPUT GROUP INDEX PAGE In following pages, press
for
1 second to back INPUT GROUP
INDEX PAGE.
A−0
aItyp
A4-20
A4-20
V0-10
The function is only for CS1-PR
aItyp
(Ai.tyP): Analog input type & range
selection
There are 3 terminals for mA and V input, if
user selects ordering code in input for "AV"
from input. Please confirm the wiring is
correct or not to set.
Programmable:
V0-10
(0~10V) /
V0- 5
(0~5V) /
V1- 5
(1~5V) /
A0-10
(0~10mA) /
A0-20
(0~20mA) /
A4-20
(4~20mA)
Up
Down
Enter
A−1
pVdp
0
0
)0000
pVdp
(Pv.dP): Decimal Point of PV Programmable:
0
/
)0
/
)00
/
)000
/
0.0000
Up
Down
Enter
NEXT
PAGE
Press
for 1 second to back Measuring Page
NO
YES

CS1 SERIES–OPERATION MANUAL(EN)-2013-01-04
19 / 31
A−2
lOsc
)0
000)0
00)00
lOsc
(Lo.SC): Low scale of PV
◘CS1-SG/PM/RS: If the field calibration has
be done and then the
[ Csel]
(Calibration
parameter selection) selected to be
field
(field calibration), the
[ lOsc]
will be
replaced by
[caLls]
, and it can not to be
set.
Programmable: -19999~29999
Shift
Up
Down
Enter
Default: [lOsc]: )00, [hIsc]: 10)00
Change to [lOsc]: 5)00, [hIsc]: 19(99
SCALE
INPUT
)00
19(99
10)00
5)00
Reverse slop
[hIsc]
[hIsc]
[lOsc]
[lOsc]
%
)00
%
5)00
%
10)00
A−3
hIsc
199(9
199(9
200)0
hIsc
(Hi.SC): high scale of PV
◘CS1-SG/PM/RS: If the field calibration has
be done and then the
[ Csel]
(Calibration
parameter selection) selected to be
field
(field calibration), the
[ hisc]
will be
replaced by
[caLhs]
,, and it can not to be
set.
Settable range: -19999~29999
Shift
Up
Down
Enter
A−4
pVzro
)0
)0
)0
pVzro
(Pv.Zro): Fine Adjustment low point for
PV display;
For Zero & Span of PV, users can get the
"Fine Adjustment" by front key. It's an easy
way to “Just Key-In” the value that the user
wants to show in the current input signal.
Especially, the
[pVzro]
&
[pVspn]
are not
only in zero & span of PV, but also any lower
point for
[pVzro]
& higher point for
[pVspn]
.
The meter wills be linear for full scale.
Settable range: -19999~+29999
Shift
Up
Down
Enter
Default Input: [lOsc]: )00, [hIsc]: 19(99
Digital fine adjustment:
input 2.75V, [pVzro]set to be 8)00
input 9.00V, [pVspn]set to be 17)00
Display: Low point from 55.00 to 80.00
High point from 180.00 to 170.00
SCALE
INPUT
0V
10V
5V
2.75V
9.00V
19(99
[hIsc]
[lOsc]
)00
10)00
18)00
5%00
8)00
17)00
A−5
pVspn
)0
)0
200)0
pVspn
(Pv.SPn): Fine Adjustment high point
for PV display;
It's same function as like as
[pVzro]
.
Settable range: -19999~+29999
Shift
Up
Down
Enter
A−6
ZSclr
none
none
both
ZSclr
(Z.S.CLr): Clear Fine Adjustment
of Low / High points for PV display; Programmable:
none
(None):
Do not clear the fine
adjustment of Low / High.
pV.zro
(PV.Zro): To clear the fine
adjustment Low.
pV.spn
(PV.SPn): To clear the fine
adjustment High
both
(Both): To clear the fine
adjustment of Low and High.
Up
Down
Enter
A−7
dsply
pv
pv
maXhd
dsply
(dSPLY): Display Function for PV
screen
When the
[dsply]
function set to be
rs485
,
At meantime, the input signal (PV) no longer
display now. The PV screen will show the
number from RS485 command & data
directly. The data(number) will be same as
PV that it will compare with set-point,
analogue output and down key functions are
correspondent to control analogue output,
relay energized and so on.
Programmable:
pv
(PV):shows PV
miNhd
(Min.Hd): Minimum Hold of PV
maXhd
(MAX.Hd): Maximum Hold of
PV
rs485
(RS485): Remote displayed
from RS485 command of master.
Up
Down
Enter
NEXT
PAGE

CS1 SERIES–OPERATION MANUAL(EN)-2013-01-04
20 / 31
A−8
lOcut
)0
000)0
010)0
lOcut
(Lo.CUt): Low Cut the PV
if set the positive value (X1) here to display
"0" which it expressed to be low-cut the PV
between "+X1 (plus)" & "-X1(minus)"
/absolute value
PV≤ I Setting value I, the display will be 0.
If set the negative value (X2) here to display
"X2" which it expressed to be low-cut the
PV that it's under the X2 setting value;
PV< Setting value, the display will be
X2(Setting value).
Settable range: -19999~+29999
Shift
Up
Down
Enter
Low Cut set to be +0.50
Low Cut is set for 0.50, if the PV is
from -0.50~+0.50, that display will be 0.
PV according
to input signal
Present
Value
Low cut
function
0.50
-0.50
)50
[lOcut]
X1
X1
Low Cut set to be -0.10
-0.10
Low cut
function
Low Cut is set for -0.10, if the PV is
under (< = -0.10), that display will be -0.10.
Present
Value
PV according
to input signal
-)10
[lOcut]
X2
A−9
avg
5
05
99
avg
(AvG): Average update for PV
The meter’s sampling is 15cycle/sec
If the
[avg]
(Average) set to be
3
to
express the display update with 5 times/sec.
The meter will calculate the sampling 1-3
and update the display value. At meantime,
the sampling 4-6 will be processed to
calculate.
Settable range:
1(no function)~99 times
Shift
Up
Down
Enter
A−10
mVavg
1
01
10
mVavg
(M.AvG): Moving Average update for PV
The meter’s sampling is 15cycle/sec. If the
[mVavg]
(Moving Average) set to be
3
expressed the display update with 15
times/sec.,
In the first updated display value will be
same as average function. In the next
updated display value, the function will get
the new fourth sample (sample 4) then
throw away the first sample (sample 1) that
the newest 3 samples(sample 2,3,4) will be
calculated for the updated display value.
Settable range:
0(no function)/1~10 times;
Shift
Up
Down
Enter
A−11
Dfilt
0
00
99
Dfilt
(d.FiLt): Digital filter
The digital filter can reduce the influence
of spark noise by magnetic of coil.
If the values of samples are over digital
filter band(fixed in firmware and about 5% of
stable reading) 3 times (Digital Filter set to
be 3) continuously, the meter will admit the
samples and update the new reading.
Otherwise, it will be as treat as a noise and
skip the samples.
Settable range:
0(no function)/1~99 times.
Shift
Up
Down
Enter
A−12
dNkey
none
none
pVhld
dNkey
(dn.key): Down key function
Users can set the
d
own key of front panel
to be the functions as like as Relative
PV(Tare) / PV Hold / Reset for max(mini)
hold / Reset for relay energized latch.
Programmable:
none
(None): no fuction
reLpv
(rEl.Pv): Relactive PV
pVhld
(Pv.HLd): PV hold
Mrst
(M.rST): Reset for Max./Mini
hold
rYrst
(rY.rST): Reset for Relay
energized latch
Up
Down
Enter
NEXT
PAGE
This manual suits for next models
6
Other ADTEK Measuring Instrument manuals
Popular Measuring Instrument manuals by other brands
Fieldpiece
Fieldpiece SC66 Operator's manual

Draper
Draper 50024 instructions
Cincinnati
Cincinnati CL-900 Series manual

Kestrel
Kestrel 5700 Sportsman instruction manual

HAMAR LASER
HAMAR LASER A-1519 Series Operation manual
London Electronics
London Electronics INTUITIVE INT2 Series Connection details, scaling and general information

HemoCue
HemoCue Albumin 201 Quick reference manual

Endress+Hauser
Endress+Hauser Proline Promass E 200 technical information
Reely
Reely RE-5631039 operating instructions
AEMC
AEMC MN375 user manual
VOLTCRAFT
VOLTCRAFT MF-10 operating instructions
HKC
HKC APL-2 Series Installation, operation & maintenance manual
