manuals.online logo
Brands
  1. Home
  2. •
  3. Brands
  4. •
  5. Dancover
  6. •
  7. Outdoor Furnishing
  8. •
  9. Dancover PA152010 User manual

Dancover PA152010 User manual

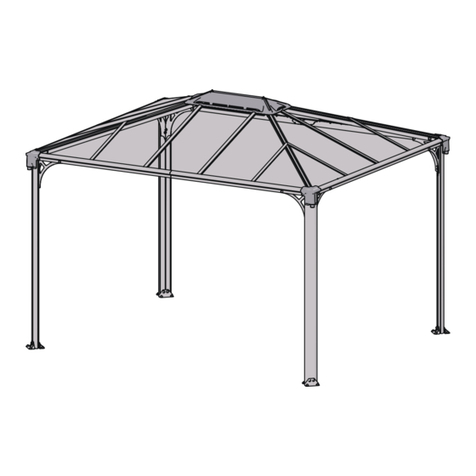
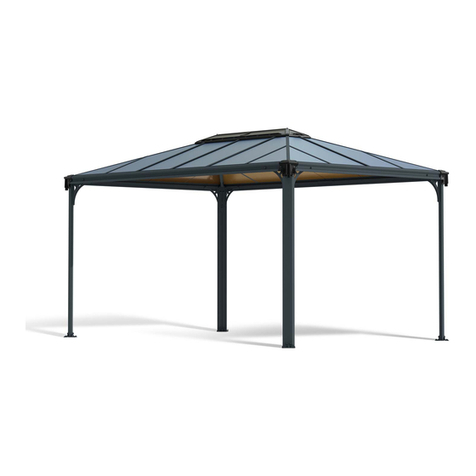
4,36x2,95x2,7m
for
Gazebo
Manual
24-02-2021
AssemblyInstructions
PRODUCT SIZE(LxWxH):436x295x270cm
PLEASE READCAREFULLYBEFOREASSEMBLY
CONTENTS
1. AssemblyAdvice ................................................................Page 1
2. Product Features ................................................................Page 2- 3
3. Parts List .............................................................................Page 4- 6
6. Base Assembly....................................................................Page 12 - 13
7. Framework &Glazing Assembly........................................Page 14 - 31
4. Roof Vent Assembly..........................................................Page 7- 8
5. Door Assembly...................................................................Page 9- 11
11
Free Tool
AssemblyandMaintenanceAdvice
1. Forsafetypurposes, westronglyrecommend that thisproductisassembledbyatleast
twopeople.
2.Somecomponentshavesharpmetaledges.Pleasebecareful when handling metal
components.Pleaseweargloves,shoesandsafetygoggles during assembly.
3. Lay allofthecomponentsonasoft carpetorblanket toavoidany scratchesordamages.
4. DONOTclimborstand on theroof.Heavyarticlesshouldnotbe leanedagainst
thegreenhouse.
5. Keeptheroofandgutterclearofsnow,dirt &leaves.Allowing snowtobuildup on
theroofmaydamagethe product.
6. Unlike steel,ifthepaint finish isscratchedthiswill notharmthe aluminiumunderneath.
7. Whenyourproduct needscleaning,useamilddetergentsolution andrinsewithcold
clean water.Donot use acetone,abrasive cleanersorstrongdetergentstoclean
thepanels.
Tools Provided:
Tools RequiredwhenAssembly(NotProvided)
Assembly at least by twoPersons
Rubberisnotprovidedifyouchoosepolycarbonatesheet as glazing panel.
Important:
2
2. Baseanchor bracketsareincluded as standardwithexpanding boltstoensureasecure
fixingintoconcreteorpaving. Alternatively, you canusethe bracketstofixintoa
timberbase withwoodscrews(notprovided).
Expansion bolt
inconcrete
3.Ouruniqueframeconnectorsmakemuchstrongerjointsthan conventional greenhouses.
4. The strongtwoparteavesbeamincludes an integralgutter. Downpipes arealso included
as standardso youcancollectrainwater.
Steel bar/Lawn land
FunctionsandFeatures:
1. Comparedwithtraditionalgreenhousesthisnewproductfeatures manysignificant
improvements. The hollowboxprofilealuminiumframingismuch strongerthanother
greenhouses anditcanwithstand muchgreaterpressure.
3
6.Remove approximately2inchesof filmfromallsheetedgesbeforeinstallingandremove
allfilmimmediatelyaftertheconstructioniscompleted.Pleaseensurethat the side
withthe whitefilmfacesoutwards.
Automatic Opener
Manual Opener
5.Manualwindowhandles areincludedasstandardwiththeroofvents.Ifrequired,
automaticroofvent openersareavailableas an inexpensive optionalextra.
7.POWEREDSCREWDRIVERRECOMMENDED
Thisqualitygreenhousefeaturesself-tapping screwstoprovide strongjoints.Asthe name
suggests,thescrewstap their ownthread.Drivinginself-tapping screwsrequires more
forcethanconventional screws.Apoweredscrewdriver isthereforerecommended.
SUN
POLYCARBONATE
PANEL
WhiteFilm
Transparent Film
PC
sheet
Twosides of PC sheet arecovered withthinfilms, one side'sfilm is
white, another istransparent. The UV-protected side of PC sheet is
covered withwhitefilm and mustface towards the Sun.
PA152010
ALU.BoxNo.1
4
PART NO QTY
1
1
L04A
L04B
L08A 2
2
L09A
2
L07A
L23A 4
L19A 4
L19B 2
4
L03C
4
L05C
2
L02E
J39 4
J41 4
L25
1
L24
L25 4
4
J40 2
4
L05A
PART NO QTY
L01A 4
L18A 2
L18B 2
L17 2
PART NO QTY
L03A 4
ALU.BoxNo.2
ToolsProvided:
5
4X16D
Z02 267
M4.2X16
Z08
8
D49
A03 2
D52 4
4
D53
D22 18
J93
J92
246
M5X12
S26
26
M5X12
S27
9
M4.8X16
Z17
A01 2
8
8
H43
D45 8
4
4
2
D56
S08 18
M8X60
M5
M05 8
S05
M6X12 6
6
M03
M6
D46
4
3.2X10
Z06
H10 2
PART NO QTY
D115 2
1
4
3
2
5
6
7
8
1
4
3
2
5
6
7
8
9
10
5
ALU.BoxNo.4
1
L05B
L11 2
L15A 2
PART NO QTY
L03B 4
6
L03D
10
L05E
L03A 9
2
L07B
L08B 2
2
L09B
L06A 1
2
L03E
1
L18C
1
L18D
L05G 4
PART NO QTY PART NO QTY
L16A 1
L16B 1
L20 2
ALU.BoxNo.3
PA152010
1
4
3
2
5
6
7
8
1
4
3
25
6
7
PC/Glass
N0.1
6
PART NO QTY
Y10 2
Y11 4
Y5 16
4
4
Y2
Y1
Y3
Y4
4
4
Y6 2
Y7 2
PART NO QTY
160M
J107
PART NO QTY
98M
J107
Y5
Y5
Y5 Y1
Y3
Y4
Y2
Y5 Y5
Y5
Y5
Y5
Y5
Y5
Y5
Y5
Y1
Y1
Y1
Y3
Y3
Y3
Y4
Y4
Y4
Y6
Y6
Y7
Y7
Y10
Y10
Y11 Y11
Y11Y11
Y5 Y5
Y5 Y5
Y8 Y8
Y8 4
Y8 Y8
Rubberforwalls& roof
(Provided forglass only)
Rubberforwallsonly
(Provided forglass only)
PA152010
PART NO QTY
L19A 2
L19B 1
7
Y10 1
L20 1
10
M4.2X16
Z08
H43
D46
Z08
D46 4
4
H43
Window
Z08
L19B
A01 1
A01
Fix A01 inthe middleof L19B,
322.2mm fromthe ends.
Insert H43 intothe Slot
of L19A,L19B & L20
Insert Part B intothe tube
of L19A,L19B & L20
Slot
Tube
AfterconnectorD46 & partH43 arein
positions, makeapencil markat about
20MM fromeachend of L19A, L19B and L20.
Useapowered screwdrivertofixthem
togetherwithscrewZ08. Makesurethere
isno gapsbetween the angleofeachprofile.
L19A
L19A
L19B
L20
Y10
H43
D46 H43
H43
H43
D46
D46
D46
322.2
A01
322.2
PART NO QTY
L11 1
L15A 1
8
2
M4.2X16
Z08 L11
L15A
1
1
22
Z02
Z08
2
Z02
Y10
J107
J107
PART NO QTY
2.65M
J107
1
2
If glass is chosen, please seal it with rubber (J107) provided.
If polycarbonate sheet is chosen, rubber is not provided.
Please seal it with silicone sealant (not provided).
4X16D
9
Z08
Z08
3
A
Left Door
PART NO QTY
L16A 1
L18A 2
L18B 2
1
D45 8
10
M5X12
S26
L18C
1
L18D
32
M4.2X16
Z08
L17 2
Y11 4
S05
S05
M03
M03
L05G
L05G
D45 D45
D45
D45
L16B
L18D
L18A
L18B
Y11
Y11
S05
M6X12 6
6
M03
M6
L05G 4
S26
L16B 1
Insert ConnectorD45 intoeachend of frame
profilesL16B & L18A & L18B & L18D,
and then fixthemwithscrewsZ08.
Beforefixing withscrews,pleasemarkthem
withapencil at distanceabout 20/30mm fr
om
eachend, and makesurethereisno gaps
between eachprofile.
10
Z08
Z08
3
Right Door
L18A
L18B
L18C
L16A
D45
D45
D45
D45
L05G
L05G
L17
Y11
Y11
S05
S05
M03
M03
S26
Insert ConnectorD45intoeachend of frame
profilesL16A & L18A & L18B & L18C,
and then fixthemwithscrewsZ08.
Beforefixing withscrews,pleasemarkthem
withapencil at distanceabout 20/30mm from
eachend, and makesurethereisno gaps
between eachprofile.
11
PART NO QTY
12.2M
J107
J107 J107
Y11
If glass ischosen, pleasesealit withrubber(J107)provided.
Rubberisnot provided if you choosepolycarbonatesheet asglazing panel.
Noted:
ab
Expansion
screw/Concrete
ground
ab
=
ab
ab
=
12
It isessentialthe dimensionsa+barethe sametoensurethe baseissquare.
Steelpegsinsoil
Support at the cornersonlyisinadequate.
13
PART NO QTY
S08 18
M8X60
D22 18
5194MM
352
705705705
352
352
705
352
352 352
352
705
705
352
705 705
705
705
705705705
Expansion boltsassembly
*Thisshowsalayout forD22's positions
whereit isplacedinthe middleof the
glazing panelforeachsection.
PART NO QTY
L08A 2
14
J41 4
8
M5X12
S26
L01A
L01A
L01A
L01A
L08B 2
J41
J41
J41
J41
L08A
L08A
L08B
L08B
L08B
J41
L01A
L08A
Insert J41 intothe tube of L08A and L08B
Fix L01A toL08A & L08B through J41, using S26.
L01A 4
PART NO QTY
15
2
L07A
8
M5X12
S26
J39 4
J39
J39
J39
J39
L07A
L07A
L07B
L07B
2
L07B
J39
L07B L07A
S26
Insert J39 intoL01A, and then fixL07A & L07B toL01A
using S26. Makesurethe angleisRight Anglebefore
tighting themup.
PART NO QTY
L03A 5
16
6
20
M5X12
S26
Y5
L07A
L08A
S26
S26
Y5
Y5
Y5
Y5
Y5
Y5
L03A
L03A
L03A
L03A
L03A
BackWallAssembly
Insert PanelY5intothe channelof L01A, and then fixaL03A
toL08B & L07B using S26. Makesurethe otherside of Y5is
completelyinthe channelof L03A.
Insert anotherY5intothe channelof L03A, then fixanotherL03A
using S26. Dothe sameforthe other3Y5& L03A. Lastly, insert
the last Y5intothe channelof L01A & L03A.
Note: If PCpanelischosen, you can fixall the L03A before
inserting all the Y5.
11111
1
22222
2
PART NO QTY
L03A 6
17
6
24
M5X12
S26
Y5
L07A
L08A
2
Y6
L03A
L03A
S26
S26
Y6
Y6
Y5Y5 Y5
L03A
L03A
Side WallsAssembly
Dothe sameasthe back wall assembly,
Y6 isthe last paneltoinsert in.

This manual suits for next models

1

Other Dancover Outdoor Furnishing manuals

Dancover Profi PA22310 User manual

Dancover

Dancover Profi PA22310 User manual

Dancover San Pablo User manual

Dancover

Dancover San Pablo User manual

Dancover San Pablo User manual

Dancover

Dancover San Pablo User manual

Dancover Palermo User manual

Dancover

Dancover Palermo User manual

Dancover ST02999 User manual

Dancover

Dancover ST02999 User manual

Dancover San Bernardino User manual

Dancover

Dancover San Bernardino User manual

Dancover Gazebo Safari User manual

Dancover

Dancover Gazebo Safari User manual

Dancover AP1010 User manual

Dancover

Dancover AP1010 User manual

Dancover PA152000 User manual

Dancover

Dancover PA152000 User manual

Dancover Nomado 3x3 m User manual

Dancover

Dancover Nomado 3x3 m User manual

Dancover Pagoda Marquee UNICO 6x6m User manual

Dancover

Dancover Pagoda Marquee UNICO 6x6m User manual

Dancover San Francisco User manual

Dancover

Dancover San Francisco User manual

Dancover San Pablo PA153020 User manual

Dancover

Dancover San Pablo PA153020 User manual

Dancover San Francisco User manual

Dancover

Dancover San Francisco User manual

Dancover Madita User manual

Dancover

Dancover Madita User manual

Dancover Gazebo Martinique User manual

Dancover

Dancover Gazebo Martinique User manual

Dancover PA22100 User manual

Dancover

Dancover PA22100 User manual

Dancover Santa Ynez User manual

Dancover

Dancover Santa Ynez User manual

Dancover Martinique User manual

Dancover

Dancover Martinique User manual

Dancover Pavillon Antik User manual

Dancover

Dancover Pavillon Antik User manual

Dancover Monaco User manual

Dancover

Dancover Monaco User manual

Dancover AC153020 User manual

Dancover

Dancover AC153020 User manual
Dancover Milena User manual

Dancover

Dancover Milena User manual

Dancover FU19010 User manual

Dancover

Dancover FU19010 User manual

Popular Outdoor Furnishing manuals by other brands

Reynolds Building Systems the Richmond Assembly Book

Reynolds Building Systems

Reynolds Building Systems the Richmond Assembly Book

Crivit 280890 Instructions for use

Crivit

Crivit 280890 Instructions for use

deVRIES PURE SEASIDE XL Care & assembly instructions

deVRIES

deVRIES PURE SEASIDE XL Care & assembly instructions

Sojag 500-9162493 Assembly manual

Sojag

Sojag 500-9162493 Assembly manual

SUNS Rota Assembly instruction

SUNS

SUNS Rota Assembly instruction

Royal garden FCS70438RSTRGDS Use and care guide

Royal garden

Royal garden FCS70438RSTRGDS Use and care guide

Anova F1032 Assembly instructions

Anova

Anova F1032 Assembly instructions

AXI.COM Zidzed user manual

AXI.COM

AXI.COM Zidzed user manual

Courtyard Creations KFS562F-WM Assembly instructions

Courtyard Creations

Courtyard Creations KFS562F-WM Assembly instructions

Sunjoy D-GG001PST-F1 Assembly instruction

Sunjoy

Sunjoy D-GG001PST-F1 Assembly instruction

Target Martti FWS60618C Assembly instructions

Target

Target Martti FWS60618C Assembly instructions

Breezesta Skyline SK-0405-36 Assembly instructions

Breezesta

Breezesta Skyline SK-0405-36 Assembly instructions

Patio Festival PF20275 Assembly instructions

Patio Festival

Patio Festival PF20275 Assembly instructions

nest ADIRONDACK CHAIR instructions

nest

nest ADIRONDACK CHAIR instructions

CAZEBOO COM-000473 instruction manual

CAZEBOO

CAZEBOO COM-000473 instruction manual

Greemotion GM-2013 manual

Greemotion

Greemotion GM-2013 manual

Costway OP70822 user manual

Costway

Costway OP70822 user manual

Forever Redwood REDWOOD TRESTLE BENCH Assembly instructions

Forever Redwood

Forever Redwood REDWOOD TRESTLE BENCH Assembly instructions

manuals.online logo
manuals.online logoBrands
  • About & Mission
  • Contact us
  • Privacy Policy
  • Terms and Conditions

Copyright 2025 Manuals.Online. All Rights Reserved.