Datakom DKG-119 User manual

DKG-119 User Manual V-27 (20.04.2012)
DKG-119 MANUAL AND
REMOTE START UNIT
True RMS measurements
Engine control
Generator protection
Built in alarms and warning
Dual genset mutual standby operation
Load shedding, dummy load
Gas engine support
Engine idle speed control
1 phase genset voltage inputs
1 phase genset CT inputs
Engine oil pressure measurement
Engine coolant temperature
measurement
Fuel level measurement
Genset active power measurement
Genset power factor measurement
Engine rpm display
Remote Start operation available
Mains simulation input
Engine Idle speed control
Periodic maintenance request
Engine hours counter
Event logging with complete
measurement values
Stores last 100 events
Statistical counters
3 level password protection
Programmable parameters
All parameters field adjustable
Return to factory settings enabled
Logic level serial port
Firmware downloadable from serial port
Free MS-Windows Remote monitoring
SW:
-monitoring and control
- download of parameters
GSM-SMS sending in case of alarm
Modem call in case of alarm
MODBUS communication
128x64 graphic LCD display
Triple language support
Customer logo display capability
Configurable analogue inputs: 3
Configurable digital inputs: 5
Configurable digital outputs: 2
Total digital outputs: 4
Survives cranking dropouts
Sealed front panel
Plug-in connection system for easy
replacement
Dimensions (96x96x53mm)
FEATURES

DKG-119 User Manual V-27 (20.04.2012)
- 2 -
Section
1. INSTALLATION
1.1. Introduction to the Control Panel
1.2. Mounting the Unit
1.3. Wiring the Unit
2. INPUTS AND OUTPUTS
3. DISPLAYS
3.1. Led Displays
3.2. Language Selection
3.3. Digital Display
4. ALARMS AND WARNINGS
5. MODES OF OPERATION
6. OTHER FEATURES
6.1. Remote start operation
6.2. Sender type selection
6.3. Engine heating operation
6.4. Engine Idle Speed Operation
6.5. Engine Block Heater
6.6. Fuel Pump Control
6.7. Mains Simulation (Disable Start)
6.8. Delayed Mains Simulation, Battery Charging
6.9. Dual Genset Mutual Standby Operation
6.10. Periodic Service Request Monitoring
6.11. Engine Hours Meter
6.12. Display of Software Version
6.13. SMS message sending
6.14. Remote Monitoring and Programming
6.15. External Control of the Unit
6.16. Resuming to factory set parameters
6.17. Gas engine fuel solenoid control
6.18. Load Shedding / Dummy Load
6.19. Fuel Theft / Fuelling Messages
6.20. Firmware Update
6.21. Engine Control Mode
6.22. Dual Voltage and Frequency
6.23. Single Phase Operation
7. MODBUS COMMUNICATION
8. EVENT LOGGING
9. STATISTICAL COUNTERS
10. MAINTENANCE
11. PROGRAMMING
12. TROUBLESHOOTING
13. DECLARATION OF CONFORMITY
14. TECHNICAL SPECIFICATIONS
15. CONNECTION DIAGRAM
TABLE OF CONTENTS

DKG-119 User Manual V-27 (20.04.2012)
- 3 -
The unit is a control and protection panel used in gensets. It shows the measured values on its
displays. The unit is designed to provide user friendliness for both the installer and the user.
Programming is usually unnecessary, as the factory settings have been carefully selected to fit most
applications. However programmable parameters allow the complete control over the generating set.
Programmed parameters are stored in a Non Volatile Memory and thus all information is retained even
in the event of complete loss of power.
The measured parameters are:
Mains voltage phase L1 to neutral
Mains voltage phase L2 to neutral
Mains voltage phase L3 to neutral
Mains voltage phase L1-L2
Mains voltage phase L2-L3
Mains voltage phase L3-L1
Gen voltage phase L1 to neutral
Gen current phase L1
Gen frequency
Engine speed (rpm)
Gen phase L1 KW
Gen phase L1 cos
Battery voltage,
Coolant temperature
Oil pressure
Fuel level
Gen frequency
Mains frequency
1.1 Introduction to the Control Panel
1. INSTALLATION

DKG-119 User Manual V-27 (20.04.2012)
- 4 -
The unit is designed for panel mounting. The user should not be able to access parts of the
unit other than the front panel.
Mount the unit on a flat, vertical surface. The unit fits into a standard panel meter opening of
92x92 millimeters. Before mounting, remove the mounting brackets and connectors from the unit, then
pass the unit through the mounting opening. The unit will be maintained in its position by the mounting
brackets spring.
The output of the current transformers shall be 5 Amperes. The input current rating of the current
transformers may be selected as needed (between 10/5 and 9000/5 amps). Current transformer outputs
shall be connected by separate cable pairs from each transformer, to related inputs. Never use common
terminals or grounding. The power rating of the transformer should be at least 5 VA. It is recommended to
use 1% precision transformers.
If analogue senders (e.g. temperature, oil pressure or fuel level) are connected to the unit, it is not
possible to use auxiliary displays, otherwise the unit may be damaged. If temperature or oil pressure or
fuel level displays are already present on the generator control panel, do not connect the senders to the
unit. The unit is factory programmed for VDO type senders. However different types of senders are
selectable via programming menu. Please check the programming section.
The programmable digital inputs are compatible with both „normally open‟ and „normally
closed‟ contacts, switching either to BAT- or BAT+.
The charge alternator connection terminal provides also the excitation current, thus it is not
necessaryto use an external charge lamp.
WARNING: ELECTRICITY CAN KILL
ALWAYS disconnect the power BEFORE connecting
the unit.The fuse rating should be 6 Amps.
1) ALWAYS remove the plug connectors when inserting wires
with a screwdriver.
2) An appropriate and readily accessible set of disconnection devices
(e.g. automatic fuses) MUST be provided as part of the installation.
3) The building mains supply MUST incorporate appropriate
short-circuit backup protection (e.g. a fuse or circuit breaker) of
High Breaking Capacity (HBC, at least 1500A).
WARNING: THE UNIT IS NOT FUSED.
Use external fuses for Mains phases: L1,L2,L3, Generator
phase: L1, Battery positive: BAT(+).
Install the fuses as nearly as possible to the unit in a
place easily accessible for the user.
The fuse rating should be 6 Amps.
1.3 Wiring the Unit
Engine body must be grounded for correct operation
of the unit, otherwise incorrect voltage and frequency
measurements may occur.
1.2 Mounting the Unit

DKG-119 User Manual V-27 (20.04.2012)
- 5 -
RS-232 SERIAL PORT: This connector provides serial data input and output for various purposes like
remote monitoring and remote programming.
EXTENSION CONNECTOR: This connector is intended for the connection to output extension modules.
The optional relay extension module provides 8 programmable 16A relay outputs. The unit allows the use
of up to 2 I/O extension modules.
Term
Function
Technical data
Description
1
-
2
-
3
-
4
-
5
-
6
LOW OIL PRESSURE
Digital inputs
These inputs have programmable
characteristics selected via the program
menu. Each input may be driven by a
„normally closed‟ or „normally open‟ contact,
switching either battery+ or battery-. The effect
of the switch is also selectable from a list. See
PROGRAMMING section for more details.
7
HIGH TEMP
8
EMERGENCY STOP
9
SPARE-2
10
SPARE-1
11
GENERATOR NEUTRAL
Input, 0-300V-AC
Neutral terminal for the generator phase.
12
GEN-L1
Generator phase
inputs, 0-300V-AC
Connect the generator phase to this input. The
generator phase voltage upper and lower
limits are programmable.
13
GENERATOR CONTACTOR
Relay output, 16A-AC
This output provides energy to the generator
contactor. If the generator phase do not have
acceptable voltage or frequency, the
generator contactor will be de-energized. In
order to provide extra security, the normally
closed contact of the mains contactor should
be serially connected to this output.
2. INPUTS AND OUTPUTS

DKG-119 User Manual V-27 (20.04.2012)
- 6 -
Term
Function
Technical data
Description
14
BATTERY POSITIVE
+12 or 24VDC
The positive terminal of the DC Supply shall
be connected to this terminal. The unit
operates on both 12V and 24V battery
systems.
15
MAGNETIC PICKUP
Inputs, 1-30V
0-10KHz
Connect the magnetic pickup signal to these
inputs.
16
MAGNETIC PICKUP
17
GROUND
O VDC
Power supply negative connection.
18
CURR_1+
Current transformer
inputs, 5A-AC
Connect the generator current transformer
terminals to these inputs. Do not connect the
same current transformer to other instruments
otherwise a unit fault will occur. Connect each
terminal of the transformer to the unit‟s related
terminal. Do not use common terminals. Do
not use grounding. Correct polarity of
connection is vital. If the measured power is
negative, then change the polarity of the
current transformer. The secondary winding
rating shall be 5 Amperes. (For ex. 200/5
Amps).
19
CURR_1-
20
FUEL LEVEL SENDER
Input, 0-5000 ohms
Analogue fuel level sender connection. Do not
connect the sender to other devices. The input
has programmable resistor value and
connects to various senders.
21
COOLANT TEMP. SENDER
Input, 0-5000 ohms
Analogue high temperature sender
connection. Do not connect the sender to
other devices. The input has programmable
characteristics and connects to any kind of
sender.
22
OIL PRESSURE SENDER
Input, 0-5000 ohms
Analogue oil pressure sender connection. Do
not connect the sender to other devices. The
input has programmable characteristics and
connects to anykind of sender.
23
CHARGE
Input and output
Connect the charge alternator‟s D+ terminal to
this terminal. This terminal will supply the
excitation current and measure the voltage of
the charge alternator.
24
FUEL RELAY
Output 1A/28VDC
This relay is used for fuel solenoid control.
25
START RELAY
Output 1A/28VDC
This relay controls the engine cranking.
26
RELAY-1 (ALARM RELAY)
Output 1A/28VDC
This relay has programmable function,
selectable from a list.
27
RELAY-2 (STOP RELAY)
Output 1A/28VDC
This relay has programmable function,
selectable from a list.

DKG-119 User Manual V-27 (20.04.2012)
- 7 -
The unit has 5 LEDs, divided in 2 groups:
-Group_1: Operating mode: This group indicates the genset function.
-Group_2: Warnings and alarms: This group indicates the existence of abnormal conditions
encountered during operation.
Function
Color
Description
RUN
Yellow
It turns on when the related operation mode is
selected. One of these LEDs is always on and
indicates which operation mode is selected.
If the operation of the genset is disabled bythe
weekly operation schedule, then the AUTO led will
flash.
OFF
Yellow
AUTO
Yellow
ALARM
Red
If a fault condition resulting to the engine shutdown
has occurred , the alarm led turns on steadily. If a
warning condition occurs, this led will flash. Alarms
work on a first occurring basis. The occurrence of a
fault will disable other faults of lower or equal priority.
SERVICE REQUEST
Red
Engine periodic maintenance request indicator. It
turns on when the preset engine hours or time
duration after previous service has elapsed.
The unit is able to display information in 3 languages. Language selection is made through
program parameter CONTROLLER CONFIGURATION > LANGUAGE SELECTION. Below selections
are available:
0: English language
1: Turkish language (spanish language on some models)
2: Chinese language
3: ask selection at power-up
If language is set to 3, below screen will come at power on:
Left / Up / Down arrow pushbuttons will select the screen language. The language will be asked
everytime power is turned on.
With language selections of 0,1,2 this screen will not appear and the selected language is
enabled.
3.2 Language Selection
3.1 Led Displays
3. DISPLAYS

DKG-119 User Manual V-27 (20.04.2012)
- 8 -
The unit has a graphical 128x64 pixel LCD display. It shows:
-Measured parameters,
-The company logo,
-The alarm list
-Software version,
-Statistical counters,
-Event records,
-Program parameters.
Navigation between different screens is made with the ◄MENU and MENU►buttons. Each
depression of the MENU►button switches the display to the next screen. Each depression of the
◄MENU button switches the display to the previous screen.
During operation, the unit will switch automatically between different screens, displaying
always the most important parameters for the current operating status.
If an alarm, loaddump or warning occurs during operation, in other then programming mode,
the display will automatically switch to ALARM LIST position.
If there is more than one alarm, the next alarm is displayed by pressing the ◄MENU or
MENU►buttons. Thus all existing alarms can be scanned. „END OF ALARM LIST‟ will be displayed
when there is no more alarm to display.
As long as alarms are not muted, only the ALARM LIST is displayed. In order to mute alarms
and enable display navigation, long-press ◄MENU(ALARM MUTE) button first.
3.3 Digital Display

DKG-119 User Manual V-27 (20.04.2012)
- 9 -
Screen
Description
Contents
1
Genset parameters
Genset status
Engine rpm, Genset Frequency
Genset Current L1, Genset Volts L1
Genset power factor, Genset Active Power (KW)
2
Engine parameters
Genset status
Oil Pressure, Engine rpm
Coolant Temperature, Battery Voltage
Fuel Level,
3
Complete Genset
parameters
Genset status
Engine rpm, Genset Frequency,
Genset Volts L1, Oil Pressure
Genset Current L1, Coolant Temperature
Genset Active Power (KW), Fuel Level
Genset power factor, Battery Voltage
4
Graphical Genset
parameters
Genset status
Genset Volts L1
Genset Current L1
Genset Active Power (%), Genset Frequency
Oil Pressure
Coolant Temperature
Fuel Level
5
Company Logo
6
Alarm List
If no alarm exists, „END OF ALARM LIST‟ will be displayed.
Existing alarms, load_dumps, warnings will be displayed as
one screen for each entry. Switching to the next entry will be
made with the ▼button.
7
Software Version
Operating software version.
8
Statistical Counters 1 / 3
Engine Hours Run
Total Genset Active Power (KW-h)
9
Statistical Counters 2/ 3
Engine Hours to Service
Time to Service
10
Statistical Counters 3 / 3
Total Engine Cranks
Total Engine Runs
11
Event Records
The unit provides information about last 100 events, starting
from the most recent one.
Please review chapter 10 for detailed information about event
logging.

DKG-119 User Manual V-27 (20.04.2012)
- 10 -
Alarms indicate an abnormal situation in the generating set are divided into 3 priority levels:
1- ALARMS: These are the most important fault conditions and cause:
-The ALARM led to be on steadily,
-The genset contactor to be released immediately,
-The engine to be stopped immediately,
-The Horn, Alarm,Alarm+Load_dump and Alarm+Load_dump+Warning digital
outputs to operate, (if selected via programming menu)
2- LOAD_DUMPS: These fault conditions cause:
-The ALARM led to flash,
-The genset contactor to be released immediately,
-The engine to be stopped after Cooldown period,
-The Horn, Alarm+Load_dump and Alarm+Load_dump+Warning digital outputs to
operate, (if selected via programming menu)
3- WARNINGS: These conditions cause:
-TheWARNING led to be on steadily,
-The Horn and Alarm+Load_dump+Warning digital outputs to operate, (if selected
via programming menu)
If the ALARM MUTE button is long pressed, the Horn output will be deactivated; however
the existing alarms will persist and disable the operation of the genset.
Alarms operate in a first occurring basis:
-If an alarm is present, following alarms, load_dumps and warnings will not be accepted,
-If a load_dump is present, following load_dumps and warnings will not be accepted,
-If a warning is present, following warnings will not be accepted.
Alarms may be of LATCHING type following programming. For latching alarms, even if the alarm
condition is removed, the alarms will stay on and disable the operation of the genset. The existing alarms
may be canceled by pressing one of the operating mode buttons (TEST / OFF / AUTO).
Most of the alarms have programmable trip levels. See the programming chapter for adjustable
alarm limits.
4. ALARMS AND WARNINGS

DKG-119 User Manual V-27 (20.04.2012)
- 11 -
LOW OIL PRESSURE: Set if a signal is detected at the Low Oil Pressure Switch input or the oil
pressure value measured from the sender is below the programmed limit. Warning and alarm limits are
separately programmable for the oil pressure sender input. This fault will be monitored with Holdoff
Timer delay after the engine is running. Also if the oil pressure switch is open at the beginning of a start
attempt, then the engine will not be started and “Oil Pressure Exists!”information is displayed. When
the oil pressure switch closes, normal operation will be resumed.
HIGH TEMPERATURE: Set if a signal is detected at the High Temperature Switch input or the coolant
temperature value measured from the sender is above the programmed limit. Warning and alarm limits
are separately programmable for the temperature sender input.
LOW TEMPERATURE (warning) : Set if the coolant temperature value measured from the sender is
blow the Engine Heating Temperature limit.
LOW FUEL: Set if the the fuel level measured from the sender is below the programmed limit. Warning
and alarm limits are separately programmable for the fuel level sender input.
EMERGENCY STOP: Set if a signal is detected at the emergency stop input.
SPARE-1 / SPARE-2: Set if a signal is detected from the related spare fault input.
LOW SPEED / HIGH SPEED:Set if the generator frequency is outside programmed limits. These faults
will be monitored with Holdoff Timer delay after the engine is running. Low and high limits for warning
and alarm are separately programmable. Another high frequency shutdown limit which is 12% above the
high limit is always monitored and stops the engine immediately.
START FAIL (alarm): Set if the engine is not running after programmed number of start attempts.
STOP FAIL (warning): Set if the engine has not stopped before the expiration of the Stop Timer.
OVERLOAD (load_dump): Set if the genset phase current goes over the Overcurrent Limit for
Overload Timer. If the current goes below the limit before expiration of the timer then no alarm will be set.
EXCESS POWER (load_dump): Set if the genset phase power (KW) supplied to the load goes over the
Excess Power limit for Overload Timer. If the power goes below the limit before expiration of the timer
then no alarm will be set.
GENSET LOW VOLTAGE:Set if any of the generator phase voltages goes outside programmed limits
for Overload Timer. This fault will be monitored with holdoff timer delay after the engine is running.
GENSET HIGH VOLTAGE: Set if any of the generator phase voltages goes outside programmed limits
for Overload Timer. This fault will be monitored with holdoff timer delay after the engine is running.
LOW BATTERY VOLTAGE (warning): Set if the battery voltage goes below the programmed limit.
During engine cranking this fault is not monitored.
HIGH BATTERY VOLTAGE: Set if the battery voltage goes above programmed limits. Both warning and
alarm levels for high battery voltage are programmable.
CHARGE: Set if a charge alternator failure (or broken belt) occurs. This fault condition may result to a
warning or alarm following programming.

DKG-119 User Manual V-27 (20.04.2012)
- 12 -
The modes of operation are selected by pushing the front panel keys. Changing the operation
mode while the genset is running will result into a behavior suitable for the new operating mode. For
example, if the AUTO mode is selected when genset is running at RUN mode, if mains phase voltages
are present then the genset will stop.
STOP: In this mode, the engine will be stopped.
AUTO: It is used for automatic genset operation. If the REMOTE START signal arrives, the diesel will be
started for programmed times after the preheat timer. When the engine runs, the crank relay will be
immediately deactivated. The engine will run without load during engine heating period. After this, if
alternator phase voltages and frequency are within limits, then the unit will wait for the generator contactor
period and the generator contactor will be energized.
When the REMOTE START signal is removed the engine will continue to run for the mains waiting period.
At the end of this period the generator contactor function is deactivated.If a cooldown period is given, the
generator will continue to run during cooldown period. At the end of the period, the fuel solenoid will be
de-energized and the diesel will stop. The unit will be readyfor the next REMOTE START cycle.
RUN:It is used to test the generator without REMOTE START signal. The engine will run unless another
mode is selected. To stop the engine, select AUTO or STOP mode.
The unit offers the possibility of REMOTE START mode of operation. Any digital input may be
assigned as Remote Start Input using Input Function Select program parameters.
The REMOTE START signal maybe a NO or NC contact, switching to either battery positive or
battery negative. These selections are made using programming menu.
It is also necessary to set the ACTION program parameter of the related input to 3in order to
prevent any alarm from this input.
In this mode the mains phases are not monitored. If the REMOTE START signal is present
then the mains will be supposed to fail, inversely if the REMOTE START signal is absent, then mains
voltages will be supposed to be present.
6.1 Remote Start Operation
6. OTHER FEATURES
5. MODES OF OPERATION

DKG-119 User Manual V-27 (20.04.2012)
- 13 -
The unit has the ability to adapt to any type of oil pressure and temperature senders. The
commonly used standard sender characteristics are recorded in memory and selectable from a list.
However non standard senders may also be used by entering their characteristics to the table.
Oil Pressure Sender Type Selection:
Selectable sender types are:
0: Sender characteristics are defined in Sender Characteristics table.
1: VDO 0-7 bars (10-180 ohms)
2: VDO 0-10 bars (10-180 ohms)
3: DATCON 0-7 bars (240-33 ohms)
4: DATCON 0-10 bars (240-33 ohms)
5: DATCON 0-7 bars (0-90 ohms)
6: DATCON 0-10 bars (0-90 ohms)
7: DATCON 0-7 bars (75-10 ohms)
Temperature Sender Selection:
Selectable sender types are:
0: Sender characteristics are defined in Sender Characteristics table.
1: VDO
2: DATCON DAH type
3: DATCON DAL type
Fuel Level Sender Selection:
The Fuel Level Sender Ohms is also programmable.
Especially on engines without a body heater, or with a failing one, it may be desired that the
genset should not take the load before reaching a suitable temperature. The unit offers 2 different
ways of engine heating.
1. Timer controlled heating:
This operation mode is selected when the Engine Heating Method parameter is set to 0. In this
mode, the engine will run during parameter Engine Heating Timer, and then the genset will take the
load.
2. Timer and temperature controlled heating:
This operation mode is selected when the Engine Heating Method parameter is set to 1. In this
mode, at first the engine will run during parameter Engine Heating Timer, then it will continue to run
until the measured coolant temperature reaches the limit defined in parameter Engine Heating
Temperature. When the requested temperature is reached, the load will be transferred to the genset.
This operation mode may be used as a backup to the engine body heater. If the engine body is warm
the heating will be skipped.
6.3 Engine Heating Operation
6.2 Sender type Selection

DKG-119 User Manual V-27 (20.04.2012)
- 14 -
It may be required that the engine runs at the idle speed for a programmed duration for engine
heating and cooldown. The idle operation duration is adjusted with the parameter Idle Speed Timer.
The idle speed will be set by the governor control unit of the engine.
Any of the spare relay outputs may be assigned as IDLE output using Relay Definition
program parameters. Also relays on an extension module may be assigned to this function.
The Idle speed operation is performed both in engine start-up and cool-down sequences.
Speed and voltage protections are disabled during idle speed operation.
The unit is able to provide a relay output in order to drive the block heater resistor.
The temperature reference is the coolant temperature measured from the the analog sender
input.
The block heater relay function may be assigned to spare relays using Relay Definition
program parameters. Also relays on an extension module may be assigned to this function.
The engine body temperature limit is adjusted using the parameter Engine Heating
Temperature. The same parameter is used for engine heating operation.
The relay will become active if the body temperature falls to 4 degrees below the limit set by
Engine Heating Temperature. It turns off when the body temperature exceeds Engine Heating
Temperature.
The unit is able to provide a relay output in order to drive the fuel pump motor. The fuel pump
is used in order to transfer fuel from the large capacity main tank (if exists) to the genset daily tank
which is generally integrated in the chassis and has a limited capacity.
The fuel level reference is measured through the analog fuel level sender. When the
measured fuel level falls below Fuel Pump Low Limit parameter, the fuel pump relay output will
operate. When the fuel level reaches Fuel Pump High Limit parameter, the relay will turn off. Thus
the chassis fuel tank level will be always kept between Fuel Pump Low Limit and Fuel Pump High
Limit parameters.
The fuel pump relay function may be assigned to spare relays using Relay Definition program
parameters. Also relays on an extension module may be assigned to this function.
6.6 Fuel Pump Control
6.5 Engine Block Heater
6.4 Engine Idle Speed Operation

DKG-119 User Manual V-27 (20.04.2012)
- 15 -
The unit offers an optional SIMULATE MAINS signal input. Any digital input may be assigned
as Simulate Mains using Input Function Select program parameters.
It is also necessary to set the ACTION program parameter of the related input to 3in order to
prevent any alarms generated from this input.
The SIMULATE MAINS signal maybe a NO or NC contact, switching to either battery positive or
battery negative. These selections are made using the programming menu.
If the Simulate Mains input is defined and the input signal is active, the mains phases are not
monitored and supposed to be inside limits. This will prevent the genset from starting even in case of a
mains failure. If the genset is running when the signal is applied, then usual Mains Waiting and
Cooldown cycles will be performed before engine stop. When the SIMULATE MAINS signal is present,
the front panels mimic diagram‟s mains LEDs will reflect the mains voltages as present.
When the signal is passive, the unit will revert to normal operation and monitor the mains
voltage status.
The REMOTE START operation overrides SIMULATE
MAINS and FORCE TO START operations.
6.7 Mains Simulation (Disable Start)

DKG-119 User Manual V-27 (20.04.2012)
- 16 -
The Delayed Mains Simulation feature is used in battery backed up telecom systems where
batteries are able to supply the load during a certain period. The genset is requested to run only when
battery voltage drops below the critical level. Once the engine runs, the rectifier system starts charging
the batteries and the battery voltage goes up immediately. Thus the engine should continue to run a
programmed period for effective charging. The critical battery voltage level will be detected by an
external unit which provides the digital Simulate Mains signal for the genset control unit.
The unit offers an optional SIMULATE MAINS signal input. Any digital input may be assigned
as Simulate Mains using Input Function Select program parameters.
It is also necessary to set the ACTION program parameter of the related input to 3in order to
prevent any alarms generated from this input.
The SIMULATE MAINS signal maybe a NO or NC contact, switching to either battery positive or
battery negative. These selections are made using the programming menu.
If the Delayed Simulate Mains program parameter is set to 1 and the input signal is active
when the genset is not feeding the load, the mains phases are not monitored and supposed to be
inside limits. This will prevent the genset from starting when the simulate mains signal is present
(batteries charged). The genset will start when mains voltages are out of limits and the simulate mains
signal not present.
If the genset is running when the signal is applied, then MAINS SIMULATION will be
prevented during Flashing Relay Timer program parameter. After this, usual Mains Waiting and
Cooldown cycles will be performed before engine stop. When the SIMULATE MAINS signal is present,
the front panels mimic diagram‟s mains LEDs will reflect the mains voltages as present.
When the signal is passive, the unit will revert to normal operation and monitor the mains
voltage status.
The REMOTE START operation overrides DELAYED
SIMULATE MAINS operation. When both parameters
“Remote Start Operation” and “Delayed Simulate
Mains” are set then REMOTE START operation mode is
performed.
6.8 Delayed Mains Simulation, Battery Charging

DKG-119 User Manual V-27 (20.04.2012)
- 17 -
Dual genset intermittent operation consists of regular switching of the load between 2 gensets.
The use of 2 gensets instead of one is due either to safety purposes in case of a genset failure or to a
continuous operation requesting service stops.
The running period for each genset is adjustable using Flashing Relay Timer program
parameter. If the time is adjusted as 0 hours, it will be actually set to 2 minutes for faster testing
purposes.
A flashing relay output function is provided, based on the parameter Flashing Relay Timer.
Each time the period programmed using Flashing Relay Timer elapses, the relay output will change
position.
The flashing relay function may be assigned to spare relays using Relay Definition program
parameters. Also relays on an extension module may be assigned to this function.
The dual genset intermittent operation uses also the Mains Simulation feature. Please review
chapter 6.7 for a detailed explanation of this feature.
Priority In Dual Genset Mutual Standby Operation:
It may be required that the dual genset system starts the same genset at every mains failure.
This is achieved using the PRIORITY input.
Any digital input may be assigned as Priority using Input Function Select program
parameters.
It is also necessary to set the ACTION program parameter of the related input to 3in order to
prevent any alarms generated from this input.
The Priority signal may be a NO or NC contact, switching to either battery positive or battery
negative. These selections are made using the programming menu.
If a Priority input is defined, then the system will work in priority mode. If the priority signal is
applied, the unit will become master after each mains failure. If the priority signal is not applied, then
the unit will become the slave one and the other genset will start.
Please contact DATAKOM for a complete application
manual.
6.9 Dual Genset Mutual Standby Operation

DKG-119 User Manual V-27 (20.04.2012)
- 18 -
The periodic maintenance is basically carried out after a given engine hours (for example 200
hours), but even if this amount of engine hours is not fulfilled, it is performed after a given time limit (for
example 12 months).
The unit has both programmable engine hours and maintenance time limit. The engine hours is
programmable with 50-hour steps, the time limit is programmable with 1 month steps. If any of the
programmed values is zero, this means that the parameter will not be used. For example a maintenance
period of 0 months indicates that the unit will request maintenance only based on engine hours, there will
be no time limit. If the engine hours is also selected as 0 hours this will mean that the SERVICE
REQUEST function will be inoperative.
When the engine hours OR the time limit is over, the SERVICE REQUEST warning will occur and
the display will switch to the ALARM LIST.
The service request relay function may be assigned to spare relays using Relay Definition
program parameters. Also relays on an extension module may be assigned to this function.
The remaining engine hours and the remaining time limit are kept stored in a non-volatile memory
and are not affected from power supply failures.
The time and engine hours to service are displayed in the STATISTICAL COUNTERS menu.
The unit features a non-erasable incremental engine hour meter. The hour meter information is
kept in a non-volatile memory and is not affected from power supply failures.
Some additional features are installed within consecutive software releases. In order to be
sure of the validity of the status of the unit, the software version needs to be known.
The software version number represents the operating software version of the unit.
6.12 Software Version Display
6.11 Engine Hour Meter
To reset the service period, press together the ALARM
MUTE and OFF keys for 5 seconds.
The SERVICE REQUEST led has no effect on the
genset operation.
6.10 Periodic Service Request Monitoring

DKG-119 User Manual V-27 (20.04.2012)
- 19 -
The GSM SMS sending is activated by setting the SMS Enable program parameter to 1.
When a fault condition occurs, the unit will compose an SMS message and will send it to up to 6
phone numbers.
The unit is also able to send SMS messages in below conditions, without creating a visible alarm
or warning:
Mains Fail, Mains Restored (enabled via SMS on Mains Change program parameter)
Fuel Theft, Fuelling (enabled by setting the Fuel Consumption / Hour parameter to other than 0)
When SMS sending is in progress, an (SMS) icon will appear at the upper right corner of the
screen.
The maximum number of alarms transmitted in a SMS message is 4. This limitation is due to the
maximum length of an SMS message which is 160 characters.
A sample GSM SMS message is given below:
DKGxxx <SITE-ID>
STOP :LOW OIL PRESSURE SW.
END OF ALARM LIST
The first line of the message carries information about the unit type and the site identitystring.
This line is intended for the identification of the genset sending the SMS message.
Each following line will give one fault information. The message will always be terminated by the
“END OF ALARM LIST” string.
When the message is sent, the existing alarms will be masked, causing the audible alarm relayto
release and preventing consecutive GSM SMS messages. Anynew upcoming alarm will result in a new
GSM SMS message. The new message will indicate all existing alarms, even masked ones.
The necessary GSM modem cable will be supplied by DATAKOM. This is the same cable as
PSTN (land) modems.
A logic level to RS-232 converter is necessary
in order to connect the unit to modem.
If SMS Enable or MODBUS Address parameters are
different from zero, the local PC connection will not work.
6.13 SMS Message Sending

DKG-119 User Manual V-27 (20.04.2012)
- 20 -
Thanks to its logic level serial port, the unit offers the remote monitoring and programming
feature.
The remote monitoring and programming PC software is called RAINBOW and may be
downloaded from www.datakom.com.tr internet site with password login.
The modem, SMS and Modbus modes are not compatible with the local PC connection. Modem
Enable, SMS Enable and MODBUS Address program parameters should be set to 0 before
connection.
The RAINBOW software allows the visualization and recording of all measured parameters.
The recorded parameters may then be analyzed graphically and printed. The software also allows the
programming of the unit and the storage of the program parameters to PC or the downloading of
stored parameters from PC to the unit.
For PCs without a serial port, below USB to serial adapters are tested and approved :
DIGITUS USB 2.0 TO RS-232 ADAPTER (PRODUCT CODE: DA70146 REV 1.1)
DIGITUS USB 1.1 TO RS-232 ADAPTER (PRODUCT CODE: DA70145 REV 1.1)
FLEXY USB 1.1 TO SERIAL ADAPTER (PRODUCT CODE BF-810)
CASECOM USB TO SERIAL CONVERTER (MODEL: RS-01)
The necessary PC connection cable will be supplied by DATAKOM. The cable length should
not be over 3 meters.
The unit offers total external control through programmable digital inputs. Each digital input may
be programmed for below functions:
- Force OFF mode
- Force AUTO mode
- Force TEST mode
- Force LOAD TEST mode
- Disable Auto Start
- Force to Start
- Fault Reset
- Alarm Mute
- Panel Lock
External mode select signals have priority on mode buttons of the unit. If the mode is selected by
external signal, it is impossible to change this mode with front panel keys. However if the external mode
select signal is removed, the unit will revert to the last selected mode via pushbuttons.
It is also possible to lock the front panel completely for remote command.
6.15 External Control of the Unit
A logic level to RS-232 converter is necessary
in order to connect the unit to modem.
6.14 Remote Monitoring and Programming
Table of contents
Other Datakom Controllers manuals

Datakom
Datakom D-700 MK3 User manual
Datakom
Datakom DKG-325 User manual
Datakom
Datakom DKM-046 User manual
Datakom
Datakom DKG-225 User manual

Datakom
Datakom DKG-225 User manual
Datakom
Datakom D-500 MK2 User manual
Datakom
Datakom DKG-190 User manual
Datakom
Datakom DKG-116 User manual
Datakom
Datakom DKG-108 User manual
Datakom
Datakom D-500 User manual
Datakom
Datakom DKG-255 User manual
Datakom
Datakom DKG-319 User manual
Datakom
Datakom DK-70 User manual
Datakom
Datakom DKG-209 User manual
Datakom
Datakom D-300 MK2 User manual
Datakom
Datakom D-100 MK2 User manual
Datakom
Datakom DKG-329 User manual
Datakom
Datakom DK-45 User manual
Datakom
Datakom DKG-114 Manual
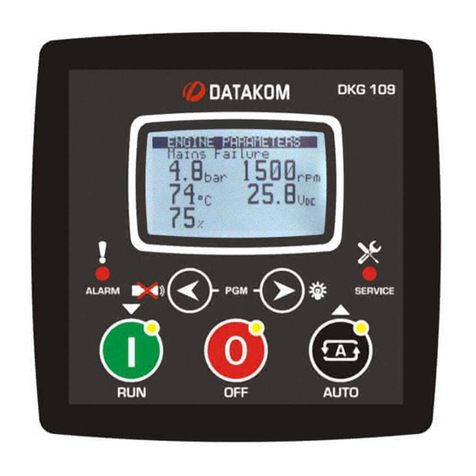
Datakom
Datakom DKG-109 User manual
