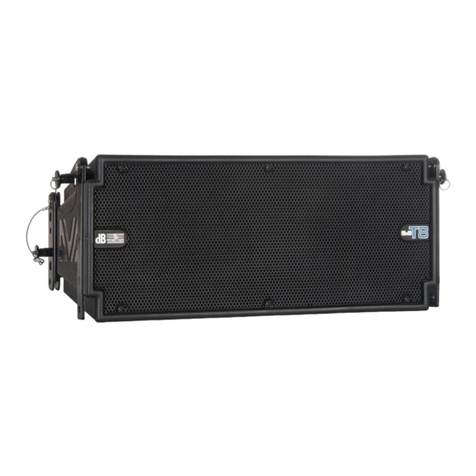
dB Technologies DVA T4 User manual

MANUALE D’USO
USER MANUAL
BEDIENUNGSANLEITUNG
CARACTERISTIQUES TECHNIQUES
Digital Vertical ArrayDigital Vertical Array
42 2
0120118 - Rev
A.E.B. INDUSTRIALE s.r.l.
Via Brodolini, 8 - 40056 Crespellano (Bo) - ITALIA
Tel. + 39 051 969870 - Fax. + 39 051 969725
Internet: www.dbtechnologies.com
E-mail: [email protected]

ItalianoItalianoItaliano
Manuale d’usoManuale d’uso
56
DATI TECNICI
Sistema Attivo 3-Amps
Tipologia amplificatore Digitale - ClasseT
Potenza RMS 420 W
Potenza musicale 840 W
Risposta in frequenza +/-3dB 80-19.000Hz
Crossover 420 - 2500Hz
24dB/oct
Pressione sonora (SPL) 128 peak
Componenti 1 woofer 8” - bobina 64mm - neodimio
Sensibilità ingresso nominale 0 dBu
Impedenza ingresso Bilanciato 20Kohm
Sbilanciato 10Kohm
Delay totale 1,2mS
~ 50-60Hz
Forma diffusore trapezioidale
Dimensioni [LxHxP] 580x330x240/160mm
Peso 13,2Kg
1 midrange 6,5” - bobina 38mm - neodimio
2 compression driver da 1” - neodimio
Alimentazione full-range con PFC
85-265V
IMPORTANT SAFETY INSTRUCTIONS
CAUTION: TO REDUCE THE RISK OF ELECTRICAL
SHOCK, DO NOT REMOVE THECOVER
(OR BACK). NO USER SERVICEABLE
PARTS INSIDE; REFER SERVICING TO
QUALIFIED PERSONNEL.
WARNING: TO REDUCE THE RISK OF FIRE OR
ELECTRICAL SHOCK. DO NOT EXPOSE
THIS APPLIANCE TO RAIN OR
MOISTURE.
This symbol, wherever it appears, alerts you to the presence of uninsulated
dangerous voltage voltage inside the enclosure - voltage that may be sufficient to
constitute a risk of shock.
This symbol wherever it appears, alerts you to important operating and
maintenance instructions in the accompanying literature. Read the manual.
DETAILED SAFETY INSTRUCTIONS:
Read these instructions:
All the safety and operation instructions should be read before the appliance is operated.
Keep these instructions:
The safety and operating instructions should be retained for future reference.
Heed all Warnings:
All warnings on the appliance and in the operating instructions should be adhered to
Follow all instructions:
All operation and user instructions should be followed
Water and Moisture:
Do not use this apparatus near water (e.g. near a bathtub, washbowl, kitchen sink, laundry tub, in a wet
basement, or near a swimming pool etc.)
Cleaning:
Clean only with a dry cloth. Do not use solvents, alcohol, benzene or volatile substances for cleaning
the exterior parts.
Ventilation
Do not block any of the ventilation openings. Install in accordance with the manufacturers instructions.
The appliance should be situated so that its location or position does not interfere with its proper
ventilation.
Heat:
Do not install the appliance near any heat sources such as radiators, heat registers, stoves, or other
appliance (including amplifiers) that produce heat.
Grounding or Polarization:
Do not defeat the safety purpose of the polarized or grounding/type plug. To prevent the risk of
electrical shock, the metallic parts of the speaker must be earthed. A polarized plug has two blades
with one wider than the other. A grounding type plug has two blades and a third grounding prong. The
wide blade or the third prong are provided for your safety. When the provided plug does not fit into your
outlet, consult an electrician for replacement of the obsolete outlet.
Speaker shall be connected to a MAINS socket outlet with a protective earthing connection.
Power Source
The appliance should be connected to a power supply only of the type described in the operating
instructions or as marked on the appliance. In order not to jeopardize the safety of the speaker, it must
only be connected to the mains using the power cable provided.
DPDT Mains Switch is used as the disconnect device located at the rear.
Power Cord Protection:
Protect the power cord from being walked on or pinched particularly at plugs, convenience
receptacles, and the point where they exit from the apparatus.
Accessories:
Only use attachments/accessories specified by the manufacturer.
Carts and stands:
Use only with a cart, stand, tripod, bracket, or table specified by the manufacturer, or sold with tha
apparatus. When a cart is used, use caution when moving the cart-apparatus combination to avoid
injury from tip-over.
"AVIS"
RISQUE DE CHOC ELECTRIQUE
NE PAS OUVRIR
POUR PREVENIR TOUT RISQUE DE FEU
REPLACER UN FUSIBLE
DE MÊME CARACTERISTIQUES
CET APPAREIL DOIT ÊNTRE RELIÉ A LA TERRE
"CAUTION"
TO PREVENT ELECTRICAL SHOCK
DO NOT REMOVE COVER
TO PREVENT RISK OF FIRE
REPLACE FUSES WITH
SAME TYPE AND RATINGS
THIS APPARATUS MUST BE EARTHED
EnglishEnglishEnglish
user manualuser manual
240
160
580
330

7
EnglishEnglishEnglish
user manualuser manual
EnglishEnglishEnglish
user manualuser manual
8
Non-use Periods:
Object and Liquid Entry
Damage Requiring Service
Servicing:
IMPORTANT NOTES
This manual is to be considered an integral part of the product, and must always accompany the
speaker when it changes ownership as a reference for correct installation and operation as well as for
the safety regulations.
dB Technologies will not assume any responsibility for incorrect installation of the speaker.
OPERATING PRECAUTIONS
- Do not force the amplifier incorporated in the speaker to work in overload for extended periods
of time.
- Never force the control elements (switches, controls, etc.).
CAUTION
- Make sure that the speaker is positioned in a stable and secure way in order to avoid any
dangerous conditions for persons or objects.
CONNECTION
- For connecting the speaker, use only qualified and experienced personnel having sufficient
technical knowledge or specific instructions for making the connections correctly and thus
preventing electrical dangers.
- To prevent the risk of electrical shock, the speaker must only be supplied from the mains after all
connections have been completed.
- Before powering up the speaker, it is advisable to re-check all the connections, making sure in
particular that there are no short circuits.
- The entire sound system must be designed and installed in compliance with the current
standards and regulations regarding electrical systems.
CAUTION
- To prevent inductive phenomena from giving rise to hum or disturbance which would jeopardize
efficient seaker operation, the cables that transmit microphone signals or line level signals
(e.g. 0 dB/V) must be screened and should not be run in the vicinity of:
1) Equipment that produces strong magnetic fields (e.g. large power supply transformers)
2) Electrical energy conductors
3) Lines that supply speakers.
Unplug this apparatus during lightning storms or when unused for long periods of time.
Care should be taken so that objects do not fall and liquids are not spilled into the enclosure through
openings.
Refer all servicing to qualified service personnel. Servicing is required when:
- the apparatus has been damaged in any way;
- the power supply cord or the plug has been damaged;
- Objects have fallen, or liquid had been spilled into the appliance;
- The appliance has been exposed to rain or moisture;
- The appliance does not appear to operate normally or exhibits a marked change in
performance;
- The appliance had been dropped.
The user should not attempt to service the appliance beyond that is described in the Operating
Instructions.All other servicing should be referred to qualified service personnel.
CAUTION
CONTROLS AND FUNCTIONS
1) POWER SWITCH
This switch permits turning the speaker on and off.
2) "MAINS FUSE" FUSE CARRIER
Mains fuse housing.
3) "MAINS INPUT" POWER SOCKET
For connecting the power cable provided.
The connector used for mains connection is a POWER CON® (blue)
4) “MAINS OUTPUT LINK” RELAUNCH POWER SOCKET
For relaunching the mains power. The output is connected in parallel with input (3)
and can be used to power another amplified speaker.
The connector uses a POWER CON® (grey)
5) " BALANCED INPUT” INPUT CONNECTOR
Balanced input at line level. It is able to accept “XLR” sockets.
6) "BALANCED LINK/OUT ” OUTPUT CONNECTOR
The “XLR” connector connected in parallel with input (5) can be used to send the
input audio signal to another amplified speaker.
7) “INPUT SENS” INPUT SENSITIVITY CONTROL
This control regulates the sensitivity of the signal amplifier input.
This control does not affect the “BALANCED LINK/OUT” output level
8) “LIMITER” INDICATOR LIGHT
This indicator comes on red to indicate that the internal limiter circuit has tripped.
This prevents amplifier distortion and protects the speakers against overloads.
9) “SIGNAL” INDICATOR LIGHT
This indicator comes on green to indicate the presence of the audio signal (at a level
of -20dB).
10) “MUTE/PROT” INDICATOR LIGHT
This yellow indicator indicates amplifier status. In normal operating conditions, the
LED is off; if it flashes or is always on, refer to the diagnostics table to check amplifier
status.
11) “READY” INDICATOR LIGHT
This indicator comes on green to indicate that the main power voltage is correct. In
normal operating conditions, the LED is on; if it flashes or is off, refer to the
diagnostics table to check amplifier status.
12) “SET-UP MODE” EQUALIZATION SWITCH
This 10-position rotating switch permits selection of the equalization curve according
to installation type.
See table for corresponding equalization curve.
ON
MAINS
FUSE
MAINS
LINK
FULL RANGE MAINS INPUT
BALANCED
INPUT
BALANCED
LINK / OUT
INPUT SENS
READY
MUTE/PROT
SIGNAL
LIMITER
SET-UP
MODE
85-265V
85-125V (T4A 250V)
200-250V (T2A 250V)
BB
dd
TECHNOLOGIES
0dB
+10dB
+4dB
1 = GND
2 = HOT
3 = COLD
"AVIS"
RISQUE DE CHOC ELECTRIQUE
NE PAS OUVRIR
POUR PREVENIR TOUT RISQUE DE FEU
REPLACER UN FUSIBLE
DE MÊME CARACTERISTIQUES
CET APPAREIL DOIT ÊNTRE RELIÉ A LA TERRE
"CAUTION"
TO PREVENT ELECTRICAL SHOCK
DO NOT REMOVE COVER
TO PREVENT RISK OF FIRE
REPLACE FUSES WITH
SAME TYPE AND RATINGS
THIS APPARATUS MUST BE EARTHED
500W MAX
50-60Hz
ACTIVE P.F.C.
SERIAL N.
1
0
2
3
4
5
6
7
8
9
Digital Vertical Array
WARNING
HOT SURFACE
WARNING
HOT SURFACE
WARNING
HOT SURFACE
WARNING
HOT SURFACE
T
4
PUSH
1
2
4
3
8
99
10
11
5
6
7
12
7
EnglishEnglishEnglish
user manualuser manual
EnglishEnglishEnglish
user manualuser manual
8
Non-use Periods:
Object and Liquid Entry
Damage Requiring Service
Servicing:
IMPORTANT NOTES
This manual is to be considered an integral part of the product, and must always accompany the
speaker when it changes ownership as a reference for correct installation and operation as well as for
the safety regulations.
dB Technologies will not assume any responsibility for incorrect installation of the speaker.
OPERATING PRECAUTIONS
- Do not force the amplifier incorporated in the speaker to work in overload for extended periods
of time.
- Never force the control elements (switches, controls, etc.).
CAUTION
- Make sure that the speaker is positioned in a stable and secure way in order to avoid any
dangerous conditions for persons or objects.
CONNECTION
- For connecting the speaker, use only qualified and experienced personnel having sufficient
technical knowledge or specific instructions for making the connections correctly and thus
preventing electrical dangers.
- To prevent the risk of electrical shock, the speaker must only be supplied from the mains after all
connections have been completed.
- Before powering up the speaker, it is advisable to re-check all the connections, making sure in
particular that there are no short circuits.
- The entire sound system must be designed and installed in compliance with the current
standards and regulations regarding electrical systems.
CAUTION
- To prevent inductive phenomena from giving rise to hum or disturbance which would jeopardize
efficient seaker operation, the cables that transmit microphone signals or line level signals
(e.g. 0 dB/V) must be screened and should not be run in the vicinity of:
1) Equipment that produces strong magnetic fields (e.g. large power supply transformers)
2) Electrical energy conductors
3) Lines that supply speakers.
Unplug this apparatus during lightning storms or when unused for long periods of time.
Care should be taken so that objects do not fall and liquids are not spilled into the enclosure through
openings.
Refer all servicing to qualified service personnel. Servicing is required when:
- the apparatus has been damaged in any way;
- the power supply cord or the plug has been damaged;
- Objects have fallen, or liquid had been spilled into the appliance;
- The appliance has been exposed to rain or moisture;
- The appliance does not appear to operate normally or exhibits a marked change in
performance;
- The appliance had been dropped.
The user should not attempt to service the appliance beyond that is described in the Operating
Instructions.All other servicing should be referred to qualified service personnel.
CAUTION
CONTROLS AND FUNCTIONS
1) POWER SWITCH
This switch permits turning the speaker on and off.
2) "MAINS FUSE" FUSE CARRIER
Mains fuse housing.
3) "MAINS INPUT" POWER SOCKET
For connecting the power cable provided.
The connector used for mains connection is a POWER CON® (blue)
4) “MAINS OUTPUT LINK” RELAUNCH POWER SOCKET
For relaunching the mains power. The output is connected in parallel with input (3)
and can be used to power another amplified speaker.
The connector uses a POWER CON® (grey)
5) " BALANCED INPUT” INPUT CONNECTOR
Balanced input at line level. It is able to accept “XLR” sockets.
6) "BALANCED LINK/OUT ” OUTPUT CONNECTOR
The “XLR” connector connected in parallel with input (5) can be used to send the
input audio signal to another amplified speaker.
7) “INPUT SENS” INPUT SENSITIVITY CONTROL
This control regulates the sensitivity of the signal amplifier input.
This control does not affect the “BALANCED LINK/OUT” output level
8) “LIMITER” INDICATOR LIGHT
This indicator comes on red to indicate that the internal limiter circuit has tripped.
This prevents amplifier distortion and protects the speakers against overloads.
9) “SIGNAL” INDICATOR LIGHT
This indicator comes on green to indicate the presence of the audio signal (at a level
of -20dB).
10) “MUTE/PROT” INDICATOR LIGHT
This yellow indicator indicates amplifier status. In normal operating conditions, the
LED is off; if it flashes or is always on, refer to the diagnostics table to check amplifier
status.
11) “READY” INDICATOR LIGHT
This indicator comes on green to indicate that the main power voltage is correct. In
normal operating conditions, the LED is on; if it flashes or is off, refer to the
diagnostics table to check amplifier status.
12) “SET-UP MODE” EQUALIZATION SWITCH
This 10-position rotating switch permits selection of the equalization curve according
to installation type.
See table for corresponding equalization curve.
ON
MAINS
FUSE
MAINS
LINK
FULL RANGE MAINS INPUT
BALANCED
INPUT
BALANCED
LINK / OUT
INPUT SENS
READY
MUTE/PROT
SIGNAL
LIMITER
SET-UP
MODE
85-265V
85-125V (T4A 250V)
200-250V (T2A 250V)
BB
dd
TECHNOLOGIES
0dB
+10dB
+4dB
1 = GND
2 = HOT
3 = COLD
"AVIS"
RISQUE DE CHOC ELECTRIQUE
NE PAS OUVRIR
POUR PREVENIR TOUT RISQUE DE FEU
REPLACER UN FUSIBLE
DE MÊME CARACTERISTIQUES
CET APPAREIL DOIT ÊNTRE RELIÉ A LA TERRE
"CAUTION"
TO PREVENT ELECTRICAL SHOCK
DO NOT REMOVE COVER
TO PREVENT RISK OF FIRE
REPLACE FUSES WITH
SAME TYPE AND RATINGS
THIS APPARATUS MUST BE EARTHED
500W MAX
50-60Hz
ACTIVE P.F.C.
SERIAL N.
1
0
2
3
4
5
6
7
8
9
Digital Vertical Array
WARNING
HOT SURFACE
WARNING
HOT SURFACE
WARNING
HOT SURFACE
WARNING
HOT SURFACE
T
4
PUSH
1
2
4
3
8
99
10
11
5
6
7
12
MODULE STATUS LED ”READY” LED AUDIO
Power ON Off On for 5 sec. Data loading
In mute for 5 sec.
Normal use On Of Complete
f
Equalization changing Off On for 5 sec. Data loading
In mute for 5 sec.
Teilweise fault On Slow flashing teilweise
Total fault On Slow flashing In mute
Amplifier emperature:
t
higher 70°C On Slow flashing Output volume
Reduction step
higher 80°C On Fast flashing Output volume
reduction -15dB
“MUTE/PROT”
(green) (yellow) FUNCTIONS
GNDIA OSTICS TABLE
9
EnglishEnglishEnglish
user manualuser manual
EnglishEnglishEnglish
user manualuser manual
10
TECHNICAL SPECIFICATION
System Active 3-Amps
Type of amplifier Digital - ClassT
RMS power 420 W
Musical power 840 W
Frequency responce +/-3dB 80-19.000Hz
Crossover 420 - 2500Hz
24dB/oct
Sound pressure (SPL) 128 peak
Component parts 1 woofer 8” - coil 64mm - neodymium
Input sensitivity nominal 0 dBu
Impedence Bilanced 20Kohm
Unbalanced 10Kohm
Delay totale 1,2mS
~ 50-60Hz
Speaker shape trapezioid
Dimension [LxHxP] 580x330x240/160mm
Weight 13,2Kg
1 midrange 6,5” - coil 38mm - neodymium
2 compression driver da 1” - neodymium
Power supply full-range with PFC
85-265V
“NOISE GATE” function
NOISE GATE, or residual noise suppressor, is a function to reduce noise of the speaker
without input audio signal applied.
NOISE GATE starts to work when there is no audio signal on input, after a few seconds, it
sets the amplifier section in MUTE state . MUTE state is indicated by slow flashing, of
“MUTE/PROT” yellow led. As soon as the audio signal passes he input section, the
speaker is set out of MUTE status automatically.
This option can be enabled and disabled according to the follow procedure on the
amplifier’s module.
1) How to check NOISE GATE status
The NOISE GATE status is visualized by the leds located on the amplifier panel during
switching on the module.
Function enabled =all leds flashes steady for 5-6 second.
Function disabled = only “MUTE/PROT” yellow led flasches steady for 5-6 second
2) NOISE GATE enabled/disabled
NOISE GATE enabled/disabled can be done each time when switching ON and OFF the
amplifier module with “SET-UP MODE” selector on position “9 “(service use only).
To enable/disable NOISE GATE function follow this procedure:
- Amplifier switched OFF
- Set “SET-UP MODE” selector in position "9"
- Switch ON the amplifier module and check following:
* if “LIMITER" red led steady flashes for a few seconds, the NOISE
GATE is enabled.
* if “LIMITER" red led flashes fast for a few seconds, the NOISE
GATE is disabled
Warning!
After enabling or disabling the NOISE GATE function, switch off the amplifier, select
“SET-UP MODE” selector in any equalization position (except of "9" position) and
switch the system ON.
240
160
580
330

23 24
INSTALLATION
DVA system has obtained the TÜV certification for suspension of DVA T4 and DVA
S10 speakers through flybar stirrup DRK 10.
The report certifies that the maximum weight applying to DRK 10 flybar is 250Kg.
The DRK 10 flybar attests that the maximum number of DVAT4 is 16.
Refer to table 1 to determine the total weight borne by flybar according to the different
DVAT4 configurations.
Table 1
Quantity Weight
[kg] [lbs.]
1 15 33
2 30 66
3 45 99
4 60 132
5 75 165
6 90 198
7 105 231
8 120 264
9 135 297
10 150 330
11 165 363
12 180 396
13 195 429
14 210 462
15 225 495
16 240 528
The DRK 10 flybar attests that the maximum number of DVAS10 is 4.
Refer to table 1 to determine the total weight borne by flybar according to the different
DVAS10 configurations.
Table 2
Quantity Weight
[kg] [lbs.]
1 51 113
2 102 225
3 153 337
4 204 449
The modular structure of DVA system permits mixed suspension configuration between
DVA T4 and DVA S10. It is necessary to consider that one DVA S10 hanging subwoofer
corresponds, in weight terms, to four DVAT4 speakers.
For this reason it is necessary to calculate the total weight according to the different
configurations.
Examples:
DVA T4 configuration
DVA S10 configuration
Mixed configuration with DVA T4 and DVA S10
Structural modification of DRK 10 flybar
Original parts dB Technologies
Note
Initiation and Operation
No structural modifications may be made without the manufacturer's consent.
Use only dB Technologies original parts
Use only dB Technologies .original parts
The TÜV authorizing body has not certificated any other parts for use!
Always install parts in accordance with these installation instruction!
Compile and store all DVAsystem documents in a safe place!
Warning
If the security norms and total weight calculations are not observed, dB Technologies
is not responsible for any possible damage to people and things.
During installation ensure that carrying structure of the system has added in the total
weight also the DRK 10 flybar weight, chain hoists, motors, cables and further weights.
§ 39, VBG 9a of the German employers' liability insurance association's accident
prevention regulations requires that load-carrying equipment be inspected by a qualified
expert and possible defects be eliminated prior to initial commissioning by the recipient.
§ 41 VBG 9a requires that load-carrying equipment be subjected to a non-routine
inspection following damage, repair work and other incidents that can affect load-carrying
capacity.
Warning
The safety regulations might be different in other countries. Please check with your
national safety authority the valid regulations!
Quantity x qty Configuration weightWeight
DVA T4 8 120Kg
DVA S10 2 102Kg 222Kg
Quantity x qty Configuration weightWeight
DVA T4 12 180Kg
DVA S10 1 51Kg 231Kg
EnglishEnglishEnglish
user manualuser manual

23 24
INSTALLATION
DVA system has obtained the TÜV certification for suspension of DVA T4 and DVA
S10 speakers through flybar stirrup DRK 10.
The report certifies that the maximum weight applying to DRK 10 flybar is 250Kg.
The DRK 10 flybar attests that the maximum number of DVAT4 is 16.
Refer to table 1 to determine the total weight borne by flybar according to the different
DVAT4 configurations.
Table 1
Quantity Weight
[kg] [lbs.]
1 15 33
2 30 66
3 45 99
4 60 132
5 75 165
6 90 198
7 105 231
8 120 264
9 135 297
10 150 330
11 165 363
12 180 396
13 195 429
14 210 462
15 225 495
16 240 528
The DRK 10 flybar attests that the maximum number of DVAS10 is 4.
Refer to table 1 to determine the total weight borne by flybar according to the different
DVAS10 configurations.
Table 2
Quantity Weight
[kg] [lbs.]
1 51 113
2 102 225
3 153 337
4 204 449
The modular structure of DVA system permits mixed suspension configuration between
DVA T4 and DVA S10. It is necessary to consider that one DVA S10 hanging subwoofer
corresponds, in weight terms, to four DVAT4 speakers.
For this reason it is necessary to calculate the total weight according to the different
configurations.
Examples:
DVA T4 configuration
DVA S10 configuration
Mixed configuration with DVA T4 and DVA S10
Structural modification of DRK 10 flybar
Original parts dB Technologies
Note
Initiation and Operation
No structural modifications may be made without the manufacturer's consent.
Use only dB Technologies original parts
Use only dB Technologies .original parts
The TÜV authorizing body has not certificated any other parts for use!
Always install parts in accordance with these installation instruction!
Compile and store all DVAsystem documents in a safe place!
Warning
If the security norms and total weight calculations are not observed, dB Technologies
is not responsible for any possible damage to people and things.
During installation ensure that carrying structure of the system has added in the total
weight also the DRK 10 flybar weight, chain hoists, motors, cables and further weights.
§ 39, VBG 9a of the German employers' liability insurance association's accident
prevention regulations requires that load-carrying equipment be inspected by a qualified
expert and possible defects be eliminated prior to initial commissioning by the recipient.
§ 41 VBG 9a requires that load-carrying equipment be subjected to a non-routine
inspection following damage, repair work and other incidents that can affect load-carrying
capacity.
Warning
The safety regulations might be different in other countries. Please check with your
national safety authority the valid regulations!
Quantity x qty Configuration weightWeight
DVA T4 8 120Kg
DVA S10 2 102Kg 222Kg
Quantity x qty Configuration weightWeight
DVA T4 12 180Kg
DVA S10 1 51Kg 231Kg
EnglishEnglishEnglish
user manualuser manual

27 28
MID CURVED
from 5° to 7,5°
set-up 5
set-up 4
Set-up 4
set-up 5 set-up 7
set-up 7
set-up 8
set-up 6
set-up 6
STRAIGHT
from 0° to 2,5°
from 10° to 15°
set-up 4
set-up 6
set-up 7
N 8°OF BOXES:
CURVED
SET-UP EXAMPLES
STRAIGHT
from 0° to 2,5°
from 5° to 15°
CURVED
set-up 5
set-up 8
N 6°OF BOXES:
set-up 2
set-up 2
set-up 3
set-up 3
N 4°OF BOXES:
set-up 1
N 2°OF BOXES:
STRAIGHT
from 0° to 2,5°
from 5° to 15°
CURVED
from 5° to 15°
CURVED
set-up 1
set-up 1
set-up 1
CONFIGURATION FRONT FIELD
N 2
:
°OF BOX:
CURVED
from 5° to 15°
CONFIGURATION SYSTEM
CONFIGURATION FRONT FIELD
N 2
:
°OF BOX:
99
SERVICE USE ONLY
DVA T4 PRESET EQUALIZATIONS
NUMBER
OF BOXES
STRAIGHT
CURVED
EQU
SET
00
11
33
22
55
44
88
77
from 0° to 2,5°
from 5° to 15°
66
STRAIGHT
CURVED
from 0° to 2,5°
from 5° to 15°
STRAIGHT
CURVED
from 0° to 2,5°
from 5° to 15°
STRAIGHT
MID
CURVED
from 0° to 2,5°
from 5° to 7,5°
CURVED from 10° to 15°
ANGLES
FROM 9 TO 12 FROM 6 TO 8 FROM 3 TO 5 FROM 1 TO 2
SHAPE
E
G
A
R
E
V
O
C
set-up 0
fr m o 2 5°
o 0°t ,
SGTRAIHT
set-up 0
0° 7,5°
SET-UP EXAMPLES

DRK 10 accessorio
Accessory DRK 10
Appeso
Hanging on
In appoggio
Groundstack
29 30
Phase 1 Phase 2
Phase 4Phase 3
INCLINAZIONE INCLINATION
NEIGUNG INCLINAISON
57° , 57° ,
12°
,5
12°
,5
1°
5
1°
5
°10°10
5°
5°
EES
RI
SEES
RI
S
Phase 6
Phase 5
Phase 7
Phase 8
INSTALLAZIONE INSTALLATION
INSTALLATIONEN INSTALLATIONS
Appeso
Hanging on

31 32
Phase 1 Phase 2
Phase 5
Phase 7 Phase 8
Phase 3 Phase 4
Phase 6
0°0° 0°0°
5°5° 5°5°
2,5°2,5°
GROUND STACKED
USE ONLY
GROUND STACKED
USE ONLY
2,5°2,5°
-2,5°-2,5° -2,5°-2,5°
-7,5°-7,5° -7,5°-7,5°
-5°-5° -5°-5°
,°
7
5
,°
7
5
,
12 5°
,
12 5°
°15°15
01° 01°
5°
5°
RSS
E
I
E
RSS
E
I
E
In appoggio
Groundstack
INSTALLAZIONE INSTALLATION
INSTALLATIONEN INSTALLATIONS
INCLINAZIONE INCLINATION
NEIGUNG INCLINAISON

33 34
DVA T4 + DVA S10
Utilizzo in appoggio verticale (DVA T4 montaggio “Ground stacking”)
Supported use (DVA T4 ““Ground stacking” assembling)
DVA T4 + DVA S20
Utilizzo in appoggio verticale (DVA T4 montaggio “Ground stacking”)
Supported use (DVA T4 ““Ground stacking” assembling)

33 34
DVA T4 + DVA S10
Utilizzo in appoggio verticale (DVA T4 montaggio “Ground stacking”)
Supported use (DVA T4 ““Ground stacking” assembling)
DVA T4 + DVA S20
Utilizzo in appoggio verticale (DVA T4 montaggio “Ground stacking”)
Supported use (DVA T4 ““Ground stacking” assembling)

Per supporto asta
Stand adaptor
35 36
Opzione DSA 4
DSA 4 Option
In appoggio
Floor stack
Per supporto asta
Stand adaptor
Solo con DVA S10
Only with DVA S10
In appoggio
Floor stack

Per supporto asta
Stand adaptor
35 36
Opzione DSA 4
DSA 4 Option
In appoggio
Floor stack
Per supporto asta
Stand adaptor
Solo con DVA S10
Only with DVA S10
In appoggio
Floor stack

38
37
Carello - opzione DT 6
Trolley - DT 6 option
Carello
Trolley
Flybar
Flightcase per 4 DVA T4 - opzione DF 4
Flightcase for 4 DVA T4 - DF 4 option
Opzione DTF 4
DTF 4 Option DTF 4 = DT 6 + DF 4

38
37
Carello - opzione DT 6
Trolley - DT 6 option
Carello
Trolley
Flybar
Flightcase per 4 DVA T4 - opzione DF 4
Flightcase for 4 DVA T4 - DF 4 option
Opzione DTF 4
DTF 4 Option DTF 4 = DT 6 + DF 4
Table of contents
Other dB Technologies Speakers System manuals

dB Technologies
dB Technologies IEM 2200 User manual

dB Technologies
dB Technologies FlexSys FMX10 Manual

dB Technologies
dB Technologies DVA T12 User manual

dB Technologies
dB Technologies Entertainment System ES 602 User manual

dB Technologies
dB Technologies MINIG2 User manual

dB Technologies
dB Technologies DVA T8 User manual

dB Technologies
dB Technologies DVA MINI G2 Manual

dB Technologies
dB Technologies DVA K5 Manual

dB Technologies
dB Technologies VIO S318 Manual

dB Technologies
dB Technologies VIO L210 Manual