manuals.online logo
Brands
  1. Home
  2. •
  3. Brands
  4. •
  5. De Agostini
  6. •
  7. Toy
  8. •
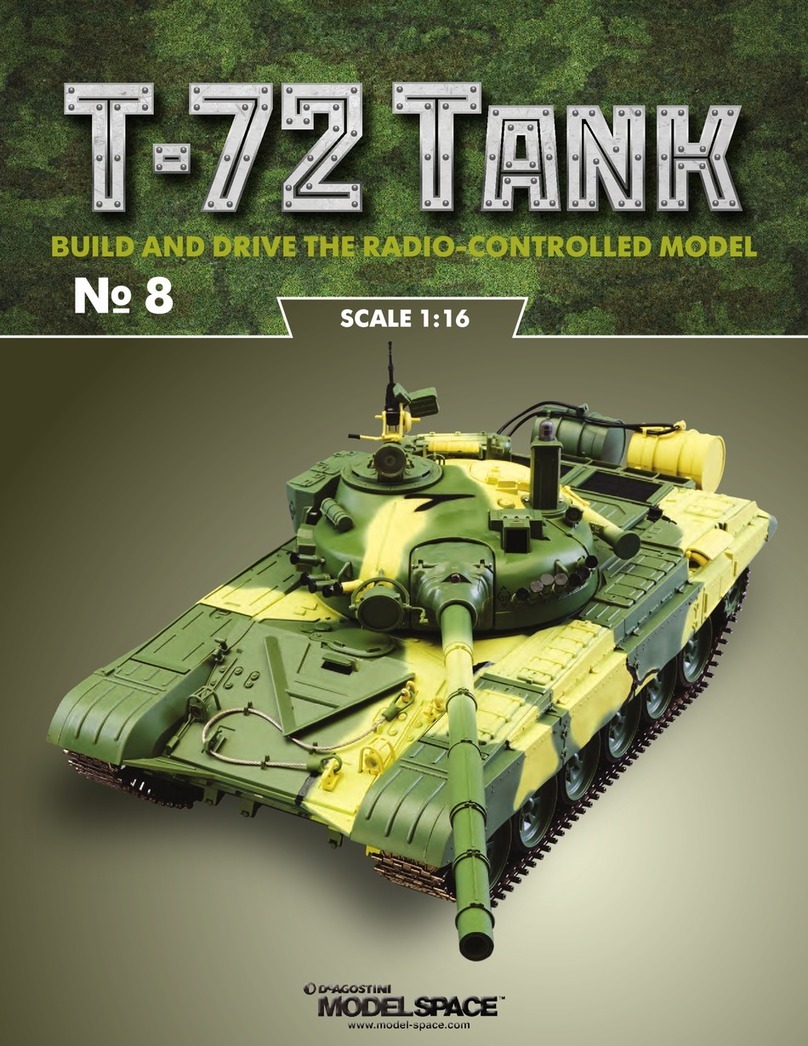
  9. De Agostini Model Space T-72 User manual

De Agostini Model Space T-72 User manual

TANK T-72 GUIDE
1
BUILD AND DRIVE THE RADIO-CONTROLLED MODEL
GUIDE SCALE 1:16
CONTENTS
Editorial and design by Continuo Creative, 39-41 North Road, London N7 9DP.
Published in the UK by De Agostini UK Ltd, Battersea Studios 2, 82 Silverthorne Road, London SW8 3HE.
Published in the USA by De Agostini Publishing USA, Inc.,121 E. Calhoun Street, Woodstock, IL 60098.
All rights reserved © 2018
Warning: Not suitable for children under the age of 14.
is product is not a toy and is not designed or intended for use in play.
Items may vary from those shown.
SECTION PAGE
Overview 3
Your model in action 11
Installing the Wi-Fi unit 17
TANK T-72 GUIDE
3
RC MODEL
Т‑72 ТANK
Close-up image of the tracks, which are assembled from individual metal treads. Metal tracks
make the tank look more real, as well as serving the practical purpose of being stronger and
therefore greatly increasing control and longevity.
Overview
The creators of your radio-
controlled T-72 model made it as
realistic as possible, even down to
the choice of materials.
Many parts of your T-72, such as the turret, are
made of metal. This also includes the tracks,
made up of individual metal treads, pinned
together. The idler wheels and drive wheels are
also metal – as well as being authentic to the real
tank, this makes the model robust and durable for
use on most terrains.
Due to its fairly large size (the length of the
model is more than 46cm without the gun), the
movement of the tank is controlled by two motors
positioned in the rear of the model. They are
supplied by a powerful 7.2V battery pack, which
can be recharged. This also supplies the motors
for the turret rotation and elevation of the gun
barrel with power.
4
Functions
The standard version of the model is controlled by a remote control unit, operating at a frequency of 2.4GHz. The remote allows
you to control the speed at which the tank moves forward and back, turn left and right, rotate the tower, as well as raise and
lower the gun.
To achieve the most realistic effect when “firing” the gun, the barrel recoils, just as it would on the real tank. At the same time,
the LED placed inside the barrel produces a flash, and the speakers replicate the sound of cannon fire. The speakers also imitate
the sound of the 12-cylinder engine of the real tank, and there is even an option to produce exhaust fumes.
All of these aspects will make for more authentic-feeling battles, and while the model may not be able to actually fire projectiles,
it does have the ability to engage in battles with other remote-controlled tanks via infrared. Each tank is equipped with an LED
that emits infrared rays which hit an infrared receiver placed on the turret. When the receiver picks up a “hit” from another tank,
that tank is then “out”. These points will be discussed in greater detail further into this guide.
Remote control by Wi-Fi
The T-72 model can be equipped with an additional remote
control device, which makes it possible to control the tank via
W-Fi using a smartphone or tablet, allowing you to use all of
the functions of the model, via the touch screen. In addition,
the screen will show a live feed using a camera mounted on
the turret, so you can control the T-72 as if you were actually
in it. See the section on the Wi-Fi system (page 17) for more
information.
With twin electric motors, the T-72 model has excellent manoeuvrability, even on tougher terrain.
Here you can see the small camera, which, when using a smartphone or tablet
through the Wi-Fi system, allows you to see what is happening as if you were in
the tank yourself.
TANK T-72 GUIDE
5
The main battery pack
In the bottom of the hull there is a compartment for the battery
pack, which consists of six 1.2V rechargeable cells. These cells
are connected to each other, creating a battery with a total
voltage of 7.2V. The socket that the connector at the end of the
battery pack cable plugs into is a standard size, so it can be
used with any battery pack purchased separately.
The strength of the current of the battery is 2,000mA. This
is more than sufficient to run the tank for 30 minutes, but
the duration of the run-time will be affected by the functions
performed by the model.
The battery pack is placed in the space in the underside of the model.
Remote Control
The remote control, the device you use to transmit
commands to the tank, requires a separate power supply,
made up of four AA batteries.
These batteries may be rechargeable (1.2V) or
disposable (1.5V). However, it is preferable to use
rechargeable batteries.
All 7.2V batteries are the same size and are
equipped with a standard cable to connect.
The charger is powered from the mains. It allows
you to charge the 7.2V battery pack in less than
an hour.
You can buy a model charger set, like the one
above, in most model shops. These are suitable for
monitoring charge and charging different types of
rechargeable batteries.
Here you can see the panel on the back of the remote
control has been removed to expose the batteries.
Recharging
Battery packs are very reliable and can be recharged hundreds of times. This can be done using a standard charger, but you can
use more sophisticated devices to reduce the charging time.
6
A small LED at the end of the barrel of the main gun
illuminates when “shot”.
Signals from the headlights indicate that the link between
the remote control and the model is functioning and the
tank is ready to use.
Four red LEDs mounted at the rear the model indicate the
level of damage to the tank.
LEDs
The model has two headlights, just like the real T-72, replicated by LEDs, which
are visible from a distance of several metres, even in daylight. These two LEDs will
help in poor visibility conditions.
But their main purpose is to inform the modeller, using a specific set of signals,
that the link between the remote control and the model is ready.
These are the three main signals:
• Both lights flashing rapidly indicates that the tank is operating, the battery
is connected and the switch is set to ON. But the radio control is still off, so
connection is not established.
• Both lights flashing slowly indicates that the tank is turned on (battery is
connected, the switch is on the ON) and is communicating with the transmitter.
• Both lights lit but not blinking indicates that the tank and remote control are
ON and connected. The model can now be used!
Always check the headlights if you have any trouble controlling the tank.
There is an LED located inside the gun barrel, which simulates the flash of
gunfire and lets you know that the “fire” command is working. The light is
accompanied by a sound that simulates a shot, and the gun also recoils. At the
rear of the hull under the grille are four red LEDs. They are damage counters,
representing the “health” of the tank when in battle.
Wheels
At the front of the tank is an idler wheel (1). This wheel is particularly susceptible to shock and friction caused by the movement of
the tracks, and so it is constructed from metal for strength.
At the opposite end is a drive wheel (2) with toothed rims, which engage with the treads, moving the tracks forward or
backward. Both parts are made of metal to ensure the connection is strong and reliable.
Between the idler and drive wheels are the six doubled rubber road wheels (3), which help to dampen vertical oscillations.
There are three rollers (4) on either side of the model which support the upper portion of the track.
TANK T-72 GUIDE
7
The transmitter (remote control handset)
Transmitters come in two main types: the pistol type which is
usually used to control car and ship models, and those with
multi-position levers (joysticks). The transmitter for your T-72
model is the lever type. It is roughly square in shape, which
makes it very easy to handle. Along the middle (latitudinally)
are two joysticks (1 and 2), with which you can control the basic
functions and movment of the model. On the lower left are three
buttons (3) that activate the secondary functions of the tank. The
power switch (4) is located in the centre, and illuminates a red
LED when the device is turned on. The transmitter is equipped
with a short antenna (6), which is mounted at the top, and a
convenient carrying handle (7), mounted on the rear.
Typically, the remote control uses one modulation frequency,
set up in the transmitter and receiver. In your model, you will
have installed a radio-control system that runs at 2.4GHz, which
provides a stable signal at a long distance, with high immunity to
interference. Each transmitter is connected to its own receiver, so
that even if many tanks are being used in close proximity there
should still be no interference between them.
When you move the power switch on the transmitter from “off”
to “on”, the LED (5) inside it will begin flashing, letting you know
that the transmitter is operational. When the LED stops flashing, it
means that the connection to the tank is complete.
The T -72 model operates at a
protected frequency of 2.4GHz,
so you can use your tank without
fear that you will lose control.
The power switch has two positions:
down is “off”, and up is “on”.
1. Right stick (controls the movement of the tracks)
2. Left stick (controls the movement of the turret and gun)
3. Buttons (fires the guns, turns the model on and off)
4. Power switch
5. LED
6. Antenna
7. Carrying handle
Parts of the transmitter:
8
The model of the T-72 tank is to allow you participate in battles through the infrared (IR)
combat system.
IR LED
Above the barrel of the tank’s main gun is an IR LED, which makes it possible to engage in fights with other IR
compatible tanks. This is better as it simulates a real fight, without firing actual projectiles.
This system is similar to the one used in a television remote control, where a beam of infrared light is sent out carrying
a signal to a receiver. The receiver on the television picks up this signal and transforms it into information i.e. increasing
the volume. In terms of the tank receiver, it reads this signal as “damage”. As when things get in the way of a TV remote,
the signal can be blocked, which can be implemented into tank battles by the way of scenery, creating a more exciting
game. Conversly, IR light bounces off reflective surfaces very easily, so these kinds of surfaces should be avoided when
battling.
The upper signal limit of the IR transmitter is 15–20m, which varies depending on how much light the tank is being
used in, e.g. outside in daylight, or inside in the dark. Also, the range is affected by battery charge, so always make
sure the battery is fully charged before use.
IR receiver
The tank also has an infrared receiver, located on the turret, which the enemy must “hit” to damage your tank. The IR
receiver consists of four sensors, which cover 360°, avoiding any blind spots. Make sure the sensor cover is always
kept clean.
Signalling LEDs
Under the grille at the rear of the tank, there are four red LEDs, which signal successful hits on the tank. These LEDs light
up immediately after the model is turned on, and whenever the tank is “hit”, one of them goes out.
After the last LED goes out, the model will turn off and will not react to any commands. This means that your tank has
been “destroyed” and you are out of the game. The model will not function for 18 seconds, after which you can reboot
the system by pressing the power button in the lower left of the remote.
To increase the realism of the model, the amount of illuminated LEDs directly relate to the controllabilty of the model,
so every time the tank is hit, not only will one LED go out, but it will also be more difficult to control the tank. Even the
sound of the engine will change.
Shot Rules
To simulate the shot from a real T-72, the system is programmed so that there is a pause of 8 seconds between shots.
Even if you press the fire button, the shot will only happen after the delay. This is because it would take around 8
seconds to reload the real gun.
TANK T-72 GUIDE
9
The four sensors of the IR receiver must always be clean, as well as the
cover over them.
The four LEDs behind the engine compartment illuminate when the tank is
turned on or restarted, and will indicate successful hits to the tank.
The model can only be restarted from the handset four times, then it will shut
down completely, and you will have to restart it properly from the underside
of the tank.
The IR receiver is located on the turret, which avoids any blind spots.
The transmitter IR LED is located just above the barrel of the main gun. This
prevents anything on the tank from obstructng it.
The topmost of the three buttons in the bottom left of the controller will fire the
main gun. The joystick above is responsible for moving the turret from side to
side, and elevating the main gun.
10
Before cleaning the running gear, you should carefully remove the tracks. Don’t
use water to wash any of the parts, as this can cause rust on the metal, or get
into the model and short the electrical components.
You can use a variety of small brushes, both plastic/hair and metal to clean the
wheels and tracks. You may also find that a can of compressed air will help.
Maintenence
The running gear of the T-72 tank on each side consists of six doubled road wheels made of aluminium alloy and rubber, three
rollers, idler wheels and driving wheels, both made of a steel alloy. Each road wheel has its own individual suspension, which
allows for greater control in various terrain. Each track is made up of individual treads. Due to the complexity of the running gear
of the tank, it will require close attention and maintenence.
Manoeuvres that could cause stress to the suspension should be avoided, for example, frequent changes of direction at
higher speeds, especially in tall grass or on uneven terrain. Also try to avoid strong impacts on the front of the model, where the
idler wheels are. Check the tracks and wheels before and after every use to ensure they are not damaged or obstructed. Any
damaged treads should be replaced. In addition to checking the parts, it is also advised that you clean them after every use.
To check the suspension, test
that the road wheels can be
easily raised and lowered.
TANK T-72 GUIDE
11
Your model in action
Learn how to drive your radio-controlled
T-72 tank, and then operate it in
simulated battle conditions.
Preliminary checks
To check the remote control, turn it on using the switch
located in the centre. The LED on the remote will begin
flashing. If the LED is not flashing, check that the AA
batteries are properly inserted into the compartment on the
back of the remote and that they have sufficient charge.
Also check that the battery is correctly installed in the
compartment in the tank. If you are not going to use the
model for a long time, it is better to remove the battery from
the compartment, to prevent oxidation of the battery.
Before using the model, be sure to check the chassis. All
the wheels should rotate easily, without making unusual
noises. Check the undercarriage for foreign objects and
dirt. If there are any, carefully remove them and clean the
tracks and wheels.
Then check the combat commands. Pressing the “fire”
button on the remote should cause the main gun LED to
flash; this should be accompanied by the gun’s recoil and
a sound that simulates a shot.
Place the model on a stand, with the wheels on either side of it to better
observe the underside, and check the movement of the tracks.
Make sure that the teeth of the idler wheels are fully engaged with
the tracks.
The elevation of the gun is from 0° to 10°, as shown. Check that it is not obstructed in any way.
12
By varying the speed of each track, you can move the tank along
a curved trajectory.
The tank can turn on the spot when driving the tracks in opposite directions.
The total angle of rotation of the turret is 300°, 150° in each direction.
Moving the tank
The running gear of the T-72 has been designed so that the model can navigate through many types of terrain and perform
a variety of manoeuvres, for example, quickly changing direction or making turns on the spot. In addition to this, the
effective suspension system increases the tank’s ability to overcome obstacles, while maintaining the driving stability at
relatively high speeds.
However, the tracks do have some limitations compared to wheeled vehicles. In addition to the more cumbersome
design, the track system requires specific skills when making turns, since change of direction is controlled by adjusting the
speed of each of the tracks.
The engines of the T-72 model are arranged so that each track has its own, allowing them to be controlled separately. If
the tracks are both full forward, and then the speed of one is reduced, the tank will begin to turn while still moving forward.
If the tracks are moved in opposite directions, the tank will stop and turn on the spot, in whichever direction the track
moving forward is going. This manoeuvre should be performed with caution though, as it can put extra stress on the tracks
and the motors.
Moving the turret and gun
The T-72 has a rotating turret, controlled by a joystick on the remote. The angle of the turret’s rotation is limited to 300°
(150° in each direction); this is in order to avoid damaging or breaking wires connecting the body and the turret. This limit
does not reduce the combat performance, but it should be remembered that the tank can’t fire in the 60° directly behind it.
The elevation angle of the gun is from 0° to 10°, and is controlled by the same joystick as the rest of the turret. As with real
tanks, barrel elevating capabilities are very limited, but this feature allows the tank to hit targets located higher than it.
TANK T-72 GUIDE
13
Motion control
The right joystick on the handset controls the tracks
and therefore the movement of the tank. When you
move the joystick up (1) the tank starts to move
forward in a straight line; pulling it down (2) will
move it backwards. The stick is pressure sensitive,
which means you can adjust the speed of the
movement by how much you push the joystick.
Moving the joystick right or left (3-4) will make the
tank turn on the spot, in that direction. If you want
the tank to move forward or backward while turning
slightly, you will need to move the joystick into a
diagonal position (5-8).
Turret and gun control
The left joystick allows you to change the angle of
the main gun and rotate the turret.
You will need to move the joystick to the left or
right (1-2) to rotate the turret, in either direction.
Remember that the turret can only rotate 150° in
either direction.
To change the elevation of the gun barrel, push
forward or pull back on the left stick (3-4). The gun
can only raise to 10°.
Secondary controls
At the bottom left of the transmitter are three buttons.
The lower button (3) is used to activate the model.
It will produce a sound from the tank which imitates
ignition of the engine, and then the LED at the top of
the remote will stop flashing and shine steadily.
The middle button (2) activates the machine gun,
prdoucing a sound when pressed.
The top button (1) activates the main gun. Pressing
it will illuminate the LED at the end of the barrel,
produce the sound and activate the recoil.
Right joystick:
1. Forward
2. Reverse
3. Turn right
4. Turn left
5. Forward right
6. Forward left
7. Reverse right
8. Reverse left
Left joystick:
1. Rotate turret to the left
2. Rotate turret to the right
3. Raise the main gun
4. Lower the main gun
Buttons:
1. The main gun
2. The machine gun
3. Model on/off
14
Dry soil is the ideal surface for the tank.
Site selection for the model T-72
Selecting the area for your tank is very important. While your radio-controlled T-72 tank is equipped with good mechanics
and metal tracks, allowing it to move in almost any terrain, you can use the tank both indoors and outdoors. Flat areas are
recommended, but the tank is engineered to be able to deal with many obstacles.
For example, when your tank is “fighting”, you can have obstacles simulating the wreckage of buildings or debris to use as
cover to hide behind, and if they are lower than 5cm your tank will be able to climb over them. In order to avoid damage, it is
recommended to reduce the speed of the model when overcoming obstacles.
Avoid operating the tank in places with poor grainy soil, small stones, gravel and tall grass which can get caught in the drive
system, causing the engine to use more power, which can lead to overheating . Avoid water as well, as this can cause rust as
well as affecting the electrical system.
If you use your tank inside, try to avoid particularly smooth surfaces (tile, marble etc.) as they can lead to the tracks slipping,
resulting in the model becoming uncontrollable, which could lead to objects being damaged, and in some cases they could
damage the surface the tank is on.
The T-72 can move quickly on patches of short grass.
Here you can see how sand, gravel and small
stones can affect the running gear of the tank.
Avoid very smooth or slippery surfaces, such as
tiles, instead preferring parquet flooring or carpet.
Tall grass can become a serious obstacle for the
tank and cause stress to its engines.
The T-72 model can easily overcome obstacles like
a real tank.
TANK T-72 GUIDE
15
Doing battle
Having learnt the basic skills of driving the model, you can now test the tank in combat conditions. This will require you to
arrange a training ground for manoeuvring skills and shooting at targets, as well as working out combat tactics. With the
assembly guide you received an interactive diorama, which will help you to recreate combat situations.
There are clubs for 1:16-scale radio-controlled model tanks where solo or team battles are organised. These clubs are great
communities where you can learn more about tanks, as well as practice and even build scenery.
The infrared system of the tank allows you to hit targets at long range.
Position the diorama around obstacles to obstruct the line of sight, making it
more of a challenge.
Use the interactive diorama to practise and improve shooting the main gun.
16
The smoke generator
Your T-72 has a smoke generator installed between the two motors; its use is optional and it has an activation switch on the
underside of the tank. The generator works by heating up a special liquid which causes “smoke” to be expelled out of the
exhaust pipe, giving the tank more realism. To avoid taking the tank apart every time you want to fill the generator, you can fill
it from the exhaust pipe using the supplied bottle, following the steps listed below.
The bottle is prefilled with the generator liquid, and lines are marked on the side of the bottle indicating how much liquid (in
grams) is left.
You can either use the nozzle cap fitted on the bottle or fit a precision nozzle, as shown below.
Make sure the tank is turned off. Lift the tank so that the back end is uppermost, insert the nozzle into the tube, and gently
squeeze the bottle, until roughly 3-5 grams have been emptied into the generator. Hold the tank in place for a minute and wipe
away any excess liquid. Lay the tank back down. Then, make sure the generator switch is in the “on” position before turning the
tank back on.
The smoke generator. The smoke generator in place between the two motors.
The exhaust port in the lower hull, where the smoke is expelled from and the
generator is refilled.
The bottle with nozzle fitted, inserted into the exhaust port to refill the generator.
TANK T-72 GUIDE
17
Installing the Wi-Fi unit
Your T-72’s Wi-Fi unit is a video camera with
1280 x 720 pixel resolution and a Wi-Fi
sender/receiver.
The Wi-Fi unit is easy to fit and easy to use. It allows you to
operate the tank with your smart phone or tablet at a distance
of up to 30 metres, depending on the environment and weather
conditions.
You can save photos and videos from the live feed displayed on
your phone screen in real time, as you are controlling the tank.
The Wi-Fi module is installed in the turret and is connected to
the distribution board. Following our simple instructions, you can
quickly connect the module to the rest of the tank. To activate the
system, you just need to move the connectivity switch from 2.4G
to Wi-Fi.
Prepare the Wi-Fi unit, cable Q and a screwdriver. Remove the top of the tank
from the lower hull and disconnect the cables.
Carefully remove the gunner’s cover to access the space in the turret.
Lower the Wi-Fi unit with the camera at the top into the space in the turret. You
may find it easier to remove the turret from the body at this point.
Turn the turret over and connect cable Q to the bottom of the unit and the
corresponding socket on the distribution board, marked Q.
The circled area of the turret is the gunner’s position, where the Wi-Fi unit is
installed. The camera will give you the same view the gunner would have in
the real T-72.
18
Installing and setting up the app
Go to the Model Space website or the App Store,
search for “T-72”and download the “Radio Tank
T-72” app to your tablet or smart phone.
1. Turn the tank on (move the switch into the ON
position).
2. Move the Wi-Fi/2.4G switch on the bottom of
the tank to the Wi-Fi position.
3. Go to the “Settings” on your tablet or smart
phone and turn on the Wi-Fi search function.
4. Select the “Tank_T-72” network and connect
(the name of the network may be slightly different).
5. Open the “Radio Tank T-72” app. To enable WiFi, you must ensure the connectivity switch is in the”Wi-Fi” position, and turn the
power “ON”.
Using the app
The interface of the app is straightforward. There are two directional “sticks” surrounded by four arrows, which simulate the
joysticks on the radio control handset. The left “stick” controls the movement of the tank, and the right “stick”controls the
movement of the turret. The three buttons along the bottom correspond with the three buttons in the bottom left of the handset,
turning the tank on, firing the main gun, and firing the machine gun. In the top right of the screen, there is a button to change the
language. The three buttons along the top (camera, video camera and library) will take a photo of the feed displayed on your
screen, will begin recording the feed on your screen until you press it again, and will show you the photos and videos you have
taken using the app.

Other manuals for Model Space T-72

9

Other De Agostini Toy manuals

De Agostini Model Space C57 User manual

De Agostini

De Agostini Model Space C57 User manual

De Agostini Model Space ROBI Pack 03 Instruction Manual

De Agostini

De Agostini Model Space ROBI Pack 03 Instruction Manual

De Agostini MODEL SPACE SUZUKI GSX 1300R HAYABUSA User manual

De Agostini

De Agostini MODEL SPACE SUZUKI GSX 1300R HAYABUSA User manual

De Agostini Model Space MiG-29 User manual

De Agostini

De Agostini Model Space MiG-29 User manual

De Agostini Model Space D51 200 User manual

De Agostini

De Agostini Model Space D51 200 User manual

De Agostini Model Space MiG-29 User manual

De Agostini

De Agostini Model Space MiG-29 User manual

De Agostini MODEL SPACE Honda CB750 FOUR User manual

De Agostini

De Agostini MODEL SPACE Honda CB750 FOUR User manual

De Agostini Model Space T-72 User manual

De Agostini

De Agostini Model Space T-72 User manual

De Agostini MODEL SPACE Honda CB750 FOUR User manual

De Agostini

De Agostini MODEL SPACE Honda CB750 FOUR User manual

De Agostini Model Space C57 User manual

De Agostini

De Agostini Model Space C57 User manual

De Agostini Model Space MiG-29 User manual

De Agostini

De Agostini Model Space MiG-29 User manual

De Agostini Model Space T-72 User manual

De Agostini

De Agostini Model Space T-72 User manual

De Agostini Model Space T-72 User manual

De Agostini

De Agostini Model Space T-72 User manual

De Agostini Model Space C57 User manual

De Agostini

De Agostini Model Space C57 User manual

De Agostini Model Space MiG-29 User manual

De Agostini

De Agostini Model Space MiG-29 User manual

De Agostini MODEL SPACE Honda CB750 FOUR User manual

De Agostini

De Agostini MODEL SPACE Honda CB750 FOUR User manual

De Agostini Model Space D51 200 User manual

De Agostini

De Agostini Model Space D51 200 User manual

De Agostini Model Space T-72 User manual

De Agostini

De Agostini Model Space T-72 User manual

De Agostini Model Space MiG-29 User manual

De Agostini

De Agostini Model Space MiG-29 User manual

De Agostini Model Space T-72 User manual

De Agostini

De Agostini Model Space T-72 User manual

De Agostini Model Space SANTISIMA TRINIDAD User manual

De Agostini

De Agostini Model Space SANTISIMA TRINIDAD User manual

De Agostini Model Space T-72 User manual

De Agostini

De Agostini Model Space T-72 User manual

De Agostini Model Space C57 User manual
De Agostini

De Agostini Model Space C57 User manual

De Agostini Model Space H.M.S. Bounty Admiralty User manual

De Agostini

De Agostini Model Space H.M.S. Bounty Admiralty User manual

Popular Toy manuals by other brands

Fisher-Price GJX10 instructions

Fisher-Price

Fisher-Price GJX10 instructions

Cornerstone 933-4554 manual

Cornerstone

Cornerstone 933-4554 manual

FMS FMS089P operating manual

FMS

FMS FMS089P operating manual

Trix Henschel manual

Trix

Trix Henschel manual

MTHTrains Premier Baldwin P-47 Operator's manual

MTHTrains

MTHTrains Premier Baldwin P-47 Operator's manual

TTC IT01118 quick start guide

TTC

TTC IT01118 quick start guide

Lansay minideices 17865 instructions

Lansay

Lansay minideices 17865 instructions

Kayoba 017104 operating instructions

Kayoba

Kayoba 017104 operating instructions

Multiplex Gemini 21 4224 Building instructions

Multiplex

Multiplex Gemini 21 4224 Building instructions

Badger Basket MINICHEF 9982 Assembly instructions

Badger Basket

Badger Basket MINICHEF 9982 Assembly instructions

Hasbro G.I.Joe Tiger Paw instructions

Hasbro

Hasbro G.I.Joe Tiger Paw instructions

REVELL KIT 7853 Assembly manual

REVELL

REVELL KIT 7853 Assembly manual

Eduard SBD-5 Dauntless engine Assembly instructions

Eduard

Eduard SBD-5 Dauntless engine Assembly instructions

Fisher-Price K6434 instruction sheet

Fisher-Price

Fisher-Price K6434 instruction sheet

Mattel Barbie AND THE ROCKERS FHC08 instructions

Mattel

Mattel Barbie AND THE ROCKERS FHC08 instructions

Eduard Bf 109G-6 manual

Eduard

Eduard Bf 109G-6 manual

Faller 222202 manual

Faller

Faller 222202 manual

Jamara Starlet 006140 Instruction

Jamara

Jamara Starlet 006140 Instruction

manuals.online logo
manuals.online logoBrands
  • About & Mission
  • Contact us
  • Privacy Policy
  • Terms and Conditions

Copyright 2025 Manuals.Online. All Rights Reserved.