manuals.online logo
Brands
  1. Home
  2. •
  3. Brands
  4. •
  5. DeLOCK
  6. •
  7. Adapter
  8. •
  9. DeLOCK 64154 User manual

DeLOCK 64154 User manual

Declaration of conformity
Products with a CE symbol fulll the EMC directive (2014/30/EU) and
RoHS directive (2011/65/EU+2015/863+2017/2102), which were released by the
EU-comission.
The declaration of conformity can be downloaded here:
https://www.delock.de/produkte/G_64154/merkmale.html
WEEE-notice
The WEEE (Waste Electrical and Electronic Equipment)-directive, which became
e󰀨ective as European law on February 13th 2003, resulted in an all out change
in the disposal of disused electro devices. The primarily purpose of this directive
is the avoidance of electrical waste (WEEE) and at the same time the support of
recycling and other forms of recycling in order to reduce waste. The WEEE-logo on
the device and the package indicates that the device should not be disposed in the
normal household garbage. You are responsible for taking the disused electrical
and electronical devices to a respective collecting point. A separated collection and
reasonable recycling of your electrical waste helps handling the natural resources
more economical. Furthermore recycling of electrical waste is a contribution to
keep the environment and thus also the health of men. Further information about
disposal of electrical and electronical waste, recycling and the collection points
are available in local organizations, waste management enterprises, in specialized
trade and the producer of the device.
Cet appareil
se recycle
Points de collecte sur www.quefairedemesdechets.fr
EU Import: Tragant Handels- und Beteiligungs GmbH
Beeskowdamm 13/15, 14167 Berlin, Germany
Support Delock
If you have further questions, please contact our customer support
[email protected]
You can nd current product information on our homepage: www.delock.com
Final clause
Information and data contained in this manual are subject to change without notice
in advance. Errors and misprints excepted.
Copyright
No part of this user's manual may be reproduced, or transmitted for any purpose,
regardless in which way or by which means, electronically or mechanically, without
explicit written approval of Delock.
Edition: 11/2022
Pin assignment
PIN USB Sub-D9
1VCC DCD
2 DM RXD
3 DP TXD
4 SG-Host DTR
5 SG-Device
6 DSR
7RTS
8CTS
9RI
FG FG-Host FG-Device
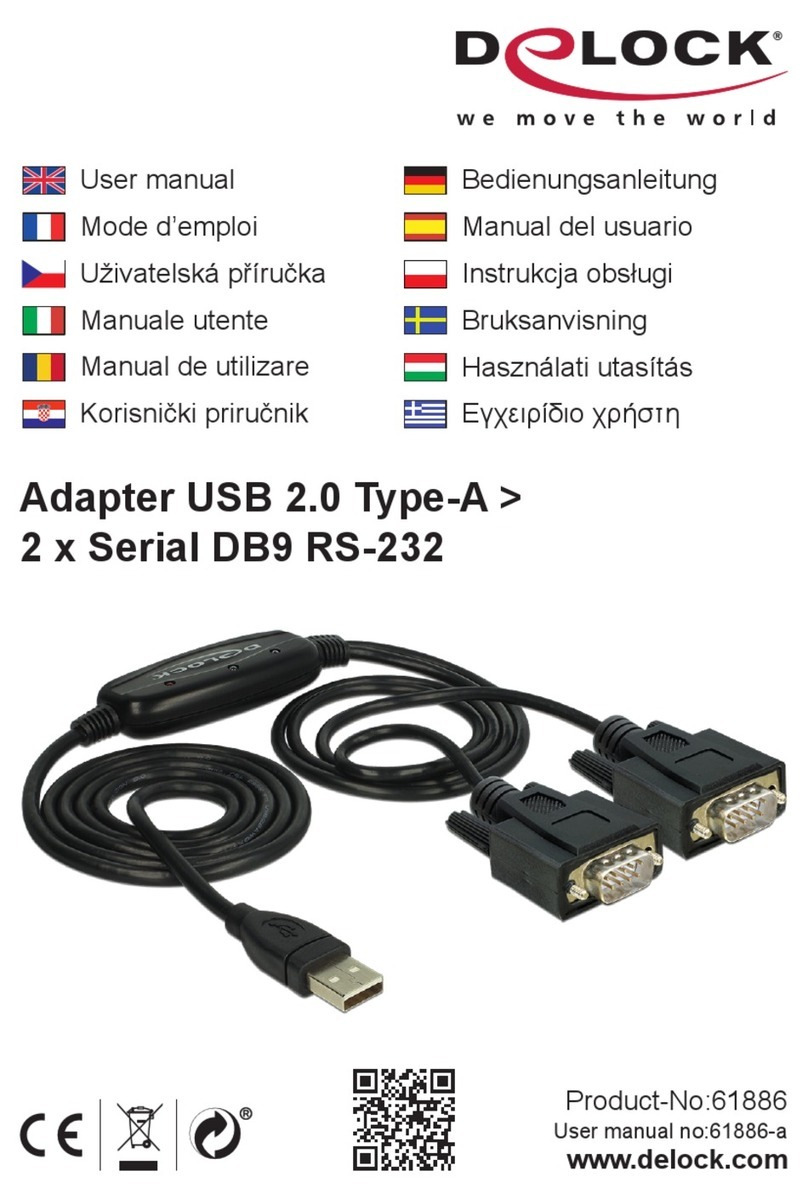
USB 2.0 Type-A to 1 x Serial RS-232
Adapter
User manual
Mode d’emploi
Uživatelská příručka
Manuale utente
Manual de utilizare
Korisnički priručnik
Bedienungsanleitung
Manual del usuario
Instrukcja obsługi
Bruksanvisning
Használati utasítás
Εγχειρίδιο χρήστη
Product-No: 64154
User manual no: 64154-a
www.delock.com
English
Description
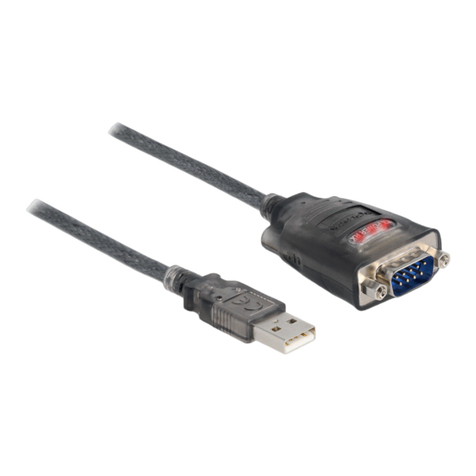
This USB Type-A to serial RS-232 adapter by Delock provides a compatible RS-
232 DB9 interface for printers, measuring instruments, controllers, IoT devices
etc. With the galvanic isolation between the computer and the device, the adapter
protects and ensures data transmission.
Galvanic isolation
The USB 2.0 to serial RS-232 adapter completely decouples the USB and RS-232
connection and the USB power supply. This ensures data transmission at di󰀨erent
ground potentials, separates any ground and hum loops that occur, and prevents
interruptions caused by electromagnetic discharges or over voltages.
Ferrite cores
Two ferrite cores on the USB 2.0 cable lter high-frequency interference signals.
Specication
• Connectors:
1 x USB 2.0 Type-A male
1 x serial RS-232 DB9 male with nuts
• 2.5 kV VRMS (max. 3.5 kV) galvanic isolation
• USB bus powered
• Chipset: FTDI FT231XS
• Compatible with USB 3.0, USB 2.0, and USB 1.1
• Data transfer rate up to 921.6 Kbps
• FIFO: 512 Byte - RX
• FIFO: 512 Byte - TX
• Databits: 7, 8
• Stop bits: 1, 2
• Parity: even, odd, none, mark, space
• Signals: TxD, RxD, RTS, CTS, DTR, DSR, DCD, RI, GND
• 2 x ferrite core
Impedance: 25 MHz / 60 Ω,100 MHz / 111 Ω
• 3 x LED indicator
• Housing: plastic
• Operating temperature: -40 °C ~ 85 °C
• Cable length without connectors: ca. 2 m
System requirements
• Linux Kernel 3.3 or above
• Mac OS 12.4 or above
• Windows 8.1/8.1-64/10/10-64/11
• PC or laptop with a free USB Type-A port
Package content
• USB 2.0 to 1 x serial adapter
• Driver CD
• User manual
Safety instructions
• Protect the product against moisture
• Protect the product against direct sunlight
Driver Installation
1. Switch on your computer.
2. Connect the adapter to an available USB port of your computer.
3. The driver will be installed automatically. If this is not the case, please perform
the driver installation as follows:
4. Put the driver CD in the CD ROM drive.
5. Open device manager, then right click on the error port and click "Update
Driver".
6. Choose "Search for drivers on the computer".
7. Navigate to the appropriate folder of your operating system.
8. Tick "Include subfolders". Afterwards click on "Next".
9. The driver will now be installed.
10. You can now start to use the device.
Conguration système requise
• Linux Kernel 3.3 ou version ultérieure
• Mac OS 12.4 ou version ultérieure
• Windows 8.1/8.1-64/10/10-64/11
• PC ou portable avec un port USB Type-A disponible
Contenu de l’emballage
• Adaptateur USB 2.0 à 1 x série
• CD d’installation des pilotes
• Mode d’emploi
Instructions de sécurité
• Protéger le produit contre l’humidité
• Protéger le produit contre la lumière directe du soleil
Installation du pilote
1. Allumez votre ordinateur.
2. Connectez l'adaptateur USB sur un port USB disponible de votre ordinateur.
3. Le pilote s’installe automatiquement. Si tel n’est pas le cas, veuillez e󰀨ectuer
l’installation du pilote comme suit :
4. Mettez le CD de pilotes dans le lecteur de CD ROM.
5. Ouvrez le gestionnaire des périphériques, cliquez avec le bouton droit sur le
port avec une erreur puis cliquez sur "Mettre à jour le pilote".
6. Choisissez "Rechercher les pilotes sur l’ordinateur".
7. Naviguez jusqu'au dossier approprié de votre système d'exploitation.
8. Cochez "Inclure les sous-dossiers". Puis cliquez sur "Suivant".
9. Le pilote va maintenant être installé.
10. Vous pouvez à présent commencer à utiliser le périphérique.
English
Deutsch
Français
Español
Systemvoraussetzungen
• Linux Kernel 3.3 oder höher
• Mac OS 12.4 oder höher
• Windows 8.1/8.1-64/10/10-64/11
• PC oder Notebook mit einem freien USB Typ-A Port
Packungsinhalt
• USB 2.0 zu 1 x Seriell Adapter
• Treiber CD
• Bedienungsanleitung
Sicherheitshinweise
• Produkt vor Feuchtigkeit schützen
• Produkt vor direkter Sonneneinstrahlung schützen
Treiberinstallation
1. Schalten Sie den Computer ein.
2. Schließen Sie den Adapter an Ihrem freien USB Port des Computers an.
3. Der Treiber wird automatisch installiert. Sollte das nicht der Fall sein, so
führen Sie die Installation wie folgt aus:
4. Legen Sie die Treiber CD in Ihr Laufwerk ein.
5. Ö󰀨nen Sie den Geräte Manager und klicken Sie mit der rechten Maustaste
auf den nicht installierten Anschluss und aktivieren Sie "Treibersoftware
aktualisieren".
6. Wählen Sie "Auf dem Computer nach Treibersoftware suchen".
7. Navigieren Sie in den entsprechenden Ordner Ihres Betriebssystems.
8. Aktivieren Sie das Kontrollkästchen "Unterordner einbeziehen". Anschließend
klicken Sie auf "Weiter".
9. Der Treiber wird nun installiert.
10. Sie können nun das Gerät verwenden.
Requisitos del sistema
• Linux Kernel 3.3 o superior
• Mac OS 12.4 o superior
• Windows 8.1/8.1-64/10/10-64/11
• PC o equipo portátil con un puerto USB Tipo-A disponible
Contenido del paquete
• Adaptador USB 2.0 a 1 x serie
• Driver en CD
• Manual del usuario
Instrucciones de seguridad
• Proteja el producto contra el polvo
• Proteja el producto contra la luz solar directa
Instalación del controlador
1. Encienda su PC.
2. Conecte el adaptador USB a un puerto USB disponible de su equipo.
3. El controlador se instalará automáticamente. Si no es así, instale el
controlador conforme al siguiente procedimiento:
4. Inserte el CD del controlador en la unidad de CD ROM.
5. Abra el administrador de dispositivos. Luego haga clic con el botón derecho
en el puerto del error y haga clic en "Actualizar Controlador".
6. Elija "Buscar otros controladores en el equipo".
7. Navegue a la carpeta apropiada del sistema operativo.
8. Seleccione "Incluir subcarpetas". Haga clic en "Siguiente".
9. El controlador se instalará.
10. Ahora ya puede utilizar el dispositivo.
České
Polsku
Italiano
Svenska
Systémové požadavky
• Linux Kernel 3.3 nebo vyšší
• Mac OS 12.4 nebo vyšší
• Windows 8.1/8.1-64/10/10-64/11
• PC nebo notebook s volným USB Typ-A portem
Obsah balení
• USB 2.0 1 x sériový adaptér
• CD s ovladači
• Uživatelská příručka
Bezpečnostní pokyny
• Chraňte produkt před vlhkostí
• Chraňte produkt před přímým slunečním světlem
Instalace ovladače
1. Zapněte počítač.
2. Připojte adaptér k volnému USB portu počítače.
3. Ovladače budou nainstalovány automaticky. Pokud ne, proveďte instalaci
ovladačů manuálně dle následujících instrukcí:
4. Vložte CD s ovladači do mechaniky.
5. Otevřete Správce zařízení, klikněte pravým tlačítkem na chybný port a
klikněte na "Aktualizovat ovladač".
6. Zvolte "Search for drivers on the computer" (Hledat ovladače na počítači).
7. Přejděte do příslušné složky vašeho operačního systému.
8. Zaškrtněte "Include sub-folders" (Prohledávat podadresáře). Poté klikněte na
"Next" (Pokračovat).
9. Ovladač bude nainstalován.
10. Zařízení můžete začít používat.
Requisiti di sistema
• Linux Kernel 3.3 o superiore
• Mac OS 12.4 o superiore
• Windows 8.1/8.1-64/10/10-64/11
• PC o laptop con porta USB Tipo-A libera
Contenuto della confezione
• USB 2.0 per 1 x seriale adattatore
• CD contenente il driver
• Manuale utente
Istruzioni per la sicurezza
• Proteggere il prodotto dall'umidità
• Proteggere il prodotto dalla luce solare diretta
Installazione del driver
1. Accendere il computer.
2. Collegare l'adattatore ad una porta USB disponibile del computer.
3. Il driver viene installato automaticamente. In caso contrario, e󰀨ettuare
l'installazione del driver come segue:
4. Inserire il CD del driver nell'unità CD ROM.
5. Aprire la gestione del dispositivo, quindi fare clic con il tasto destro sulla porta
di errore e fare clic su "Aggiorna driver".
6. Selezionare "Cerca i driver sul computer".
7. Navigare alla cartella corretta del sistema operativo.
8. Selezionare "Includi sottocartelle". Quindi, fare clic su "Avanti".
9. Il driver a questo punto verrà installato.
10. Ora è possibile iniziare a utilizzare il dispositivo.
Wymagania systemowe
• Linux Kernel 3.3 lub nowszy
• Mac OS 12.4 lub nowszy
• Windows 8.1/8.1-64/10/10-64/11
• Komputer osobisty lub laptop z wolnym portem USB Typ-A
Zawartość opakowania
• Adapter USB 2.0 do 1 x COM port
• Sterowniki na CD
• Instrukcja obsługi
Instrukcje bezpieczeństwa
• Produkt należy zabezpieczyć przed wilgocią
• Produkt należy zabezpieczyć przed bezpośrednim światłem słonecznym
Instalacja sterownika
1. Włącz komputer.
2. Podłącz adapter do wolnego portu USB komputera.
3. Sterownik powinien zostać zainstalowany automatycznie. jeśli nie, wykonaj
instalację sterownika w następujący sposób:
4. Włóż płytę CD-ROM ze sterownikami.
5. Otwórz menedżera urządzeń, następnie kliknij prawym przyciskiem port błędu
i kliknij "Aktualizuj sterownik".
6. Wybierz "Wyszukaj sterowniki w komputerze".
7. Przejdź do odpowiedniego folderu systemu operacyjnego.
8. Zaznacz "Uwzględniaj podfoldery". Następnie kliknij polecenie "Dalej".
9. Zostanie teraz zainstalowany sterownik.
10. Teraz można już korzystać z urządzenia.
Systemkrav
• Linux Kernel 3.3 eller högre
• Mac OS 12.4 eller högre
• Windows 8.1/8.1-64/10/10-64/11
• Dator eller bärbar dator med en ledig USB Typ-A-port
Paketets innehåll
• USB 2.0 till 1 x seriell adapter
• CD-skiva med drivrutiner
• Bruksanvisning
Säkerhetsinstruktioner
• Skydda produkten mot fukt
• Skydda produkten mot direkt solljus
Installation av drivrutiner
1. Slå på datorn.
2. Anslut adaptern till en ledig USB-port på datorn.
3. Drivrutinen kommer att installeras automatiskt. Om detta inte är fallet, utför
installationen av drivrutinen enligt följande instruktioner:
4. Placera CD-skivan med drivrutinerna i CD-enheten.
5. Öppna enhetshanteraren, högerklicka på den felaktiga porten och klicka på
"Update Driver" (Uppdatera drivrutin).
6. Välj "Sök efter drivrutin på datorn".
7. Navigera till en lämplig mapp på ditt operativsystem.
8. Markera "Include sub-folders" (Inkludera undermappar). Klicka sedan på
"Next" (Nästa).
9. Nu installeras drivrutinen.
10. Du kan nu börja använda enheten.
Preduvjeti sustava
• Linux Kernel 3.3 ili noviji
• Mac OS 12.4 ili noviji
• Windows 8.1/8.1-64/10/10-64/11
• Osobno ili prijenosno računalo sa slobodnim USB Tipa-A priključkom
Sadržaj pakiranja
• USB 2.0 na 1 x serijski adapter
• CD s upravljačkim programom
• Korisnički priručnik
Sigurnosne upute
• Zaštitite proizvod od vlage
• Zaštitite proizvod od izravne sunčeve svjetlosti
Instalacija upravljačkog programa
1. Uključite vaše računalo.
2. Spojite adapter na slobodni USB priključak računala.
3. Upravljački program će se automatski instalirati. Ako to nije slučaj, molimo
provedite instalaciju upravljačkog programa na sljedeći način:
4. Umetnite CD s upravljačkim programom u CD ROM.
5. Otvorite upravitelj uređaja pa desnom tipkom kliknite na neispravni priključak,
a zatim na "Update Driver" (Ažuriraj upravljački program).
6. Odaberite "Traži upravljačke programe na računalu".
7. Dođite do odgovarajuće mape u operativnom sustavu.
8. Označite "Include sub-folders" (Uključi pod-mape). Nakon toga kliknite "Next"
(Dalje).
9. Sada će se instalirati upravljački program.
10. Sada možete početi s upotrebom uređaja.
Română
Magyar
Hrvatski
ελληνικά
Cerinte de sistem
• Linux Kernel 3.3 sau superior
• Mac OS 12.4 sau superior
• Windows 8.1/8.1-64/10/10-64/11
• PC sau laptop cu un port USB Tip-A liber
Pachetul contine
• USB 2.0 la 1 x seriale adaptoare
• CD cu drivere
• Manual de utilizare
Instrucţiuni de siguranţă
• Protejaţi produsul împotriva umidităţii
• Protejaţi produsul împotriva luminii directe a soarelui
Instalarea driverului
1. Porniţi computerul.
2. Conectaţi adaptorul la un port USB disponibil de pe computer.
3. Driverul se va instala automat. Dacă nu se întâmplă acest lucru, instalaţi
driverul după cum urmează:
4. Introduceţi CD-ul cu drivere în unitatea CD ROM.
5. Deschideţi Manager dispozitive şi apoi faceţi clic dreapta pe portul cu eroarea
şi faceţi clic pe "Actualizare driver".
6. Alegeţi "Căutare drivere pe computer".
7. Navigaţi la folderul corespunzător al sistemului dvs. de operare.
8. Bifaţi "Se includ subfolderele". Apoi, faceţi clic pe "Următorul".
9. Driverul va  instalat acum.
10. Acum puteți începe să utilizați dispozitivul.
Rendszerkövetelmények
• Linux Kernel 3.3 vagy újabb
• Mac OS 12.4 vagy újabb
• Windows 8.1/8.1-64/10/10-64/11
• PC vagy notebook számítógép szabad USB A-típusú-csatlakozóval
A csomag tartalma
• USB 2.0 - 1 x soros adapter
• CD lemez illesztőprogrammal
• Használati utasítás
Biztonsági óvintézkedések
• Óvja a terméket a nedvességtől.
• Óvja a terméket a közvetlen napsugárzástól.
Illesztőprogram telepítése
1. Kapcsolja be a számítógépet.
2. Csatlakoztassa az adaptert a számítógép egyik szabad USB-csatlakozójához.
3. Az illesztőprogram telepítése automatikusan végbemegy. Ha ez nem történik
meg, telepítse az illesztőprogramot az alábbiak szerint:
4. Helyezze az illesztőprogramot tartalmazó CD-lemezt a CD ROM meghajtóba.
5. Nyissa meg az eszközkezelőt, majd kattintson a jobb egérgombbal a
hibás portra, és kattintson az "Update Driver" (Illesztőprogram frissítése)
lehetőségre.
6. Válassza az "Illesztőprogramok keresése a számítógépen" lehetőséget.
7. Navigáljon az operációs rendszerben a megfelelő mappához.
8. Jelölje be az "Include sub-folders" (Almappák belefoglalása) lehetőséget.
Ezután kattintson a "Next" (Tovább) gombra.
9. Megtörténik az illesztőprogram telepítése.
10. Most már használatba veheti az eszközt.
Απαιτήσεις συστήματος
• Linux Kernel 3.3 ή νεότερο
• Mac OS 12.4 ή νεότερο
• Windows 8.1/8.1-64/10/10-64/11
• Η/Υ ή φορητός υπολογιστής με διαθέσιμη θύρα USB τύπου-A
Περιεχόμενα συσκευασίας
• Προσαρμογέας USB 2.0 σε 1 x σειριακό
• CD με πρόγραμμα οδήγησης
• Εγχειρίδιο χρήστη
Οδηγίες ασφάλειας
• Προστατεύστε το προϊόν από την υγρασία
• Προστατεύστε το προϊόν από την άμεση ηλιακή ακτινοβολία
Εγκατάσταση προγράμματος οδήγησης
1. Ενεργοποιήστε τον υπολογιστή σας.
2. Συνδέστε τον προσαρμογέα σε μια διαθέσιμη θύρα USB του υπολογιστή σας.
3. Η εγκατάσταση του προγράμματος οδήγησης θα γίνει αυτόματα. Εάν όχι,
εκτελέστε την εγκατάσταση του προγράμματος οδήγησης με τον τρόπο που
ακολουθεί:
4. Βάλτε το CD με πρόγραμμα οδήγησης στον οδηγό CD ROM.
5. Ανοίξτε τη διαχείριση συσκευής, κάντε δεξί κλικ στη θύρα σφάλματος και κάντε
κλικ στην επιλογή "Update Driver" (Ενημέρωση προγράμματος οδήγησης).
6. Επιλέξτε "Αναζήτηση για προγράμματα οδήγησης στον υπολογιστή".
7. Πλοηγηθείτε στον κατάλληλο φάκελο του λειτουργικού σας συστήματος.
8. Επιλέξτε "Include sub-folders" (Να συμπεριλαμβάνονται οι υπο-φάκελοι).
Κατόπιν κάντε κλικ στην επιλογή "Next" (Επόμενο).
9. Αυτή η μονάδα πλέον θα είναι εγκατεστημένη.
10. Μπορείτε πλέον να ξεκινήσετε να χρησιμοποιήσετε τη συσκευή σας.
Other DeLOCK Adapter manuals

DeLOCK 61478 User manual

DeLOCK

DeLOCK 61478 User manual

DeLOCK USB 2.0 to SVGA adapter User manual

DeLOCK

DeLOCK USB 2.0 to SVGA adapter User manual

DeLOCK 12461 User manual

DeLOCK

DeLOCK 12461 User manual

DeLOCK 90414 User manual

DeLOCK

DeLOCK 90414 User manual

DeLOCK 12771 User manual

DeLOCK

DeLOCK 12771 User manual

DeLOCK 61014 User manual

DeLOCK

DeLOCK 61014 User manual

DeLOCK 64225 User manual

DeLOCK

DeLOCK 64225 User manual

DeLOCK 62964 User manual

DeLOCK

DeLOCK 62964 User manual

DeLOCK 64191 User manual

DeLOCK

DeLOCK 64191 User manual

DeLOCK 61308 User manual

DeLOCK

DeLOCK 61308 User manual

DeLOCK 61425 User manual

DeLOCK

DeLOCK 61425 User manual

DeLOCK 64105 User manual

DeLOCK

DeLOCK 64105 User manual

DeLOCK 82001 User manual

DeLOCK

DeLOCK 82001 User manual

DeLOCK 61059 User manual

DeLOCK

DeLOCK 61059 User manual

DeLOCK 65904 User manual

DeLOCK

DeLOCK 65904 User manual

DeLOCK 61644 User manual

DeLOCK

DeLOCK 61644 User manual

DeLOCK 62736 User manual

DeLOCK

DeLOCK 62736 User manual

DeLOCK 61026 User manual

DeLOCK

DeLOCK 61026 User manual

DeLOCK 64074 User manual

DeLOCK

DeLOCK 64074 User manual

DeLOCK 62721 User manual

DeLOCK

DeLOCK 62721 User manual

DeLOCK 62408 User manual

DeLOCK

DeLOCK 62408 User manual

DeLOCK 65569 User manual

DeLOCK

DeLOCK 65569 User manual

DeLOCK 61022 User manual

DeLOCK

DeLOCK 61022 User manual

DeLOCK 61387 User manual

DeLOCK

DeLOCK 61387 User manual

Popular Adapter manuals by other brands

Lenovo 90W AC Adapter user guide

Lenovo

Lenovo 90W AC Adapter user guide

NETGEAR PA101 Specifications

NETGEAR

NETGEAR PA101 Specifications

Quatech MPAP-200 user manual

Quatech

Quatech MPAP-200 user manual

NETGEAR XAVB5501 user manual

NETGEAR

NETGEAR XAVB5501 user manual

FONESTAR WPL-403 quick start

FONESTAR

FONESTAR WPL-403 quick start

Gembird NIC-GX1 user manual

Gembird

Gembird NIC-GX1 user manual

ZyXEL Communications GN-600 Series quick guide

ZyXEL Communications

ZyXEL Communications GN-600 Series quick guide

LeCroy WS-DCADAP user manual

LeCroy

LeCroy WS-DCADAP user manual

Tenda U1 user guide

Tenda

Tenda U1 user guide

Ritter evolution digital quick start guide

Ritter

Ritter evolution digital quick start guide

Hainbuch T812 operating instructions

Hainbuch

Hainbuch T812 operating instructions

Intellinet 524438 user manual

Intellinet

Intellinet 524438 user manual

Saramonic MixMic manual

Saramonic

Saramonic MixMic manual

KRONAsteel D20 operating instructions

KRONAsteel

KRONAsteel D20 operating instructions

Advantek Networks AWN-11G-USB user guide

Advantek Networks

Advantek Networks AWN-11G-USB user guide

Bernafon TV-A Instructions for use

Bernafon

Bernafon TV-A Instructions for use

TRENDnet TVP-SP5G Specifications

TRENDnet

TRENDnet TVP-SP5G Specifications

Assmann IEEE 1394B user manual

Assmann

Assmann IEEE 1394B user manual

manuals.online logo
manuals.online logoBrands
  • About & Mission
  • Contact us
  • Privacy Policy
  • Terms and Conditions

Copyright 2025 Manuals.Online. All Rights Reserved.