DeLOCK 95273 User manual

Mini PCIe Card full size to
2 x Serial RS-232 D-Sub 9 pin
Product-No: 95273
User manual no: 95273-a
www.delock.com
User manual
Mode d’emploi
Uživatelská příručka
Manuale utente
Manual de utilizare
Korisnički priručnik
Bedienungsanleitung
Manual del usuario
Instrukcja obsługi
Bruksanvisning
Használati utasítás
Εγχειρίδιο χρήστη

-2-
English
Description
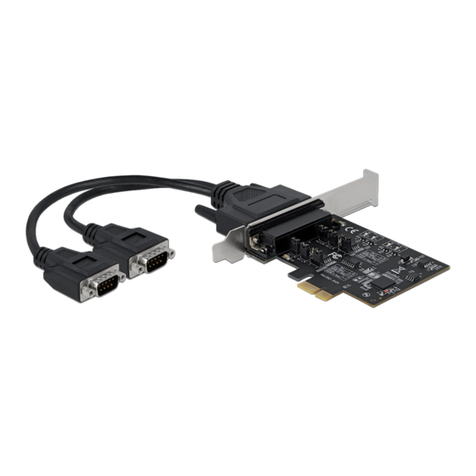
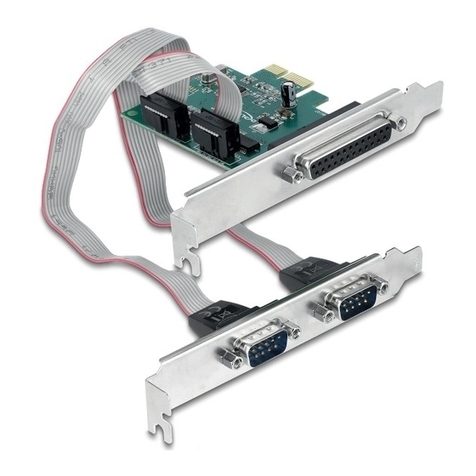
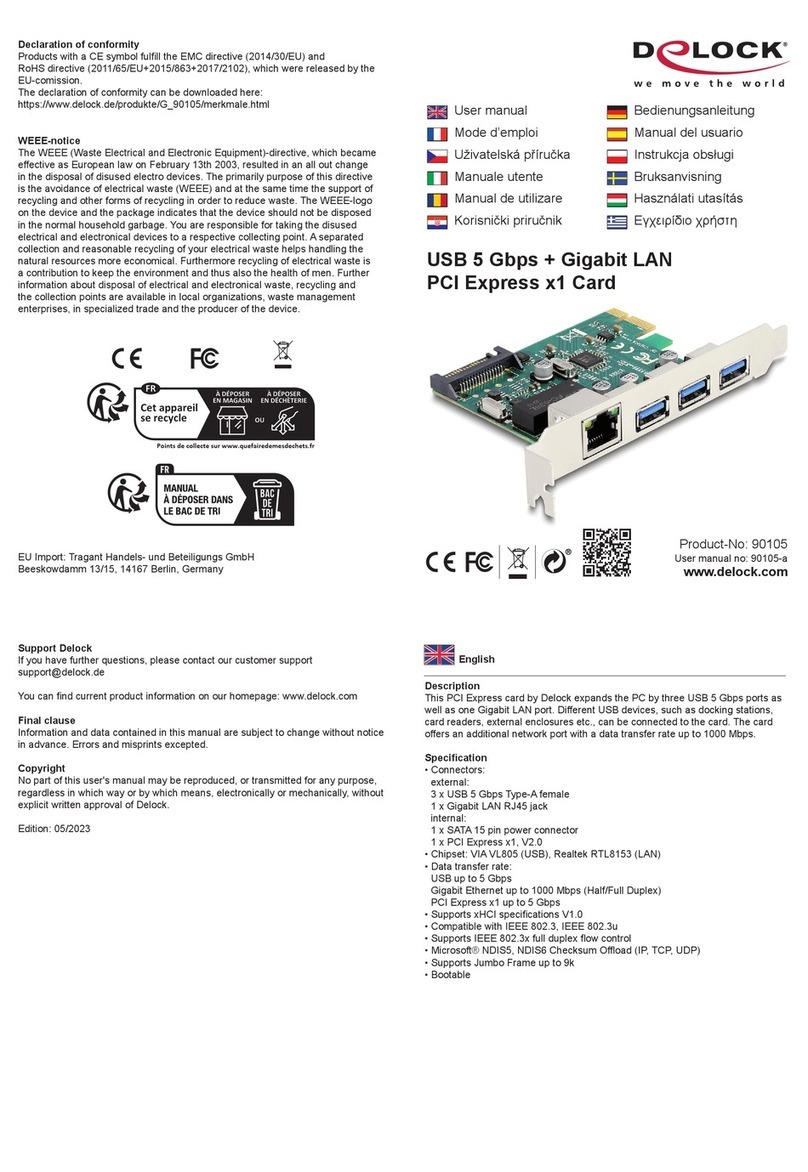
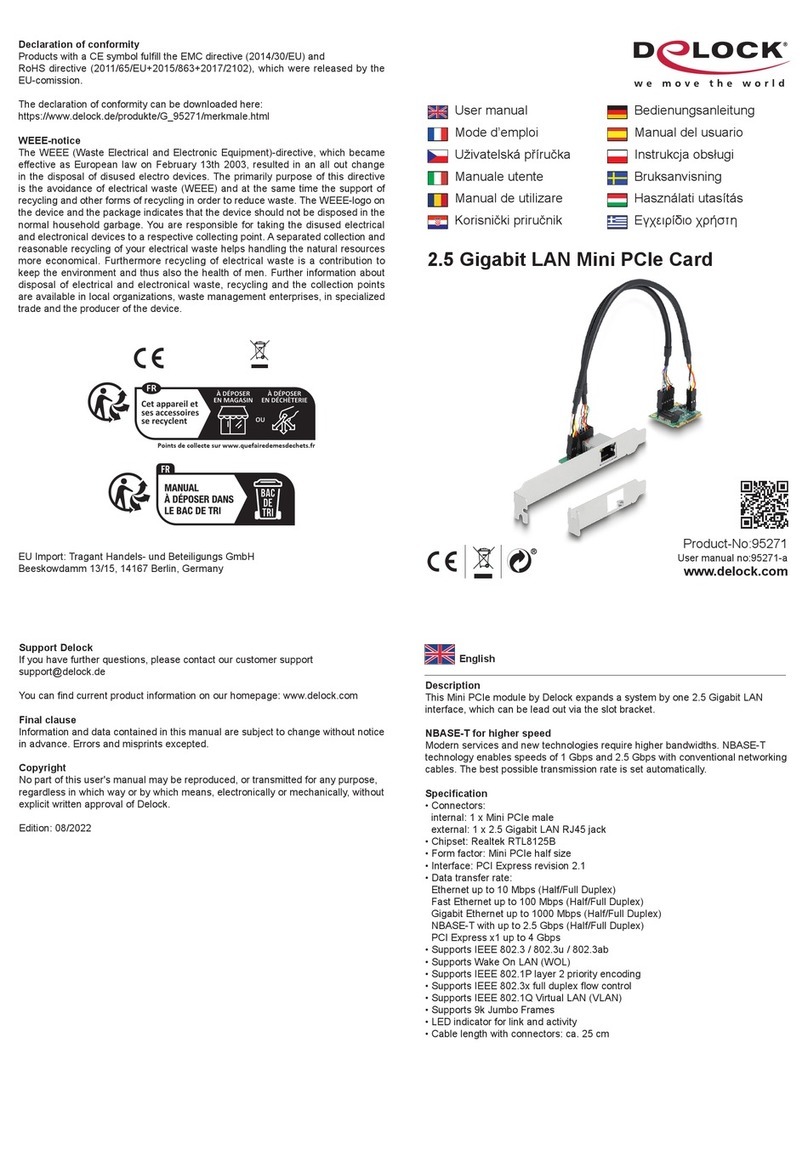
The Mini PCI Express card by Delock expands a PC by two external serial RS-
232 ports. Dierent devices such as scanner, protocol converter, IoT devices etc.
can be connected to this card.
Specication
• Connectors:
external: 2 x serial RS-232 DB9 male with nuts
internal: 1 x Mini PCI Express, Rev. 1.1
• Chipset: Moschip MCS9901
• Form factor: Mini PCIe full size
• Data transfer rate up to 460.8 Kbps
• Compatible with 16C450 / 16C550 / 16C650 UART
• FIFO: 256 byte
• Cable length incl. connectors: ca. 30 cm
System requirements
• Windows 8.1/8.1-64/10/10-64/11
• Motherboard with a free Mini PCIe slot with a PCIe interface
Package content
• Mini PCIe module
• 1 x slot bracket with two serial ports
• Driver CD
• User manual
Safety instructions
• Protect the product against moisture
• Avoid anti-static electricity when installing the product
Hardware Installation
Note:
Make sure your motherboard has a Mini PCIe port with PCIe interface.
1. Turn o your PC and unplug the power cord.
2. Open the housing.
3. Connect the serial cables to the module.
4. If you want to lead out the serial ports, please remove the slot brackets from
the required slot. Fix the slot brackets to the case.

-3-
English
5. Insert the module into a free Mini PCIe slot and screw the module. (dierent
motherboards may have dierent xing options)
6. Now connect your devices to the module.
7. Reattach the housing and connect the power cord to the AC adapter.
Driver Installation
1. Switch on your computer.
2. Put the driver CD in the CD ROM drive.
3. Afterwards, Windows displays the Hardware wizard.
4. Follow the instructions of the driver installation.
5. In case the assistant should not start automatically, please start the Setup.
exe from the driver CD.
6. Navigate to: CD-drive\Moschip\MCS99xx and choose by double clicking the
le StnSetup.exe.
7. Follow the instructions of the driver installation.
8. Restart your system after the installation.
9. After restart you can start using the device immediately.
Support Delock
If you have further questions, please contact our customer support
You can nd current product information on our homepage: www.delock.com
Final clause
Information and data contained in this manual are subject to change without
notice in advance. Errors and misprints excepted.
Copyright
No part of this user manual may be reproduced, or transmitted for any purpose,
regardless in which way or by any means, electronically or mechanically, without
explicit written approval of Delock.
Edition: 03/2023

-4-
Deutsch
Kurzbeschreibung
Die Mini PCI Express Karte von Delock erweitert den PC um zwei externe
Serielle RS-232 Ports. Es können verschiedene Geräte, wie z. B. Scanner,
Protokoll-Konverter, IoT Geräte etc., an die Karte angeschlossen werden.
Spezikation
• Anschlüsse:
extern: 2 x Seriell RS-232 DB9 Stecker mit Muttern
intern: 1 x Mini PCI Express, Rev. 1.1
• Chipsatz: Moschip MCS9901
• Formfaktor: Mini PCIe full size
• Datentransferrate bis zu 460,8 Kbps
• Kompatibel mit 16C450 / 16C550 / 16C650 UART
• FIFO: 256 Byte
• Kabellänge inkl. Anschlüsse: ca. 30 cm
Systemvoraussetzungen
• Windows 8.1/8.1-64/10/10-64/11
• Mainboard mit einem freien Mini PCIe Steckplatz mit PCIe Schnittstelle
Packungsinhalt
• Mini PCIe Modul
• 1 x Slotblech mit 2 seriellen Anschlüssen
• Treiber CD
• Bedienungsanleitung
Sicherheitshinweise
• Produkt vor Feuchtigkeit schützen
• Vermeiden Sie antistatische Auadung beim Einbau des Produktes
Hardwareinstallation
Hinweis:
Achten Sie darauf, dass Ihr Mainboard einen Mini PCIe Port mit PCIe Schnittstelle
zur Verfügung stellt.
1. Schalten Sie Ihren PC aus, ziehen Sie das Netzkabel.
2. Önen Sie das Gehäuse.
3. Schließen Sie die seriellen Kabel an das Modul an.

-5-
Deutsch
4. Wenn Sie die Seriellen Schnittstellen nach außen führen wollen, so
entfernen Sie die Slotbleche vom gewünschten freien Schacht. Schrauben
Sie dann die Slotbleche am Gehäuse fest.
5. Stecken Sie das Modul in den freien Mini PCIe Slot und schrauben Sie
das Modul fest. (unterschiedliche Mainboards haben evtl. eine andere
Befestigungsmöglichkeit)
6. Verbinden Sie nun Ihre Geräte mit dem Modul.
7. Schließen Sie das Gehäuse wieder und verbinden Sie das Netzkabel mit
dem Netzteil.
Treiberinstallation
1. Schalten Sie den Computer ein.
2. Legen Sie die Treiber CD in Ihr Laufwerk ein.
3. Danach erscheint von Windows der Hardware Assistent.
4. Folgen Sie nun den Anweisungen der Treiberinstallation.
5. Sollte der Assistent nicht automatisch starten, so starten Sie die Setup.exe
von der Treiber CD.
6. Navigieren Sie dann zu: CD-Laufwerk\Moschip\MCS99xx und wählen Sie
per Doppelklick die Datei StnSetup.exe aus.
7. Folgen Sie nun den Anweisungen der Treiberinstallation.
8. Starten Sie nach der Installation Ihr System neu.
9. Nach dem Neustart können Sie das Gerät verwenden.
Support Delock
Bei weitergehenden Supportanfragen wenden Sie sich bitte an
Aktuelle Produktinformationen nden Sie auf unserer Homepage: www.delock.de
Schlussbestimmung
Die in diesem Handbuch enthaltenen Angaben und Daten können ohne vorherige
Ankündigung geändert werden. Irrtümer und Druckfehler vorbehalten.
Copyright
Ohne ausdrückliche schriftliche Erlaubnis von Delock darf kein Teil dieser
Bedienungsanleitung für irgendwelche Zwecke vervielfältigt oder übertragen
werden, unabhängig davon, auf welche Art und Weise oder mit welchen Mitteln,
elektronisch oder mechanisch, dies geschieht.
Stand: 03/2023
-6-
Français
Conguration système requise
• Windows 8.1/8.1-64/10/10-64/11
• Carte mère avec un port libre Mini PCIe avec interface PCIe
Instructions de sécurité
• Protéger le produit contre l’humidité
• Evitez l’électricité électrostatique lorsque vous installez le produit
Installation matérielle
Remarque :
Assurez-vous que votre carte mère dispose d’un port Mini PCIe avec interface
PCIe.
1. Eteignez votre PC et débranchez le cordon d'alimentation.
2. Ouvrez le boîtier.
3. Connectez les câbles série au module.
4. Si vous souhaitez sortir les ports série, veuillez retirer les supports
d'emplacement de l'emplacement souhaité. Fixez les supports
d'emplacement au boîtier.
5. Insérez le module dans une fente Mini PCIe libre et vissez le module.
(diérentes cartes mères peuvent avoir des options de xation diérentes)
6. Maintenant, connecter vos appareils au module.
7. Remontez le boîtier et branchez le cordon d'alimentation et l'adaptateur AC.
Installation du pilote
1. Allumez votre ordinateur.
2. Mettez le CD de pilotes dans le lecteur de CD ROM.
3. Ensuite, Windows ache l'assistant matériel.
4. Suivez les instructions d’installation du pilote.
5. Si l’assistant ne démarre pas automatiquement, faites démarrer le Setup.exe
depuis le CD d’installation.
6. Naviguez vers : CD-drive\Moschip\MCS99xx et choisissez en double-
cliquant sur le chier StnSetup.exe.
7. Suivez les instructions d’installation du pilote.
8. Redémarrez votre système après l’installation.
9. Après redémarrage vous pouvez immédiatement commencer à utiliser le
périphérique.

-7-
Español
Requisitos del sistema
• Windows 8.1/8.1-64/10/10-64/11
• Placa base con un puerto Mini PCIe disponible con interfaz PCIe
Instrucciones de seguridad
• Proteja el producto contra el polvo
• Evite la electricidad antiestática al instalar el producto
Hardware Instalación
Nota:
Asegúrese de que la placa base tiene un puerto Mini PCIe con interfaz PCIe.
1. Apague su equipo y desconecte el cable de alimentación.
2. Abra la carcasa.
3. Conecte los cables serie al módulo.
4. Si desea sacar los puertos serie, quite los soportes de ranura de la ranura
requerida. Fije los soportes de ranura a la carcasa.
5. Inserte el modelo en una ranura Mini PCIe disponible y atorníllelo. (cada
placa base puede tener diferentes opciones de jación)
6. Ahora conecte sus dispositivos al módulo.
7. Vuelva a colocar la carcasa y conecte el adaptador de CA del cable de
alimentación.
Instalación del controlador
1. Encienda su PC.
2. Inserte el CD del controlador en la unidad de CD ROM.
3. A continuación, Windows mostrará el asistente para hardware.
4. Siga las instrucciones de instalación del controlador.
5. Si el ayudante no se inicia automáticamente, inicie el archivo Setup.exe
desde el CD de los controladores.
6. Desplácese a: Unidad_de_CD\Moschip\MCS99xx y elija el archivo StnSetup.
exe haciendo doble clic en él.
7. Siga las instrucciones de instalación del controlador.
8. Reinicie el sistema después de la instalación.
9. Después del reinicio el dispositivo estará listo para su uso.

-8-
České
Systémové požadavky
• Windows 8.1/8.1-64/10/10-64/11
• Základní deska s volným Mini PCIe portem s PCIe rozhraním
Bezpečnostní pokyny
• Chraňte produkt před vlhkostí
• Při instalaci produktu se vyvarujte antistatické elektřině
Instalace hardware
Poznámka:
Ujistěte se, že základní deska má Mini PCIe port s PCIe rozhraním
1. Vypněte PC a odpojte přívodní šňůru napájení.
2. Otevřte kryt PC.
3. Připojte sériové kabely k modulu.
4. Jestli chcete vyvést sériové porty, odstraňte prosím záslepky z požadovaných
slotů. Připevněte záslepky k case.
5. Zasuňte modul do volného Mini PCIe slotu a přišroubujte. (různé desky
mohou mít různá uchycení modulů)
6. Nyní připojte vaše zařízení k modulu.
7. Nasaďte zpět kryt a připojte napájecí šňůru.
Instalace ovladače
1. Zapněte počítač.
2. Vložte CD s ovladači do mechaniky.
3. Windows zobrazí hlášku Pomocníka instalace.
4. Pokračujte podle instrukcí pro instalaci ovladače.
5. V případě, že se nespustí Pomocník instalace automaticky, spusťte prosím
soubor Setup.exe z přiloženého CD s ovladači.
6. Přejděte na: CD-mechanika\Moschip\MCS99xx a vyberte dvojklikem na
soubor StnSetup.exe.
7. Pokračujte podle instrukcí pro instalaci ovladače.
8. Po dokončení instalace restartujte počítač.
9. Po restartu je možné disk ihned používat.

-9-
Polsku
Wymagania systemowe
• Windows 8.1/8.1-64/10/10-64/11
• Płyta główna z jednym wolnym portem Mini PCIe z interfejsem PCIe
Instrukcje bezpieczeństwa
• Produkt należy zabezpieczyć przed wilgocią
• Podczas instalacji produktu należy unikać elektryczności statycznej
Instalacja sprzętu
Uwaga:
Upewnij się, że na płycie głównej znajduje się port Mini PCIe ze złączem PCIe.
1. Wyłącz komputer i odłącz kabel zasilania.
2. Otwórz obudowę.
3. Podłącz przewody szeregowe do modułu.
4. Jeżeli porty szeregowe mają być wyprowadzone, zdejmij obudowy gniazd z
odpowiednich gniazd. Przymocuj obudowy gniazd do obudowy komputera.
5. Włóż moduł do wolnego złącza Mini PCIe i przykręć go. (odmienne płyty
główne mają różne opcje mocowania)
6. Podłączyć urządzenia do modułu.
7. Zamknij z powrotem obudowę i podłącz kabel do zasilacza.
Instalacja sterownika
1. Włącz komputer.
2. Włóż płytę CD-ROM ze sterownikami.
3. Następnie Windows wyświetli kreatora dodawania nowego sprzętu.
4. Postępuj zgodnie z instrukcjami programu instalacyjnego.
5. Jeśli moduł pomocy nie uruchomi się automatycznie, uruchom plik Setup.exe
na płycie CD ze sterownikami.
6. Przejdź do: CD-drive\Moschip\MCS99xx i kliknij dwukrotnie plik StnSetup.
exe.
7. Postępuj zgodnie z instrukcjami programu instalacyjnego.
8. Po instalacji uruchom ponownie system.
9. Po restarcie można od razu rozpocząć korzystanie z urządzenia.

-10-
Italiano
Requisiti di sistema
• Windows 8.1/8.1-64/10/10-64/11
• Scheda principale con uno slot Mini PCIe disponibile con un'interfaccia PCIe
Istruzioni per la sicurezza
• Proteggere il prodotto dall'umidità
• Evitare l'elettricità antistatica durante l'installazione del prodotto
Installazione dell'hardware
Nota:
Assicurarsi che la scheda principale disponga di una porta Mini PCIe con
interfaccia PCIe.
1. Spegnere il PC e scollegare il cavo di alimentazione.
2. Aprire l'alloggiamento.
3. Collegare i cavi seriali al modulo.
4. Se si desidera estrarre le porte seriali, si prega di rimuovere le stae dello
slot dallo slot in questione. Fissare le stae dello slot alla custodia.
5. Inserire il modulo in uno slot Mini PCIe disponibile e avvitare il modulo.
(Diverse schede principali potrebbero avere dierenti opzioni di ssaggio)
6. Ora collegare i dispositivi al modulo.
7. Reinserire l'alloggiamento e collegare il cavo di alimentazione all'adattatore
CA.
Installazione del driver
1. Accendere il computer.
2. Inserire il CD del driver nell'unità CD ROM.
3. Successivamente, Windows visualizza la procedura guidata hardware.
4. Attenersi alle istruzioni di installazione del driver.
5. In caso l'assistente non si avvii automaticamente, si prega di avviare il Setup.
exe dall'unità CD.
6. Andare su: CD-drive\Moschip\MCS99xx e selezionare facendo doppio clic
sul le StnSetup.exe.
7. Attenersi alle istruzioni di installazione del driver.
8. Ravviare il sistema dopo l'installazione.
9. Dopo il riavvio, è possibile iniziare ad utilizzare il dispositivo immediatamente.

-11-
Svenska
Systemkrav
• Windows 8.1/8.1-64/10/10-64/11
• Moderkort med en ledig Mini PCIe-plats med ett PCIe-gränssnitt
Säkerhetsinstruktioner
• Skydda produkten mot fukt
• Undvik antistatisk elektricitet när du installerar produkten
Hårdvaruinstallation
Obs:
Se till att ditt moderkort har en Mini PCIe-port med PCIe-gränssnitt.
1. Stäng av datorn och koppla ifrån strömsladden.
2. Öppna höljet.
3. Anslut de seriella kablarna till modulen.
4. Om du vill leda ut de seriella portar, ta bort kortplatserna från deras avsedda
plats. Fixera kortplatserna till höljet.
5. Anslut modulen till en ledig Mini PCIe-plats och skruva fast modulen. (olika
moderkort har olika xeringsalternativ)
6. Anslut sedan dina enheter till modulen.
7. Sätt tillbaka höljet och anslut strömsladden till eluttaget.
Installation av drivrutiner
1. Slå på datorn.
2. Placera CD-skivan med drivrutinerna i CD-enheten.
3. Efteråt visar Windows maskinvaruguiden.
4. Följ instruktionerna för drivrutinsinstallation.
5. Om assistenten inte startas automatiskt, kör "Setup.exe" från CD-skivan med
drivrutiner.
6. Navigera till: CD-drive\Moschip\MCS99xx och välj genom att dubbelklicka på
len StnSetup.exe.
7. Följ instruktionerna för drivrutinsinstallation.
8. Starta om systemet efter installationen.
9. Efter omstart kan du börja använda enheten direkt.

-12-
Română
Cerinte de sistem
• Windows 8.1/8.1-64/10/10-64/11
• Placă de bază cu fantă Mini PCIe liberă cu interfaţă PCIe
Instrucţiuni de siguranţă
• Protejaţi produsul împotriva umidităţii
• Evitaţi electricitatea antistatică atunci când instalaţi produsului
Instalarea componentelor hardware
Notă:
Asiguraţi-vă că placa de bază are un port Mini PCIe cu interfaţă PCIe.
1. Închideţi PC-ul şi deconectaţi cablul de alimentare.
2. Deschideţi carcasa.
3. Conectaţi cablurile seriale la modul.
4. Dacă doriți să scoateți porturile seriale, eliminați consolele de slot din slotul
necesar. Fixați consolele de xare în carcasă.
5. Introduceţi modulul într-o fantă Mini PCIe liberă şi înşurubaţi modulul.
(diversele plăci de bază pot avea opţiuni diferite de xare)
6. Acum, conectați dispozitivele la modul.
7. Reataşaţi carcasa şi conectaţi cablul de alimentare la adaptorul de c.a.
Instalarea driverului
1. Porniţi computerul.
2. Introduceţi CD-ul cu drivere în unitatea CD ROM.
3. După aceea, Windows va aşa expertul Hardware.
4. Urmaţi instrucţiunile de instalare a driverului.
5. Dacă asistentul nu pornește automat, porniți Setup.exe de pe CD-ul cu
drivere.
6. Navigaţi la: CD-drive\Moschip\MCS99xx şi alegeţi făcând dublu clic pe
şierul StnSetup.exe.
7. Urmaţi instrucţiunile de instalare a driverului.
8. Reporniţi sistemul după instalare.
9. După repornire, puteţi începe să utilizaţi dispozitivul imediat.

-13-
Magyar
Rendszerkövetelmények
• Windows 8.1/8.1-64/10/10-64/11
• Alaplap egy szabad Mini PCIe-nyílással és PCIe-csatlakozóval
Biztonsági óvintézkedések
• Óvja a terméket a nedvességtől.
• Kerülje az elektrosztatikus kisüléseket a termék üzembe helyezése közben
Hardvertelepítés
Megjegyzés:
Győződjön meg arról, hogy egy olyan Mini PCIe-porttal rendelkezik, amely PCIe-
csatolóval van ellátva.
1. Kapcsolja ki a PC-t és húzza ki a hálózati tápkábelt.
2. Nyissa ki a számítógépházat.
3. Csatlakoztassa a soros kábeleket a modulhoz.
4. Ha szeretné kivezetni a soros portokat, távolítsa el a nyíláskereteket a
szükséges nyílásról. Rögzítse a nyíláskereteket a házhoz.
5. Helyezze be a modult egy szabad Mini PCIe-nyílásba, és rögzítse csavarral.
(A különböző alaplapok különféle rögzítési módszereket igényelhetnek.)
6. Most csatlakoztassa eszközeit a modulhoz.
7. Szerelje vissza a ház fedelét és csatlakoztassa a tápkábelt a tápegységhez.
Illesztőprogram telepítése
1. Kapcsolja be a számítógépet.
2. Helyezze az illesztőprogramot tartalmazó CD-lemezt a CD ROM meghajtóba.
3. Ezt követően a Windows megjeleníti a Hardver varázslót.
4. Kövesse az illesztőprogram telepítésének útmutatásait.
5. Ha az asszisztens nem indul el automatikusan, indítsa el a Setup.exe fájlt a
meghajtó CD-ről.
6. Lépjen ide: CD-drive\Moschip\MCS99xx és jelölje ki a StnSetup.exe fájlon
végzett dupla kattintással.
7. Kövesse az illesztőprogram telepítésének útmutatásait.
8. A telepítést követően indítsa újra a rendszert.
9. A rendszerindítást követően azonnal használatba veheti az eszközt.

-14-
Hrvatski
Preduvjeti sustava
• Windows 8.1/8.1-64/10/10-64/11
• Matična ploča sa slobodnim Mini PCIe utorom i PCIe sučeljem
Sigurnosne upute
• Zaštitite proizvod od vlage
• Izbjegavajte statički elektricitet kod ugradnje proizvoda
Ugradnja hardvera
Napomena:
Provjerite da se na matičnoj ploči nalazi Mini PCIe priključak s PCIe sučeljem.
1. Isključite računalo i odvojite kabel za napajanje.
2. Otvorite kućište.
3. Spojite serijske kabele na modul.
4. Ako želite izvesti serijske priključke, uklonite utorske nosače iz željenog
utora. Pričvrstite utorske nosače na kućište.
5. Uložite modul u slobodni utor za Mini PCIe i pričvrstite modul vijkom. (razne
matične ploče mogu imati razne opcije za pričvršćenje)
6. Sada priključite vaše uređaje na modul.
7. Vratit kućište i ponovno priključite kabel za napajanje u AC adapter.
Instalacija upravljačkog programa
1. Uključite vaše računalo.
2. Umetnite CD s upravljačkim programom u CD ROM.
3. Nakon toga, Windows će prikazati čarobnjak za hardver.
4. Slijedite upute za instalaciju upravljačkog programa.
5. Ako se pomoćnik ne pokrene automatski, pokrenite Setup.exe na CD-u s
upravljačkim programom.
6. Navigacija do: CD-drive\Moschip\MCS99xx i duplim klikom odabir datoteke
StnSetup.exe.
7. Slijedite upute za instalaciju upravljačkog programa.
8. Nakon instalacije ponovno pokrenite sustav.
9. Nakon ponovnog pokretanja možete odmah početi koristiti uređaj.

-15-
ελληνικά
Απαιτήσεις συστήματος
• Windows 8.1/8.1-64/10/10-64/11
• Μητρική με ελεύθερη υποδοχή Mini PCIe με διασύνδεση PCIe
Οδηγίες ασφάλειας
• Προστατεύστε το προϊόν από την υγρασία
• Αποφύγετε αντιστατικό ηλεκτρισμό όταν εγκαθιστάτε το προϊόν
Εγκατάσταση υλικού
Σημείωση:
Βεβαιωθείτε ότι η μητρική πλακέτα σας διαθέτει υποδοχή Mini PCIe με διεπαφή
PCIe.
1. Σβήστε τον Η/Υ σας και βγάλτε το καλώδιο τροφοδοσίας από την πρίζα.
2. Ανοίξτε το περίβλημα.
3. Συνδέστε τα σειριακά καλώδια στη μονάδα.
4. Εάν θέλετε να βγάλετε έξω τις σειριακές υποδοχές, αφαιρέστε τα bracket
θυρών από την απαραίτητη θύρα. Στερεώστε τα bracket θυρών στη θήκη.
5. Εισάγετε τη μονάδα σε μια ελεύθερη θύρα Mini PCIe και βιδώστε τη. (για
διαφορετικές μητρικές πλακέτες ενδέχεται να υπάρχουν διαφορετικές
επιλογές στερέωσης)
6. Τώρα συνδέστε τις συσκευές σας στην ενότητα.
7. Συνδέστε ξανά το περίβλημα και συνδέστε το καλώδιο τροφοδοσίας στην
πρίζα ρεύματος.
Εγκατάσταση προγράμματος οδήγησης
1. Ενεργοποιήστε τον υπολογιστή σας.
2. Βάλτε το CD με πρόγραμμα οδήγησης στον οδηγό CD ROM.
3. Έπειτα, τα Windows εμφανίζουν τον οδηγό υλικού.
4. Ακολουθήστε τις οδηγίες εγκατάστασης του οδηγού.
5. Σε περίπτωση που ο οδηγός βοήθειας δεν ξεκινήσει αυτόματα, ξεκινήστε το
Setup.exe από τον οδηγό CD.
6. Περιηγηθείτε στη διαδρομή: CD-drive\Moschip\MCS99xx και επιλέξτε με
διπλό κλικ το αρχείο StnSetup.exe.
7. Ακολουθήστε τις οδηγίες εγκατάστασης του οδηγού.
8. Κάντε επανεκκίνηση του συστήματός σας μετά την εγκατάσταση.
9. Μετά την επανεκκίνηση, μπορείτε να ξεκινήσετε να χρησιμοποιείτε τη
συσκευή αμέσως.

Declaration of conformity
Products with a CE symbol fulll the EMC directive (2014/30/EU) and
RoHS directive (2011/65/EU+2015/863+2017/2102), which were released by the
EU-comission.
The declaration of conformity can be downloaded here:
https://www.delock.de/produkte/G_95273/merkmale.html
WEEE-notice
The WEEE (Waste Electrical and Electronic Equipment)-directive, which became
eective as European law on February 13th 2003, resulted in an all out change
in the disposal of disused electro devices. The primarily purpose of this directive
is the avoidance of electrical waste (WEEE) and at the same time the support of
recycling and other forms of recycling in order to reduce waste. The WEEE-logo
on the device and the package indicates that the device should not be disposed
in the normal household garbage. You are responsible for taking the disused
electrical and electronical devices to a respective collecting point. A separated
collection and reasonable recycling of your electrical waste helps handling the
natural resources more economical. Furthermore recycling of electrical waste is
a contribution to keep the environment and thus also the health of men. Further
information about disposal of electrical and electronical waste, recycling and
the collection points are available in local organizations, waste management
enterprises, in specialized trade and the producer of the device.
EU Import: Tragant Handels- und Beteiligungs GmbH
Beeskowdamm 13/15, 14167 Berlin, Germany
Table of contents
Languages:
Other DeLOCK PCI Card manuals

DeLOCK
DeLOCK 89219 User manual

DeLOCK
DeLOCK 88204 User manual

DeLOCK
DeLOCK 90413 User manual

DeLOCK
DeLOCK 95271 User manual

DeLOCK
DeLOCK 89133 User manual

DeLOCK
DeLOCK 89243 User manual

DeLOCK
DeLOCK 90155 User manual

DeLOCK
DeLOCK 47028 User manual

DeLOCK
DeLOCK 89641 User manual

DeLOCK
DeLOCK 88206 User manual

DeLOCK
DeLOCK 89074 User manual

DeLOCK
DeLOCK 89379 User manual

DeLOCK
DeLOCK 89040 User manual

DeLOCK
DeLOCK 89016 User manual

DeLOCK
DeLOCK 90061 User manual

DeLOCK
DeLOCK 89125 User manual

DeLOCK
DeLOCK 89555 User manual

DeLOCK
DeLOCK 89135 User manual

DeLOCK
DeLOCK 88615 User manual

DeLOCK
DeLOCK 89999 User manual