manuals.online logo
Brands
  1. Home
  2. •
  3. Brands
  4. •
  5. DeLonghi
  6. •
  7. Heater
  8. •
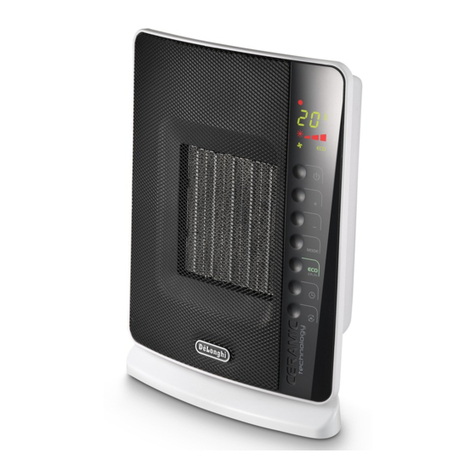
  9. DeLonghi HCX9120E User manual

DeLonghi HCX9120E User manual

8
IMPORTANT WARNINGS
Safety warnings
Important!
- This appliance can be used by children
aged from 8 years and above and persons
with reduced physical, sensory or mental
capabilities or lack of experience and
knowledge if they have been given
supervision or instruction concerning
use of the appliance in a safe way
and understand the hazards involved.
Childrenshallnotplaywiththeappliance.
Cleaning and user maintenance shall not
bemadebychildrenwithoutsupervision.
- Children of less than 3 years should
be kept away unless continuously
supervised.
- Children aged from 3 years and less
than 8 years shall only switch on/
o the appliance provided that it has
been placed or installed in its intended
normal operating position and they have
been given supervision or instruction
concerning use of the appliance in a
safe way and understand the hazards
involved. Children aged from 3 years
and less than 8 years shall not plug in,
regulate and clean the appliance or
perform user maintenance. CAUTION —
Some parts of this product can become
very hot and cause burns. Particular
attention has to be given where children
and vulnerable people are present.
- WARNING: In order to avoid
overheating, never under
any circumstances cover the
appliances during operation, as this
would lead to dangerous overheating.
- The appliance must not be located
immediately below a xed socket-outlet.
- When the heater is used with feet do
not use in the vicinity of bathtubs, wash
basins, showers, sinks and swimming
pools.
- If you intend to x your appliance to the
wall, make sure that the switch or other
control devices are not within reach of
persons in the bath or shower.
- If the power cable has been damaged, it
must be replaced by the manufacturer
or the technical service centre or by a
qualied person so as to avoid all risks.
- ATTENTION: in order to avoid any danger
caused by an accidental resetting of the
safety system, this appliance must not
be powered through an external timer.
-
Do not use the appliance in small rooms
when they are occupied by persons that
are not capable of leaving the room,
unless constant supervision is provided.
Please note:
- Never use the heater to dry laundry.
- Never place the power cable on top of the heater while it is
hot.
- We recommend that you not place the heater in a draught,
because strong draughts of air may adversely aect the
equipment’s operational eciency.
- Only use the heater in an upright position.
- The heater must be positioned at least 80cm from furniture
or other objects.
- The rst time you use the appliance, operate it of at least 15
minutes with the thermostat at maximum to eliminate the
“new”smell. A little smoke due to the protective substances
applied to the heating element before transport may be
given o.
- Do not position the appliance on long hair carpets, in order
to avoid obstruction to the air intake grille located under it.
- Do not obstruct the hot air outlet grilles or the air intake
grille on the bottom of the appliance.
- Position the appliance so that the plug and the outlet can
be easily reached even after installation.
- Do not use the appliance in rooms less than 4m2in
area.
- A tip over safety device turns the appliance o if it falls
over or is positioned inappropriately in such a way as to
jeopardise safety. The appliance emits a beep and a dot
9
ashes on the display. The appliance resumes operation
a few seconds after being placed in an upright position
again.
See troubleshooting session. See the following
paragraph: "troubleshooting".
- The appliance is tted with a safety device which will
switch the appliance o in case of accidental overheating.
To reset, disconnect the plug from the power socket for a
few minutes, remove the cause of overheating then plug
the appliance in again. If this abnormal situation happens
several times, please contact the customer service.
Danger of burns!!
- The use of an extension lead is not recommended, as
overheating of the extension lead may occur during the
operation of the heater.
The appliance complies with the following EC directives:
- Low Voltage Directive 2006/95/EC and subsequent
amendments;
- EEC Directive 2004/108 on electromagnetic compatibility
(EMC) and subsequent amendments;
Disposing of the appliance
In compliance with European directive 2002/96/EC,
the appliance must not be disposed of with household
waste, but taken to an authorised waste separation and
recycling centre.
INTRODUCTION
Thank you for choosing a De’Longhi product. Please take a few
moments to read the instructions to avoid risks or damage to the
appliance.
Symbols used in these instructions
Important warnings are identied by the symbols below.
It is important to respect the warnings. Failure to respect the
warnings could lead to electric shock, serious injury, burns, re
or damage to the appliance.
Important!
Failure to observe the warning could result in injury or damage
to the appliance.
Danger of burns!!
Failure to observe the warning could result in burns or scalds.
Please note:
This symbol indicates recommendations and important
information for the user.
DESCRIPTION
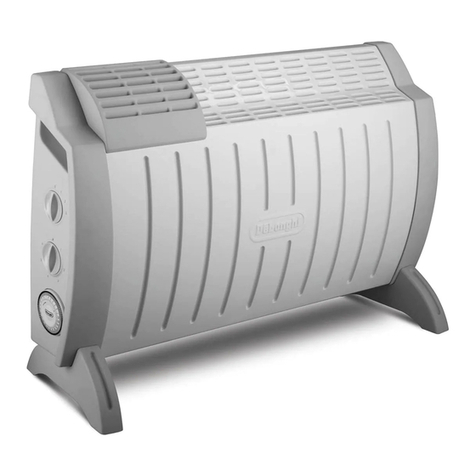
A Power indicator light
B ON/STAND-BY button
C +/- adjustment buttons
D MODE button (selects the operating mode)
E “ECO plus”button
F Timer button
General instructions
Remove the heater from the packaging. Check that neither the
heater nor the power cable has been damaged during transport.
Do not operate the heater if damaged. Remove all publicity
material present on the appliance. The appliance is suitable for
free-standing or wall-mounted usage. Do not assemble the feet
if wall-mounted.
Electrical connection
- Before connecting the appliance to the current outlet,
check that the voltage indicated on the appliance rating
plate is the same as your electric plant and that it can stand
the power consumption (Watt) indicated by the labelling.
- If more than one appliance is used at once, it is important to
ensure that the electric plant is able to support the power
required.
Mounting the feet
Turn the appliance upside down on a rug or soft surface in order
to prevent damaging the paint nish.
Fix the feet to the appliance with the nr. 4 screws B supplied
(see g. 1), 2 screws for each foot.
Wall-Mounting Installation
The wall mounting kit contains:
4 metal brackets (A)
2 screws 4,8x13 PH (B)
4 screws 4,5x25 PH (C)
4 plastic anchors 6x30 (D)
Required tools for assembly and estimated assembly
time
Screwdriver PH 2 x 100 (Phillips type)
Estimated assembly time: 30 minutes
Before installing the unit , make sure of the following:
a. The appliance must not be located directly beneath
a current outlet.
b. The plug and outlet must be easy to reach after
installation.
10
c. No electric cables or other pipes could be damaged
during the installation.
d. Keep away from curtains or ammable materials.
To wall-mount, proceed as follows:
Turn the appliance upside down on a at stable surface . Using
a screwdriver, x the 2 brackets A with the 2 screws B as shown
in Fig. 2. For brick walls use a 6 mm concrete drill bit . For
plaster board or false (hollow) walls, it is recommended to use
appropriate screws and anchors (not supplied).
1. Before drilling the wall, mark the exact points, respecting
the minimum distances as shown in g. 3.
2. Drill the wall where previously marked, and insert the
plastic anchors D.
3. Fix the 2 metal brackets A using the two screws C provided.
4. Hang the appliance on the bracket.
5. Mark out the 2 lower xing points. Remove the appliance,
drill the lower holes and insert the wall anchors D.
6. Now, you can hang back the heater on the bracket and
x the lower part of the appliance with the 2 remaining
screws C.
USE
Operation and use
1. Plug into the mains socket.
2. The appliance emits a beep. The power indicator light
(A)
comes on and remains lit while the appliance is powered.
3. The appliance switches to stand-by.
4. Press the ON/STAND-BY
(B)
to turn the appliance on. It
begins heating the room according to the current settings.
5. Press the MODE
(D)
button to select one of the following
operating modes:
Freeze prevention
Heating 1
Heating 2
Heating 3
Heating 3 + Fan
5.1 Freeze prevention
In this mode, the appliance keeps the room at a
temperature of 7°C to avoid freezing.
5.2 Heating 1, 2, 3 and Heating 3 + Fan
In this mode, the desired temperature can be selected
by pressing the adjustment buttons + and –. By
pushing the + or - button once, the temperature
(shown on the display) will increase or decrease by
1°C.
Heating 1
The appliance operates at low power.
Heating 2
The appliance operates at medium power.
Heating 3
The appliance operates at high power.
Heating 3 + Fan
The appliance operates at the maximum power with
the fan. The setting temperature range available is
from 16°C to 32°C.
6. “ECO plus” function
The “ECO plus” function is available in Heating 1, 2 3 and 3 +
fan modes only. To activate the function, press the “ECO plus”
(E)
button.When this function is active the appliance automatically
sets the most appropriate power level to guarantee optimum
comfort while reducing energy consumption.
While the “ECO plus”function is active, the appliance may switch
automatically to a lower heating power than the one displayed.
Working indicator
The symbol indicates the heating status by means of its
colors.
RED: the unit is heating at the maximum power.
YELLOW: the unit is heating at the medium power.
GREEN: the unit is heating at the minimum power.
absent: the unit is not heating.
Brightness of the display
The appliance allows two dierent brightness settings for the
display. The highest is active when any key button is pressed.
After a few seconds of keyboard inactivity, the brightness will
decrease to the operating brightness level.
Key lock
In order to avoid accidental operation, you can lock the keyboard
usingthe keylockfunction.To activate thisfunction pressbuttons
+ and -
(C)
together for at least 3 seconds. The display shows
the symbol and a double acoustic signal will be emitted. To
deactivate the function proceed in the same way.
Timer function
This function can be activated in two dierent ways.
Delayed start: With the appliance on-standby, press the timer
button (F) . The symbol is displayed ashing together
with the hours left before the appliance comes on. Change the
hours using the + and -
(C)
buttons, then wait a few seconds
for the program to be stored. The display will return to o and
11
the symbols remains on. When the programmed time has
elapsed, the appliance will come on with the previous settings.
Delayed stop: with the appliance on, press the timer button
(F)
. The symbol is displayed ashing together with the
hours left before the appliance goes on-standby. Change the
hours using the + and -
(C)
buttons, then wait a few seconds for
the program to be stored.
The current settings and symbol are displayed.
At the end of the set time the appliance switches on-standby
automatically. To go back to operating without the timer, press
the timer button twice.
The timer symbol disappears from the display.
Note: the time is settable from 0.5 to 24 hours.
Changing of the temperature scale
The display can show the temperature in both °F (Fahrenheit)
and °C (Celsius). To select the desired temperature scale, when
the unit is in standby position, press and hold the "+" key for at
least 10 seconds, then release.
The change of scale will be indicated by two short beeps.
MAINTENANCE
Before carrying out any maintenance, unplug the heater from
the mains and wait for it to cool o completely. This heater
requires no particular maintenance. It is sucient to remove
the dust with a soft, dry cloth. Never use abrasive powders or
solvents. If necessary remove concentrated areas of dirt with a
vacuum cleaner.
TECHNICAL CHARACTERISTICS
Power supply See rating label
Absorbed power “
TROUBLESHOOTING
PROBLEM CAUSE SOLUTION
The appliance doesn't work
(the display could blink
and you could hear an
intermittent "beep")
The display shows a
blinking dot and you hear an
intermittend "beep"
The display shows "PF"
The display shows "Ht"
blincking (the heating
power will progressively and
automatically be reduced)
Be sure it is plugged in and that the electrical
outlet is working
The temperature may be set too low
The Key lock may be activated
The air intake or outlet grille is obstructed
The appliance could be tipped over or is positioned
in an improper way
The temperature sensor is malfunctioning
The internal temperature is too high
Plug into the power outlet
Set the temperature to a higher position
See the section "Key lock"
Remove the obstruction
remove the plug
from the mains
and let the appliance cool
down. After few minutes plug the appliance
again. If the appliance doesn't work please
contact a
Customer Experience
Make sure the appliance is standing upright
on a at surface. Position the appliance
correctly
Contact the nearest customer service
T
o remove the cause of this alarm check
that the unit is not covered or obstructed.
The appliance will operate again after few
minutes.
Check the appliance is correctly positioned
respecting the minum distances from the wall,
or objects, as indicated on the rating label,
if not, position the appliance correctly. The
appliance will operate again after few minutes.

Other DeLonghi Heater manuals

DeLonghi Heater User manual

DeLonghi

DeLonghi Heater User manual

DeLonghi EW7707CB User manual

DeLonghi

DeLonghi EW7707CB User manual

DeLonghi BAMBINO User manual

DeLonghi

DeLonghi BAMBINO User manual

DeLonghi HCX9115ECA User manual

DeLonghi

DeLonghi HCX9115ECA User manual

DeLonghi HX65L22 User manual

DeLonghi

DeLonghi HX65L22 User manual

DeLonghi DCH7093ERBCA User manual

DeLonghi

DeLonghi DCH7093ERBCA User manual

DeLonghi EW7707CM-6A User manual

DeLonghi

DeLonghi EW7707CM-6A User manual

DeLonghi Electric radiator User manual

DeLonghi

DeLonghi Electric radiator User manual

DeLonghi TCH7915ER User manual

DeLonghi

DeLonghi TCH7915ER User manual

DeLonghi FAN HEATER User manual

DeLonghi

DeLonghi FAN HEATER User manual

DeLonghi DCH1030 User manual

DeLonghi

DeLonghi DCH1030 User manual

DeLonghi DRAGON HM3 User manual

DeLonghi

DeLonghi DRAGON HM3 User manual

DeLonghi BBH200 User manual

DeLonghi

DeLonghi BBH200 User manual

DeLonghi Holmo Fluid User manual

DeLonghi

DeLonghi Holmo Fluid User manual

DeLonghi TOWER CERAMIC HEATER User manual

DeLonghi

DeLonghi TOWER CERAMIC HEATER User manual

DeLonghi HTF3033 User manual

DeLonghi

DeLonghi HTF3033 User manual

DeLonghi TRRS0715E User manual

DeLonghi

DeLonghi TRRS0715E User manual

DeLonghi TRV Series User manual

DeLonghi

DeLonghi TRV Series User manual

DeLonghi RCH100 User manual

DeLonghi

DeLonghi RCH100 User manual

DeLonghi Rapido User manual

DeLonghi

DeLonghi Rapido User manual

DeLonghi STRETTO User manual

DeLonghi

DeLonghi STRETTO User manual

DeLonghi HOR KH770920 User manual

DeLonghi

DeLonghi HOR KH770920 User manual

DeLonghi TRRS0715.B User manual

DeLonghi

DeLonghi TRRS0715.B User manual

DeLonghi RADIANT LPG GAS HEATER Quick guide

DeLonghi

DeLonghi RADIANT LPG GAS HEATER Quick guide

Popular Heater manuals by other brands

Kooper 2194354 manual

Kooper

Kooper 2194354 manual

Modine Manufacturing LM Installation and service manual

Modine Manufacturing

Modine Manufacturing LM Installation and service manual

NuTone 161 Specification sheet

NuTone

NuTone 161 Specification sheet

Sears 583.356030 owner's manual

Sears

Sears 583.356030 owner's manual

EINHELL ETH 2000 Original operating instructions

EINHELL

EINHELL ETH 2000 Original operating instructions

EUROM Heat-Duct-Pro 3 operating instructions

EUROM

EUROM Heat-Duct-Pro 3 operating instructions

UNIPRODO UNI SAUNA V6.0KW user manual

UNIPRODO

UNIPRODO UNI SAUNA V6.0KW user manual

EUROM Dual-mate 2000 RC user manual

EUROM

EUROM Dual-mate 2000 RC user manual

Fondital eBLITZ Core Installation and maintenance manual

Fondital

Fondital eBLITZ Core Installation and maintenance manual

AENO AGH0001S-IT Installation and operation manual

AENO

AENO AGH0001S-IT Installation and operation manual

Adax ECO installation instructions

Adax

Adax ECO installation instructions

Warmlite WL43006Y instruction manual

Warmlite

Warmlite WL43006Y instruction manual

BIEMMEDUE SG 420 C instruction manual

BIEMMEDUE

BIEMMEDUE SG 420 C instruction manual

serene living Hellos instruction & operation manual

serene living

serene living Hellos instruction & operation manual

Helo 1712-450-04 product manual

Helo

Helo 1712-450-04 product manual

HearthRite HVF2R18N-2 User's manual and operating instructions

HearthRite

HearthRite HVF2R18N-2 User's manual and operating instructions

Vornado VMH505 owner's guide

Vornado

Vornado VMH505 owner's guide

Infiniton HORM-700 user manual

Infiniton

Infiniton HORM-700 user manual

manuals.online logo
manuals.online logoBrands
  • About & Mission
  • Contact us
  • Privacy Policy
  • Terms and Conditions

Copyright 2025 Manuals.Online. All Rights Reserved.