WARNING: Do not stare into beam of light when light is on.
NOTE: Color temperature is subjective and varies between operators.
1. To clean all surfaces, use a typical alcohol-free commercial cleaner or a solution of neutral liquid detergent and water.
2. Aer washing, a disinfectant may be used following the manufacturer’s instructions.
3. e following disinfectants are acceptable to use:
• CaviWipesTM
• Banicide®
• COESIDETM
• BactSpray®
LED Light
Light Switch/Sensor
2 of 4 3 of 4
Maintenance and Cleaning/Disinfection
WARNING: To avoid personal injury, ensure the dental light is o before proceeding.
CAUTION: To prevent risks and damages to equipment, make sure that liquid does not enter into the unit. Do not allow liquid into the vents.
CAUTION: Avoid spraying anything directly on the light. Spray cloth rst, then wipe.
CAUTION: All surface disinfectants cause varying degrees of discoloration to light-colored surfaces.
CAUTION: Do not use alcohol-based disinfectants on plastic surfaces.
CAUTION: e use of solvent-based cleaning products or bleach is not recommended.
CAUTION: Do not use abrasive material or steel wool when cleaning.
NOTE: Under normal use, there is no routine maintenance required.
NOTE: Daily cleaning with soap and water or a neutralizer for iodophors may reduce discoloration.
NOTE: Use of BactSpray®cleaner is highly recommended, or any other cleaning product that has the active component benzalkonium chloride.
Input Voltage 12/24 VAC
Light Source 4 LEDs (15 W Max)
Light Pattern 16.5 cm (6-1/2”) x 8.9 cm (3-1/2”)
Light Intensity (Adjustable) High: 3,345 Foot-candles (36,000 Lux)
Medium: 2,508 Foot-candles (27,000 Lux)
Low: 1,672 Foot-candles (18,000 Lux)
Color Temperature 5,000 - 5,700K
Protection against electrical dangers Class 1 device
Power Supply/Transformer Continuous Duty
Primary: 100/240VAC, 50/60 Hz
Secondary: 17VAC
Operating Amperage 1.0 max.
Note: 115V uses two 1-Amp Slo-Blo fuses. 220V uses two 0.5-Amp Slo-Blo fuses.
CAUTION: Federal law restricts this device to sale by or on the order of a dental practitioner licensed by the law of the State in which he/she
practices to use or order the use of the device.
NOTE: Refer to Service Manual and Installation Instructions for complete technical descriptions.
Technical Description/Specications
Indications for Use/Intended Use e dental operatory light is a light source intended to illuminate the oral cavity of dental patients for
better visibility by a dental practitioner during diagnostic and therapeutic treatment in a clinical environment. ere are no contraindications for
this product.
Refer to light installation instruction for locating power supply/transformer away from the vicinity of water sources.
Refer to Forest General Information Operator’s Guide
for Glossary of Symbols, Terms, EMC/Electrical Safety
Declaration and User Guidance.
Expected Service Life With proper maintenance and service, Forest Dental products are designed for a dened “service life” under
normal use (based on approximately 50 patients per week) of 5 years from the date of manufacture, with the exception of serviceable components.
Some components may become obsolete due to changes in technology or due to product improvements and may necessitate product updates
or upgrades. At the end of the dened service life, all products require examination by a trained service technician prior to continued use.
Following this, additional examinations are required every 5 years.
e light switch toggle is located on the adjustable arm behind the reector
head (Figure 1).
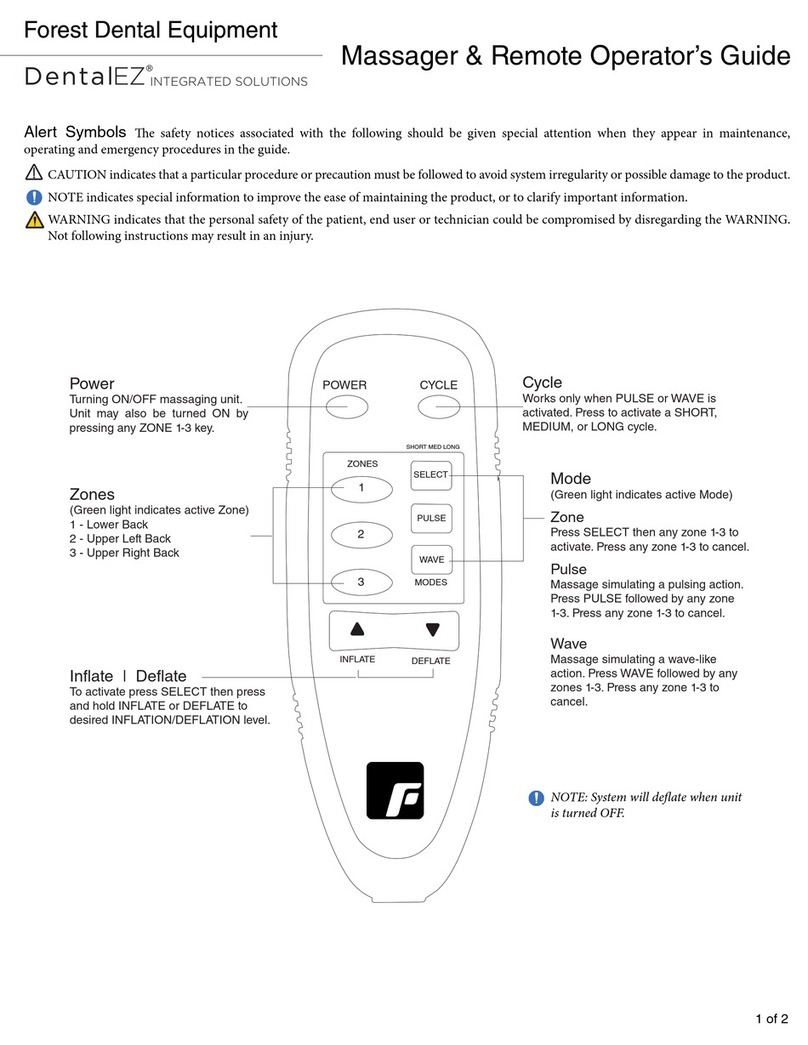
1. Use switch to turn light on or o, or hold hand near sensor for a few
seconds.
2. To adjust brightness levels, wave hand by sensor. Levels will adjust from low,
to medium, then high and back.
Figure 1. Light switch/sensor
Light switch
Sensor
Positioning Light
Figure 2. Positioning Light
Handles
Using the handles on either side of the reector head, position the light to
illuminate the oral cavity (Figure 2).
Figure 3. Focal Adjustment
Focal Adjustment
To take full advantage of the LED light’s intensity and color correction,
position the light between 50.8 cm (20”) and 114.3 cm (45”) away from the
oral cavity.
CAUTION: Focal adjustment is set at the factory, therefore do not adjust
focal adjustment screw (Figure 3).
Focal adjustment screw
CAUTION: Do not adjust
Refer to Forest Operatory Equipment Asepsis Operator’s Guide for infection control procedures.


