52.5 mm
fold
fold
fold
fold
fold
fold
fold
fold
Pantone Black
157.5 mm
74.3 mm
222.9 mm
EN DE FR
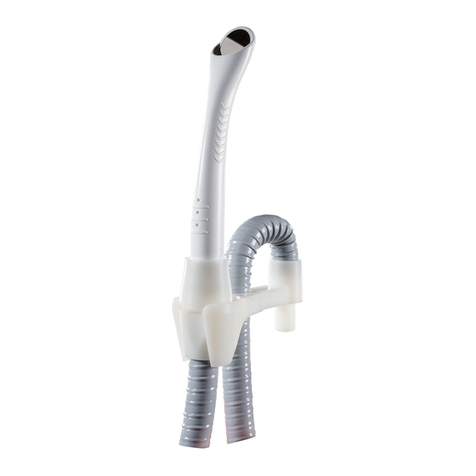
BioBiteCorrector™MS
Directions for Use
The BioBiteCorrector
™
MS (BBC) is a xed rigid Class II appliance
working with the functional principles of the Herbst-appliance.
INDICATIONS:
• Correction of Class II malocclusions and functional mandibular
midline shifts
• Use as anchorage appliance for closing a gap in the posterior
teeth of the lower jaw while simultaneously correcting a Class II
malocclusion
• Avoidance of dysgnathic surgeries
CONTRAINDICATIONS:
• Severe protrusion of lower incisors
MATERIAL:
• The BioBiteCorrector is only manufactured of titanium grade 5
• The xing screws and the distance spacers are manufactured of
titanium
• The screwdriver is manufactured of stainless steel (sterilizable
and re-usable)
The BioBiteCorrector is determined for single use only.
THE FIXATION OF THE BBC:
Bands on the upper molars are not required to x the
BioBiteCorrector.
1. Preconditions
• Precondition for the integration of the BioBiteCorrector is a
multi-bracet appliance with a steel archwire with a minimum size
of .017”x .025”in the upper and lower jaws.
• In the lower jaw the steel archwire must have a cinch back to
avoid a proclination of the incisors. For the cinch back we
recommend a Twister-Instrument. With the Twister you can bend
the arch very simply without risking to remove the bracket from
the tooth.
2. Choice of size
• Standard size is used in non-extraction cases.
• Only in extraction cases in the upper jaw small size is used.
3. Fixation of the BBC
• The BBC is already pre-assembled. The appliance is distinguished
in left and right sides. First the BBC is xed in the upper jaw and
afterwards in the lower jaw.
4. Fixation in the upper jaw
• The upper jaw connecting element is xed between the rst
molar and second premolar. The connecting element should
have no contact with the bracket of the rst molar.
The screwdriver should be assured with dental oss to avoid
aspiration or swallowing.
• Slide the body on the archwire from lateral and then x the
screw.
5. Fixation in the lower jaw
• After fxing the upper jaw connecting element, the lower jaw
connecting element must be xed between canine and rst
premolar. Slide the body on the archwire from lateral and then
x the screw.The connecting element should be situated as
distal as possible mesially to the bracket of the rst premolar.
The connecting element must not have any contact with the
canine bracket at all. Fix the other side in the same way.
6. Adjustment in neutral occlusion
• After both sides are xed, guide the lower jaw back as far as
possible. If there is still distal occlusion the lower jaw can be
shifted forward by using distance spacers. These spacers can be
crimped on the appliance, whereby the lower jaw can be shifted
into neutral occlusion.
• The distance spacers are attached to the thinnest telescope pipe.
Fine corrections can be carried out by shifting the connecting
element.
The product range description is included on the product
website.
The average duration of treatment with the BioBiteCorrector
is approximately 4-7 months.
LIABILITY
• There is no liability for unsatisfying results. Do not use the
appliance for other than dental or orthodontic purposes. The
dentist or orthodontist is responsible for the use of the
appliance.
SAFETY INSTRUCTIONS
• The rmness of the screws must be checked by the doctor in
regular intervals to recognize loosened screws and to prevent a
loss of the appliance with the danger of swallowing or aspirating
the appliance or parts of it. The patient must be instructed for
self-control.
Distributor:
DENTSPLY GAC International Inc.
One CA Plaza, Suite 100
Islandia, NY 11749 USA
T: 1-800-645-5530 In USA
F: 631-357-8793
www.dentsplysirona.com
Manufacturer:
Trinon Titanium GmbH
Augartenstr. 1
D-76137 Karlsruhe
GERMANY
0483 Issue date: 04-2017
DFU-0222 Rev. 03
Rx Only
Made in Germany
BioBiteCorrector®MS
Gebrauchsanweisung
Der BioBiteCorrector
®
MS (BBC) ist ein festsitzend-rigides,
intermaxilläres Non-Compliance KL II Gerät, welches sehr eng an
das Funktionsprinzip einer Herbstapparatur anknüpft.
INDIKATIONEN:
• Beseitigung einer Distalbisslage und die Korrektur von
mandibulären Mittellinienverschiebungen
• Verankerungsapparatur für einen Lückenschluss im
Unterkiefer-Seitenzahnbereich bei zeitgleicher Überstellung
einer Distalbisslage
• Zur Vermeidung einer Dysgnathie-Operation
KONTRAINDIKATION:
• Starke Protrusion der Unterkieferfrontzähne
MATERIAL:
• Der BioBiteCorrector besteht nur aus Titan Grade 5
• Die Klemmschrauben und Distanzhülsen bestehen aus Titan
• Schraubendreher besteht aus Edelstahl (sterilisierbar und
wiederverwendbar)
Der BioBiteCorrector ist nur für den einmaligen Gebrauch bestimmt.
DER EINBAU DES BBC :
Bänder an den oberen Molaren sind keine Voraussetzung zum
Eingliedern des BioBiteCorrector®.
1. Die Voraussetzungen
•
Voraussetzung für das Einsetzen des BBC ist eine Multibracketapparatur
mit einem Stahlbogen in einer Mindestgröße von .017”x .025”.
•
lm Unterkiefer muss der Stahlbogen direkt distal vom 6er Bracket
umgebogen werden. Tipp: Für den Cinch back empfehlen wir als
Instrument einen Twister. Mit diesem Instrument kann, ohne
Gefahr das Bracket vom Zahn abzulösen, der Bogen umgebogen
werden.
2. Auswahl der Größe
• Bei einem kieferorthopädischen Non-Extrationsfall wird die
Größe Standard verwendet.
• Im Extraktionsfall wird die Größe Small verwendet.
3. BBC einbauen
• Der BBC ist bereits vormontiert. Die Apparatur wird in eine Iinke
und rechte Seite unterschieden. Der BBC wird erst im Oberkiefer
und danach im Unterkiefer befestigt.
4. Befestigung im Oberkiefer
•
Das Oberkiefer-Verbindungselement wird zwischen dem 6er und
5er xiert. Das Verbindungselement sollte keinen Kontakt zum 6er
Bracket besitzen. Der Schraubendreher muss mittels Zahnseide
gesichert werden, um ggf. eine Aspiration und ein Verschlucken
zu verhindern.
• Der Body wird seitlich aufgeschoben. Danach wird die
Klemmschraube festgeschraubt.
5. Befestigung im Unterkiefer
•
Nachdem das Oberkiefer-Verbindungselement befestigt wurde,
wird das Unterkiefer-Verbindungselement zwischen dem 3er und
4er Bracket xiert. Der Body wird seitlich aufgeschoben.
Danach wird die Klemmschraube festgeschraubt.
Das Verbindungselement sollte soweit wie möglich nach distal
geschoben werden und mesial zum 4er Bracket Kontakt besitzen.
Das Verbindungselement darf jedoch keinen Kontakt zum 3er
Bracket besitzen. Nach dem gleichen Vorgehen wird die andere
Seite eingegliedert.
6. Einstellung in die Neutralverzahnung
•
Nachdem beide Seiten eingegliedert wurden, wird der Unterkiefer
soweit wie möglich zurückgeführt. Ist noch eine Distalokklusion
vorhanden, kann mittels der Distanzhülsen, welche auf die
Apparatur gecrimpt werden, der Unterkiefer vorverlagert werden
und präzise in die beidseitige Neutralverzahnung eingestellt
werden.
• Die Distanzhülsen werden auf dem dünnsten Teleskoprohr
befestigt. Feinkorrekturen können durch das Verschieben des
Verbindungselementes vorgenommen werden.
Das Lieferprogramm zu den einzelnen Produkten entnehmen Sie
bitte der Produkt-Website.
Die durchschnittliche Behandlungsdauer mit dem
BioBiteCorrector beträgt ca. 4-7 Monate.
HAFTUNG
• Für nicht zufriedenstellende Ergebnisse wird nicht gehaftet. Die
Anwendung darf nur durch einen Zahnarzt/in oder
Kieferorthopäde/in erfolgen. Der Zahnarzt/in oder
Kieferorthopäde/in ist für die Anwendung selbst verantwortlich.
SICHERHEITSHINWEISE:
• In regelmäßigen Abständen muss durch den Zahnarzt/in die
Festigkeit der Schrauben überprüft werden, um gelockerte
Schrauben zu erkennen und um ein Lösen der Apparatur zu
verhindern mit der Gefahr, die Apparatur oder Teile der
Apparatur zu verschlucken oder zu aspirieren. Der Patient muss
zur Selbstkontrolle aufgeklärt werden.
Vertriebshändler:
DENTSPLY GAC International Inc.
One CA Plaza, Suite 100
Islandia, NY 11749 USA
T: 1-800-645-5530 In USA
F: 631-357-8793
www.dentsplysirona.com
Hersteller:
Trinon Titanium GmbH
Augartenstr. 1
D-76137 Karlsruhe
GERMANY
0483 Ausgabedatum: 04-2017
DFU-0222 Rev. 03
nur RX
Hergestellt in Deutschland
BioBiteCorrector®MS
Guide d'utilisation
Le BioBiteCorrector
®
MS (BBC) est un appareil rigide de classe II
qui utilise les principes de fonctionnement d'un appareil de
Herbst.
INDICATIONS:
• Correction de malocclusions de classe II et correction de
déviations latérales mandibulaires fonctionnelles
• Fonction d'appareil d'ancrage pour Ia fermeture d'espaces en
zone postérieure de l'arcade inferieure
• Permet d'éviter les operations de chirurgies de Ia dysgnathie
CONTRE-INDICATIONS:
• Protrusion sévère des incisives inférieures
MATÉRIEL:
• Le BioBiteCorrector est fabriqué à base de titane de grade 5
• Les vis de xation et les douilles d'espacement sont faites en
titane
• Le tournevis est en acier inoxydable (il peut être stérilisé et
réutilisé)
Le BioBiteCorrector est à usage unique.
FIXATION DU BBC:
L'utilisation de bagues sur les molaires supérieures n'est pas
nécessaire pour attacher le BioBiteCorrector.
1. Conditions requises
• Le BBC se xe sur un appareil multibracket, avec arc en acier
d'une taille minimum de .017”x .025”sur les arcades supérieure
et inferieure.
• L'extrémité de l'arc inférieur doit être repliée pour éviter une
inclinaison des incisives. Pour rabattre cette partie de l'arc nous
recommandons l'utilisation d'un appareil pour plier l'arc très
simplement sans risquer de décoller le bracket de Ia dent.
2. Choix de Ia taille
• Une taille standard est utilisée dans les cas de non-extraction.
• Une taille plus petite est utilisée seulement dans les cas
d'extraction pour l'arcade supérieure.
3. La xation du BBC
• Le BBC est entièrement pré-assemblé. Le côté gauche de
l'appareil est dierencié du côté droit. Le BBC se place en
premier sur l'arcade supérieure puis sur l'arcade inférieure.
4. Fixation sur Ia mâchoire supérieure
• L'élément de connexion de l'arcade supérieure est placé entre Ia
première molaire et Ia seconde prémolaire. Cet élément ne doit
pas être en contact avec le bracket de Ia première molaire.
L'utilisation du tournevis peut être assurée avec du l dentaire
pour éviter l'aspiration ou l'avalement.
• Faire glisser l'élément sur l'arc latéralement, et visser Ia vis.
5. Fixation de Ia mâchoire inférieure
• Après avoir attaché l'élément de connexion de l'arcade
supérieure, l'élément de connexion de I'arcade inférieure doit
être attaché entre Ia canine et Ia première prémolaire. Faire
glisser l'élément sur l'arc latéralement puis visser Ia vis.
L'élément de connexion doit être en contact avec Ia surface
mesiale du bracket de Ia première prémolaire. L'élément de
connexion ne doit avoir aucun contact avec le bracket de Ia
canine. Fixer l'autre côté de Ia même façon.
6. Ajustement en occlusion neutre
• Une fois que les deux cotés sont xés, diriger Ia mâchoire
inférieure vers l'arrière aussi loin que possible. Si une occlusion
distale demeure, l'utilisation des douilles d'espacement
permettra d'avancer Ia mâchoire inférieure vers l'avant. Ces
douilles d'espacement peuvent être serties sur l'appareil, auquel
cas Ia mâchoire inférieure peut se repositionner en occlusion
neutre.
• Les douilles d'espacement sont serties à Ia plus ne tige
télescopique. Des corrections peuvent être apportées en
modiant Ia position des éléments de connexion sur I'arc.
Les descriptions des produits de la gamme sont indiquées sur le
site Internet.
La durée moyenne de traitement avec le BioBiteCorrector® est
de 4-7 mois environ.
RESPONSABILITÉ
• II n'y a pas de responsabilité légale concernant les résultats
insatisfaisants. N'utiliser l'appareil que dans le cas d'un
traitement dentaire ou orthodontique. Le dentiste ou
orthodontiste est le seul responsable de l'utilisation de
l'appareil.
RÈGLES DE SÉCURITÉ
• Le dentiste doit vérier à intervalles réguliers Ia solidité des vis
pour s'assurer que les vis sont bien serrées et éviter Ia perte de
l'appareil ainsi que le risque d'avaler ou d'aspirer une partie ou Ia
totalité de l'appareil. Le dentiste ou orthodontiste doit enseigner
au patient comment contrôler lui-même son appareil.
Distributeur:
DENTSPLY GAC International Inc.
One CA Plaza, Suite 100
Islandia, NY 11749 USA
T: 1-800-645-5530 In USA
F: 631-357-8793
www.dentsplysirona.com
Fabriquant:
Trinon Titanium GmbH
Augartenstr. 1
D-76137 Karlsruhe
GERMANY
0483 Date de publication: 04-2017
DFU-0222 Rev. 03
RX Uniquement
Fabriqué en Allemagne
