Denver DAB-26 PLUS Technical manual

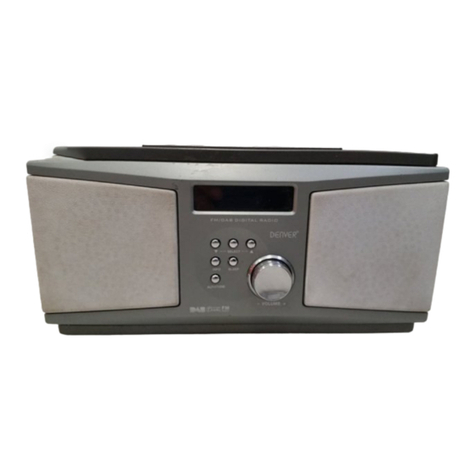
DENVER DAB-26 PLUS. is a DAB & FM Radio, with ALARM function, Power is ON/OFF,
and there is no clock display on “POWER OFF”.
DENVER DAB-26 PLUS OPERATION INSTRUCTION
DAB/DAB+ Digital Radio

Button introduction . . . . . . . . . . . . . . . . . . . . . . . . . . . . . . . . . . . . . . . . . . . . . . . . . . . . . . . . . . . . . . . . . . . . . . . . . . .1
Button introduction . . . . . . . . . . . . . . . . . . . . . . . . . . . . . . . . . . . . . . . . . . . . . . . . . . . . . . . . . . . . . . . . . . . . . . . . . . .2
DAB MODE . . . . . . . . . . . . . . . . . . . . . . . . . . . . . . . . . . . . . . . . . . . . . . . . . . . . . . . . . . . . . . . . . . . . . . . . . . . . . .3-4
FM MODE . . . . . . . . . . . . . . . . . . . . . . . . . . . . . . . . . . . . . . . . . . . . . . . . . . . . . . . . . . . . . . . . . . . . . . . . . . . . . . . 4-5
System operation . . . . . . . . . . . . . . . . . . . . . . . . . . . . . . . . . . . . . . . . . . . . . . . . . . . . . . . . . . . . . . . . . . . . . . . . . . . .5
Setting the Alarm . . . . . . . . . . . . . . . . . . . . . . . . . . . . . . . . . . . . . . . . . . . . . . . . . . . . . . . . . . . . . . . . . . . . . . . . . . . 6
WEEE . . . . . . . . . . . . . . . . . . . . . . . . . . . . . . . . . . . . . . . . . . . . . . . . . . . . . . . . . . . . . . . . . . . . . . . . . . . . . . . . . . . . .7
Knapper . . . . . . . . . . . . . . . . . . . . . . . . . . . . . . . . . . . . . . . . . . . . . . . . . . . . . . . . . . . . . . . . . . . . . . . . . . . . . . . . . .8
Knapper . . . . . . . . . . . . . . . . . . . . . . . . . . . . . . . . . . . . . . . . . . . . . . . . . . . . . . . . . . . . . . . . . . . . . . . . . . . . . . . . . .9
DAB TILSTAND . . . . . . . . . . . . . . . . . . . . . . . . . . . . . . . . . . . . . . . . . . . . . . . . . . . . . . . . . . . . . . . . . . . . . . . 10-11
FM TILSTAND
. . . . . . . . . . . . . . . . . . . . . . . . . . . . . . . . . . . . . . . . . . . . . . . . . . . . . . . . . . . . . . . . . . . . . . . . . . . . . 11-12
SYSTEMDRIFT
. . . . . . . . . . . . . . . . . . . . . . . . . . . . . . . . . . . . . . . . . . . . . . . . . . . . . . . . . . . . . . . . . . . . . . . . . . . . . . . . .12
Indstilling af alarmen
. . . . . . . . . . . . . . . . . . . . . . . . . . . . . . . . . . . . . . . . . . . . . . . . . . . . . . . . . . . . . . . . . . . . . . . . . . 13
WEEE . . . . . . . . . . . . . . . . . . . . . . . . . . . . . . . . . . . . . . . . . . . . . . . . . . . . . . . . . . . . . . . . . . . . . . . . . . . . . . . . . . . .14
Contents

Button introduction
121
5
2
10 9
7
3
6
8
11 4
1DAB/FM
DAB/FM switch mode
2ENTER
Enter the system menu (press ENTER long
as 3 seconds) and select function
3INFO
Check the software version (press INFO
long as 3 seconds)and check the program
4AUTO
Auto search information
5PRE
Down / Backward menu
6NEXT
Up / forward menu
7VOL+
Volume up
8VOL-
Volume down
English
1

Button introduction
9SHIFT
Together with button <1>, <2>, <3> <4><5>, : Press <SHIFT> shortly, then press one of button
<1>, <2>, <3><4> <5>, long,it will preset program <6>,<7>,<8> <9><10>,
10 <1>, <2>, <3>, <4> <5>
Preset program
11 SLEEP
Power on state set sleep time, short press check alarm when in standby state, long press set alarm
12 STANDBY
open/standb
English
Standby: Press the Standby button to enter DAB mode. The radio will scan for DAB stations. Any DAB stations
found will be saved into the memory. When the scan is complete, the first DAB station will be played. Press the Standby
button to turn the radio off. When powered on from standby, the radio will be tuned to the station previously listened to.
2

DAB MODE
English
Connect to the power supply, switch the power to ON, the screen will display: “Welcome to Digital Radio”, Then the unit
enter in the working state.
When “power on” for the first time, system enter in the DAB MODE, and QUICK SCAN automatically, the screen will
display “AUTOTUNE FULL SCAN”, and automatically search EU DAB station quickly.
The screen will appear the scan schedule, station and scaned station qualities etc. information.
After search ,it play the first program automatically, press NEXT or PREV button to shift the station. When meet the
favorites station, press ENTER to confirm or wait 2 seconds, play that station’s program.
Press VOL+ or VOL- to up or down the volume.
DAB program information: Under DAB mode, press “INFO” button to display dynamic label information, program type,
station name, current frequency value date which is sync with existing broadcast source.
Pre-set program: When DAB is playing, press <1>, <2>, <3><4><5>, long to preset the 1 to 5 program at the right
place as they are; as to preset 6-10 program, press SHIFT shortly, inform “Preset 6-10”, then press <1>, <2>, <3><4>,
<5>, long to save the programs, 10 programs will be stored totally.
If you want to listen to all the DAB program, press AUTO long as 3 seconds under the DAB MODE, will display
“AUTOTUNE FULL SCAN”, to full scan the whole area.
3

DAB MODE
FM MODE
English
If you don’t like auto scan, you can also have manual tune, but first you should know the multiplex of the station you
want Press ENTER 3 seconds, will display MANUAL TUNE, then multiplex appear, for example, 11B 218.64 MHZ,
now you can press NEXT or PREV to tune up the multiplex, when the multiplex tune to the one you want, it will auto
search all the stations in that multiplex, and display the station name at the second line. It will auto play the first program
in that multiplex after finished the scan. If you want to listen other programs, press ENTER shortly, enter the list of
station, press NEXT or PREV to tune to the program you want.
After scan or manual tune if no station is found, it will display NO SIGNAL.
Under the DAB mode, press DAB/FM to switch to FM MODE.
Enter the FM MODE, press AUTO button to have a auto scan. When it tune to a frequency with strong signal, it will stop
automatically and play. If you want to search forward, press NEXT first, then press SCAN, the machine will search
forward automatically; if you want to search backward, press PREV first, then press SCAN, the machine will search
backward automatically.
Using Headphones
You can connect headphones(not included ) to your DAB Radio .The headphone socket can be found on the front of the
Radio when you have headphones connected the radio Speakers are switched off and all sound is via from the
headphones.Noted :Headphones will need a 3.5mm stereo plug and an impedance of 32 ohms.
4

FM MODE
English
If the pick-up station have RDS information, the machine will display the information synchronously. You can also press
INFO to check the RDS information and dynamic label information.
Program preset is as same as the DAB MODE, Totally ten programs can be stored.
Under the FM MODE, press ENTER to enter the AUDIO MODE setting, then press ENTER again to select AUTO
ST/MONO)or MONO mode..
Under the FM Mode ,press and Hold ENTER to enter the “sensitivity” setting, then press “PREV” or “NEXT” to adjust
the sensitivity. Press ENTER button to confirm or it will be confirmed automatictly after 5 seconds.
Press INFO 3 seconds under the DAB MODE or FM MODE, you can check this machine’s software’s version, press
INFO again to exit.
Under the DAB MODE or FM MODE, press DAB/FM long to reset the system. Press DAB/FM 3 seconds, the machine
will display PRESS ENTER KEY TO RESET; press ENTER,the machine will display SYSTEM RESET, the system
will be reset right now. After the system reset, the machine will enter DAB MODE directly and have a full scan.
If the power supply from battery, the program is playing and without any button operation in 40 seconds, it will enter
the power-save mode, meanwhile backlight is off. You can activate the backlight by pressing any button. When the
backlight is on, press button to operate the system as normal.
SYSTEM OPERATION
5

Setting the Alarm
English
Press the “PREV “OR “ NEXT” button to choose on and Press the “ENTER “ buttonto confirm the Alarm on , Press
the “PREV” or “NEXT” button to adjust the Hour and Min and then press the “ENTER “ button to confirm the Alarm time.
And then press “ PREV” and “NEXT “ button to choose the Alarm mode between .FM and DAB .Press “ENTER”
button to choose your decided Alarm Mode.
The unit just has one alarm mode.
DON’T FORGET !
The alarm modes can only be set in standby mode..To set Alarm,press and hold the “SLEEP” button ,The Alarm “ ON “
or “OFF “ and time will flash in the display .
Setting the Sleep Time
Under power on state, press “SLEEP” button to enter into to set the Sleep Timer. Press the “PRE” or “Next” Button to
adjust the hour digits and minutes digits. And then Press “Enter “Button to confirm the Sleep Timer. Then the Sleep time
will display on the LCD .And it will be back STANDBY state after the setting sleep time.
6

WEEE
English
Electric and electronic equipment contains materials, components and substances that can
be hazardous to your health and the environment, if the waste material (discarded electric
and electronic equipment) is not handled correctly.
Electric and electronic equipment is marked with the crossed out trash can symbol, seen
below. This symbol signifies that electric and electronic equipment should not be disposed
of with other household waste, but should be disposed of separately.
All cities have established collection points, where electric and electronic equipment can
either be submitted free of charge at recycling stations and other collection sites, or be c
ollected from the households. Additional information is available at the technical
department of your city.
ALL RIGHTS RESERVED
DENVER ELECTRONICS A/S
7
WWW.DENVER-ELECTRONICS.COM

Knapper
121
5
2
10 9
7
3
6
8
11 4
1DAB/FM
Skift DAB/FM
2ENTER
Gå til systemmenuen (tryk på ENTER i tre
sekunder) og vælg funktion.
3INFO
Tjek software-version (tryk på INFO i tre
sekunder) og tjek programmet.
4AUTO
Autom. søgning af oplysninger
5PRE
Ned / Bagud menu
6NEXT
Op / Fremad menu
7VOL+
Lydstyrke op
8VOL-
Lydstyrke ned
Danish
8

Knapper
9SHIFT
Sammen med knap <1>/<2>/<3>/<4>/<5>:Tryk kort på <SHIFT> og derefter længe på <1>/<2>/<3>/<4>/<5>.
Program <6>/<7>/<8>/<9>/<10> forindstilles,
10 Knap <1>, <2>, <3>, <4>, <5>
Forindstil program
11 SLEEP
I tændt tilstand, indstil dvaletid. I standby tilstand, tryk kort på den, tjek alarm. Langt tryk: indstil alarm.
12 STANDBY
åben / standby
Standby: Tryk på Standby for at åbne DAB tilstand. Radioen søger efter DAB stationer. Enhver DAB station,
der registreres, lagres i hukommelsen. Når søgningen er udført, afspilles den første DAB station. Tryk på Standby for
at slukke for radioen. Når der tændes i standby tilstand, indstiller radioen sig på stationen, der sidst er lyttet til.
Danish
9

DAB TILSTAND
Danish
Forbind til strømforsyningen, tænd for strømmen. Skærmen viser ”Welcome to Digital Radio” (”Velkommen til digital
radio”). Herefter radion er klar til funktion.
Når der tændes første gang, går systemet automatisk i DAB TILSTAND og HURTIGSØGNING, Skærmen viser
“AUTOTUNE FULL SCAN” (“AUTOMATISK TUNING FULD SØGNING”), og søger EU DAB station.
En skærm med oplysninger om søge/scanning plan, station, den scannede stations kvalitet osv ses.
Efter søgeningen afspilles det første program automatisk. Tryk på NEXT (NÆSTE) eller PREV (FORRIGE) for at
skifte station. Når den foretrukne station er fundet, tryk på ENTER for at bekræfte og vent i to sekunder, hvorefter
stationen kan afspilles.
Tryk på VOL+ eller VOL- for at skrue op eller ned for lyden.
DAB programoplysninger: I DAB tilstand, tryk på “INFO” for at se dynamiske labeloplysninger, programtype, stationsnavn,
frekvens og dato, som er synkroniseret med den pågældende udsendelseskilde.
Forindstilling af program: Under afspilning af DAB, tryk på 1>, <2>, <3>, <4>, <5> for at forindstille program 1 til 5. For
at forindstille program 6 til 10, tryk kort på SHIFT for at aktivere ”Preset 6-10” (”Forindstil 6-10”). Tryk derefter længe
på 1>, <2>, <3>, <4>, <5> for at lagre programmerne. Herefter er i alt 10 programmer lagret.
Hvis du vil lytte til alle DAB programmerne, skal du i DAB TILSTAND trykke i tre sekunder på AUTO. “AUTOTUNE FULL
SCAN” (“AUTOMATISK TUNING FULD SCANNING”) ses, hvorefter hele området søges.
10

DAB TILSTAND
FM TILSTAND
Danish
Hvis du foretrækker at tune manuelt, skal du først kende multiplekset for stationen, som du ønsker. Tryk på ENTER i tre
sekunder, hvorefter MANUAL TUNE (MANUEL TUNING) ses. Multipleks, f.eks. 11B 218.64 MHZ ses. Du kan nu trykke
på NEXT (NÆSTE) eller PREV (FORRIGE) for at tune i multiplekset. Når der tunes i det ønskede multipleks, vil radioen
automatisk søge alle stationer i det pågældende multipleks og vise stationens navn på den anden linje. Når søgningen
er gennemført, vil den automatisk afspille det første program i det pågældende multipleks. Hvis du ønsker at lytte til
andre programmer, skal du trykke kort på ENTER, gå til listen med stationer og trykke på NEXT (NÆSTE) eller PREV
(FORRIGE) til det ønskede program.
Hvis der efter søgning eller manuel tuning ikke er fundet nogen station, ses NO SIGNAL (IKKE NOGET SIGNAL).
I DAB tilstand, tryk på DAB/FM for at skifte til FM TILSTAND.
Gå til FM TILSTAND og tryk på AUTO for at foretage en automatisk søgning. Når radioen tuner ind på en frekvens med
et stærkt signal, stopper den automatisk og afspiller. Hvis du ønsker at søge fremad, skal du trykke på NEXT(NÆSTE)
først og derefter på SCAN (SØG), hvorefter maskinen vil søge fremad automatisk. Hvis du ønsker at søge bagud, skal
du først trykke på PREV (FORRIGE) og derefter på SCAN (SØG), hvorefter maskinen automatisk søger bagud.
Bruge høretelefoner
Du kan tilslutte høretelefoner (ikke medfølgende) til din DAB Radio. Høretelefonstikket findes på forsiden af radioen,
når du har tilsluttet høretelefonerne til radion, slås højttalerne fra og alt lyd afspilles i høretelefonerne.
Bemærk: Høretelefonerne skal have et 3,5 mm stereo stik og en impedans på 32 ohm.
11

FM TILSTAND
Danish
Du kan indstille frekvensen manuelt ved at trykke på NEXT (NÆSTE) og PREV (FORRIGE). Tryk kort på NEXT
(NÆSTE), hvorefter frekvensen øges 0,05MHZ. Tryk kort på PREV (FORRIGE) for at reducere 0,05MHZ. Trykpå
NEXT (NÆSTE) eller PREV (FORRIGE) for at gå hurtigt fremad eller tilbage i frekvenstuningen.
Hvis den pågældende station har RDS information, viser maskinen informationen synkront. Du kan også trykke
på INFO for at tjekke RDS informationen og den dynamiske labelinformation.
Forindstilling af programmer er den samme som i DAB TILSTAND. Der kan lagres i alt seks programmer.
I FM MODE (FM TILSTAND), tryk på ENTER for at gå i AUDIO MODE (LYDTILSTAND). Tryk derefter igen på
ENTER for at vælge AUTO(ST/MONO)eller MONO tilstand.
Du kan tjekke maskinens software-version, hvis du trykker på INFO i tre sekunder i DAB eller FM tilstand.
Nulstil systemet ved at trykke længe på DAB/FM i DAB TILSTAND eller FM TILSTAND. Tryk på DAB/FM i tre
sekunder; PRESS ENTER KEY TO RESET (TRYK PÅ ENTER FOR AT NULSTILLE) ses. Tryk på ENTER,
hvorefter maskinen viser SYSTEM RESET (NULSTILLER SYSTEM). Efter nulstilling af systemet går maskinen
direkte i DAB TILSTAND med en fuld søgning.
Hvis strømmen kommer fra batteriet, programmet afspiller, og der ikke har været nogen betjening af knapper i 40
sekunder, går radioen i strømsparetilstand. Baggrundslyset er slukket. Baggrundslyset aktiveres ved tryk på en hvilken
som helst knap. Når baggrundslyset er tændt, tryk på den rette knap for at betjene systemet normalt.
SYSTEMDRIFT
12
Under FM, tryk og Hold INDTAST for at komme til “følsomhed” indstilling, tryk så på “FORRIGE” eller “NÆSTE”
for at justere følsomheden. Tryk på INDTAST knappen for at bekræfte ellers bliver det automatisk bekræftet
efter 5 sekunder.

Indstilling af alarmen
Danish
Indstil alarmen ved at trykke på ”SLEEP” (”DVALE”). Alarm ”ON" (”TIL”) og ”OFF” (”FRA”) blinker på displayet.
Tryk på "PREV" ("FORRIGE") eller "NEXT" ("NÆSTE") for at vælge ON (TÆNDT) og tryk derefter på "Enter" for at
bekræfte, at alarmen er aktiveret. Tryk derefter igen på "PREV" ("FORRIGE") og "NEXT" ("NÆSTE") for at vælge
alarmtilstand mellem FM og DAB. Tryk på ”ENTER” for at bekræfte den ønskede alarmtilstand.
Tryk på "PREV" ("FORRIGE") eller "NEXT" ("NÆSTE") for at indstille timer og minutter og tryk derefter på ”ENTER”
for at bekræfte indstillingen.
Systemet har kun én alarmindstilling.
GLEM IKKE!
Indstilling af sovetid
I tændt indstilling, tryk på “SLEEP” (“DVALE”) for at indstille dvaletimeren. Tryk på "PREV" ("FORRIGE") eller "NEXT"
("NÆSTE") for at indstille time og minutter. Tryk derefter på “ENTER” for at bekræfte dvaletimeren. Dvaletidspunktet ses
på displayet. Der gås tilbage til STANDBY efter indstilling af dvaletidspunkt.
Alarmindstillingerne kan kun foretages i standby tilstand.
13

WEEE
Elektrisk og elektronisk udstyr indeholder materialer, komponenter og stoffer, der kan være
skadelige for menneskers sundhed og for miljøet, hvis affaldet (kasseret elektrisk og elektronisk
udstyr) ikke håndteres korrekt.
Elektrisk og elektronisk udstyr er mærket med nedenstående overkrydsede skraldespand. Den
symboliserer, at elektrisk og elektronisk udstyr ikke må bortskaffes sammen med usorteret
husholdningsaffald, men skal indsamles særskilt.
Alle kommuner har etableret indsamlingsordninger, hvor kasseret elektrisk og elektronisk udstyr
gratis kan afleveres af borgerne på genbrugsstati oner og andre indsamlingssteder eller bliver
afhentet direkte fra husholdningerne. Nærmere information kan fås hos kommunens tekniske
forvaltning.
ALLE RETTIGHEDER RESERVERET
COPYRIGHT DENVER ELECTRONICS A/S
14
WWW.DENVER-ELECTRONICS.COM
Table of contents
Languages:
Other Denver Radio manuals

Denver
Denver DAB-60LW User manual

Denver
Denver MCI-100 User manual
Denver
Denver DAB-33 User manual

Denver
Denver IR-135B User manual

Denver
Denver IR-100 User manual

Denver
Denver DAB-24 User manual

Denver
Denver MCR-50 User manual

Denver
Denver DAB-32 SILVER User manual

Denver
Denver MIR-260 User manual

Denver
Denver MIR-270 User manual

Denver
Denver DAB-43 PLUS User manual

Denver
Denver DAB-30 User manual

Denver
Denver DAB-18 User manual
Denver
Denver MIR-260 User manual

Denver
Denver CAD-438BT User manual

Denver
Denver TR-56C User manual

Denver
Denver MIR-260 User manual

Denver
Denver MCR-50MK2 User manual

Denver
Denver IR-110 User manual

Denver
Denver DAB-22 User manual