Page 2 SB-6-156-O
Risk of personal injury.
Risk of property damage.
Except as otherwise specified by
the manufacturer, this product is
specifically designed for com-
pressed air service and use with
any other fluid (liquid or gas) is a
misapplication. For example, use
with or injection of certain hazard-
ous gases in the system (such as
oxygen or liquid petroleum gas)
could be harmful to the unit or
result in a combustible condition
that may cause fire or explosion.
Manufacturer's warranties are
void in the event of misapplica-
tion and manufacturer assumes
no responsibility for any resulting
loss.
INSTALLATION
Risk of injury. Release all air pres-
sure from system before servicing
system. Be sure to read and un-
derstand all Service Bulletins on
the separate components before
using the system. Use only speci-
fied DeVilbiss parts.
Certain solvents, paints and
chemicals may attack plastic fil-
ter bowl and can cause bowl
failure. Do not use near these
materials.
NOTE
Risk of equipment damage! Do
not install your DAD unit where
it is subjected to sudden depres-
surization cycles exceedling 20
PSIG. Quick relieving air solenoid
valves, typical in some spray
booths, will eventually fail pres-
sure gauges and filters, and pro-
duce desiccant "dusting".
To minimize sudden depressur-
ization effect, replace the exist-
ing solenoid with a "slow closing
solenoid valve". (One source: Au-
tomatic Switch Co.) Or, install an
air adjusting valve at the existing
solenoids outlet.
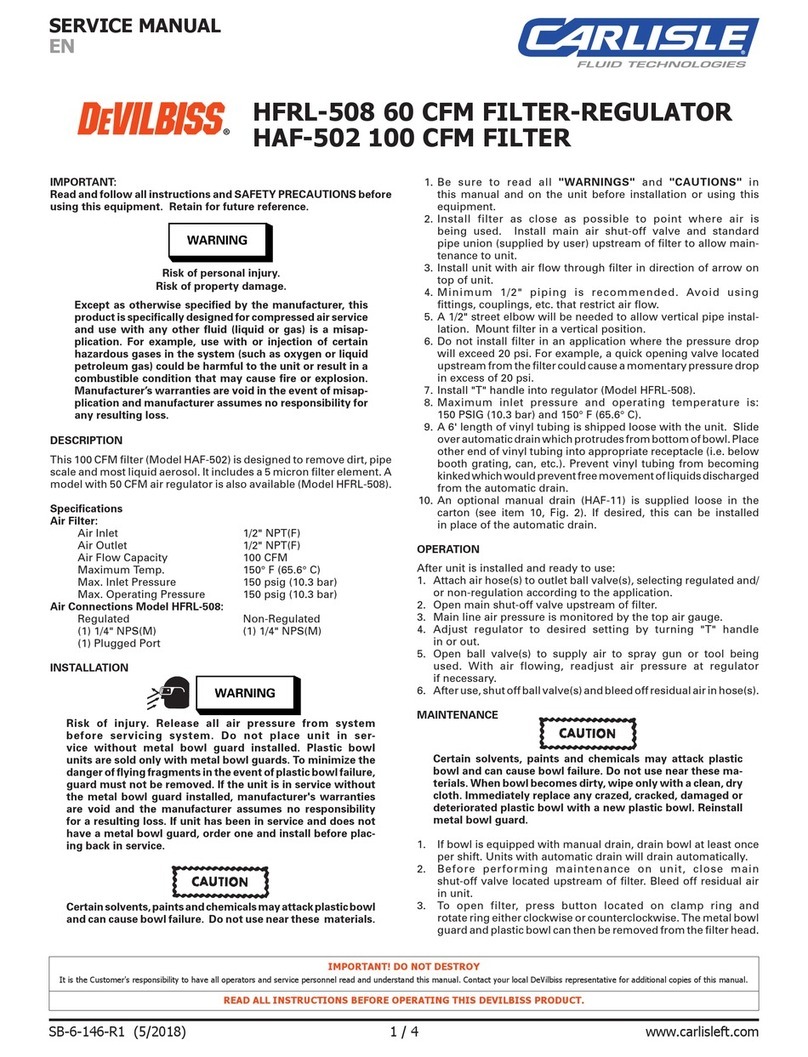
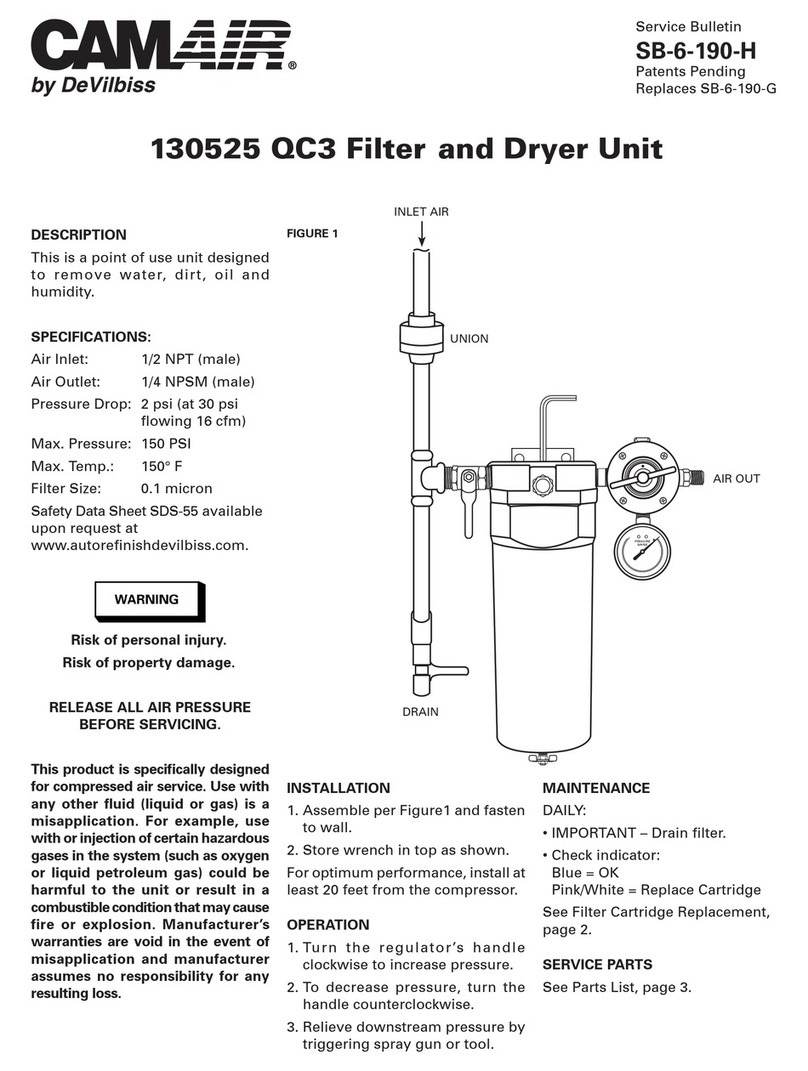
1. See Plumbing Guide on page 6.
Be sure to read all "Warnings" and
"Cautions" in this manual and com-
ponent manuals on the unit before
installation or using this equipment.
2. Install air drying system as close as
possible to the point where the air is
being used. Use template to position
location of system.
3. Install main air supply shut off valve
and piping union fitting (supplied by
user) upstream of air drying system to
allow maintenance to the unit.
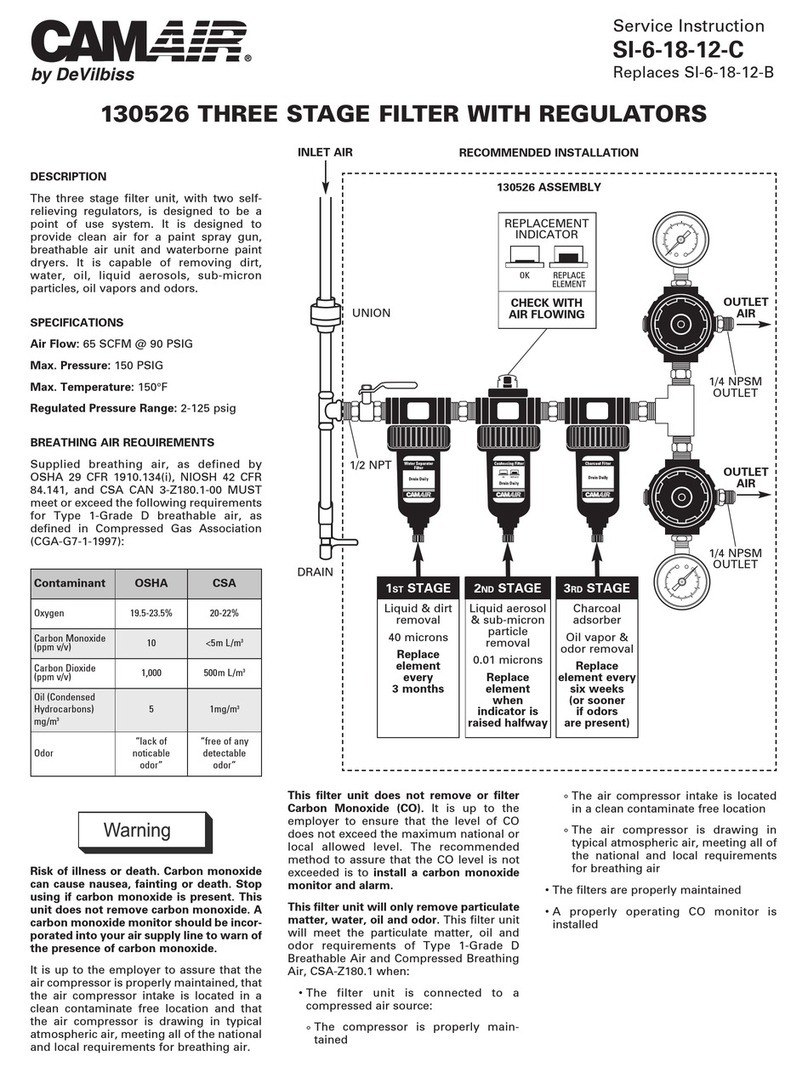
4. Install unit with air flow through filter
in direction of arrow on top of filters.
5. Minimum 1/2" NPT piping is recom-
mended. Avoid using fittings, cou-
plings, etc. that restrict air flow.
6. Maximum inlet pressure and operat-
ing temperature is: 150 PSIG (10.3 bar)
and a150°F (65.6°C)
7. Fill tank with desiccant materials (see
paragraphs 4, 5, 6 under "MAINTE-
NANCE".
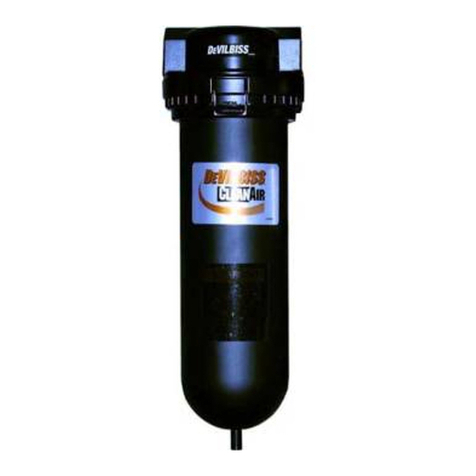
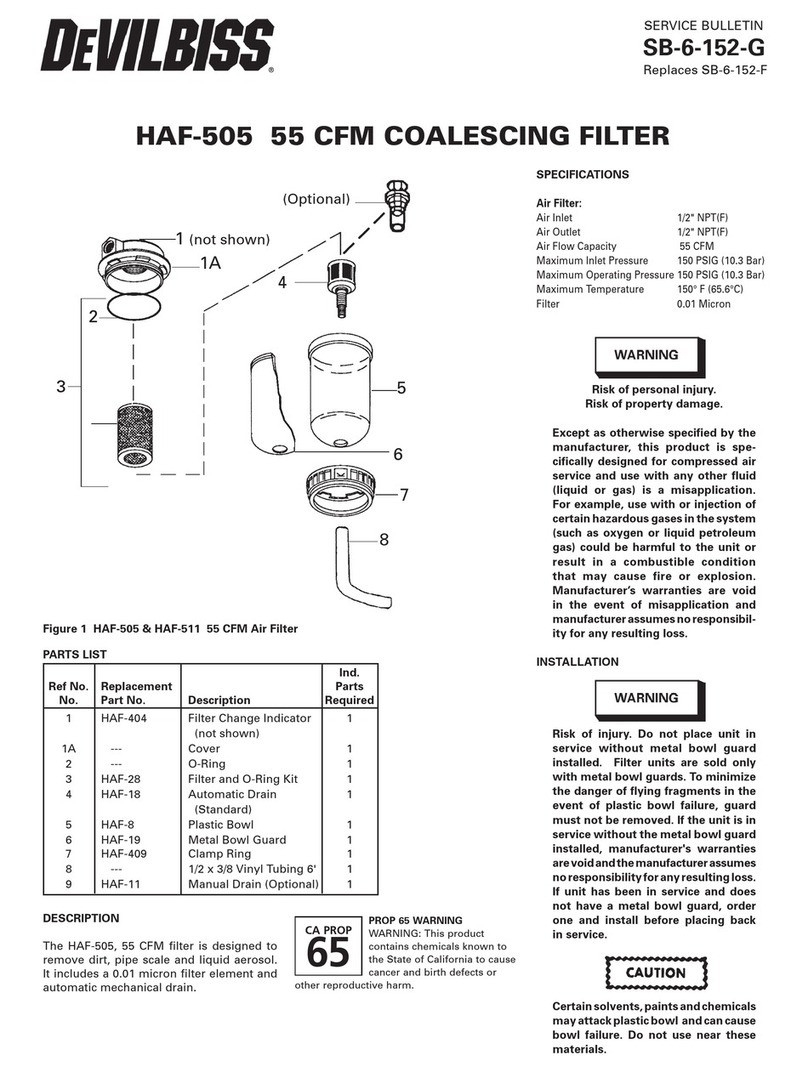
8. Two 6' lengths of vinyl tubing are
shipped loose with the system. Slide
over automatic drains which protrude
from bottom of the water/separator
and the oil coalescing filters. Place the
other end of vinyl tubing into appropri-
ate receptacle. Prevent vinyl tubing
from becoming kinked which would
prevent free movement of liquids dis-
charged from the automatic drain.
9. An optional manual drain (HAF-11) can
be installed in place of the automatic
drains.
OPERATION
After the system is installed and ready to use:
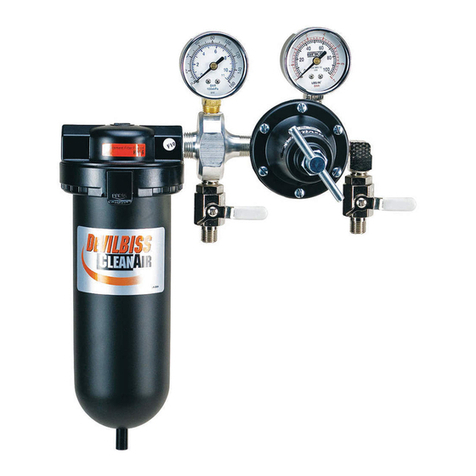
1. Attach air hose(s) to outlet valve.
2. Open main shut-off valve upstream of
system.
3. Adjust regulator to desired setting by
turning "T" handle in or out.
4. Open ball valve to supply air to spray
guns or tool being used. With air
flowing, readjust air pressure at regu-
lator if necessary.
5. After use, shut off ball valve and bleed
off residual air in hose.
MAINTENANCE
Risk of injury. Components under
pressure. Relieve air pressure be-
fore performing any maintenance.
Certain solvents, paints and chemi-
cals may attack plastic bowl and
can cause bowl failure. Do not use
near these materials. When bowl
becomes dirty, wipe only with a
clean, dry cloth. Immediately re-
place any crazed, cracked, dam-
aged or deteriorated plastic bowl
with a new plastic bowl. Reinstall
metal bowl guard.
Risk of injury. Do not place unit
in service without metal bowl
guard installed.
1. Check system at least once per shift to
insure proper drainage. Look for water
in the drain tubing.
2. Before performing maintenance on
system, close main shut-off valve
located upstream. Bleed off residual
air in system.
MAINTENANCE - DESICCANT DAD-1
NOTE
The desiccant tank contains an in-
ternal filter (DAD-8) at the inlet and
outlet. Be careful not to damage
them when changing desiccant.
1. Replace the desiccant when the hu-
midity indicator changes to a pink or
white color. Remove the pipe plug at
the bottom of the tank. Allow the mate-
rial to drain into a two (2) gallon or
larger container.
2. Once all the material has been removed,
replace the pipe plug (see "Note" fol-
lowing) and tighten (do not over
tighten) securely (air tight).
NOTE
Use Teflon tape on pipe plug threads
and all threaded fittings to facili-
tate removal in the future. Do not
use loctite or any material that may
bond and make removal difficult.
Risk of injury. Only use a socket
wrench to remove the DAD-400
humidity indicator from the desic-
cant tank. Immediately replace
the DAD-400 humidity indicator
if damaged.
3. Replace the humidity indicator paper
(supplied with DAD-1 Dessiccant) by
removing the DAD-400 humidity indi-
cator. Pry out the old paper and push in
the new paper (printed side facing away
from the glass).
4. Remove the pipe plug on top of the unit.
5. Replace desiccant material, DAD-1 (19-
0831). Two bags are supplied. Hold
bag pointed upward and cut bag on
dotted line. Grasp and hold bag where
cut and rotate over opening on top of
tank. Empty both bags into tank.
("Note" tank must be filled completely
to prevent damage to desiccant.)
6. Wrap pipe plug with 2 wraps of teflon
tape. Replace the pipe plug and tighten
until air tight (do not over tighten).
7. The humidity indicator will return to a
blue color within five minutes.
8. The desiccant material should be dis-
posed of properly.
9. Refer to the appropriate service bulletin
for checking the filters and compo-
nents.
NOTE
A desiccant Tune-Up Kit Part No.
DAD-600, is available. Contains the
following parts to completely recon-
dition a desiccant air station:
