DeWalt DCE530 User manual

DCE530
Final page size: A5 (148mm x 210mm)

B
ENGLISH
English (original instructions) 3
Pусский (перевод соригинала инструкции) 13
Türkçe (orijinal talimatlardan çevrilmiştir) 26
Англійська (оригінальні інструкції) 38
Copyright
DeWALT

1
Fig. A
Fig. B
6
7
6
5
4
7
3
9
8
11
2
XXXX XX XX
10
1

2
Fig. DFig. C
8
10
Fig. E Fig. F
1

ENGLISH
3
WARNING: To reduce the risk of injury, read the
instructionmanual.
Definitions: Safety Guidelines
The definitions below describe the level of severity for each
signal word. Please read the manual and pay attention to
thesesymbols.
DANGER: Indicates an imminently hazardous
situation which, if not avoided, will result in death or
seriousinjury.
WARNING: Indicates a potentially hazardous situation
which, if not avoided, could result in death or
seriousinjury.
CAUTION: Indicates a potentially hazardous situation
which, if not avoided, may result in minor or
moderateinjury.
Batteries Chargers/Charge Times (Minutes)
Cat # VDC Ah Weight (kg) DCB104 DCB107 DCB112 DCB113 DCB115 DCB118 DCB132 DCB119
DCB546 18/54 6.0/2.0 1.05 60 270 170 140 90 60 90 X
DCB547 18/54 9.0/3.0 1.46 75* 420 270 220 135* 75* 135* X
DCB548 18/54 12.0/4.0 1.44 120 540 350 300 180 120 180 X
DCB181 18 1.5 0.35 22 70 45 35 22 22 22 45
DCB182 18 4.0 0.61 60/40** 185 120 100 60 60/40** 60 120
DCB183/B 18 2.0 0.40 30 90 60 50 30 30 30 60
DCB184/B 18 5.0 0.62 75/50** 240 150 120 75 75/50** 75 150
DCB185 18 1.3 0.35 22 60 40 30 22 22 22 X
DCB187 18 3.0 0.54 45 140 90 70 45 45 45 90
DCB189 18 4.0 0.54 60 185 120 100 60 60 60 120
*Date code 201811475B or later
**Date code 201536 or later
DCE530
Voltage VDC 18
Type 1
Battery type
Temperature at air outlet 290 °C/530 °C
Airflow l/min 109/190
Weight (without battery pack) kg 0.5
English (original instructions)
Congratulations!
You have chosen a
DeWALT
tool. Years of experience, thorough
product development and innovation make
DeWALT
one of the
most reliable partners for professional power toolusers.
Technical Data
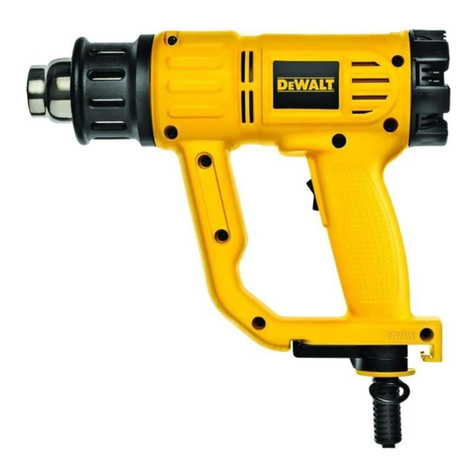
HEAT GUN
DCE530
NOTICE: Indicates a practice not related to
personal injury which, if not avoided, may result in
propertydamage.
Denotes risk of electricshock.
Denotes risk offire.
Batteries
Chargers/Charge Times (Minutes)
Cat #
DC
Weight
*Date code 201811475B or later
**Date code 201536 or later

4
ENGLISH
GENERAL POWER TOOL SAFETY WARNINGS
WARNING: Read all safety warnings, instructions,
illustrations and specifications provided with this
power tool. Failure to follow all instructions listed below
may result in electric shock, fire and/or seriousinjury.
SAVE ALL WARNINGS AND INSTRUCTIONS FOR
FUTURE REFERENCE
Safety Instructions for Heat Guns
A fire may result if the appliance is not used with care, therefore:
• Heat may be conducted to combustible materials that
are out of sight. DO NOT use in a damp atmosphere,
where flammable gases may be present or near
combustiblematerials.
• Place the appliance on its stand after use and allow it to cool
down beforestorage.
• DO NOT leave the tool unattended while it is switchedon.
• DO NOT place your hand over the air vents or block the vents
in anyway.
• The nozzle and accessories of this tool become extremely hot
during use. Let these parts cool down beforetouching.
• ALWAYS switch the tool off before putting itdown.
• This appliance is not intended for use by persons (including
children) with reduced physical, sensory or mental capabilities,
or lack of experience and knowledge, unless they have
been given supervision or instruction concerning use of the
appliance by a person responsible for theirsafety.
• Ensure adequate ventilation as toxic fumes may beproduced.
• DO NOT use as a hairdryer.
• DO NOT obstruct either the air intake or nozzle outlet, as this
may cause excessive heat build up resulting in damage to
thetool.
• DO NOT direct the hot air blast at otherpeople.
• DO NOT touch the metal nozzle as it becomes very hot during
use and remains hot for up to 30 minutes afteruse.
• DO NOT place the nozzle against anything while using or
immediately afteruse.
• DO NOT poke anything down the nozzle as it could give you
an electric shock. Do not look down the nozzle while the unit is
working because of the high temperatures beingproduced.
• DO NOT allow paint to adhere to the nozzle or scraper as it
could ignite after sometime.
• DO NOT remove the heat barrel cover duringuse.
• To reduce the risk of explosion, DO NOT use in paint spray
booths or within 3.0 m of paint sprayingoperations.
• DO NOT use this tool to remove paint containing lead.
The peelings, residue and vapors of paint may contain lead
which ispoisonous.
• Hidden areas such as behind walls, ceilings, floors, soffit
boards and other panels may contain flammable materials
that could be ignited by the heat gun when working in these
locations. The ignition of these materials may not be readily
apparent and could result in property damage and injury to
persons. When working in these locations, keep the heat gun
moving in a back-and-forth motion. Lingering or pausing in
one spot could ignite the panel or the material behindit.
NOTE: These heat guns are capable of producing
temperatures in excess of 530 ˚C.
• DO NOT use this tool to heatfood.
• DO NOT lay the heat gun on flammable surfaces when
operating the gun or immediately after shutting it off. Allow
the tool to cool before storing. Always set the gun on a flat
level surface so that the nozzle tip is pointedupward.
• Keep moveable items secured and steady whilescraping.
• Be sure to direct the hot air blast in a safe direction; away from
other people or flammableobjects.
• DO NOT remove the heat barrel cover duringuse.
• DO NOT touch the nozzle to any surface while running or
shortly afterrunning.
• Splinters and small particles of stripped paint can be
ignited and blown through holes and cracks in the surface
beingstripped.
• DO NOT burn the paint. Use the scraper and keep the nozzle
at least 25 mm away from the painted surface. When working
in a vertical direction, work downwards to prevent paint from
falling into the tool andburning.
• ALWAYS use good quality scrapers and strippingknives.
• DO NOT use the heat gun in combination with
chemicalstrippers.
• DO NOT use accessory nozzles asscrapers.
• DO NOT direct heatgun airflow directly on glass. The
glass may crack and could result in property damage or
personalinjury.
• Maintain labels and nameplates. These carry
importantinformation.
• Place the heat gun on a stable, level surface when not
handheld.
• Be constantly aware that this tool can ignite flammable
materials, soften or melt others. Regardless of the task you
are performing, shield or keep the heat gun away from
thesematerials.
• You may occasionally notice some slight smoking of the tool
after it is turned off. This is the result of heating the residual
oil that was deposited on the heating element during the
manufacturingprocess.
• Use eye protection and other safetyequipment.
• Do not expose tools to rain or wet conditions. Water
entering a tool will increase the risk of electricshock.
• Do not overreach. Keep proper footing and balance
at all times. This enables better control of the tool in
unexpectedsituations.
• Store idle tools out of the reach of children and do
not allow persons unfamiliar with the tool or these
instructions to operate the tool. Tools are dangerous in the
hands of untrainedusers.
• Have your tool serviced by a qualified repair person
using only identical replacement parts. This will ensure
that the safety of the tool ismaintained.

5
ENGLISH
Residual Risks
In spite of the application of the relevant safety regulations
and the implementation of safety devices, certain residual risks
cannot be avoided. These are:
• Impairment ofhearing.
• Risk of personal injury due to flyingparticles.
• Risk of burns due to accessories becoming hot
duringoperation.
• Risk of personal injury due to prolongeduse.
SAVE THESE INSTRUCTIONS
• Welding operations must not be repeated on a fitting since
this can result in live parts becomingaccessible.
Persons Removing Paint Should Always Follow
These Guidelines:
WARNING: Extreme care should be taken when stripping
paint. The peelings, residue and vapors of paint may
contain lead, which is poisonous. Any pre-1977 paint may
contain lead and paint applied to homes prior to 1950 is
likely to contain lead. Once deposited on surfaces, hand to
mouth contact can result in the ingestion of lead. Exposure
to even low levels of lead can cause irreversible brain and
nervous system damage; young and unborn children are
particularlyvulnerable.
Before beginning any paint removal process you should determine
whether the paint you are removing contains lead. This can be
done by your local health department or by a professional who
uses a paint analyzer to check the lead content of the paint to be
removed. LEAD-BASED PAINT SHOULD ONLY BE REMOVED
BY A PROFESSIONAL AND SHOULD NOT BE REMOVED
USING A HEAT GUN. Persons removing paint should follow
theseguidelines:
1 . Move the workpiece outdoors. If this is not possible,
keep the work area well ventilated. Open the windows
and put an exhaust fan in one of them. Be sure the fan is
moving the air from inside tooutside.
2 . Remove or cover any carpets, rugs, furniture, clothing, cooking
utensils and airducts.
3 . Place drop cloths in the work area to catch any paint
chips or peelings. Wear protective clothing such as extra
work shirts, overalls andhats.
4 . Work in one room at a time. Furnishings should be
removed or placed in the center of the room and
covered. Work areas should be sealed off from the rest of the
dwelling by sealing doorways with dropcloths.
5 . Children, pregnant or potentially pregnant women and
nursing mothers should not be present in the work area until
the work is done and all clean up iscomplete.
6 . Wear a dust respirator mask or a dual filter (dust and
fume) respirator mask. Be sure the mask fits. Beards
and facial hair may keep masks from sealing properly.
Change filters often. DISPOSABLE PAPER MASKS ARE
NOTADEQUATE.
7 . Use caution when operating the heat gun. Keep the heat
gun moving as excessive heat will generate fumes which can
be inhaled by theoperator.
8 . Keep food and drink out of the work area. Wash
hands, arms and face and rinse mouth before eating
or drinking. Do not smoke or chew gum or tobacco in the
workarea.
9 . Clean up all removed paint and dust by wet mopping
the floors. Use a wet cloth to clean all walls, sills and
any other surface where paint or dust is clinging.
DO NOT SWEEP, DRY DUST OR VACUUM. Use a high
phosphate detergent or trisodium phosphate (TSP) to wash
and mopareas.
10 . At the end of each work session put the paint chips and debris
in a double plastic bag, close it with tape or twist ties and
dispose ofproperly.
11 . Remove protective clothing and work shoes in the work
area to avoid carrying dust into the rest of the dwelling.
Wash work clothes separately. Wipe shoes off with a wet
rag that is then washed with the work clothes. Wash hair
and body thoroughly with soap andwater.
Important Notice
In order for this tool to be an effective paint stripper, it must
produce extremely high temperatures. As a consequence, the
stripper is capable of igniting paper, wood, paint and varnish
residue and similarmaterials.
As you become more familiar with the tool and develop the
proper technique, the danger of accidental ignition will be greatly
reduced. In establishing the proper technique, the best thing to
do is PRACTICE! Work on simple stripping projects, preferably
outdoors, until you get a “feel” for how to use your stripper safely
andeffectively.
As You Practice, Observe the Following
Procedures for Safety
• Always be sure the tool is turned off and disconnected from
power supply whenunattended.
• Clean the scraper blade often during use. Built up residue on
the blade is highlyflammable.
• Experiment to find the optimum distance from the
tool’s nozzle to the surface being stripped. This distance
25.4mm–50.8mm will vary depending on the material
beingremoved.
• Keep the heat gun moving ahead of the scraper blade at
alltimes.
• As you work, clean up loose pieces of paint as they accumulate
around the workarea.
• When working indoors, keep away from curtains, papers,
upholstery and similar flammablematerials.
• Above all, remember that this is a serious tool that is capable
of producing excellent results when used properly. Practice on
simple projects until you feel comfortable with your stripper.
Only then will you have mastered the propertechnique.

6
ENGLISH
Chargers
DeWALT
chargers require no adjustment and are designed to be
as easy as possible tooperate.
Electrical Safety
The electric motor has been designed for one voltage only.
Always check that the battery pack voltage corresponds to the
voltage on the rating plate. Also make sure that the voltage of
your charger corresponds to that of yourmains.
Your
DeWALT
charger is double insulated in
accordance with EN60335; therefore no earth wire
isrequired.
If the supply cord is damaged, it must be replaced by a
specially prepared cord available through the
DeWALT
serviceorganisation.
Mains Plug Replacement
(U.K. & Ireland Only)
If a new mains plug needs to be fitted:
• Safely dispose of the oldplug.
• Connect the brown lead to the live terminal in theplug.
• Connect the blue lead to the neutralterminal.
WARNING: No connection is to be made to the
earthterminal.
Follow the fitting instructions supplied with good quality plugs.
Recommended fuse: 3A.
Using an Extension Cable
An extension cord should not be used unless absolutely
necessary. Use an approved extension cable suitable for
the power input of your charger (see Technical Data). The
minimum conductor size is 1mm2; the maximum length
is30m.
When using a cable reel, always unwind the cablecompletely.
Important Safety Instructions for All Battery
Chargers
SAVE THESE INSTRUCTIONS: This manual contains important
safety and operating instructions for compatible battery
chargers (refer to TechnicalData).
• Before using charger, read all instructions and cautionary
markings on charger, battery pack, and product using
batterypack.
WARNING: Shock hazard. Do not allow any liquid to get
inside charger. Electric shock mayresult.
WARNING: We recommend the use of a residual current
device with a residual current rating of 30mA orless.
CAUTION: Burn hazard. To reduce the risk of injury,
charge only
DeWALT
rechargeable batteries. Other types of
batteries may burst causing personal injury anddamage.
CAUTION: Children should be supervised to ensure that
they do not play with theappliance.
NOTICE: Under certain conditions, with the charger
plugged into the power supply, the exposed charging
contacts inside the charger can be shorted by foreign
material. Foreign materials of a conductive nature such
as, but not limited to, steel wool, aluminum foil or any
buildup of metallic particles should be kept away from
charger cavities. Always unplug the charger from the
power supply when there is no battery pack in the cavity.
Unplug charger before attempting to clean
• DO NOT attempt to charge the battery pack with any
chargers other than the ones in this manual. The charger
and battery pack are specifically designed to worktogether.
• These chargers are not intended for any uses other than
charging
DeWALT
rechargeable batteries. Any other uses
may result in risk of fire, electric shock orelectrocution.
• Do not expose charger to rain orsnow.
• Pull by plug rather than cord when disconnecting
charger. This will reduce risk ofdamage to electric plug
andcord.
• Make sure that cord is located so that it will not be
stepped on, tripped over, or otherwise subjected to
damage orstress.
• Do not use an extension cord unless it is absolutely
necessary. Use of improper extension cord could result in risk
of fire,electric shock, orelectrocution.
• Do not place any object on top of charger or place
the charger on a soft surface that might block the
ventilation slots and result in excessive internal heat.
Place the charger in a position away from any heat source. The
charger is ventilated through slots in the top and the bottom
of thehousing.
• Do not operate charger with damaged cord or plug—
have them replacedimmediately.
• Do not operate charger if it has received a sharp blow,
been dropped, or otherwise damaged in any way. Take it
to an authorised servicecentre.
• Do not disassemble charger; take it to an authorised
service centre when service or repair is required. Incorrect
reassembly may result in a risk of electric shock, electrocution
orfire.
• In case of damaged power supply cord the supply cord must
be replaced immediately by the manufacturer, its service agent
or similar qualified person to prevent anyhazard.
• Disconnect the charger from the outlet before
attempting any cleaning. This will reduce the risk of
electric shock. Removing the battery pack will not reduce
thisrisk.
• NEVER attempt to connect two chargerstogether.
• The charger is designed to operate on standard
230V household electrical power. Do not attempt to
use it on any other voltage. This does not apply to the
vehicularcharger.
Charging a Battery (Fig. B)
1. Plug the charger into an appropriate outlet before inserting
batterypack.
2. Insert the battery pack 7 into the charger, making sure the
battery pack is fully seated in the charger. The red (charging)
light will blink repeatedly indicating that the charging
process hasstarted.

7
ENGLISH
Battery Packs
Important Safety Instructions for All Battery
Packs
When ordering replacement battery packs, be sure to include
catalogue number andvoltage.
The battery pack is not fully charged out of the carton. Before
using the battery pack and charger, read the safety instructions
below. Then follow charging proceduresoutlined.
READ ALL INSTRUCTIONS
• Do not charge or use battery in explosive atmospheres,
such as in the presence of flammable liquids, gases or
dust. Inserting or removing the battery from the charger may
ignite the dust orfumes.
• Never force battery pack into charger. Do not modify
battery pack in any way to fit into a non-compatible
charger as battery pack may rupture causing serious
personalinjury.
• Charge the battery packs only in
DeWALT
chargers.
• DO NOT splash or immerse in water or otherliquids.
• Do not store or use the tool and battery pack in
locations where the temperature may reach or exceed
40 ˚C (104 ˚F) (such as outside sheds or metal buildings
insummer).
• Do not incinerate the battery pack even if it is severely
damaged or is completely worn out. The battery pack can
explode in a fire. Toxic fumes and materials are created when
lithium-ion battery packs areburned.
• If battery contents come into contact with the skin,
immediately wash area with mild soap and water. If
battery liquid gets into the eye, rinse water over the open eye
for 15 minutes or until irritation ceases. If medical attention
is needed, the battery electrolyte is composed of a mixture of
liquid organic carbonates and lithiumsalts.
• Contents of opened battery cells may cause respiratory
irritation. Provide fresh air. If symptoms persists, seek
medicalattention.
WARNING: Burn hazard. Battery liquid may be flammable
if exposed to spark orflame.
3. The completion of charge will be indicated by the red
light remaining ON continuously. The battery pack is fully
charged and may be used at this time or left in the charger.
To remove the battery pack from the charger, push the
battery release button 6 on the batterypack.
NOTE: To ensure maximum performance and life of lithium-ion
battery packs, charge the battery pack fully before firstuse.
Charger Operation
Refer to the indicators below for the charge status of the
batterypack.
Charge Indicators
Charging
Fully Charged
Hot/Cold Pack Delay*
*The red light will continue to blink, but a yellow indicator light
will be illuminated during this operation. Once the battery pack
has reached an appropriate temperature, the yellow light will
turn off and the charger will resume the chargingprocedure.
The compatible charger(s) will not charge a faulty battery pack.
The charger will indicate faulty battery by refusing tolight.
NOTE: This could also mean a problem with acharger.
If the charger indicates a problem, take the charger and battery
pack to be tested at an authorised servicecentre.
Hot/Cold Pack Delay
When the charger detects a battery pack that is too hot or too
cold, it automatically starts a Hot/Cold Pack Delay, suspending
charging until the battery pack has reached an appropriate
temperature. The charger then automatically switches to the
pack charging mode. This feature ensures maximum battery
packlife.
A cold battery pack will charge at a slower rate than a warm
battery pack. The battery pack will charge at that slower rate
throughout the entire charging cycle and will not return to
maximum charge rate even if the battery packwarms.
The DCB118 charger is equipped with an internal fan designed
to cool the battery pack. The fan will turn on automatically
when the battery pack needs to be cooled. Never operate the
charger if the fan does not operate properly or if ventilation slots
are blocked. Do not permit foreign objects to enter the interior
of thecharger.
Electronic Protection System
XR Li-Ion tools are designed with an Electronic Protection
System that will protect the battery pack against overloading,
overheating or deepdischarge.
The tool will automatically turn off if the Electronic Protection
System engages. If this occurs, place the lithium-ion battery
pack on the charger until it is fullycharged.
Wall Mounting
These chargers are designed to be wall mountable or to sit
upright on a table or work surface. If wall mounting, locate the
charger within reach of an electrical outlet, and away from a
corner or other obstructions which may impede air flow. Use
the back of the charger as a template for the location of the
mounting screws on the wall. Mount the charger securely using
drywall screws (purchased separately) at least 25.4mm long
with a screw head diameter of 7–9mm, screwed into wood to
an optimal depth leaving approximately 5.5mm of the screw
exposed. Align the slots on the back of the charger with the
exposed screws and fully engage them in theslots.
Charger Cleaning Instructions
WARNING: Shock hazard. Disconnect the charger
from the AC outlet before cleaning. Dirt and grease
may be removed from the exterior of the charger using a
cloth or soft non-metallic brush. Do not use water or any
cleaning solutions. Never let any liquid get inside the tool;
never immerse any part of the tool into aliquid.

8
ENGLISH
WARNING: Never attempt to open the battery pack for
any reason. If battery pack case is cracked or damaged,
do not insert into charger. Do not crush, drop or damage
battery pack. Do not use a battery pack or charger that
has received a sharp blow, been dropped, run over or
damaged in any way (i.e., pierced with a nail, hit with
a hammer, stepped on). Electric shock or electrocution
may result. Damaged battery packs should be returned to
service centre forrecycling.
WARNING: Fire hazard. Do not store or carry the
battery pack so that metal objects can contact
exposed battery terminals. For example, do not place
the battery pack in aprons, pockets, tool boxes, product kit
boxes, drawers, etc., with loose nails, screws, keys,etc.
CAUTION: When not in use, place tool on its side on
a stable surface where it will not cause a tripping
or falling hazard. Some tools with large battery packs
will stand upright on the battery pack but may be easily
knockedover.
Transportation
WARNING: Fire hazard. Transporting batteries can
possibly cause fire if the battery terminals inadvertently
come in contact with conductive materials. When
transporting batteries, make sure that the battery
terminals are protected and well insulated from
materials that could contact them and cause a short
circuit. NOTE: Lithium-ion batteries should not be put in
checkedbaggage.
DeWALT
batteries comply with all applicable shipping
regulations as prescribed by industry and legal standards which
include UN Recommendations on the Transport of Dangerous
Goods; International Air Transport Association (IATA) Dangerous
Goods Regulations, International Maritime Dangerous Goods
(IMDG) Regulations, and the European Agreement Concerning
The International Carriage of Dangerous Goods by Road (ADR).
Lithium-ion cells and batteries have been tested to section 38.3
of the UN Recommendations on the Transport of Dangerous
Goods Manual of Tests andCriteria.
In most instances, shipping a
DeWALT
battery pack will be
excepted from being classified as a fully regulated Class 9
Hazardous Material. In general, only shipments containing a
lithium-ion battery with an energy rating greater than 100 Watt
Hours (Wh) will require being shipped as fully regulated Class 9.
All lithium-ion batteries have the Watt Hour rating marked on
the pack. Furthermore, due to regulation complexities,
DeWALT
does not recommend air shipping lithium-ion battery packs
alone regardless of Watt Hour rating. Shipments of tools with
batteries (combo kits) can be air shipped as excepted if the Watt
Hour rating of the battery pack is no greater than 100Whr.
Regardless of whether a shipment is considered excepted
or fully regulated, it is the shipper's responsibility to consult
the latest regulations for packaging, labeling/marking and
documentationrequirements.
The information provided in this section of the manual is
provided in good faith and believed to be accurate at the time
the document was created. However, no warranty, expressed or
implied, is given. It is the buyer’s responsibility to ensure that its
activities comply with the applicableregulations.
Transporting the FLEXVOLTTM Battery
The
DeWALT
FLEXVOLTTM battery has two modes: Use
andTransport.
Use Mode: When the FLEXVOLTTM battery stands alone or is in
a
DeWALT
18V product, it will operate as an 18V battery. When
the FLEXVOLTTM battery is in a 54V or a 108V (two 54V batteries)
product, it will operate as a 54Vbattery.
Transport Mode: When the cap is attached to the FLEXVOLTTM
battery, the battery is in Transport mode. Keep the cap for
shipping.
When in Transport mode, strings
of cells are electrically
disconnected within the pack
resulting in 3 batteries with a
lower Watt hour (Wh) rating as compared to 1 battery with a
higher Watt hour rating. This increased quantity of 3 batteries
with the lower Watt hour rating can exempt the pack from
certain shipping regulations that are imposed upon the higher
Watt hour batteries.
For example, the Transport
Wh rating might indicate
3x36 Wh, meaning 3
batteries of 36 Wh each.
The Use Wh rating might
indicate 108Wh (1batteryimplied).
Storage Recommendations
1. The best storage place is one that is cool and dry away
from direct sunlight and excess heat or cold. For optimum
battery performance and life, store battery packs at room
temperature when not inuse.
2. For long storage, it is recommended to store a fully charged
battery pack in a cool, dry place out of the charger for
optimalresults.
NOTE: Battery packs should not be stored completely
depleted of charge. The battery pack will need to be recharged
beforeuse.
Labels on Charger and Battery Pack
In addition to the pictographs used in this manual, the labels
on the charger and the battery pack may show the following
pictographs:
Read instruction manual beforeuse.
See Technical Data for chargingtime.
Do not probe with conductiveobjects.
Do not charge damaged batterypacks.
Example of Use and Transport Label Marking

9
ENGLISH
Description (Fig. A)
WARNING: Never modify the power tool or any part of it.
Damage or personal injury couldresult.
1 On/off trigger switch
2 Air vents
3 Air temperature
adjustment switch
4 Nozzle
5 Heat barrel cover
6 Battery release button
7 Battery
8 Lock-on button
9 LED light
10 Trigger
Intended Use
Your
DeWALT
heat gun has been designed for stripping paint,
soldering pipes, shrinking PVC, welding and bending plastics as
well as general drying and thawingpurposes.
DO NOT use under wet conditions or in the presence of
flammable liquids orgases.
The heat gun is a professional power tool.
DO NOT let children come into contact with the tool.
Supervision is required when inexperienced operators use
thistool.
• Young children and the infirm. This appliance is not
intended for use by young children or infirm persons
withoutsupervision.
• This product is not intended for use by persons (including
children) suffering from diminished physical, sensory or
mental abilities; lack of experience, knowledge or skills
unless they are supervised by a person responsible for their
safety. Children should never be left alone with thisproduct.
Date Code Position (Fig. B)
The date code, which also includes the year of manufacture, is
printed into thehousing.
Example:
2019 XX XX
Year of Manufacture
Package Contents
The package contains:
1 Heat gun
1 Cone nozzle
1 Fish tail surface nozzle
1 Li-Ion battery pack (C1, D1, L1, M1, P1, S1, T1, X1, Y1 models)
2 Li-Ion battery packs (C2, D2, L2, M2, P2, S2, T2, X2, Y2 models)
3 Li-Ion battery packs (C3, D3, L3, M3, P3, S3, T3, X3, Y3 models)
1 Instruction manual
NOTE: Battery packs, chargers and kitboxes are not included
with N models. Battery packs and chargers are not included with
NT models. Bmodels include Bluetooth® batterypacks.
NOTE: The Bluetooth® word mark and logos are registered
trademarks owned by the Bluetooth®, SIG, Inc. and any use of
such marks by
DeWALT
is under license. Other trademarks and
trade names are those of their respectiveowners.
• Check for damage to the tool, parts or accessories which may
have occurred duringtransport.
• Take the time to thoroughly read and understand this manual
prior tooperation.
Battery Type
The DCE530 operate on a 18 volt batterypack.
These battery packs may be used: DCB181, DCB182, DCB183,
DCB183B, DCB184, DCB184B, DCB185, DCB187, DCB189,
DCB546, DCB547, DCB548. Refer to Technical Data for
moreinformation.
Do not expose to water.
Have defective cords replacedimmediately.
Charge only between 4 ˚C and 40 ˚C.
Only for indooruse.
Discard the battery pack with due care for
theenvironment.
Charge
DeWALT
battery packs only with designated
DeWALT
chargers. Charging battery packs other
than the designated
DeWALT
batteries with a
DeWALT
charger may make them burst or lead to
other dangeroussituations.
Do not incinerate the batterypack.
USE (without transport cap). Example: Wh rating
indicates 108 Wh (1 battery with 108 Wh).
TRANSPORT (with built-in transport cap). Example:
Wh rating indicates 3 x 36 Wh (3batteries of 36Wh).
Markings on Tool
The following pictograms are shown on the tool:
Read instruction manual beforeuse.
Wear earprotection.
Wear eyeprotection.
Visible radiation. Do not stare intolight.

10
ENGLISH
Use only one hand to hold the tool as shown in FigureC. Do not
place your other hand over the airvents.
Proper Hand Position (Fig. C)
WARNING: To reduce the risk of serious personal injury,
ALWAYS use proper hand position asshown.
WARNING: To reduce the risk of serious personal
injury, ALWAYS hold securely in anticipation of a
suddenreaction.
OPERATION
Instructions for Use
WARNING: Always observe the safety instructions and
applicableregulations.
WARNING: To reduce the risk of serious personal
injury, turn tool off and disconnect battery pack
before making any adjustments or removing/
installing attachments or accessories. An accidental
start-up can causeinjury.
Air Temperature (Fig.A)
The Heat Gun has two temperature settings. Slide the air
temperature adjustment switch3 forwards to select low heat
(L), or pull the switch backwards to select high heat (H).
Applications
The table below suggests settings for differentapplications.
Inserting and Removing the Battery Pack
from the Tool (Fig. B)
NOTE: Make sure your battery pack 7 is fullycharged.
To Install the Battery Pack into the Tool Handle
1. Align the battery pack 7 with the rails inside the tool’s
handle (Fig. B).
2. Slide it into the handle until the battery pack is firmly seated
in the tool and ensure that you hear the lock snap intoplace.
To Remove the Battery Pack from the Tool
1. Press the release button 6 and firmly pull the battery pack
out of the toolhandle.
2. Insert battery pack into the charger as described in the
charger section of thismanual.
Fuel Gauge Battery Packs (Fig. B)
Some
DeWALT
battery packs include a fuel gauge which
consists of three green LED lights that indicate the level of
charge remaining in the batterypack.
To actuate the fuel gauge, press and hold the fuel gauge
button 11. A combination of the three green LED lights will
illuminate designating the level of charge left. When the level
of charge in the battery is below the usable limit, the fuel gauge
will not illuminate and the battery will need to berecharged.
NOTE: The fuel gauge is only an indication of the charge left on
the battery pack. It does not indicate tool functionality and is
subject to variation based on product components, temperature
and end-userapplication.
ASSEMBLY AND ADJUSTMENTS
WARNING: To reduce the risk of serious personal
injury, turn tool off and disconnect battery pack
before making any adjustments or removing/
installing attachments or accessories. An accidental
start-up can causeinjury.
WARNING: Use only
DeWALT
battery packs andchargers.
Setting Applications
Low • Drying paint and varnish
• Removing stickers
• Waxing and dewaxing
• Drying wet timber prior to filling
• Shrinking PVC wrapping and
insulation tubes
• Thawing frozen pipes
High • Welding plastics
• Bending plastic pipes and sheets
• Loosening rusted or tightly
fastened nuts and bolts
• Removing paint and lacquer
• Soldering plumbing joints
• Removing linoleum or vinyl
floor tiles
To Attach the Correct Accessory (Fig. A)
This tool is supplied with a set of accessories for
differentapplications.
Icon Description Purpose
Reflector nozzle or
hook nozzle
Heat shirnk wrap reflecting heat
around item. avoiding excess heat
burning or hurting surface behind
item being heated.
75 mm Fish tail
surface nozzle
Drying, removing paint, removing
vinyl or linoleum, thawing (heat
spread over wide area).
1. Make sure the on/off trigger switch1 is in the off position
and the tool is disconnected from the power source. Ensure
the nozzle has cooleddown.
2. Place the desired accessory onto thenozzle4.

11
ENGLISH
Cleaning
WARNING: Blow dirt and dust out of the main housing
with dry air as often as dirt is seen collecting in and around
the air vents. Wear approved eye protection and approved
dust mask when performing thisprocedure.
WARNING: Never use solvents or other harsh chemicals
for cleaning the non-metallic parts of the tool. These
chemicals may weaken the materials used in these parts.
Use a cloth dampened only with water and mild soap.
Lubrication
Your power tool requires no additionallubrication.
MAINTENANCE
Your power tool has been designed to operate over a long
period of time with a minimum of maintenance. Continuous
satisfactory operation depends upon proper tool care and
regularcleaning.
WARNING: To reduce the risk of serious personal
injury, turn tool off and disconnect battery pack
before making any adjustments or removing/
installing attachments or accessories. An accidental
start-up can causeinjury.
The charger and battery pack are notserviceable.
Prior to Operation (Fig. A)
WARNING: Make sure the nozzle always points away
from you and anybystanders.
WARNING: DO NOT drop anything into thenozzle.
WARNING: DO NOT exceed 60 minutes "ON" in a
2hourperiod.
1. Attach the correct accessory recommended for
theapplication.
2. Slide the air temperature adjustment switch3 to desired
airtemperature.
NOTE: During operation pauses, ensure that the heat gun is
placed in such a way that it will not tip over. Place the heat gun
in a location where it will not be inadvertently knocked over
and is free of flammable materials. If the product is bumped
or placed poorly it could fall and burn or ignite materials in
thearea.
Switching On and Off (Fig.A, D)
1. Push the air temperature adjustment switch3 to the
desired air flow settings:
2. Allow air flow to heat up the workpieceslowly.
I 109 l/min (290 ˚C)
A high air flow to heat up the workpiecequickly.
II 190 l/min (530 ˚C)
3. To power on: flip trigger switch1 upwards and pull
trigger10 in. To keep the unit on hands free then, press in
the lock-on button8 on the left with your thumb.
4. To turn the unit off release the trigger. If the trigger is
locked -on, squeeze the trigger slightly to disengage the
lock-off button and then release the trigger.
NOTE: Disconnect the tool from the power source and let the
tool cool down before moving or storingit.
NOTE: When using hands free operation ensure that the
heat gun is placed in such a way that it will not tip over. Place
the heat gun in a location where it will not be inadvertently
knocked over and is free of flammable materials. If the product
is bumped or placed poorly it could fall and burn or ignite
materials in thearea.
Removing Paint (Fig. A)
WARNING: Refer to Important Notice under
Important Safety Instructions before using the tool to
removepaint.
WARNING: Do not strip metal window frames as the heat
may crack theglass.
• When striping other window frames, use a glass
protectionnozzle.
• To prevent igniting the surface, do not keep the tool
directed at one spot toolong.
• Avoid collecting paint on the scraper accessory, as it
may ignite. If necessary, carefully remove paint debris
from the scraper accessory using aknife.
1. Attach the appropriateaccessory.
2. Slide the air temperature adjustment switch3 tohigh.
3. Turn the tool on by flipping trigger switch1 upwards and
pulling trigger10in.
4. Direct the hot air onto the paint to beremoved.
Best results will be achieved if the heat gun is moved slowly,
but CONSTANTLY, from side to side to evenly distribute
heat. DO NOT LINGER OR PAUSE IN ONESPOT.
5. When the paint softens, scrape the paint away using a
handscraper.
REMEMBER: Splinters and small particles of stripped paint can
be ignited and blown through holes and cracks in the surface
beingstripped.
Stationary Use (Fig. E)
This tool can also be used in stationarymode.
1. Set the tool onto a level, stable workbench. Ensure the tool
will not tipover.
2. Turn the tool on by selecting the desired airflow.
Cool Down Period (Fig. F)
The nozzle and accessory becomes very hot during use. Turn
heat gun off, disconnect from the power source and set the tool
onto a level, stable workbench. Ensure the tool will not tip over.
Let the tool cool down for at least 30 minutes before moving or
storingit.
NOTE: To reduce the cooling time, switch the tool on at the
lowest air temperature setting and let it run for a few minutes
before turning the heat gunoff.

12
ENGLISH
Protecting the Environment
Separate collection. Products and batteries marked
with this symbol must not be disposed of with normal
householdwaste.
Products and batteries contain materials that can
be recovered or recycled reducing the demand for raw
materials. Please recycle electrical products and batteries
according to local provisions. Further information is available at
www.2helpU.com.
Rechargeable Battery Pack
This long life battery pack must be recharged when it fails
to produce sufficient power on jobs which were easily done
before. At the end of its technical life, discard it with due care for
our environment:
• Run the battery pack down completely, then remove it from
thetool.
• Li-Ion cells are recyclable. Take them to your dealer or a
local recycling station. The collected battery packs will be
recycled or disposed ofproperly.
Optional Accessories
WARNING: Since accessories, other than those offered
by
DeWALT
, have not been tested with this product, use
of such accessories with this tool could be hazardous.
To reduce the risk of injury, only
DeWALT
recommended
accessories should be used with thisproduct.
Consult your dealer for further information on the
appropriateaccessories.
Never let any liquid get inside the tool; never immerse any
part of the tool into aliquid.

13
PУССКИЙ
ВНИМАНИЕ: Во избежание риска получения травм
ознакомьтесь синструкцией.
:
Ниже описывается уровень опасности, обозначаемый
каждым из предупреждений. Прочитайте руководство
иобратите внимание на данныесимволы.
ОПАСНО: Обозначает опасную ситуацию, которая
неизбежно приведет ксерьезной травме или
смертельному исходу, вслучае несоблюдения
соответствующих мербезопасности.
ВНИМАНИЕ: Указывает на потенциально опасную
ситуацию, которая, вслучае несоблюдения
соответствующих мер безопасности,
может привести ксерьезной травме или
смертельномуисходу.
ПРЕДУПРЕЖДЕНИЕ: Указывает на потенциально
опасную ситуацию, которая, вслучае несоблюдения
!
Вы приобрели инструмент . Многолетний опыт, тщательная
разработка изделий иинновации делают компанию
одним из самых надёжных партнеров для пользователей
профессиональногоэлектроинструмента.
соответствующих мер безопасности может
стать причиной травм средней или легкой
степенитяжести.
ПОЯСНЕНИЕ: Указывает на практики,
использование которых не связано
сполучением травмы, но если ими пренебречь,
могут привести кпорчеимущества.
Указывает на риск поражения электрическимтоком.
Указывает на рисквозгорания.
DCE530
Напряжение Впост. тока 18
Тип 1
Тип батареи
Температура на выходе воздуха 290 °C/530 °C
Поток воздуха л/мин 109/190
Вес (без аккумуляторной батареи) кг 0,5
Pусский (перевод соригинала инструкции)
ПИСТОЛЕТ ГОРЯЧЕГО ВОЗДУХА
DCE530
Батареи Зарядные устройства/время зарядки (мин)
Кат. № Vпост. тока Ah Вес (kg) DCB104 DCB107 DCB112 DCB113 DCB115 DCB118 DCB132 DCB119
DCB546 18/54 6.0/2.0 1.05 60 270 170 140 90 60 90 X
DCB547 18/54 9.0/3.0 1.46 75* 420 270 220 135* 75* 135* X
DCB548 18/54 12.0/4.0 1.44 120 540 350 300 180 120 180 X
DCB181 18 1.5 0.35 22 70 45 35 22 22 22 45
DCB182 18 4.0 0.61 60/40** 185 120 100 60 60/40** 60 120
DCB183/B 18 2.0 0.40 30 90 60 50 30 30 30 60
DCB184/B 18 5.0 0.62 75/50** 240 150 120 75 75/50** 75 150
DCB185 18 1.3 0.35 22 60 40 30 22 22 22 X
DCB187 18 3.0 0.54 45 140 90 70 45 45 45 90
DCB189 18 4.0 0.54 60 185 120 100 60 60 60 120
*Код даты 201811475B или новее
**Код даты 201536 или новее
Батареи
Зарядные устройства/время зарядки (мин)
Кат. №
пост.тока
Вес
*Код даты 201811475B или новее
**Код даты 201536 или новее

14
PУССКИЙ
ВНИМАНИЕ: Прочитайте и просмотрите
все предупреждения, инструкции,
иллюстрации и спецификации по данному
электроинструменту. Несоблюдение всех
приведенных ниже инструкций может стать
причиной поражения электрическим током,
возгорания и/или тяжелойтравмы.
СОХРАНИТЕ ВСЕ ИНСТРУКЦИИ ДЛЯ
ПОСЛЕДУЮЩЕГО ИСПОЛЬЗОВАНИЯ
При неосторожном использовании инструмента возможно
возникновение пожара. Поэтому:
• Учтите, что тепло может передаться на
легковоспламеняющиеся материалы, которые
находятся вне поле зрения. ЗАПРЕЩАЕТСЯ
использовать во влажной атмосфере, где могут
присутствовать горючие газы или рядом с
легковоспламеняющимисяматериалами.
• Перед тем, как убрать инструмент на хранение,
поставьте его на подставку и позвольте емуостыть.
• ЗАПРЕЩАЕТСЯ оставлять включенный инструмент
безприсмотра.
• ЗАПРЕЩАЕТСЯ закрывать руками или любым образом
блокировать вентиляционныеотверстия.
• Во время работы сопло и насадки инструмента сильно
нагреваются. Перед тем, как прикоснуться к этим
деталям, позвольте имостыть.
• ВСЕГДА отключайте инструмент перед тем, как
положитьего.
• Данный инструмент не предназначен для использования
лицами (включая детей) с ограниченными физическими,
сенсорными или ментальными возможностями, а
также лицами без достаточного опыта и знаний, если
только они не делают этого под руководством лица
имеющего соответствующий опыт и отвечающего за
ихбезопасность.
• Обеспечьте достаточную вентиляцию, так
как во время работы могут образоваться
токсичныеиспарения.
• ЗАПРЕЩАЕТСЯ использовать в качестве фена для
сушкиволос.
• ЗАПРЕЩАЕТСЯ закрывать вход воздуха или выход сопла,
так как это может привести к чрезмерному перегреву и
повреждениюинструмента.
• ЗАПРЕЩАЕТСЯ направлять поток горячего воздуха
наокружающих.
• ЗАПРЕЩАЕТСЯ прикасаться к металлическому соплу,
так как оно сильно нагревается во время работы, и
сохраняет тепло до 30минут послеиспользования.
• ЗАПРЕЩАЕТСЯ класть сопло на предметы во время
работы или сразу после еезавершения.
• ЗАПРЕЩАЕТСЯ вставлять пальцы или предметы в
сопло, так как это может привести к поражению
электрическим током. Запрещается смотреть в сопло
во время работы инструмента по причине выпуска
потока воздуха высокойтемпературы.
• НЕ позволяйте краске налипать на сопло или
скребок, так как она может воспламениться через
некотороевремя.
• ЗАПРЕЩАЕТСЯ снимать крышку теплового ствола во
времяработы.
• Во избежание риска взрыва, ЗАПРЕЩАЕТСЯ
использовать пистолет горячего воздуха в камерах
для окрашивания распылителем или в 3,0м от работ с
распылениемкраски.
• ЗАПРЕЩАЕТСЯ использовать данный инструмент
для удаления краски, содержащей свинец. Осыпания,
остатки и пары краски могут содержать ядовитый для
людейсвинец.
• Горючие материалы, находящиеся вне зоны видимости,
например, за стенами, потолками, полами, нижними
поверхностями конструкций и другими панелями,
могут воспламениться во время работы пистолета
горячего воздуха. Воспламенение этих материалов
может быть не сразу заметно, и может привести
к материальному ущербу и травмам. При работе в
таких местах, двигайте пистолетом горячего воздуха
взад-вперед. Задержка или пауза на одном месте может
воспламенить панель или материал заней.
ПРИМЕЧАНИЕ. Пистолеты горячего воздуха могут
создавать температуры, превышающие 530˚C.
• ЗАПРЕЩАЕТСЯ использовать инструмент для
разогрева продуктовпитания.
• ЗАПРЕЩАЕТСЯ класть пистолет горячего воздуха
на легковоспламеняющиеся поверхности во время
работы или сразу после выключения. Перед тем, как
убрать инструмент на хранение, позвольте ему
остыть. Всегда ставьте пистолет горячего воздуха
на ровную поверхность так, чтобы кончик сопла был
направленнаверх.
• Убедитесь, что передвижные предметы надежно
закреплены прискребке.
• Обязательно направляйте поток горячего воздуха в
безопасном направлении, вдали от других людей или
легковоспламеняющихсяпредметов.
• ЗАПРЕЩАЕТСЯ снимать крышку теплового цилиндра во
времяработы.
• ЗАПРЕЩАЕТСЯ прикасаться соплом к любой
поверхности во время работы или сразу после
еезавершения.
• Щепки или мелкие частицы счищенной краски могут
воспламениться и быть продутыми в щели и трещины
на очищаемойповерхности.

15
PУССКИЙ
• ЗАПРЕЩАЕТСЯ сжигать краску. Используйте скребок
и держите сопло на расстоянии не менее 25мм от
покрашенной поверхности. При работе в вертикальном
направлении, работайте сверху вниз, чтобы краска не
падала в инструмент и негорела.
• ВСЕГДА используйте скребки и очистные ножи
хорошегокачества.
• ЗАПРЕЩАЕТСЯ использовать пистолет
горячего воздуха в сочетании с химическими
средствамиудаления.
• ЗАПРЕЩАЕТСЯ использовать сопла с
принадлежностями какскребки.
• ЗАПРЕЩАЕТСЯ направлять поток воздуха из
пистолета горячего воздуха на стекло. Стекло может
треснуть, что может привести к материальному
ущербу итравмам.
• Содержите этикетки и паспортные таблички
в хорошем состоянии. На них находится
важнаяинформация.
• Ставьте пистолет горячего воздуха на ровную
поверхность, когда не держите его в руках.
• Всегда помните, что этот инструмент может
воспламенить горючие материалы, и размягчить или
расплавить другие. Закрывайте такие материалы или
держите пистолет горячего воздуха на расстоянии от
них, вне зависимости от выполняемой вамиработы.
• Иногда после выключения инструмента может
образоваться немного дыма. Это происходит
из-за нагрева остатков масла, которым
покрыт нагревательный элемент во время
производственногопроцесса.
• Используйте средства защиты глаз и другие
средства индивидуальнойзащиты.
• Запрещается оставлять инструмент под
дождем и в местах повышенной влажности. При
попадании воды в электроинструмент, риск поражения
электрическим токомвозрастает.
• Не пытайтесь дотянуться до слишком удаленных
поверхностей. Обувь должна быть удобной,
чтобы вы всегда могли сохранять равновесие.
Это позволит лучше контролировать инструмент в
непредвиденныхситуациях.
• Храните инструмент в недоступном для детей
месте и не позволяйте работать с инструментом
людям, не имеющим соответствующих
навыков работы с такого рода инструментами.
Инструменты представляют опасность в руках
неподготовленныхпользователей.
• Обслуживание инструмента должно выполняться
только квалифицированным техническим
персоналом с использованием оригинальных
запасных частей. Это позволит обеспечить
безопасность обслуживаемогоинструмента.
• Сварочная работа не должна повторяться на
установке, так как это может открыть детали
поднапряжением.
Персонал, удаляющий краску, должен всегда
соблюдать данные указания:
ВНИМАНИЕ: Соблюдайте особую осторожность
при удалении краски. Осыпания, остатки и пары
краски могут содержать ядовитый для людей
свинец. Любая краска, произведенная до 1977 года,
может содержать свинец. Краска домов до 1950
года скорее всего содержит свинец. При оседании на
поверхности, контакт руки и рта может привести
к попаданию свинца внутрь. Даже небольшая доза
свинца может вызвать необратимые повреждения
мозга и нервной системы. Маленькие и нерожденные
дети особоуязвимы.
Перед выполнением любой работы по удалению краски,
необходимо определить, содержит ли удаляемая краска
свинец. Это может сделать местный здравотдел или
специалист с использованием анализатора краски,
для проверки содержания свинца в удаляемой краске.
КРАСКИ НА ОСНОВЕ СВИНЦА ДОЛЖНЫ УДАЛЯТЬСЯ
ТОЛЬКО СПЕЦИАЛИСТОМ И НЕ ДОЛЖНЫ УДАЛЯТЬСЯ
ПИСТОЛЕТОМ ГОРЯЧЕГО ВОЗДУХА. Персонал, удаляющий
краску, должен соблюдать данные указания:
1 . Переместите заготовку вне помещения. Если
это невозможно, обеспечьте достаточную
вентиляцию рабочего места. Откройте окна и
поставьте в одно из них вытяжной вентилятор.
Убедитесь, что вентилятор вытягивает воздух из
помещениянаружу.
2 . Уберите или закройте ковры, коврики, мебель, одежду,
кухонные принадлежности ивоздуховоды.
3 . Покройте рабочее место защитной пленкой,
чтобы собрать любые кусочки или отслоения
краски. Носите защитную одежду, например,
дополнительные рабочие рубашки, комбинезоны
ишапки.
4 . Работайте в одной комнате за раз. Мебель
следует убрать или поместить в центр комнаты
и закрыть. Запечатайте дверь защитной пленкой,
чтобы рабочее место было закрыто должным образом
от остальной жилойплощади.
5 . Дети, беременные или возможно беременные,
кормящие женщины не должны находиться на рабочем
месте, пока работа не выполнена и помещение не
очищенополностью.
6 . Надевайте пылезащитную респираторную маску
или респираторную маску с двойным фильтром
(пыль и испарения). Убедитесь, что маска
надежно закреплена на лице. Усы и борода могут
помешать правильному креплению маски. Часто
заменяйте фильтры. НЕ ИСПОЛЬЗУЙТЕ ОДНОРАЗОВЫЕ
БУМАЖНЫЕМАСКИ.
7 . Соблюдайте осторожность при использовании
пистолета горячего воздуха. Не задерживайте

16
PУССКИЙ
Зарядные устройства не требуют регулировки
имаксимально просты виспользовании.
Электробезопасность
Электродвигатель рассчитан на работу только при одном
напряжении сети. Необходимо обязательно убедиться
втом, что напряжение источника питания соответствует
указанному на шильдике устройства. Необходимо также
убедиться втом, что напряжение работы зарядного
устройства соответствует напряжению всети.
Зарядное устройство оснащено двойной
изоляцией всоответствии стребованиями
EN60335; поэтому провод заземления нетребуется.
Вслучае повреждения кабеля питания его необходимо
заменить специально подготовленным кабелем, который
можно приобрести всервисных центрах.
Использование удлинительного кабеля
Используйте удлинитель только вслучаях крайней
необходимости. Используйте только утвержденные
удлинители промышленного изготовления, рассчитанные
на мощность не меньшую, чем потребляемая мощность
зарядного устройства (см. Технические характеристики).
Минимальное поперечное сечение провода электрического
кабеля должно составлять 1мм2; максимальная длина 30м.
При использовании кабельного барабана всегда полностью
разматывайтекабель.
Важные инструкции по технике безопасности
для всех зарядных устройств
СОХРАНИТЕ НАСТОЯЩЕЕ РУКОВОДСТВО. Вданном
руководстве содержатся важные инструкции по технике
Несмотря на соблюдение соответствующих инструкций по
технике безопасности ииспользование предохранительных
устройств, некоторые остаточные риски невозможно
полностью исключить. А именно:
• ухудшение слуха;
• риск травм от разлетающихся частиц;
• риск получения ожогов врезультате нагревания
инструмента впроцессе работы;
• риск получения травмы врезультате
продолжительнойработы.
СОХРАНИТЕ НАСТОЯЩЕЕ РУКОВОДСТВО
пистолет горячего воздуха на одном участке, так
как перегрев создаст испарения, которые может
вдохнутьоператор.
8 . Держите продукты питания и питьевые
жидкости вне рабочего места. Промойте ладони,
руки и лицо и прополощите рот, перед тем как
поесть или попить. Не курите и не жуйте жвачку или
табак на рабочемместе.
9 . Очистите всю удаленную краску и пыль,
протирая полы влажной шваброй. Протрите
все стены, пороги и другие поверхности, где
может осесть краска или пыль, влажной
тряпкой. НЕ ПОДМЕТАЙТЕ, НЕ СОБИРАЙТЕ СУХУЮ
ПЫЛЬ И НЕ ПЫЛЕСОСЬТЕ. Используйте чистящие
средства с высоким содержанием фосфата или
тринатрийфосфата (TSP) для очистки рабочегоместа.
10 . После завершения работы, положите кусочки краски и
мусор в двойной полиэтиленовый пакет, закройте его
лентой или зажимом-закруткой, и утилизируйте его
надлежащимобразом.
11 . Снимайте защитную одежду и рабочую обувь
на рабочем месте, чтобы не занести пыль в
остальную жилую площадь. Стирайте рабочую
одежду отдельно. Вытирайте обувь влажной
тряпкой, которую затем стирайте вместе с
рабочей одеждой. Тщательно промывайте волосы и
тело мылом иводой.
Данному инструменту необходимо создавать сверхвысокие
температуры для эффективного удаления краски. Это
значит, что инструмент способен воспламенить бумагу,
дерево, краску, остатки лака и схожиематериалы.
Когда вы наберете опыт обращения с инструментом
и выработайте правильные методы работы, риск
случайного возгорания существенно снизится. Лучший
способ выработать правильные методы – ПРАКТИКА!
Выполняйте простые работы по удалению, желательно
вне помещений, пока вы не почувствуете, как необходимо
использовать инструмент безопасно иэффективно.
Обязательно соблюдайте следующие
процедуры безопасности во время практики
• Всегда проверяйте, что инструмент выключен и
отсоединен от источника питания, оставляя его
безприсмотра.
• Регулярно чистите очистные лезвия во время работы.
Остатки материала на лезвии могутвоспламениться.
• Найдите оптимальную дистанцию от сопла
инструмента до обрабатываемой поверхности.
Обычно эта дистанция в пределах от 25,4мм до
50,8мм, в зависимости от удаляемогоматериала.
• Всегда двигайте пистолет горячего воздуха впереди
очистныхлезвий.
• Регулярно убирайте кусочки краски, образующиеся на
рабочем месте в процессеработы.
• При работе в помещении, держите пистолет горячего
воздуха на расстоянии от занавесок, бумаги, обивки и
схожих горючихматериалов.
• Помните, что данный профессиональный инструмент
способен давать отличные результаты при
правильном использовании. Практикуйтесь на простых
проектах, пока не освоитесь с инструментом. Только
тогда можно сказать, что вы овладели правильными
методамиработы.

17
PУССКИЙ
безопасности для совместимых зарядных устройств (см.
Техническиехарактеристики).
• Перед тем как использовать зарядное устройство,
внимательно изучите все инструкции
ипредупреждающие этикетки на зарядном
устройстве, батарее иинструменте, для которого
используетсябатарея.
ВНИМАНИЕ: Опасность поражения электрическим
током. Не допускайте попадания жидкости
взарядное устройство. Это может привести
кпоражению электрическимтоком.
ВНИМАНИЕ: Рекомендуется использовать
устройство защитного отключения (УЗО) стоком
утечки до 30мA.
ВНИМАНИЕ: Опасность ожога. Во избежание травм,
следует использовать только аккумуляторные
батареи производства . Использование батарей
другого типа может привести квзрыву, травмам
иповреждениям.
ПРЕДУПРЕЖДЕНИЕ: Не позволяйте детям играть
сданнымустройством.
ПОЯСНЕНИЕ: Вопределенных условиях, при
подключении зарядного устройства кисточнику
питания, может произойти короткое замыкание
контактов внутри зарядного устройства
посторонними материалами. Не допускайте
попадания вполости зарядного устройства таких
токопроводящих материалов, как стальная
стружка, алюминиевая фольга или другие
металлические частицы ит.п. Всегда отключайте
зарядное устройство от источника питания,
если внем нет аккумуляторной батареи. Всегда
отключайте зарядное устройство от сети перед
тем, как приступить кочистке инструмента
• НЕ ПЫТАЙТЕСЬ заряжать батареи спомощью
каких-либо других зарядных устройств, кроме
тех, которые указаны вданном руководстве.
Зарядное устройство ибатарея предназначены для
совместногоиспользования.
• Эти зарядные устройства не предназначены
ни для какого другого использования, помимо
зарядки аккумуляторных батарей . Использование
любых других батарей может привести квозгоранию,
поражению электротоком или гибели от
электрическогошока.
• Не подвергайте зарядное устройство
воздействию снега илидождя.
• При отключении зарядного устройства от
сети всегда тяните за штепсельную вилку, ане
за кабель. Это поможет избежать повреждения
штепсельной вилки ирозетки.
• Убедитесь втом, что кабель расположен
таким образом, чтобы на него не наступили, не
споткнулись об него, атакже втом, что он не
натянут ине может бытьповрежден.
• Не используйте удлинительный кабель без крайней
необходимости. Использование удлинительного
кабеля неподходящего типа может привести кпожару
или поражению электрическимтоком.
• Не ставьте на зарядное устройство никакие
предметы ине устанавливайте зарядное
устройство на мягкую поверхность, которая
может закрыть вентиляционные отверстия
ипривести кперегреву. Не размещайте зарядное
устройство поблизости от источников тепла.
Вентиляция зарядного устройства происходит
спомощью отверстий вверхней инижней
частикорпуса.
• Не используйте зарядное устройство при наличии
повреждений кабеля или штепсельной вилки –
вэтом случае необходимо немедленно ихзаменить.
• Не используйте зарядное устройство, если его
роняли, либо если оно подвергалось сильным
ударам или было повреждено каким-либо
иным образом. Обратитесь вавторизованный
сервисныйцентр.
• Не разбирайте зарядное устройство.
При необходимости обратитесь
вспециализированный сервисный центр, если
нужно провести обслуживание или ремонт
инструмента. Неправильная сборка может стать
причиной пожара или поражения электрическимтоком.
• Вслучае повреждения кабеля питания его необходимо
немедленно заменить упроизводителя, вего сервисном
центре или спривлечением другого специалиста
аналогичной квалификации для предотвращения
несчастногослучая.
• Перед очисткой отключите зарядное устройство
от сети. Впротивном случае, это может
привести кпоражению электрическим током.
Извлечение аккумуляторной батареи не приведет
кснижению степени этогориска.
• НИКОГДА не подключайте два зарядных
устройствавместе.
• Зарядное устройство предназначено для работы
при стандартном напряжении сети в230В. Не
пытайтесь использовать его при каком-либо ином
напряжении. Это не относится кавтомобильному
зарядномуустройству.
Зарядка батареи (Рис. [Fig.] B)
1. Перед установкой батареи подключите зарядное
устройство ксоответствующей сетевойрозетке.
2. Вставьте аккумуляторную батарею 7 взарядное
устройство, убедившись втом, что она хорошо
установлена. Красный индикатор зарядки начнет мигать.
Это означает, что процесс зарядкиначался.
3. По окончании зарядки красный индикатор будет гореть
непрерывно, не мигая. Теперь батарея полностью
заряжена, иее можно использовать или оставить
взарядном устройстве. Чтобы извлечь аккумуляторную

18
PУССКИЙ
Важные инструкции по технике безопасности
для всех батарей
При заказе запасных батарей не забудьте указать номер по
каталогу инапряжение.
При покупке батарея заряжена не полностью. Перед тем,
как использовать батарею изарядное устройство, прочтите
следующие инструкции по технике безопасности. Затем
выполните необходимые действия длязарядки.
ВНИМАТЕЛЬНО ПРОЧТИТЕ ВСЕ ИНСТРУКЦИИ
• Не заряжайте ине используйте батарею во
взрывоопасной атмосфере, например, при наличии
горючих жидкостей, газов или пыли. Установка или
удаление батареи из зарядного устройства может
привести квоспламенению пыли илигазов.
• Никогда не прилагайте больших усилий,
вставляя батарею взарядное устройство. Не
вносите изменения вконструкцию батарей
сцелью установить их взарядное устройство,
ккоторому они не подходят. Это может привести
ксерьезнымтравмам.
• Заряжайте батареи только спомощью зарядных
устройств .
батарею из зарядного устройства, нажмите кнопку
фиксатора батареи6иизвлекитебатарею.
ПРИМЕЧАНИЕ: Чтобы обеспечить максимальную
производительность исрок службы ионно-литиевых
батарей, перед первым использованием полностью
зарядите аккумуляторнуюбатарею.
Работа сзарядным устройством
См. состояние зарядки аккумуляторной батареи на
приведенных нижеиндикаторах.
Индикаторы зарядки
Зарядка
Полностью заряжен
Температурная задержка*
*Вэто время красный индикатор продолжит мигать, акогда
начнется зарядка, загорится желтый. После того, как
батарея достигнет рабочей температуры, желтый индикатор
погаснет, изарядкапродолжится.
Зарядное(-ые) устройство(-а) не может(-гут) полностью
зарядить неисправную аккумуляторную батарею. При
неисправной аккумуляторной батарее, индикатор на
зарядном устройстве незагорится.
ПРИМЕЧАНИЕ: Также это может указывать на проблему
сзаряднымустройством.
Если зарядное устройство указывает на наличие
проблемы, проверьте аккумулятор изарядное устройство
вспециализированном сервисномцентре.
Температурная задержка
Если температура батареи слишком низкая или слишком
высокая, зарядное устройство автоматически переходит
врежим температурной задержки; при этом зарядка не
начинается до тех пор, пока батарея не достигнет нужной
температуры. После того, как нужный уровень температуры
будет достигнут, устройство перейдет врежим зарядки.
Данная функция обеспечивает максимальный срок
эксплуатациибатареи.
Зарядка холодной батареи занимает больше времени, чем
теплой. Аккумуляторная батарея заряжается медленнее во
время цикла зарядки имаксимального заряда не удастся
добиться даже после того, как аккумуляторная батарея
будеттеплой.
Зарядное устройство DCB118 оснащено внутренним
вентилятором для охлаждения батареи. Вентилятор
включится автоматически, если батарея нуждается в
охлаждении. Не используйте зарядное устройство,
если вентилятор не функционирует или если забиты
вентиляционные отверстия. Не позволяйте посторонним
предметам попадать внутрь зарядногоустройства.
Система электронной защиты
Ионно-литиевые аккумуляторные батареи XR оснащены
системой электронной защиты, которая защищает
аккумуляторную батарею от перегрузки, перегревания или
глубокойразрядки.
При срабатывании системы электронной защиты инструмент
автоматически отключается. Вэтом случае поставьте
ионно-литиевую батарею на зарядку до тех пор, пока она
полностью незарядится.
Крепление на стену
Данные зарядные устройства могут крепиться на стены
или устанавливаться на стол или рабочую поверхность.
При креплении на стену расположите зарядное устройство
впределах досягаемости розетки иподальше от углов
идругих препятствий, которые могут помешать потоку
воздуха. Используйте заднюю часть зарядного устройства
вкачестве образца для положения монтажных болтов
на стене. Надежно закрепите зарядное устройство при
помощи саморезов (приобретаются отдельно) длиной
минимум в25,4мм сдиаметром шляпки самореза в7–9мм,
вкрученных вдерево до оптимальной глубины, оставляющей
на поверхности примерно 5,5мм самореза. Совместите
отверстия на задней стороне зарядного устройства
свыступающими саморезами иполностью вставьте их
вотверстия.
Инструкции по очистке зарядного устройства
ВНИМАНИЕ: Опасность поражения
электрическим током. Перед чисткой
отключите зарядное устройство от сети
питания. Грязь ижир можно удалить снаружной
поверхности зарядного устройства спомощью
тряпки или мягкой неметаллической щетки.
Не используйте воду или чистящие растворы.
Не допускайте попадание жидкости внутрь
инструмента; никогда не погружайте никакие из
деталей инструмента вжидкость.
Other manuals for DCE530
2
Table of contents
Languages:
Other DeWalt Power Tools manuals

DeWalt
DeWalt DCH363 User manual

DeWalt
DeWalt DW451S2 User manual

DeWalt
DeWalt DWE249 User manual

DeWalt
DeWalt D25501 User manual

DeWalt
DeWalt DCS571 User manual

DeWalt
DeWalt DCS356 User manual

DeWalt
DeWalt DCF886 User manual

DeWalt
DeWalt SDS MAX D25711 User manual

DeWalt
DeWalt DC300 User manual

DeWalt
DeWalt DCF503N User manual

DeWalt
DeWalt DCS498 User manual

DeWalt
DeWalt DW349 User manual

DeWalt
DeWalt DW895 User manual

DeWalt
DeWalt XR DCS355 User manual

DeWalt
DeWalt DWE349 User manual

DeWalt
DeWalt XR Li-ION DCS334 User manual

DeWalt
DeWalt DW896 User manual

DeWalt
DeWalt DC300 User manual

DeWalt
DeWalt DCS356P2-GB User manual

DeWalt
DeWalt XR Li-ION DCS331 User manual