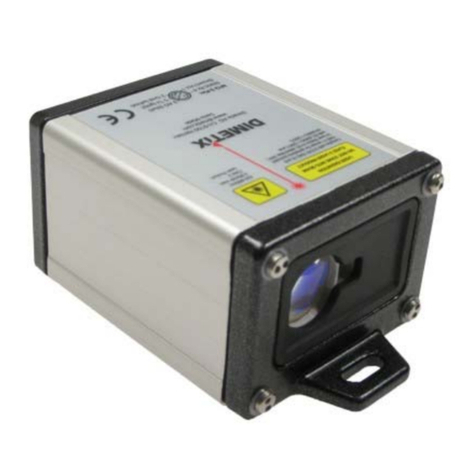
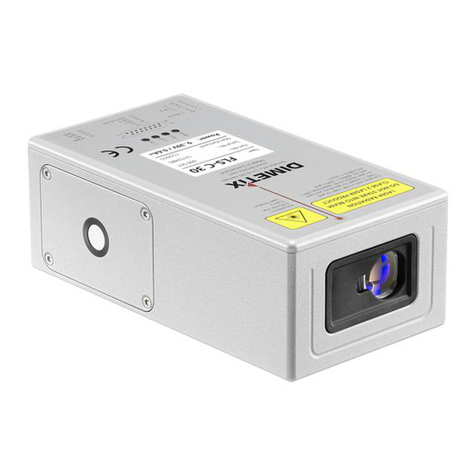
Dimetix DLS-C 15 Product manual

TECHNICAL REFERENCE MANUAL
Ta le of Contents
1 Introduction...................................................................................................................................................................................................4
1.1 Product identification...........................................................................................................................................................................5
1.2 Components........................................................................................................................................................................................5
1.3 Validit .................................................................................................................................................................................................5
2 Application examples....................................................................................................................................................................................6
2.1 Serial interface RS-232 / RS-422...........................................................................................................................................................6
2.2 Analog and digital output....................................................................................................................................................................6
2.3 External displa ....................................................................................................................................................................................6
2.4 External trigger....................................................................................................................................................................................6
2.5 SSI connection.....................................................................................................................................................................................7
2.6 Positioning...........................................................................................................................................................................................7
3 Device overview and setup............................................................................................................................................................................8
3.1 Connection for configuration...............................................................................................................................................................8
3.2 Output interfaces.................................................................................................................................................................................9
3.2.1 Output configuration example...................................................................................................................................................9
3.3 Operation modes...............................................................................................................................................................................10
3.3.1 Controlled mode......................................................................................................................................................................10
3.3.2 Stand-alone mode....................................................................................................................................................................11
3.4 Measuring characteristics...................................................................................................................................................................12
3.4.1 Measuring characteristics overview..........................................................................................................................................12
3.4.2 Moving target characteristic.....................................................................................................................................................13
3.4.3 Error behavior...........................................................................................................................................................................14
3.5 Special user commands......................................................................................................................................................................15
3.5.1 Offset / Gain.............................................................................................................................................................................15
3.5.2 Output format..........................................................................................................................................................................15
3.6 Output value filter..............................................................................................................................................................................16
3.6.1 Moving average filter...............................................................................................................................................................16
3.6.2 Spike suppression filter.............................................................................................................................................................16
3.6.3 Error suppression filter..............................................................................................................................................................16
4 Installation...................................................................................................................................................................................................17
4.1 Mounting...........................................................................................................................................................................................17
4.1.1 Mounting of the device............................................................................................................................................................17
4.1.2 Mounting for the reflective plate..............................................................................................................................................17
4.1.3 Alignment of the laser beam....................................................................................................................................................17
4.1.4 Laser Life time consideration....................................................................................................................................................17
4.2 Device wiring.....................................................................................................................................................................................17
4.2.1 Power suppl ............................................................................................................................................................................17
4.2.2 Cable connection.....................................................................................................................................................................17
4.2.3 Shield and ground....................................................................................................................................................................17
4.2.4 Serial connection......................................................................................................................................................................18
4.2.5 Analog / Digital connection......................................................................................................................................................19
4.2.6 SSI connection..........................................................................................................................................................................19
4.2.7 External trigger connection......................................................................................................................................................20
5 Technical data.............................................................................................................................................................................................21
5.1 Measuring accurac definition...........................................................................................................................................................21
5.2 Measuring performance influences....................................................................................................................................................21
5.3 Prevention of erroneous measurements.............................................................................................................................................22
5.3.1 Rough surfaces.........................................................................................................................................................................22
5.3.2 Transparent surfaces................................................................................................................................................................22
5.3.3 Wet, smooth, or high-gloss surfaces........................................................................................................................................22
5.3.4 Inclined, round surfaces............................................................................................................................................................22
5.3.5 Multiple reflections...................................................................................................................................................................22
5.3.6 Influence of sun light................................................................................................................................................................22
5.4 Specifications.....................................................................................................................................................................................23
6 Electrical components.................................................................................................................................................................................24
6.1 ID switch............................................................................................................................................................................................24
6.2 Reset switch.......................................................................................................................................................................................24
6.3 Digital output.....................................................................................................................................................................................24
6.4 Digital input.......................................................................................................................................................................................24
6.5 Analog output...................................................................................................................................................................................25
6.6 RS-232 serial interfaces......................................................................................................................................................................25
6.7 RS-422 serial interface.......................................................................................................................................................................25
6.8 SSI output..........................................................................................................................................................................................26
6.8.1 SSI Specification.......................................................................................................................................................................26
6.8.2 SSI Timing................................................................................................................................................................................26
6.9 Connector..........................................................................................................................................................................................27
6.9.1 D-Sub connector......................................................................................................................................................................27
6.9.2 Screw terminal.........................................................................................................................................................................27

TECHNICAL REFERENCE MANUAL
7 Ph sical dimensions.....................................................................................................................................................................................28
8 Factor settings...........................................................................................................................................................................................28
8.1 Standard configuration......................................................................................................................................................................28
8.2 User configured measurement...........................................................................................................................................................28
9 Command set.............................................................................................................................................................................................29
9.1 General..............................................................................................................................................................................................29
9.1.1 Command termination <trm>..................................................................................................................................................29
9.1.2 Device identification N.............................................................................................................................................................29
9.1.3 Parameter separator.................................................................................................................................................................29
9.1.4 Set/Get commands...................................................................................................................................................................29
9.1.5 Startup sequence.....................................................................................................................................................................29
9.2 Operation commands........................................................................................................................................................................30
9.2.1 Distance measurement (sNg)....................................................................................................................................................30
9.2.2 Single sensor tracking (sNh)......................................................................................................................................................30
9.2.3 Single sensor tracking with timer(sNh).....................................................................................................................................30
9.2.4 Tracking with buffering – Start (sNf).........................................................................................................................................31
9.2.5 Read out - Tracking with buffering(sNq)...................................................................................................................................31
9.2.6 STOP/CLEAR command (sNc)....................................................................................................................................................31
9.2.7 Signal measurement (sNm).......................................................................................................................................................31
9.2.8 Temperature measurement (sNt)..............................................................................................................................................32
9.2.9 Laser ON (sNo).........................................................................................................................................................................32
9.2.10 Laser OFF (sNp).......................................................................................................................................................................32
9.3 Configuration commands..................................................................................................................................................................33
9.3.1 Set communication parameter (sNbr).......................................................................................................................................33
9.3.2 Measuring characteristic configuration (sNuc)..........................................................................................................................34
9.3.3 Set auto start configuration (sNA)............................................................................................................................................35
9.3.4 Set/Get analog output min level (sNvm)...................................................................................................................................35
9.3.5 Set/Get analog output value in error case (sNve)......................................................................................................................35
9.3.6 Set/Get analog output distance range (sNv).............................................................................................................................36
9.3.7 Set/Get digital output levels (sNn)............................................................................................................................................37
9.3.8 Configure digital input (sNDI1).................................................................................................................................................38
9.3.9 Read digital input (sNRI)...........................................................................................................................................................38
9.3.10 Interface 2 configuration (RS-422 / SSI)..................................................................................................................................39
9.3.11 Set/Get error value on SSI output...........................................................................................................................................40
9.3.12 Set/Get measurement filter configuration (sNfi).....................................................................................................................40
9.3.13 Save configuration parameters (sNs)......................................................................................................................................40
9.3.14 Set configuration parameters to factor default (sNd)............................................................................................................41
9.3.15 Get software version (sNsv)....................................................................................................................................................41
9.3.16 Get serial number (sNsn)........................................................................................................................................................41
9.3.17 Get device generation and t pe (dg)......................................................................................................................................42
9.3.18 Get device t pe (dt)................................................................................................................................................................42
9.4 Special user operation commands.....................................................................................................................................................43
9.4.1 User distance measurement (sNug)..........................................................................................................................................43
9.4.2 User single sensor tracking (sNuh)............................................................................................................................................43
9.4.3 User single sensor tracking with timer(sNuh)............................................................................................................................44
9.4.4 User tracking with buffering – Start (sNuf)...............................................................................................................................44
9.4.5 Read out – User tracking with buffering (sNuq)........................................................................................................................44
9.5 Special User configuration commands...............................................................................................................................................45
9.5.1 Set user auto start configuration (sNuA)...................................................................................................................................45
9.5.2 Set/Get user distance offset (sNuof).........................................................................................................................................45
9.5.3 Set/Get user distance gain (sNuga)...........................................................................................................................................45
9.5.4 User output protocol (sNuo).....................................................................................................................................................46
9.6 Error codes.........................................................................................................................................................................................47
10 Safet instructions.....................................................................................................................................................................................48
10.1 Use of the instrument......................................................................................................................................................................48
10.2 Limits to use....................................................................................................................................................................................48
10.3 Areas of responsibilit ......................................................................................................................................................................49
10.4 Hazards in use.................................................................................................................................................................................49
10.5 Laser classification...........................................................................................................................................................................50
10.6 Electromagnetic compatibilit (EMC)...............................................................................................................................................51
10.7 Producer Standards..........................................................................................................................................................................51
10.8 Disposal...........................................................................................................................................................................................51
10.9 Labeling...........................................................................................................................................................................................52
10.10 Laser Specification.........................................................................................................................................................................52
10.11 Maintenance..................................................................................................................................................................................52
10.12 Service...........................................................................................................................................................................................52

TECHNICAL REFERENCE MANUAL
1 Introduction
The DLS-C(H) and FLS-C(H) are powerful distance-measuring instruments for integration into industrial applications. The allow accurate and
contactless distance measurement over a wide range using the reflection of a laser beam:
Ke features
•Compatible with DIMETIX DLS-B(H) and DLS-A(H) Laser Distance Sensor
•Measurement range 0.05 to 500 m
•Serial interface (RS-232 and RS-422)
•SSI interface (FLS-C(H) onl )
•Connection of up to 10 modules on a single RS-422 line
•Wide range power suppl (9...30VDC), heating option (24...30VDC)
•Programmable analog output (0/4...20mA)
•Two programmable digital outputs (DO1 and DO2)
•Digital output for error signalization (DOE)
•One programmable digital input (DI1)
•ASCII protocol to control external displa s
•D-Sub connector and screw terminal joint for eas connection of DLS-C(H) / FLS-C(H)
•IP65 (protected against ingress of dust and water)
•4 LEDs for status signaling
•Complementar configuration software available at Dimetix web site (www.dimetix.com)
•Optional: Internal heater for device operation down to -40°C
•Laser class II (<0.95mW)
•Accessories for eas use of the sensor
Use of controls or adjustments or performance of procedures other than those specified in this
Technical Reference Manual may result in hazardous radiation exposure.
For easy startup with the DLS / FLS sensor, please use our free
configuration software from our we -page:
www.dimetix.com/Utilit SW
Distance Laser Sensor Page 4/53
Fig. 1 Standard application
Measured distance
Target
Measuring
reference
DLS-C(H)
FLS-C(H)

TECHNICAL REFERENCE MANUAL
1.1 Product identification
The product is identified b the label on the top of the sensor:
DLS-C Version with a measurement rate of up to 6 Hz and a maximum measuring distance of 150m
Typical Accuracy
1.5mm 3.0mm
Standard version DLS-C 15
Part No.: 500622
DLS-C 30
Part No.: 500621
Extended temperature range DLS-CH 15
Part No.: 500624
DLS-CH 30
Part No.: 500623
FLS-C Version with a measurement rate of up to 250 Hz and a maximum measuring distance of 500m
Typical Accuracy
1.0mm 3.0mm
Standard version FLS-C 10
Part No.: 600502
FLS-C 30
Part No.: 600501
Extended temperature range FLS-CH 10
Part No.: 600504
FLS-CH 30
Part No.: 600503
1. Components
1 Status LEDs
status signaling
2 15-Pin D-Su connector
RS-422, RS-232, SSI , analog, digital output
3 Ca le gland (M16 x 1.5mm)
for connection cable insertion
4 Cover
provides access to the screw terminal,
Screwdriver-t pe is Torx T9
5 Reset switch
resets the DLS-C(H)/FLS-C(H) to default settings
6 Screw terminal
RS-422, RS-232, SSI, analog, digital output
7 ID switch
defines the Device ID for RS-422 operation
8 Laser eam outlet
9 Receiver optics
10 Product la el
see 10.9 Labeling on page 52
1.3 Validity
This manual is valid for DLS-C(H) and FLS-C(H) devices with the following software version:
Interface software version: 0500 or later
Module software version: 0400 or later
To get the software version use the command described in 9.3.15 Get software version (sNsv) on page 41
Distance Laser Sensor Page 5/53
7
6
5
9
1
8
10
1
2
1
10
4
3

TECHNICAL REFERENCE MANUAL
Application examples
Since the configuration of the DLS-C(H)/FLS-C(H) is ver flexible the device is usable in various situations. The following application examples
give an idea of possible applications. Please visit www.dimetix.com for a detailed description of the mentioned application examples and
check for additional application examples.
.1 Serial interface RS- 3 / RS-4
While the RS-232 should be used for the configuration of the device (See
3.1 Connection for configuration on page 8) the RS-422 is made for
communication in industrial environment (See 3.3.1 Controlled mode on
page 10 and 4.2.4 Serial connection on page 18).
Fig. 2 shows the connection of multiple DLS-C(H)/FLS-C(H) devices to a
Siemens S7 PLC. A detailed application note can be found on
www.dimetix.com.
For RS-422 connections use twisted pair cables onl !.
. Analog and digital output
Activate the stand-alone mode (3.3.2 Stand-alone mode on page 11) and the
device is read to use. It starts measuring after power on and updates the analog
and digital output according to the configuration. See 9.3.4 and the following
chapters for the configuration commands.
.3 External display
If Displa Mode is enabled, the DLS-C(H)/FLS-C(H) formats the measured distance
as ASCII string, which is understood b External Displa s with a serial interface.
Since the DLS-C(H)/FLS-C(H) transfers this formatted string automaticall on the
serial interface after completing a measurement. Measurement results can be
displa ed on an external displa without an additional controller.
Check www.dimetix.com for a detailed application note.
.4 External trigger
The DLS-C(H)/FLS-C(H) includes the option of triggering measurements with an
external switch or push button on Digital Input 1 (DI 1). Using the Digital Input DI 1
disables the Digital Output DO 1.
Please refer to 3.3.2.2 Manual start configuration on page 11
Distance Laser Sensor Page 6/53
Fig. 5: Use digital input as external trigger
12
13
AO
AGND
DO/DI 1
V+
7,8
9
1k
Fig. 4: External displa connection
DO/DI 1
V+
7,8
9
1k
2
1
R
T
m
GND
14,15
RS232 or RS422
Fig. 2: RS-422 connection to S7 PLC
R+
R-
T+
T-
ID switch
Position 0
CP 340 Zusatzkarte
5
4
6
3
14,1 5
7,8
V+
R+
R-
T+
T-
ID switch
Position 1
5
4
6
3
14,1 5
7,8
V+
R+
R-
T+
T-
ID switch
Position 9
5
4
6
3
14,1 5
7,8
V+
Vcc
0V
(slave) (slave) (slave)
CP3 40-RS 4 22/485;
6ES7 340-1CH 00-0A E0
Pin 2
Pin 9
Pin 4
Pin 11
Pin 8
Sub -D
Buch se 15pol
Siemens S7
DLS-C(H)/FLS-C(H) DLS-C(H)/FLS-C(H) DLS-C(H)/FLS-C(H)
DLS-C(H)
FLS-C(H)
DLS-C(H)
FLS-C(H)
Fig. 3: AO and DO connection
DLS-C(H)
FLS-C(H)
12
14,15
13
24V=
9..30VDC
24..30VDC for Heating Option
0V
AO
AGND
DO 1
DO 2
V+
GND
7,8
9
10

TECHNICAL REFERENCE MANUAL
.5 SSI connection
Set the FLS-C(H) in stand-alone mode (3.3.2 Stand-alone mode on page 11) and
connect it to a SSI master as shown in Fig. 6. The measured distances are
immediatel available at the SSI output. See 9.3.10 Interface 2 configuration (RS-
422 / SSI) on page 39 for the detailed command description.
Never connect the SSI master before the FLS-C(H) interface 2 is configured as SSI
interface.
.6 Positioning
The figure on the left shows a t pical positioning application. In this
application the SSI interface of the FLS-C(H) is directl connected to a
position input of a motor drive. The drive controls the motor In such a
wa , that the sledge moves to the position given as set point b the
PLC.
The encoder is used for securit reasons to double check the movement
b the Drive.
In this applications the FLS-C(H) uses the SSI interface (4.2.6 SSI
connection on page 19) and the moving target characteristic (3.4.2
Moving target characteristic on page 13.
Please check on www.dimetix.com for detailed application notes.
Distance Laser Sensor Page 7/53
Fig. 7: Positioning application
Possition
SSI
Field bus
PLC
Drive
Fig. 6: SSI connection example
Cl oc k+
SS I c loc k
SS I data
R+
R-
T+
T-
5
4
6
3
7, 8
V+
(SSI Clock in +)
(SSI Clock in -)
(SSI da ta out + )
(SSI da ta out - )
14 , 1 5
0V
V c c
shielded twisted pair
connection
GND
SSI master
(i.e. controller)
SSI slave
FLS-C(H)
Cl oc k-
Dat a+
Dat a-
Te rm in a l
Shield

TECHNICAL REFERENCE MANUAL
3 Device overview and setup
We recommend that ou carr out the configuration steps in an office before mounting the device, especiall if ou are not familiar with
the DLS-C(H)/FLS-C(H).
Configure the outputs first and second do the configuration of the operation mode. The following sections describe the configuration steps
and give an example.
3.1 Connection for configuration
To be able to configure the DLS-C(H)/FLS-C(H), it must be powered and connected to a PC. Figure 8 shows the necessar connections. On
the PC, an terminal program can be used to communicate with the module. A configuration utilit is also available on the web page
www.dimetix.com.
Distance Laser Sensor Page 8/53
Fig. 8 Connection for DLS-C(H)/FLS-C(H) configuration
DLS-C(H)
9 pin
D-Sub
T
Gnd
2
5
3
T
R
2
1
GND
V+
R
15 pin
D-Sub
9..30VDC
24..30VDC for Heating option
+-
14,15
7,8
Default setting:
Baud:
Bit:
Parity:
Stop:
19200
7
even
1
COM1 or COM2
DLS-C(H)
FLS-C(H)

TECHNICAL REFERENCE MANUAL
3. Output interfaces
The DLS-C(H)/FLS-C(H) contains different interfaces. Measurement results and errors are signaled at the outputs as described below.
RS-232 The RS-232 is meant for the configuration of the device, however measurement can also be taken using the RS-232
interface. Measurement results and/or error codes are sent corresponding to the command description. To use this
interface host s stem is needed as described in 3.3.1 Controlled mode on page 10.
RS-422 The RS-422 operates like the RS-232, but it is an industrial interface and therefore not onl usable for configuration
but also for controlled measurement as described in 3.3.1 Controlled mode on page 10.
The RS-422 can not be used simultaneous with the SSI interface since it uses the same signal lines.
SSI Output The SSI Interface is onl implemented in the FLS t pe. The SSI interface is updated after each successful measurement
as well as after an error occurs. If the interface is activated, it is updated in all operation modes.
Binar and Gra code as well as error signalization is supported. (See 4.2.6 SSI connection on page 19)
Analog Output The analog output is updated in controlled and stand-alone mode. It is configurable and works with two ranges:
- 0..20mA
- 4..20mA
Digital Outputs Three digital outputs are included in the DLS-C(H)/FLS-C(H). Two of them are programmable, while the third is used
to signal an error state of the device. The digital outputs are updated in all operation modes.
3.2.1 Output configuration example
After connecting the DLS-C(H)/FLS-C(H), the following steps are necessar to configure the output behavior.
No. Action Comment Command
1
Set current output range Defines the current output range from 0 to
20mA or from 4 to 20mA.
Example for device 0:
Set current output range from 4mA to 20mA.
s0vm+1<trm>1)
2
Set distance range Defines the minimum distance (Dmin) and the
maximum distance (Dmax) for the current
range of the analog output.
Example for device 0:
Set distance range from 0m to 10m
s0v+00000000+00100000<trm>1)
3
Set analog output in case of
an error
Sets the current that should be applied in
case of an error.
Example for device 0:
Set current to 0mA in case of an error.
s0ve+000<trm>1)
4
Configure digital output Set the ON and OFF level for the digital
outputs.
Example for device 0:
DO 1: off=2000mm on=2005mm
DO 2: off=4000mm on=4005mm
s01+00020000+00020050<trm>1)
s02+00040000+00040050<trm>1)
5
Configure SSI Output Activate SSI output (RS-422 is deactivated)
Example for device 0:
Set SSI configuration
Set output value in error case to 12345
s0SSI+1<trm>1)
s0SSIe+12345<trm>1)
6
Save settings The changed configuration must be saved to
make it permanent.
Example for device 0:
Save settings for device 0
s0s<trm>1)
1) Commands are described in 9 Command set on page 29
Note: If the serial line settings of the device have been lost, please reset the configuration to the factor settings (8 Factor settings on
page 28) using the reset button (6.2 Reset switch on page 24). Please note that the ID switch must be reset manuall .
Distance Laser Sensor Page 9/53

TECHNICAL REFERENCE MANUAL
3.3 Operation modes
The first decision to be taken is the t pe of operating mode that will be used to perform distance measurements. While the controlled mode
provides maximum flexibilit and accurac , it is often not suitable for integration into existing drives, PLCs or analog environments. In such
cases the Stand-alone mode might be preferred.
controlled mode stand-alone mode
Auto start Manual start
The measurement is controlled b a host with
commands such as
- sNg
- sNh
- sNuf
The measurement starts after power
on. This must be configured with the
command
- sNA
- sNuA
After configuring the DO1 as DI1, the
measurement can be triggered b an
external signal. Use the following
command
- sNDI
See 9.2 Operation commands starting on page 30 See 9.3.3 Set auto start
configuration (sNA) on page 35
See 9.3.8 Configure digital input (sNDI1)
on page 38
After each measurement all outputs are updated corresponding to the configuration (See 9.3 Configuration commands on page 33).
3.3.1 Controlled mode
In controlled mode, each operation of a DLS-C(H)/FLS-C(H) is triggered b a command sent from a host s stem over a serial line. While a
single device can be connected to the host s stem using the RS-232 interface, up to 10 devices can be connected to a single serial RS-422
line. The related command set is described in Chapter 9 on page 29.
3.3.1.1 Configuration
After connecting the module, the steps below are necessar to configure the DLS-C(H)/FLS-C(H) for the controlled interface mode.
No. Action Comment Command
1 Set ID switch Changes to the Device ID are activated after a
power c cle.
Example for device 0:
Change the ID Switch to position 0
Set ID switch to position 0
Power OFF; Wait 10s; Power ON
2
Set controlled mode Set the DLS-C(H)/FLS-C(H) to the controlled
mode, if not alread in controlled mode.
Example for device 0:
Set to controlled mode b means of the stop
command.
s0c<trm>1)
3
Set communication
parameters
If necessar , change the settings for the serial
interface.
Example for device 0:
Set serial interface to 19200 Baud, 8 Bit, no
Parit
s0br+2<trm>1)
Power OFF; Wait 10s; Change settings on the
host; Power ON
1) Commands are described in 9 Command set on page 29
Note: If the communication parameters of the device are lost, please reset the configuration to the factor settings (8 Factor settings
on page 28) using the reset button (6.2 Reset switch on page 24). Please note that the ID switch must be reset manuall .
3.3.1.2 Host software
Host software is required for operation of the DLS-C(H)/FLS-C(H) in controlled mode. When connecting multiple devices to a single serial
line (RS-422), strict Master-Slave communication must be implemented (DLS-C(H)/FLS-C(H) operates as slave). For software sample-code or
application-notes please consult our web site www.dimetix.com.
Careful testing of the host software together with the devices prior to installation is strongl recommended.
Distance Laser Sensor Page 10/53

TECHNICAL REFERENCE MANUAL
3.3.2 Stand-alone mode
Before starting the stand-alone mode, output configuration must be done (See 3.2 Output interfaces on page 9)
3.3.2.1 Auto start configuration
The following steps are necessar to configure the DLS-C(H)/FLS-C(H) for stand-alone mode with auto start.
No. Action Comment Command
1
Set auto start Set the DLS-C(H)/FLS-C(H) to the stand-alone
mode with auto start and with the desired
sample rate.
Example for device 0:
Set sample rate to fastest possible speed.
s0A+0<trm>1)
1) Commands are described in 9 Command set on page 29
Note: If the serial line settings of the device have been lost, please reset the configuration to the factor settings (8 Factor settings on
page 28) using the reset button (6.2 Reset switch on page 24). Please note that the ID switch must be reset manuall .
3.3.2.2 Manual start configuration
Configure the Digital Input (see 9.3.8 Configure digital input (sNDI1) on page 38) to activate the external trigger to start measurements.
No. Action Comment Command
1
Activate digital input DI1 Defines the action for a trigger event on DI1.
Example for device 0:
Configure DI1 to start and stop tracking. If
DI1 is high, distances are measured and the
result is transferred to the output at all
interfaces. If DI1 goes to low, the
measurement stops
s0DI1+3<trm>1)
2
Save settings The changed configuration must be saved to
make it permanent.
Example for device 0:
Save settings for device 0 s0s<trm>1)
1) Commands are described in 9 Command set on page 29
Note: If the serial line settings of the device have been lost, please reset the configuration to the factor settings (8 Factor settings on
page 28) using the reset button (6.2 Reset switch on page 24). Please note that the ID switch must be reset manuall .
Distance Laser Sensor Page 11/53

TECHNICAL REFERENCE MANUAL
3.4 Measuring characteristics
Multiple measuring characteristics are available in the FLS-C measuring devices to meet different requirements for various applications. With
these measuring characteristics measuring rate and accurac can be optimized for special requirements.
The FLS-C measuring device at factor settings has an accurac of ±1 mm (FLS-C(H) 10) respectivel ±3 mm (FLS-C(H) 30) at 2σ. Measuring
rate depends on environmental conditions such as target surface, distance, background light (e.g. sun light), etc. Good environmental
conditions increase measuring rate (e.g. white target surface or orange reflective target plate and dark environment).
3.4.1 Measuring characteristics overview
Availa le in DLS-C(H)
Availa le in FLS-C(H)
Measuring
character-
istic
Measuring
rate
Typical accuracy @
2σ
Description
Error ehavior1)
User Commands2)
FLS-C(H)
10
FLS-C(H)
30
Normal Commands2)
Normal
(factory
setting)
max. 10
Hz3)1) ±1 mm ±3 mm Measuring range on natural surface: typical 65 m
Configuration command: sNuc+0+04) A
Fast max. 20 Hz1) ±2 mm ±6 mm Increased measuring rate up to 20 Hz.
Configuration command: sNuc+0+14) A
Precise max. 6 Hz1) ~±0.8 mm ~±2.4 mm
Increased accurac of ±0.8 mm
Surveying applications, short range applications etc.
Configuration command: sNuc+0+24)
A
Natural
surface
max. 6Hz,
can drop to
0.25Hz @ up
to approx.
80m
~±5 mm
@ up to
approx.
80m
~±15 mm
@ up to
approx.
80m
Increased measuring range on natural surfaces:
t pical 80 meters
Measuring against far awa natural surfaces or bad reflective
surfaces such as black s nthetic granules, etc.
Configuration command: sNuc+0+34)
A
Timed
user
programmed
DLS: ≤ 6Hz,
FLS: ≤ 35Hz
variable variable
The device does not check the signal condition to ensure the
specified accurac is reached, a measurement value is transferred
to the output at a defined measuring rate.
This mode serves for applications where the accurac is not
important but the reaction time is critical
Configuration command: sNuc+1+14)
A
Moving
Target
250Hz,
SSI can poll
with up to
500Hz
±1 mm ±3 mm
The device measures to a continuously moving target and the
distance changes without any jumps.
This measurement characteristic supervises the ma speed,
checks for distance jumps and includes a special filter to
eliminate errors occurring for only a very short time.
Configuration command: sNuc+2+04) (with error freezing)
sNuc+2+14) (without error freezing)
B
1) The behavior in case of an error depends on the configuration. See 3.4.3 Error behavior on page 14
2) Changed characteristics do not influence all commands
3) Good environmental conditions (e.g. white target surface or orange reflective target plate and dark environment).
4) For the description of the command see 9.3.2 Measuring characteristic configuration (sNuc) on Page 34
Distance Laser Sensor Page 12/53

TECHNICAL REFERENCE MANUAL
3.4.2 Moving target characteristic
For continuous movements of a target which t picall appears in positioning applications like automatic warehouses there is a special
measurement characteristic built into the FLS-C (H) called “Moving target”(See 2.6 Positioning on page 7 for a sample application)
To operate the FLS-C(H) in this measurement characteristic
successfull , distance jumps must not occur. The laser beam
must alwa s hit the target.
This measurement characteristic combines a fast measurement rate with the unique accurac of the FLS-C(H). The measurement rate is
fixed and does not change during operation.
For RS-232, RS-422, analog and digital outputs, the output rate is 250Hz. The SSI interface can return reliable measurement data at up to
500Hz read out rate corresponding to the clock received from the master.
When measuring to a stopped target, the resulting distance will sta at a single value, it does not occur an deviation of the distance. This is
necessar if the sensor is used for positioning in closed looped applications.
An optimized error handling suppresses short errors, that ma occur b a short break of the laser beam. In addition an over speed detector
(>10m/s) detects improper situations, which results in an error. This ensures robust operation in positioning applications.
The behavior of the device in case of a severe error can be defined b the operator (See 3.4.3 Error behavior on page 14).
For a description of the configuration command see 9.3.2 Measuring characteristic configuration (sNuc) on page 34.
Distance Laser Sensor Page 13/53
Fig. 9: Condition for moving target characteristic
V
VV
> 150mm
distance jump
moving target jumping target

TECHNICAL REFERENCE MANUAL
3.4.3 Error ehavior
The device has different error behaviors depending on the measuring characteristics and on the start operation.
3.4.3.1 A - Behavior
In case the device detects an error, this error is signalized at the outputs. On the serial and SSI output the error code will be visible
depending on the configuration. The error will be visible at the output until the device performs a successful measurement and outputs the
new distance value or the device will be reset b command (sNc) or b a power c cle.
3.4.3.2 B – Behavior (in moving target characteristic)
This error behavior is onl relevant when using the moving target measurement characteristic.
Configuration with error freezing
sNuc+2+01)
without error freezing
sNuc+2+11)
Situation
Temporar error The temporar error is converted into a
permanent error. This error must be reset as
described below.
The temporar error disappears as soon as the error
condition is cleared (a successful measurement is
done).
Permanent error The permanent error must be reset as described
below.
The permanent error must be reset as described
below.
The error reset function depending on the start condition. The following diagram shows the error reset for the different start configurations.
Stand-alone mode: Auto start configuration
(3.3.2.1 Auto start configuration on page 11)
In this operation the measurement starts automaticall at power on.
A signalized error is reset automaticall after 5 seconds. The reset is
done b an automatic restart of the device. This restart maximal
takes about 4 seconds.
Stand-alone mode: Manual start configuration
(3.3.2.2 Manual start configuration on page 11)
In this operation the measurement is started with a digital input. In
case of an error, the reset of a signalized error is done b restarting
the measurement with the digital input.
1) For the description of the command see 9.3.2 Measuring characteristic configuration (sNuc) on Page 34
Distance Laser Sensor Page 14/53
t < 4 sec
Initialization *
t = min. 1 sec
Error
DO Error
Digital
Input
Output
SSI
Output
RS-232/422
ON
HIGH
OFF
LOW
Start
measuring
Stop
measuring
Measuring values Measuring values
Measuring valuesMeasuring values Error value
Configured Error value
(s SSIe)NValue = 0
no output
Value = 0
no output
t = 5 sec
Error time
t < 4 sec
Initialization*
DO Error
Output
SSI
ON
OFF
Error
Automatic
restart
Measuring values Measuring values
Configured Error value
(s SSIe)NValue = 0

TECHNICAL REFERENCE MANUAL
3.5 Special user commands
The standard command set is extended b a special user command set, which makes it possible to change the output format and appl a
offset and gain.
User command configuration do not influence Analog, Digital and SSI outputs.
3.5.1 Offset / Gain
The user can set an individual user gain and offset to create user defined output values. The output value is calculated as follows.
ValueUser =(Distance+Offset User )⋅GainNumUser
GainDenUser
See 9.5.2 Set/Get user distance offset (sNuof) and
9.5.3 Set/Get user distance gain (sNuga) on page 45
With the offset and gain the result of the user commands (See 9.4 Special user operation commands on page 43) are changed onl .
Analog, Digital and SSI output values are not affected.
3.5.2 Output format
The DLS-C(H)/FLS-C(H) is able to format the output value on the serial interface (RS-232/RS-422) in order to fit it to an ASCII displa . B the
command sNuo the length of the output value can be defined as well as the position of the decimal point. This command in combination
with a gain and offset allows the direct connection of an external displa as described under 2.3 External displa on page 6.
The command is described under 9.5.4 User output protocol (sNuo) on page 46
Distance Laser Sensor Page 15/53

TECHNICAL REFERENCE MANUAL
3.6 Output value filter
The DLS-C(H)/FLS-C(H) contains a filter for the measurement value, which can be activated and offers different configurations. This filter is
available in the following Measuring characteristics (see 3.4 Measuring characteristics) on the DLS-C(H) and the FLS-C(H):
- Normal
- Fast
- Precise
- Natural Surface
- Timed
The output value filter is made of a moving average, a spike suppression as well as an error suppression filter. These filters are all
configurable to offer most possible flexibilit for the adaption of the DLS-C(H)/FLS-C(H) device to various applications.
This filter is inactive for the moving target characteristic.
3.6.1 Moving average filter
The moving average filter averages a specified number of measurements.
Maximum 32 measurement values can be averaged. If a new measurement
value is present, this value will be added to the filter values, while the last
value will be removed. The sum of all measurement values divided b the
size of the filter is transferred to all outputs.
3.6.2 Spike suppression filter
The spike suppression eliminates pairs of min max values inside the filter values (Number of
filter values can be defined). Alwa s the smallest and largest values are removed from the
average calculation.
3.6.3 Error suppression filter
A maximum number of errors inside the filtered values can be suppressed. If the number of
errors inside the filtered values is less as the specified value, no error is shown at the output
See 9.3.12 Set/Get measurement filter configuration (sNfi) on page 40
Distance Laser Sensor Page 16/53
Fig. 10 Moving average filter
New Measurement Value
filtered result
n
Filter
Fig. 11: Spike suppression filter
10
8
4
5
3
2
9
7
6
17
18
13
12
11
115
16
14 19
Fig. 12: Error suppression
Error
Error
10
8
4
5
3
2
9
7
6
17
18
13
12
11
115
16
14 19

TECHNICAL REFERENCE MANUAL
4 Installation
4.1 Mounting
4.1.1 Mounting of the device
Three M4 threaded holes in the bottom of the DLS-C(H)/FLS-C(H) make it eas to mount the device.
Alwa s obe all applicable safet regulations and never use the device outside the specifications stated under 5 Technical data on page 21.
4.1.2 Mounting for the reflective plate
Measuring to the reflective plate ma generate erroneous measurements, if the reflective plate is
mounted exactl at an angle of 90° to the laser beam. Therefore mount the reflective plate like shown
in figure 13.
Avoid direct sunlight on the reflective plate to increase measurement performance.
4.1.3 Alignment of the laser eam
Alignment of the laser beam is often difficult when the target is far awa , as the laser spot is not visible. An optional telescopic viewfinder
and an alignment jig is available to simplif the alignment procedure. (See www.dimetix.com for additional accessories and further details).
4.1.4 Laser Life time consideration
since the life time of the laser is limited, operate the device in a wa , that the laser is switched on onl when necessar . The laser life time
stated under 5 Technical data on page 21 relates to the time while the laser is on.
4. Device wiring
4.2.1 Power supply
For trouble-free operation use a separate power suppl for the DLS-C(H)/FLS-C(H).
FLS-C, DLS-C: 9...30V, 0.5A DC
FLS-CH, DLS-CH: 24...30V, 2.5A DC
4.2.2 Ca le connection
A ferrite core must be fitted to the connecting cable. Use a ferrite core with an impedance of 150 Ω to 260 Ω at 25MHz and 640 Ω to 730
Ω at 100MHz. For example ou can use KCF-65 from KE Kitagawa.
4.2.3 Shield and ground
The DLS-C(H)/FLS-C(H) contains two electricall isolated grounds, the
general ground (GND) and the analog ground (AGND). GND and
AGND are connected to the housing b a RC element. Please see
figure 19.
Distance Laser Sensor Page 17/53
Fig. 13: Reflective Plate mounting
Sensor
Laser Beam 1-3°
Reflective plate
Fig. 14 Connection between shield and ground
Screw terminal
GND
AGND
15 pin D-Sub
GND
AGND
20nF
1M
10nF
500k
DLS-C(H)
FLS-C(H)

TECHNICAL REFERENCE MANUAL
4.2.4 Serial connection
This connection is mainl used for the controlled mode or to configure the device.
RS-232
Onl point-to-point communication is possible when using the RS-232 interface.
Never connect multiple DLS-C(H)/FLS-C(H)s on a RS-232 serial line
RS-422
It is possible to connect multiple devices on a single RS-422 line. To ensure proper operation, strict Master-Slave communication must be
applied. It is important, that the Master has full control of the communication and never initiates a new communication before termination
of the previous communication (answer from the DLS-C(H)/FLS-C(H) or timeout).
For RS-422 connections, use shielded twisted pair cables onl ! For detailed information following the RS-422 guidelines.
Ensure, that all DLS-C(H)/FLS-C(H)s are set to different ID num ers.
The RS-422 interface cannot e used simultaneous with the SSI interface.
Distance Laser Sensor Page 18/53
Fig. 16: Connecting multiple devices with RS-422
DLS-B(H)
Fig. 15 Point-to-point connection with RS-232
DLS-C(H)
FLS-C(H)
T
Host
(PC or PLC)
R
TR
2
7,8
1
14,15
V+
9..30VDC
24..30VDC with Heating
0V
DLS-C(H) / FLS-C(H) DLS-C(H) / FLS-C(H) DLS-C(H) / FLS-C(H)
R+
R-
T+
T-
ID switch
Position 0
Host
(PC or PLC)
R
t
R
t
5
4
6
3
14,15
R
t
R
t
7,8
V+
R+
R-
T+
T-
ID switch
Position 1
5
4
6
3
14,15
7,8
V+
R+
R-
T+
T-
ID switch
Position 9
5
4
6
3
14,15
7,8
V+
9..30VDC
24..30VDC with Heating
0V
(slave) (slave) (slave)
(master)

TECHNICAL REFERENCE MANUAL
4.2.5 Analog / Digital connection
This connection is mainl used with the stand-alone mode. The analog interface of the DLS-C(H)/FLS-C(H) is isolated from the rest of the
device (See 4.2.3 Shield and ground on page 17). When using the analog interface, connect the analog ground (AGND).
Make sure, that the total resistance in the analog path is lower than 500 Ω.
4.2.6 SSI connection
Connect a SSI master according to the connection diagram in Fig. 18. It is compulsor to use a twisted pair cable. See 6.8 SSI output on
page 26 and 6.8 SSI output on page 26 for additional information on the SSI interface.
Typical ca le length
The maximum transmission rate depends on the cable length as shown in the following table. For detailed cable specification use the SSI
guidelines. The transmission rate must be specified at the SSI master.
Max. cable length (t pical) max. transmission rate (t pical)
< 12.5 m < 810 kBaud
< 25 m < 750 kBaud
< 50 m < 570 kBaud
< 100 m < 360 kBaud
< 200 m < 220 kBaud
< 400 m < 120 kBaud
< 500 m < 100 kBaud
The RS-422 interface cannot e used simultaneous with the SSI interface.
The SSI Interface is implemented in the FLS-C(H) only.
Distance Laser Sensor Page 19/53
Fig. 17: Connection of an instrument and a PLC
Analog Input
0..20mA
12
14,15
13
Digital Input
24V=
9..30VDC
24..30VDC for Heating Option
0V
PLC
AO
AGND
DO 1
DO 2
V+
GND
7,8
9
10
DLS-C(H)
FLS-C(H)
Fig. 18: Connection of a SSI Master
Cloc k +
SSI c loc k
SSI data
R+
R-
T+
T-
5
4
6
3
7, 8
V+
(SSI Cloc k in + )
(SSI Cloc k in - )
(SSI data out + )
(SSI data out - )
1 4, 1 5
0V
V c c
shielded twisted pair
connection
G ND
SSI master
(i.e. controller)
SSI slave
FLS-C(H)
Cloc k -
Data+
Data-
Ter m in al
Shield

TECHNICAL REFERENCE MANUAL
4.2.7 External trigger connection
The DO1 (Digital Output 1) can also be used as digital input. For safet
reasons, alwa s use a resistor to protect the connection terminal.
The function of digital input can be configured b the command sNDI1
(see 9.3.8 Configure digital input (sNDI1) on page 38)
Distance Laser Sensor Page 20/53
Fig. 19: Connection for external triggering
DO/DI 1
V+
7,8
9
1k
DLS-C(H)
FLS-C(H)
Other manuals for DLS-C 15
2
This manual suits for next models
15
Table of contents
Other Dimetix Measuring Instrument manuals
Popular Measuring Instrument manuals by other brands

CIAT
CIAT GeoCIAT instruction manual
SenseAir
SenseAir eSENSE installation manual
Sensus
Sensus FieldLogic FL6500 Series quick guide
Shenzhen Linshang Technology
Shenzhen Linshang Technology LS117 user manual
AEMC instruments
AEMC instruments MA194-24-BK user manual

AIC WAIKATO
AIC WAIKATO Presto Master Installation & operating manual

