manuals.online logo
Brands
  1. Home
  2. •
  3. Brands
  4. •
  5. Dimplex
  6. •
  7. Heater
  8. •
  9. Dimplex IRX Series User manual

Dimplex IRX Series User manual

This manual suits for next models

3

Other Dimplex Heater manuals

Dimplex BLF3451 User manual

Dimplex

Dimplex BLF3451 User manual

Dimplex XLS6N User manual

Dimplex

Dimplex XLS6N User manual

Dimplex CHESIL CLS20 User manual

Dimplex

Dimplex CHESIL CLS20 User manual

Dimplex PLX075NN User manual

Dimplex

Dimplex PLX075NN User manual

Dimplex WMCS712N User manual

Dimplex

Dimplex WMCS712N User manual

Dimplex EF12 Series User manual

Dimplex

Dimplex EF12 Series User manual

Dimplex IRX60/120E User manual

Dimplex

Dimplex IRX60/120E User manual

Dimplex ROF2T User manual

Dimplex

Dimplex ROF2T User manual

Dimplex SmartRad SRX80 Technical manual

Dimplex

Dimplex SmartRad SRX80 Technical manual

Dimplex DuoHeat Duo300N User manual

Dimplex

Dimplex DuoHeat Duo300N User manual

Dimplex DEP Series User manual

Dimplex

Dimplex DEP Series User manual

Dimplex DXUFSR2 User manual

Dimplex

Dimplex DXUFSR2 User manual

Dimplex 3082S User manual

Dimplex

Dimplex 3082S User manual

Dimplex SOLAR ST0133 User manual

Dimplex

Dimplex SOLAR ST0133 User manual

Dimplex DTX Series Installation instructions manual

Dimplex

Dimplex DTX Series Installation instructions manual

Dimplex DX200 User manual

Dimplex

Dimplex DX200 User manual

Dimplex LC2507W31 User manual

Dimplex

Dimplex LC2507W31 User manual

Dimplex DX 421 User manual

Dimplex

Dimplex DX 421 User manual

Dimplex DF-X User manual

Dimplex

Dimplex DF-X User manual

Dimplex BFH24R User manual

Dimplex

Dimplex BFH24R User manual

Dimplex Studio G DXSTG25 User manual

Dimplex

Dimplex Studio G DXSTG25 User manual

Dimplex OFRC15FA User manual

Dimplex

Dimplex OFRC15FA User manual

Dimplex QSH-70 User manual

Dimplex

Dimplex QSH-70 User manual

Dimplex AC3CN User manual

Dimplex

Dimplex AC3CN User manual

Popular Heater manuals by other brands

Porter-Cable PCXH80KT Operating instructions and owner's manual

Porter-Cable

Porter-Cable PCXH80KT Operating instructions and owner's manual

Dyna-Glo RA18LPDG user manual

Dyna-Glo

Dyna-Glo RA18LPDG user manual

EOS Herkules XL S120 installation instructions

EOS

EOS Herkules XL S120 installation instructions

Trebs Comfortheat 99209 manual

Trebs

Trebs Comfortheat 99209 manual

Biddle STYLE2 Series Installation operation & maintenance

Biddle

Biddle STYLE2 Series Installation operation & maintenance

Vermont Castings Non-Catalytic Convection Heater 2477CE Installation and operating manual

Vermont Castings

Vermont Castings Non-Catalytic Convection Heater 2477CE Installation and operating manual

Fagor RA-1505 Instructions for use

Fagor

Fagor RA-1505 Instructions for use

THERMAL FLOW Delta 175 Operating instructions manual

THERMAL FLOW

THERMAL FLOW Delta 175 Operating instructions manual

GET G2CH instructions

GET

GET G2CH instructions

ApenGroup PK Series User, installation, and maintenance manual

ApenGroup

ApenGroup PK Series User, installation, and maintenance manual

oventrop Regucor Series quick start guide

oventrop

oventrop Regucor Series quick start guide

Blaze King CLARITY CL2118.IPI.1 Operation & installation manual

Blaze King

Blaze King CLARITY CL2118.IPI.1 Operation & installation manual

ELMEKO ML 150 Installation and operating manual

ELMEKO

ELMEKO ML 150 Installation and operating manual

BN Thermic 830T instructions

BN Thermic

BN Thermic 830T instructions

KING K Series Installation, operation & maintenance instructions

KING

KING K Series Installation, operation & maintenance instructions

Empire Comfort Systems RH-50-5 Installation instructions and owner's manual

Empire Comfort Systems

Empire Comfort Systems RH-50-5 Installation instructions and owner's manual

Well Straler RC-16B user guide

Well Straler

Well Straler RC-16B user guide

EUROM 333299 instruction manual

EUROM

EUROM 333299 instruction manual

manuals.online logo
manuals.online logoBrands
  • About & Mission
  • Contact us
  • Privacy Policy
  • Terms and Conditions

Copyright 2025 Manuals.Online. All Rights Reserved.

Installation and Operating Instructions
IRX Range—Wall Mounted Infra Red Heater
Models: IRX1200N, IRX1800N November 2007—Issue 4
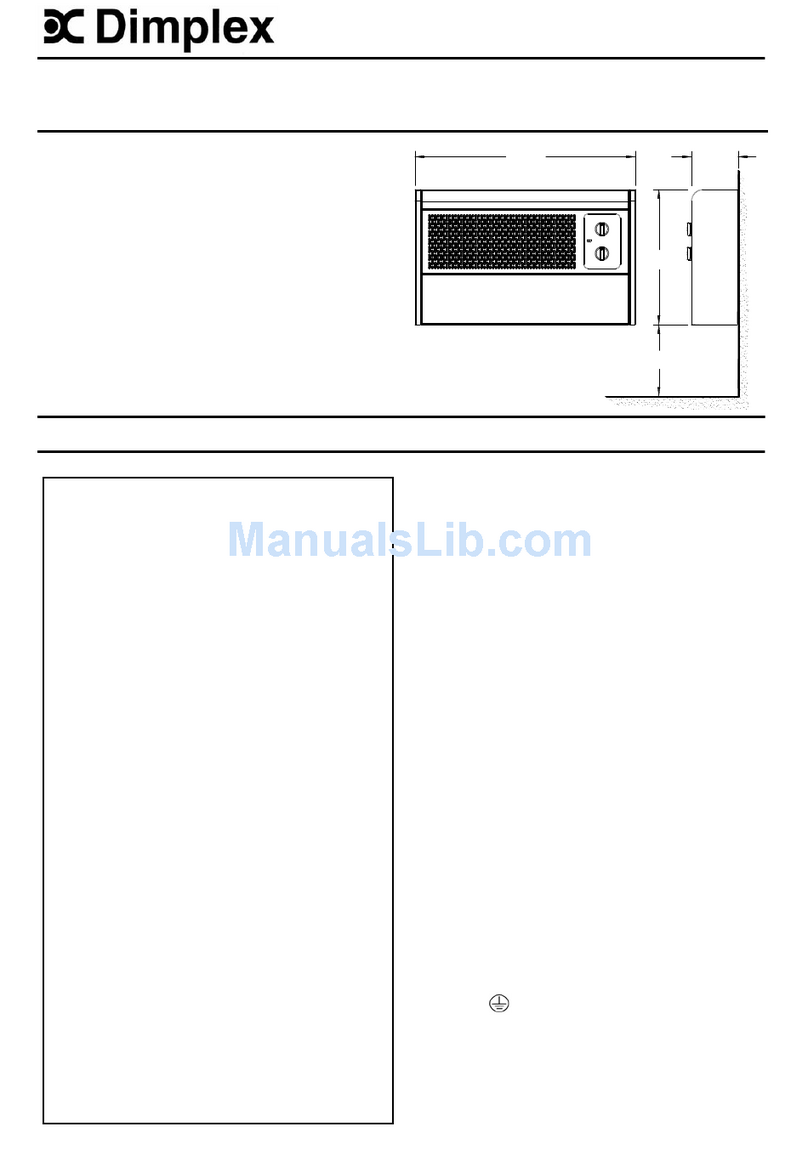
Dimensions (mm)
Model Length Height Depth
IRX1200 750 91.5 75
IRX1800N 510 140 80
Model IRX1200N Model: IRX1800N
THESE INSTRUCTIONS SHOULD BE READ CAREFULLY AND RETAINED FOR FUTURE REFERENCE
IMPORTANT SAFETY ADVICE
WARNING- This product must be installed by a competent
person or electrician in conjunction with the current IEE
Wiring Regulations and relevant Building Regulations
When using electrical appliances, basic precautions
should always be followed to reduce risk of fire, electrical
shock, and injury to persons including the following:
If aged or infirm persons or young children should not be
left unsupervised in the vicinity of the heater unless a
suitable guard is fitted This appliance is not intended for
use by children or other persons without assistance or
supervision if their physical, sensory or mental
capabilities prevent them from using it safely.
DO NOT cover or obstruct any part of the heater
DO NOT recess the unit in to a wall, as this will cause
overheating and potentially be a fire risk
The wall bracket provided must be used for
installation
DO NOT use outdoors
DO NOT locate the heater immediately below a fixed
socket outlet or connection box
This heater is IPX4 rated and can be installed in a
bathroom but must be located so switches and other
controls cannot be touched by a person using a bath
or shower
This heater should be positioned observing all safety
clearances stated in these instructions
Model Output
(kW) Voltage Weight
(kg) Finish IP Rating
IRX1200 1.2 230V- 240V~AC 2.0 Silver IPX4
IRX1800N 1.8 230V- 240V~AC 2.1 White IPX4
General Principle
The IRX range of infra-red wall heaters are a safe, practical source of heat in
bathrooms, kitchens, work areas– anywhere where fast localised heating is
required.
Electrical Connection
WARNING THIS APPLIANCE MUST BE EARTHED
Before undertaking any installation work, ensure the electricity supply is
disconnected from any relevant fixing wiring.
Supply cable is not supplied with this appliance and it should therefore be installed
by a competent person or electrician and be in strict accordance with the current
IEE Wiring Regulations and relevant Building Regulations.
If in doubt consult a qualified electrician.
The supply circuit must be adequate for the input of the appliance and must be
protected wit a 13 Amp fuse.
A suitable termination to the fixed wiring of the premises must be provided adjacent
to the final position of the appliance and be not less than 1800mm from the floor,
through a double pole switch having a contact separation of at least 3mm in all
poles.
Installation
The heater should be permanently wall mounted and installed in conjunction with
the following minimum clearances:
Side clearance to wall = 200mm
Side clearance curtains or other combustible materials = 600mm
Floor to underside of heater = 250mm
See also Fig.1 below
Technical Specification
The appliance must be wall mounted as follows:
1. Firstly remove the polystyrene inserts which secure the elements during transportation by removing the screw and washer at each end
of the grille. Lift the grille off carefully and dispose of the inserts.
2. Before positioning the heater, firstly observe the clearances shown on page 1 (Fig.1)
3. Remove the screw (3) from the back plate (1) and remove the terminal block cover (2) (Fig.2)
4. Rotate the back plate (1) backwards through 90° (Fig.2)
5. Draw a line along the top edge of the back plate and mark the fixing positions through the two holes at either end of the terminal block.
6. Drill two holes and use the wall fixings supplied (alternative wall fixings may be required depending on the wall type)
7. Insert the narrow end of the two cylindrical plastic spacers (4) in to the two holes of the back plate (Fig.3)
8. Insert the screws (5) in to the spacers and screw firmly to the wall
9. Insert the supply cable through either the left of right cable entry grommet and clamp in to position
10. Connect the supply cable to the terminal block as follows:
Blue– N (Neutral)
Brown– L (Live)
Green/Yellow– E (Earth)
11. Re-attach the terminal cover (2) to cover the electricity supply before switching the heater on
Operation
The indicator window shows a number which corresponds to the number of elements being energised. To switch the heater ON,
Pull and release the cord gently until the number is visible.
IRX1200N IRX1800N
(0) - Heater switched OFF (0) - Heater switched OFF
(1) - One element energised = 1200Watts (1) - One element energised = 600Watts
(2) - Two elements energised = 1200Watts
(3) - Three elements energised = 1800Watts
Element Replacement WARNING: DISCONNECT THE POWER SUPPLY before carrying out any
maintenance
1. Remove the screw and washer at each end of the grill and lift off the grille carefully
2. Pull off the spade connector at each end of the failed element
3. Gently slide the element out of the reflector
4. Fit the replacement element in reverse order of the above instructions taking care NOT to touch the element tube with your fingers. Ensure
the grille is secured correctly with the screws and washers.
Cleaning WARNING: DISCONNECT THE POWER SUPPLY before carrying out any maintenance
Before cleaning your heater, switch off the electricity supply to the appliance and allow to cool. The outside of the appliance can be cleaned by
wiping it over with a soft damp cloth and then dried. To remove dust from the reflector and heating elements you can use a brush with long soft
bristles.
After Sales Service
Your product is guaranteed for two years from the date of purchase.
Within this period, we undertake to repair or exchange this product free of charge (subject to availability) provided it has been installed and operated
in accordance with these instructions. Your rights under this guarantee are additional to your statutory rights, which in turn are not affected by this
guarantee.
Should you require after sales service you should contact our Technical Services help desk on 0845 600 5111. It would assist us if you can quote
the model number, date of purchase, and nature of the fault at the time of your call. The Technical Services help desk will also be able to advise you
should you need to purchase any spares.
Please do not return a faulty product to us in the first instance as this may result in loss or damage and delay in providing you with a satisfactory
service.
Please retain your receipt as proof of purchase.
Dimplex UK Ltd
Millbrook House
Grange Drive
Hedge End
Southampton
SO30 2DF
UK Technical Services: 8.00am - 5.00pm Mon-Fri and 8.30am-1pm Sat (Oct-March)
Telephone: 0845 600 5111
Fax: 01489 773053
E-mail: [email protected]
Web-site: www.dimplex.co.uk
Republic of Ireland Tel: 01 842 4833
All rights reserved. Material contained in this publication may not be reproduced in whole or part, without prior permission in writing from Dimplex UK Limited.
(C) Dimplex UK Limited