manuals.online logo
Brands
  1. Home
  2. •
  3. Brands
  4. •
  5. Ditel
  6. •
  7. Measuring Instrument
  8. •
  9. Ditel IOX121LTH User manual

Ditel IOX121LTH User manual

IOX121LTH
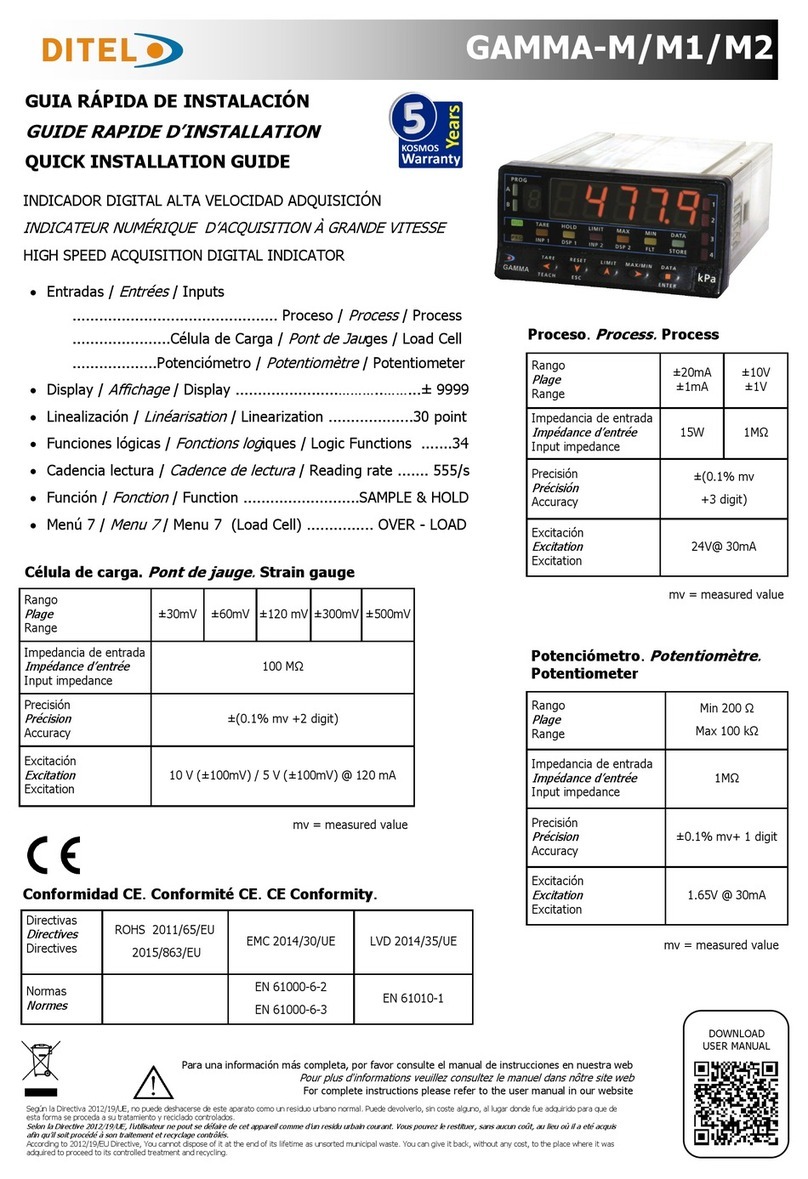
GUIA RÁPIDA DE INSTALACIÓN
GUIDE RAPIDE D’INSTALLATION
QUICK INSTALLATION GUIDE
IONA MATRIX ºC %HR
Rango de medida (1) (2)
Plage de mesure
Measuring Range -20ºC/+60ºC 0-80 %
Precisión (2)
Précision
Accuracy ±0.3ºC ±2%
Repetibilidad
Répetibilité
Repeatability ±0.2ºC ±0.1%RH
Tiempo de respuesta
Temps de réponse
Response time <5s <5s
Deriva en el tiempo
Derive dans le temps
Drift in time
±0.1
ºC/year <1%
HR/year
Dimensiones (sin soportes)
Dimensions (sans supports)
Dimensions (without brackets) 280 x 88 x 48 mm
Alimentación
Alimentation
Power Supply
85-265 VAC 50/60Hz
50 W
Peso / Estanqueidad
Poids / Étanchéité
Weight / Sealed level 1100 g / IP20
Altura digito/distancia visión
Hauteur des digits / distance de
lecture
Digit height / viewing distance
50 mm / 25 m
IONA MATRIX 8*32 PIXEL LITE TEMP/HR
30728909 20230804
DISEÑOS Y TECNOLOGÍA, S.A.
Xarol, 6B P.I. Les Guixeres
08915 Badalona (Barcelona) - Spain
Tel. +34 933 394 758
Fax +34 934 903 145 Email: comercial@ditel.es
web: www.ditel.es
Para una información más completa, por favor consulte el manual de instrucciones en nuestra web
Pour plus d'informations veuillez consultez le manuel dans nôtre site web
For complete instructions please refer to the user manual in our website
Según la Directiva 2012/19/UE, no puede deshacerse de este aparato como un residuo urbano normal. Puede devolverlo, sin coste alguno, al lugar donde fue adquirido para que de esta forma proceder a su
tratamiento y reciclado controlados.
Selon la Directive 2012/19/UE, l’utilisateur ne pout se défaire de cet appareil comme d’un residu urbain courant. Vous pouvez le restituer, sans aucun coût, au lieu où il a eté acquis afin qu’il soit procédé à
son traitement et recyclage contrôlés.
According to 2012/19/EU Directive, You cannot dispose of it at the end of its lifetime as unsorted municipal waste. You can give it back, without any cost, to the place where it was adquired to proceed to its
controlled treatment and recycling
Conformidad CE. Conformité CE. CE Conformity.
DOWNLOAD
USER MANUAL
(1) Display Resoluon: -20ºC to -10ºC and -9.9ºC to 60.0ºC
(2) Only for non-condensing environment
• CONFIGURACION VIA WIFI
CONFIGURATION PAR WIFI
WI-FI CONFIGURATION
• VISUALIZACIÓN PRECISA LED RGB
AFFICHAGE LED RGB PRÉCIS
ACCURATE RGB LED DISPLAY
• REGULACIÓN DE LUMINOSIDAD
RÉGLAGE DE LA LUMINOSITÉ
BRIGHTNESS SETTING
• PALETA COLORES PERSONALIZABLE
PALETTE DE COULEURS PERSONNALISABLE
CUSTOMIZABLE COLOR PALETTE
• OPCIONES DE DISPLAY ALTERNADO
OPTIONS D’AFFICHAGE ALTERNÉ
ALTERNATED DISPLAY OPTIONS
• VISUALIZACIÓN DE DESPLAZAMIENTO
AFFICHAGE À DÉFILEMENT
SCROLLING DISPLAY
• DETECCION AUSENCIA DE SONDA
DETECTION D'ABSENCE DE SONDE
PROBE ABSENCE DETECTION
PANTALLAS WEB SERVER / ÉCRANS WEB SERVER / WEB SERVER DISPLAYS
DIMENSIONES
DIMENSIONS
DIMENSIONS
IOX121LTH : Provides a measurement of temperature and humidity for environmental control
with resolution of 0.1 ºC and 1% HR. Supplied with combined TEMP/HR probe with connector.
It allows the configuration via WIFI of the following parameters:
• DISPLAY LED COLOR
• DISPLAY BRIGHTNESS (by SOFTWARE and by rear buttons (up/down)
• PRESENTATION MODE: ALTERNATED / WITH HORIZONTAL SCROLL
 SEQUENCE TIME / SCROLL SPEED
FEATURES
GENERAL CONFIGURATION
MAIN SCREEN:
Allows access to configurable parameters.Once selected, press "TEST" to view them on the
device.
If they are correct, press “SAVE” to store them in memory, from this moment the WIFI con-
nection of the “access point” is canceled and the device is ready to work.
To modify any parameter, the "access point" must be opened again by pressing the two rear
buttons for a few seconds until the device indicates: UNCONFIGURED Vx.xL and repeat
the initial process.
COLOR SELECTION SCREEN:
Allows access to the color palette where you can choose the color applied to the display LEDs.
Exit using the symbol (x) and press "TEST" to view the result on the device
If you want to modify more parameters, do not press “SAVE” until you have configured all of
them, since pressing “SAVE” closes the “access point” that gives us access to the web server.
DISPLAY MODE SELECTION SCREEN:
Allows access to display mode, where you can choose between
• TOGGLED (alternated). When choosing TOGGLED, the cadence of the
change must also be indicated with a maximum of 30 s.
• SCROLL (scrolling). When choosing SCROLL, the scrolling speed of the
text must be chosen from the options that appear on the screen.
Once configured press "TEST" to check the device and then press "SAVE" to
save in memory and close the "access point"
Connect the supplied probe to the connector at the bottom of the device and power the indicator using the
cable with the plug that it incorporates.
The following message will be displayed on the display: UNCONFIGURED Vx.xL and a WIFI "access point"
will be created (password 12345678) that will allow “pairing” from any smartphone on the device's Wi-Fi.
It will be identified with: IONALEDMatrix Lite_XX where XX is a personalized number assigned by the devi-
ce itself. This connection will give us access to the Web Server that shows us the following screens:
IOX121LTH : Proporciona una medida de temperatura y humedad para control ambiental
con resolución de 0.1 ºC y 1% HR. Se entrega con sonda combinada TEMP/HR con conector.
Permite la configuración via WIFI de los siguientes parámetros:
• COLOR DE LOS LED DISPLAY
• BRILLO DEL DISPLAY (por SOFTWARE y por los pulsadores traseros (up/down)
• MODO PRESENTACIÓN : ALTERNADO / CON SCROLL HORIZONTAL
 TIEMPO DE SECUENCIA / VELOCIDAD DESLIZAMIENTO
CARACTERÍSTICAS
CONFIGURACION GENERAL
Conectar la sonda suministrada al conector de la parte inferior del dispositivo i alimentar el indicador mediante el
cable con clavija que lleva incorporado.
En el display se visualizará en deslizante el siguiente mensaje : UNCONFIGURED Vx.xL y se creará un
“acces point” de WIFI (contraseña 12345678) que permitirá hacer el “pairing” desde cualquier smartphone en la wifi
del dispositivo.
Se identificará con : IONALEDMatrix Lite_XX siendo XX número personalizado que asigna el propio dispositivo.
Esta conexión nos dará acceso al Web Server que nos presenta las siguientes pantallas:
PANTALLA PRINCIPAL:
Permite acceder a los parámetros configurables.
Una vez seleccionados, pulsar “TEST” para visualizarlos en el dispositivo.
Si son los correctos pulsar “SAVE” para almacenarlos en memoria, a partir de este momento se
cancela la conexión WIFI del “acces point” i el dispositivo queda listo para funcionar.
Para modificar algún parámetro deberá abrirse de nuevo el “acces point” pulsando los dos botones
posteriores durante unos segundos hasta que el dispositivo indique : UNCONFIGURED Vx.xL y
repetir el proceso inicial.
PANTALLA SELECCIÓN COLOR:
Permite acceder a la paleta de colores donde se puede elegir el color aplicado a los LED de visualiza-
ción.
Salir mediante el símbolo (x) y pulsar “TEST” para visualizar el resultado en el dispositivo
Si se desea modificar mas parámetros no pulsar “SAVE” hasta no haberlos configurado todos, ya
que al pulsar “SAVE” se cierra el “acces point” que nos da acceso al web server.
PANTALLA SELECCIÓN MODO DISPLAY:
Permite acceder al modo de display , donde puede escoger entre
• TOGGLED (alternado). Al elegir TOGGLED debe indicarse también la
cadencia del cambio con un máximo de 30 s.
• SCROLL (deslizante). Al elegir SCROLL debe escogerse entre las
opciones que nos aparecen en pantalla la velocidad de deslizamiento
del texto.
Una vez configurado pulsar “TEST” para la comprobación en el dispositivo y a
continuación pulsar “SAVE” para guardar en memoria y cerrar el “acces point”
IOX121LTH : Il fournit une mesure de la température et de l'humidité pour le contrôle environnemental avec une
résolution de 0,1 ºC et 1 % HR. Livré avec sonde combinée TEMP/HR avec connecteur.
Il permet la configuration via WIFI des paramètres suivants :
•
COULEUR DES LED D'AFFICHAGE
•
LUMINOSITÉ DE L'AFFICHAGE (par LOGICIEL et par les boutons arrière (haut/bas)
•
MODE DE PRESENTATION : ALTERNÉ / AVEC DÉFILEMENT HORIZONTAL

TEMPS DE SÉQUENCE / VITESSE DE DÉFILEMENT
CARACTÉRISTIQUES
CONFIGURATION GÉNÉRALE
Connectez la sonde fournie au connecteur situé uau bas de l'appareil et alimentez l'indicateur à l'aide du câble avec
prise inclus.
Le message suivant s'affichera à l'écran : UNCONFIGURED Vx.xL et un "point d'accès" WIFI sera créé (mot de pas-
se 12345678) qui permettra “le jumelage” depuis n'importe quel smartphone sur le Wi-Fi de l'appareil.
Il sera identifié par : IONALEDMatrix Lite_XX où XX est un numéro personnalisé attribué par l'appareil lui-même.
Cette connexion nous donnera accès au serveur Web qui nous présente les écrans suivants :
ÉCRAN PRINCIPAL:
Permet d'accéder aux paramètres configurables.
Une fois sélectionnés, appuyez sur "TEST" pour les visualiser sur l'appareil.
S'ils sont corrects, appuyez sur "SAVE" pour les stocker en mémoire, à partir de ce moment, la
connexion WIFI du "point d'accès" est annulée et l'appareil est prêt à fonctionner.
Pour modifier un paramètre, le "point d'accès" doit être rouvert en appuyant sur les deux bou-
tons arrière pendant quelques secondes jusqu'à ce que l'appareil indique :
UNCONFIGURED Vx.xL et répéter le processus initial.
ÉCRAN DE SÉLECTION DES COULEURS :
Permet d'accéder à la palette de couleurs où vous pouvez choisir la couleur à appliquer aux LED
d'affichage.
Sortez à l'aide du symbole (x) et appuyez sur "TEST" pour visualiser le résultat sur l'appareil
Si vous souhaitez modifier plus de paramètres, n'appuyez pas sur “SAVE” tant que vous ne les
avez pas tous configurés, car le fait d'appuyer sur “ SAVE “ ferme le “point d'accès “ qui nous
donne accès au serveur Web.
ÉCRAN DE SÉLECTION DU MODE D'AFFICHAGE :
Permet d'accéder au mode d'affichage, où vous pouvez choisir entre
•
TOGGLED (alterné). En choisissant TOGGLED la cadence du change-
ment doit également être indiquée avec un maximum de 30 s.
•
SCROLL (défilement). En choissant SCROLL, la vitesse de défilement
du texte doit être choisie parmi les options qui apparaissent à l'écran.
Une fois configuré, appuyez sur "TEST" pour vérifier l'appareil, puis appuyez
sur "SAVE" pour enregistrer en mémoire et fermer le "point d'accès"

Other Ditel Measuring Instrument manuals

Ditel KOSMOS MICRA-X User manual

Ditel

Ditel KOSMOS MICRA-X User manual

Ditel KOSMOS PICA-F User manual

Ditel

Ditel KOSMOS PICA-F User manual

Ditel IORD1826 User manual

Ditel

Ditel IORD1826 User manual

Ditel KOSMOS JUNIOR-E User manual

Ditel

Ditel KOSMOS JUNIOR-E User manual

Ditel JUNIOR JR20-P User manual

Ditel

Ditel JUNIOR JR20-P User manual

Ditel MICRA-E User manual

Ditel

Ditel MICRA-E User manual

Ditel KOSMOS PICA-P User manual

Ditel

Ditel KOSMOS PICA-P User manual

Ditel JUNIOR JR-E User manual

Ditel

Ditel JUNIOR JR-E User manual

Ditel Kosmos series User manual

Ditel

Ditel Kosmos series User manual

Ditel MICRA-NE User manual

Ditel

Ditel MICRA-NE User manual

Ditel KOSMOS JUNIOR-D User manual

Ditel

Ditel KOSMOS JUNIOR-D User manual

Ditel DMR21 F Series User manual

Ditel

Ditel DMR21 F Series User manual

Ditel DC-20 User manual

Ditel

Ditel DC-20 User manual

Ditel KOSMOS BETA-M User manual

Ditel

Ditel KOSMOS BETA-M User manual

Ditel MICRA-M User manual

Ditel

Ditel MICRA-M User manual

Ditel KOSMOS PICA-T User manual

Ditel

Ditel KOSMOS PICA-T User manual

Ditel KOSMOS MICRA-E User manual

Ditel

Ditel KOSMOS MICRA-E User manual

Ditel PICA40-ADC User manual

Ditel

Ditel PICA40-ADC User manual

Ditel DINOS Series User manual

Ditel

Ditel DINOS Series User manual

Ditel DINOS DT110/NE User manual

Ditel

Ditel DINOS DT110/NE User manual

Ditel IDEAL-P User manual

Ditel

Ditel IDEAL-P User manual

Ditel JUNIOR JR-D User manual

Ditel

Ditel JUNIOR JR-D User manual

Ditel MICRA-D User manual

Ditel

Ditel MICRA-D User manual

Ditel ALPHA-D User manual

Ditel

Ditel ALPHA-D User manual

Popular Measuring Instrument manuals by other brands

SCORPION G3-600 user manual

SCORPION

SCORPION G3-600 user manual

HEIDENHAIN TS 460 Mounting instructions

HEIDENHAIN

HEIDENHAIN TS 460 Mounting instructions

multicomp pro MP780905 user manual

multicomp pro

multicomp pro MP780905 user manual

Decagon Devices AquaLab 4TE Operator's manual

Decagon Devices

Decagon Devices AquaLab 4TE Operator's manual

Steinberg Systems SBS-AM-30C user manual

Steinberg Systems

Steinberg Systems SBS-AM-30C user manual

PCB Piezotronics ICP J356A44 Installation and operating manual

PCB Piezotronics

PCB Piezotronics ICP J356A44 Installation and operating manual

TRAMEX Moisture Encounter Plus user guide

TRAMEX

TRAMEX Moisture Encounter Plus user guide

Consort C3010 manual

Consort

Consort C3010 manual

Seikom Electronic 77029 Installation and operating instruction

Seikom Electronic

Seikom Electronic 77029 Installation and operating instruction

National Instruments PXIe-4147 Getting started guide

National Instruments

National Instruments PXIe-4147 Getting started guide

Leica Geosystems DISTO D810 touch quick start

Leica Geosystems

Leica Geosystems DISTO D810 touch quick start

Camille Bauer SIRAX MM1400 operating instructions

Camille Bauer

Camille Bauer SIRAX MM1400 operating instructions

TRAMEX PROFESSIONAL PTM 2.0 user guide

TRAMEX

TRAMEX PROFESSIONAL PTM 2.0 user guide

Nivel System CL3D manual

Nivel System

Nivel System CL3D manual

Haag-Streit LENSTAR LS 900 Instructions for use

Haag-Streit

Haag-Streit LENSTAR LS 900 Instructions for use

Topcon ES series Quick manual

Topcon

Topcon ES series Quick manual

Pitagora TrueScan user manual

Pitagora

Pitagora TrueScan user manual

Onicon F-4400 user guide

Onicon

Onicon F-4400 user guide

manuals.online logo
manuals.online logoBrands
  • About & Mission
  • Contact us
  • Privacy Policy
  • Terms and Conditions

Copyright 2025 Manuals.Online. All Rights Reserved.