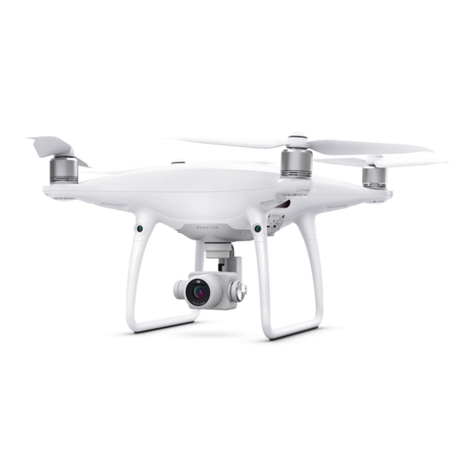
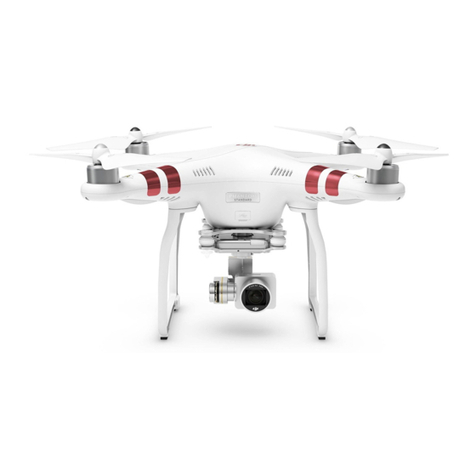
dji Phantom 4 RTK User manual

v1.2
RTK
Quick Start Guide
Kurzanleitung
Guía de inicio rápido
Guide de démarrage rapide
Guida rapida
Snelstartgids
Guia de início rápido
Краткое руководство пользователя

Contents
Quick Start Guide 2
Kurzanleitung 10
Guía de inicio rápido 18
Guide de démarrage rapide 26
Guida di avvio rapido 34
Snelstartgids 42
Guia de início rápido 50
Краткое руководство пользователя 58
EN
ES
DE
FR
IT
NL
PT
RU

EN
2
Phantom 4 RTK
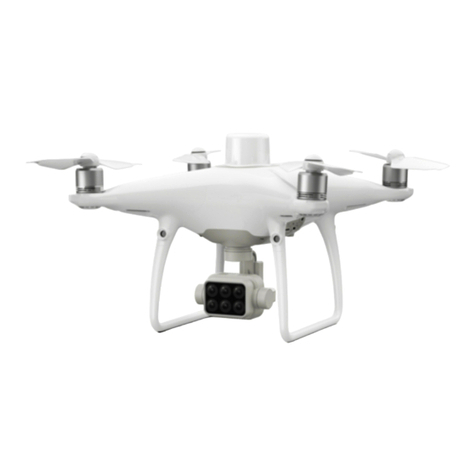
The PHANTOMTM 4 RTK is a smart mapping and imaging drone capable of highly accurate mapping functions.
The aircraft has a built-in DJITM Onboard D-RTK*, which provides precision data for centimeter-level positioning
accuracy. Multi-directional obstacle sensing is enabled by forward, rear, and downward vision and infrared
sensors*. The camera features a 1-inch 20-megapixel CMOS sensor housed within a high stability gimbal.
When it comes to mapping, the high-performance mechanical shutter eliminates rolling shutter distortion when
capturing images at speed. Image data can be used to generate maps for eld planning when operating a
DJI AGRASTM aircraft. Users can also import photos to the DJI PC GS Pro application or third-party mapping
software to composite highly accurate maps for dierent applications.
15
14 16
17
* This should be used with Network RTK service, a DJI D-RTK 2 High-Precision GNSS Mobile Station (purchased
additionally) or post-processed kinematic (PPK) data (recommended when RTK signal is weak during operation).
The Vision and Infrared Sensing Systems are affected by surrounding conditions. Read the Disclaimer and Safety
Guidelines to learn more.
6
1
2
3
4
5
7
8
910
11
12
13
1. Gimbal and Camera
2. Downward Vision System
3. Micro USB Port
4. Camera/Linking Status Indicator and
Link Button
5. Camera microSD Card Slot
6. Forward Vision System
7. Infrared Sensing System
8. Front LEDs
9. Motors
10. Propellers
11. Aircraft Status Indicators
12. OCUSYNCTM Antennas
13. Onboard D-RTKTM
Antenna
14. Rear Vision System
15. Intelligent Flight Battery
16. Power Button
17. Battery Level Indicators

EN
3
Remote Controller
The Phantom 4 RTK remote controller has a transmission range of up to 4.3 mi (7 km) * with controls for
camera tilt and photo capture. DJI OcuSync is built into the remote controller, transmitting live HD imaging
from the camera directly. Simply tap the screen in the DJI GS RTK app or import KML/KMZ les to plan
an operation for convenient project management. Users can also connect the remote controller to a PC to
access DJI PC GS Pro for planning and executing operations. The remote controller’s Multi-Aircraft Control
mode can be used to coordinate the operation of up to ve aircraft at the same time, enabling pilots to work
more eciently. Replaceable batteries can be easily hot-swapped and the antennas are easily removable for
quick maintenance.
The figure below shows the function that each control stick movement performs, using Mode 2 as an
example. The left stick controls the aircraft’s altitude and heading, while the right stick controls its forward,
backward, left and right movements. The gimbal dial controls the camera’s tilt.
* The remote controller is able to reach its maximum transmission distance (FCC) in a wide open area with no Electro-
Magnetic Interference, and at an altitude of about 400 feet (120 meters).
1. Power Button
2. RTH Button
3. Control Sticks
4. Speaker
5. Lanyard Attachment
6. Status LED
7. Battery Level LEDs
8. USB-C Port
9. 3.5 mm Audio Jack
10. MicroSD Card Slot
11. Display Device
12. Sleep/Wake Button
13. Antennas
12
1
2
3
5
4
6
11
7
9
10
13
8
16 17 18 19
14 15
22
23
20
21
24
12
1
2
3
5
4
6
11
7
9
10
13
8
16 17 18 19
14 15
22
23
20
21
24
12
1
2
3
5
4
6
11
7
9
10
13
8
16 17 18 19
14 15
22
23
20
21
24
14. Gimbal Dial
15. Aircraft Control Switch Dial
16. Record Button
17. Pause Switch
18. Shutter Button
19. Reserved Button
20. Button C1 (customizable)
21. Button C2 (customizable)
22. Battery Compartment Cover
23. Battery Compartment Cover Lock
24. Dongle Compartment Cover
Left Stick Up
Down
Right Stick Forward
Backward
Turn RightTurn Left RightLeft
Gimbal Dial

EN
4
Using Phantom 4 RTK
●To remove the Intelligent Battery, open the cover, press and hold the battery release button, then push the
battery downward.
●The Phantom 4 RTK remote controller can access the Internet via the 4G dongle with SIM card or via Wi-Fi
signal. A Network RTK server can only be accessed using a 4G dongle with SIM card. When uploading or
downloading system logs or operation data, using a Wi-Fi signal for Internet access is recommended.
●Only use a DJI approved dongle.
●The dongle supports various network standards. Use a SIM card that is compatible with the chosen mobile
network provider and select a mobile data plan according to the planned level of usage.
● The dongle and SIM card are used to enable the remote controller to access to specific networks and platforms,
such as the DJI AG platform. Be sure to mount them correctly, or else network access will not be available.
2. Mount the Dongle and SIM Card
3. Check the Battery Levels
1. Mount the Remote Controller Battery
The remote controller uses an easily removable interchangeable
Intelligent Battery for long-term operation.
1Slide the battery compartment cover lock on the back of the
remote controller down to open the cover.
2Insert the Intelligent Battery into the compartment and push it
to the top.
3Close the cover.
Battery Release
Buttoon
3
2
Lift the dongle compartment cover
at the gap at its lower right corner,
then remove it.
Insert the dongle into the USB
port with the SIM card inserted
into the dongle and test. *
Re-mount the cover. To secure the
cover, open the silicone protectors
on it, insert and tighten two Phillips
screws, then close the protectors.
* Test procedure: Press the remote controller power button once, then press again and hold to turn the remote
controller on. In the DJI GS RTK app tap > and select Network Diagnostics. If the statuses of all the devices
in the network chain are shown in green the dongle and SIM card are functioning properly.
Press once to check the battery level. Short press once, then long press and hold to turn on/off.
Low High Low High
Dongle

EN
5
B
A
B
A A
● Fully charge the batteries before first-time use.
● Ensure to connect the Intelligent Flight Batteries to the charging hub as shown in the figure above.
●Ensure that the Mode Switch of the Intelligent Flight Battery charging hub is set to the Charging Mode position.
4. Charge the Batteries
5. Prepare the Remote Controller
Power Outlet
100 - 240 V
OR
Strong UnfoldWeak
Try to keep the aircraft inside the optimal
transmission zone. If the signal is weak,
adjust the antennas or fly the aircraft closer.
Optimal Transmission Zone
6. Prepare for Takeo
DJI GS
RTK App
Remove the gimbal clamp
from the camera.
Power on the remote
controller and the aircraft.
Enter the DJI GS RTK app.
When using your Phantom 4 RTK for the rst time, activate it using the DJI GS RTK app. Ensure that the
remote controller has access to the Internet.
Internet

EN
6
●Check that the propellers are
secure before each flight.
Black propeller
rings go on motors
with black dots.
Silver propeller
rings go on motors
without black dots.
Press the propeller down onto the
mounting plate and rotate in the
lock direction until secure.
7. Flight
Ready to Go (RTK) Before taking o, make sure the Aircraft Status Bar in the DJI GS RTK
app indicates Ready to Go (RTK)* or Ready to Go (GNSS).
Takeo Landing
●Spinning propellers can be dangerous. Stay away from spinning propellers and motors. DO NOT start the
motors in confined spaces or when there are people nearby.
●Always keep your hands on the remote controller when the motors are spinning.
●Stopping motors mid-ight: Perform the CSC to stop the motors. This feature is disabled by default. It can
be enabled in the app. Only stop motors mid-ight in emergency situations when doing so can reduce the
risk of damage or injury.
OR
Combination Stick Command
to start/stop the motors
Left stick (in Mode 2)
up slowly to take off
Left stick down slowly
until you touch the
ground
Hold for 3 seconds to
stop the motors
It is important to understand basic flight guidelines, for the safety of both you and those around you. Do not
forget to read the Disclaimer and Safety Guidelines.
* RTK positioning is recommended. Go to DJI GS RTK > Fly > > RTK to enable RTK module and select a method
for receiving RTK signals.

EN
7
●Only take off in open areas.
●An operation can be paused by toggling the Pause Switch. The aircraft will hover and record the breakpoint,
and then the aircraft can be controlled manually. To continue the operation, select it from the list again and
then resume. The aircraft will automatically return to the breakpoint and resume the operation.
●The aircraft will return to the Home Point automatically once the operation is complete. Instead of RTH, the
aircraft can also be set to perform other flight actions within the app.
8. Start Operations
9. Applications
Photogrammetry and waypoint actions can be performed using both PC GS Pro software and the DJI GS
RTK app. The following example includes instructions for photogrammetry operation using the DJI GS RTK
app. Refer to PC GS Pro User Manual for details (if in use).
Field Planning
Import aerial photos into PC GS Pro to perform map post-processing. Then plan the eld in
PC GS Pro. Use a microSD card to import the plan le from PC GS Pro into the Agras MG-
1S Advanced / MG-1P series remote controller. Refer to corresponding user manuals for
more details.
High Accuracy Mapping
Import the original aerial photos into PC GS Pro and perform map post-processing to
produce a high-accuracy map. Please refer to the PC GS Pro User Manual for more details.
* Users can also import KML/KMZ files to the app through a microSD card to plan photogrammetry operations.
Refer to the Phantom 4 RTK User Manual for details.
** Select the operation again via the following method if the operation was not used immediately. Go to DJI GS RTK
main screen > Fly > on the left, select the operation from the planning list, and tap Invoke.
Visit the link below to learn more about PC GS Pro:
http://www.dji.com/pc-gs-pro
Tap Plan on the
main screen, select
Photogrammetry*
Slide the slider to
start the operation
Tap Start
Tap in the
Camera View for
camera settings
Tap the map to
add edge points,
drag to adjust their
positions
Settings: altitude,
speed, completion
action, camera, and
advanced settings
Tap Save, add
name and remark,
then tap OK
Use the operation**

EN
8
Specications
Y
2
8
9.5 mm
289
.
5
m
m
213 mm
16
7
mm
1
6
8 m
m
131 mm
72 mm
X
Z
● Aircraft
Weight (Battery & Propellers Included) 1391 g
Max Service Ceiling Above Sea Level 19685 ft (6000 m)
Max Ascent Speed 6 m/s (automatic ight); 5 m/s (manual control)
Max Descent Speed 3 m/s
Max Speed 31 mph (50 kph) (P-mode); 36 mph (58 kph) (A-mode)
Max Flight Time Approx. 30 minutes
Operating Temperature 32° to 104° F (0° to 40° C)
Operating Frequency 2.400 GHz to 2.483 GHz (Europe, Japan, Korea)
5.725 GHz to 5.850 GHz (United States, China)
EIRP 2.4 GHz
CE (Europe) / MIC (Japan) / KCC (Korea): < 20 dBm
5.8 GHz
FCC (United States) / SRRC (Mainland China) / NCC (Taiwan, China): < 26 dBm
Hover Accuracy Range RTK enabled and functioning properly:
Vertical: ±0.1 m; Horizontal: ±0.1 m
RTK disabled:
Vertical: ±0.1 m (with vision positioning); ±0.5 m (with GNSS positioning)
Horizontal: ±0.3 m (with vision positioning); ±1.5 m (with GNSS positioning)
Image Position Oset The position of the camera center is relative to the phase center of the onboard D-RTK
antenna under the aircraft body’s axis: (36, 0, and 192 mm) already applied to the image
coordinates in Exif data. The positive x, y, and z axes of the aircraft body point to the
forward, rightward, and downward of the aircraft, respectively.
● GNSS
Single-Frequency High-Sensitivity
GNSS
GPS + BeiDou + Galileo* (Asia); GPS + GLONASS + Galileo* (other regions)
Multi-Frequency Multi-System High-
Precision RTK GNSS
Frequency Used
GPS: L1/L2; GLONASS: L1/L2; BeiDou: B1/B2; Galileo*: E1/E5
First-Fixed Time: < 50 s
Positioning Accuracy: Vertical 1.5 cm + 1 ppm (RMS); Horizontal 1 cm + 1 ppm (RMS).
1 ppm indicates error with a 1 mm increase over 1 km of movement.
Velocity Accuracy: 0.03 m/s
● Mapping Functions
Mapping Accuracy** Mapping accuracy meets the requirements of the ASPRS Accuracy Standards for Digital
Orthophotos Class III.
Ground Sample Distance (GSD) (H/36.5) cm/pixel, H indicates the aircraft altitude relative to the shooting scene (unit: m)
Acquisition Eciency Max operating area of approx. 1 km2 for a single ight (at an altitude of 182 m, i.e., GSD is
approx. 5 cm/pixel, meeting the requirements of the ASPRS Accuracy Standards for Digital
Orthophotos Class III).
● Gimbal
Controllable Range Pitch: -90° to +30°
● Vision System
Velocity Range ≤ 31 mph (50 kph) at 6.6 ft (2 m) above ground with adequate lighting
Altitude Range 0 - 33 ft (0 - 10 m)
Operating Range 0 - 33 ft (0 - 10 m)
Obstacle Sensory Range 2 - 98 ft (0.7 - 30 m)
Operating Environment Surfaces with clear patterns and adequate lighting (> 15 lux)
● Infrared Sensing System
Obstacle Sensory Range 0.6 - 23 ft (0.2 - 7 m)
Operating Environment Surface with diuse reection material, and reectivity > 8% (such as wall, trees, humans, etc.)
● Camera
Sensor 1’’ CMOS; Eective pixels: 20M
Lens FOV (Field of View) 84°, 8.8 mm (35 mm format equivalent: 24 mm), f/2.8 - f/11, auto focus
at 1 m - ∞
ISO Range Video: 100 - 3200 (Auto), 100 - 6400 (Manual); Photo: 100 - 3200 (Auto), 100 - 12800 (Manual)
* supported later
** The actual accuracy depends on surrounding lighting and patterns, aircraft altitude, mapping software used, and other factors when
shooting.
EN
9
Download the user manual for more information:
http://www.dji.com/phantom-4-rtk
※This Quick Start Guide is subject to change without prior notice.
PHANTOM is a trademark of DJI.
Copyright © 2018 DJI All Rights Reserved. Designed by DJI. Printed in China.
Y
2
8
9.5 mm
289
.
5
m
m
213 mm
16
7
mm
1
6
8 m
m
131 mm
72 mm
X
Z
Mechanical Shutter 8 - 1/2000 s
Electronic Shutter 8 - 1/8000 s
Max Image Size 4864×3648 (4:3); 5472×3648 (3:2)
Video Recording Modes H.264, 4K: 3840×2160 30p
Photo JPEG
Video MOV
Supported File Systems FAT32 (≤ 32 GB); exFAT (> 32 GB)
Supported SD Cards microSD, Max Capacity: 128 GB. Class 10 or UHS-1 rating required
Operating Temperature 32° to 104° F (0° to 40° C)
● Remote Controller
Operating Frequency 2.400 GHz to 2.483 GHz (Europe, Japan, Korea)
5.725 GHz to 5.850 GHz (United States, China)
EIRP 2.4 GHz
CE / MIC / KCC: < 20 dBm
5.8 GHz
FCC / SRRC / NCC: < 26 dBm
Max Transmission Distance FCC / NCC: 4.3 mi (7 km); CE / MIC / KCC / SRRC: 3.1 mi (5 km)
(Unobstructed, free of interference)
Power Consumption 16 W (typical value)
Display Device 5.5 inch screen, 1920×1080, 1000 cd/m2, Android system, 4G RAM + 16G ROM
Operating Temperature 32° to 104° F (0° to 40° C)
● Intelligent Flight Battery (PH4-5870mAh-15.2V)
Capacity 5870 mAh
Voltage 15.2 V
Battery Type LiPo 4S
Energy 89.2 Wh
Net Weight 468 g
Operating Temperature 14° to 104° F (-10° to 40° C)
Max Charging Power 160 W
● Intelligent Flight Battery Charging Hub (PHANTOM 4 CHARGING HUB)
Voltage 17.5 V
Operating Temperature 41° to 104° F (5° to 40° C)
● Remote Controller Intelligent Battery (WB37-4920mAh-7.6V)
Capacity 4920 mAh
Voltage 7.6 V
Battery Type LiPo 2S
Energy 37.39 Wh
Operating Temperature -4° to 104° F (-20° to 40° C)
● Intelligent Battery Charging Hub (WCH2)
Input Voltage 17.3 to 26.2 V
Output Voltage and Current 8.7 V, 6 A; 5 V, 2 A
Operating Temperature 41° to 104° F (5° to 40° C)
● AC Power Adapter (PH4C160)
Voltage 17.4 V
Rated Power 160 W

10
DE
Phantom 4 RTK
Die intelligente Vermessungs- und Kameradrohne PHANTOMTM 4 RTK erlaubt die Durchführung hochpräziser
Vermessungen. Im Fluggerät ist ein DJITM Onboard D-RTK* verbaut. Dieses liefert hochpräzise Daten zur
zentimetergenauen Ortung. Die multidirektionale Hinderniserkennung wird durch nach vorne, nach hinten und
nach unten gerichtete Infrarotsensoren ermöglicht*. In der Kamera kommt ein 1"-20MP-CMOS-Sensor in einem
hochstabilen Gimbal zum Einsatz. Beim Vermessen mit hoher Geschwindigkeit verhindert der hochleistungsstarke
mechanische Verschluss Verzerrungen durch den Rolling-Shutter-Eekt. Bilddaten können zum Erstellen von Karten
für die Feldplanung mit einer DJI AGRASTM verwendet werden. Anwender können darüber hinaus die erfassten
Bilddaten in die Anwendung DJI PC GS Pro oder eine andere Kartierungs-Software importieren und in diesen präzise
Karten für unterschiedliche Anwendungen erstellen.
15
14 16
17
* Sollte mit dem Network RTK-Service, einem DJI D-RTK 2 Mobile GNSS Referenzstation (separat erhältlich) oder mit PPK-Daten
(nachbearbeitete Bewegungsdaten, empfohlen bei schwachem RTK-Signal während des Betriebs) verwendet werden.
SichtsystemundInfraroterkennungreagierenempndlichaufUmgebungsbedingungen.LesenSiedenHaftungsausschlussund
die Sicherheitsrichtlinien, um mehr zu erfahren.
6
1
2
3
4
5
7
8
910
11
12
13
1. Gimbal und Kamera
2. Abwärts gerichtetes Sichtsystem
3.Micro-USB-Anschluss
4.Kamera/Verbindungsstatus-LEDund
Verbindungstaste
5.EinschubfürdieMicro-SD-Karte
(Kamera)
6. Vorwärts gerichtetes Sichtsystem
7. Infrarotsensorsystem
8.VordereLEDs
9. Motoren
10. Propeller
11.Status-LEDsdes
Fluggeräts
12.OCUSYNCTM Antennen
13. Onboard D-RTKTM Antenne
14.Rückwärtsgerichtetes
Sichtsystem
15. Intelligent Flight Battery
16.Ein/Aus-Taste
17. Akkuladezustandsanzeige

11
DE
Fernsteuerung
Die Phantom 4 RTK Fernsteuerung bietet einen Übertragungsbereich von bis zu 7 km*. Mit ihr können auch
Kameraneigung und Fotoaufnahmen gesteuert werden. DJI OcuSync ist in die Fernsteuerung integriert, d. h., ein
Live-HD-Bild wird direkt von der Kamera übertragen. Berühren Sie einfach den Bildschirm in der „DJI GS RTK“-App,
oder importieren Sie KML/KMZ-Dateien, um Vorgänge für bequemes Projektmanagement zu planen. Anwender
können die Fernsteuerung auch an einen PC anschließen und mit DJI PC GS Pro Vorgänge direkt am Computer
planen und ausführen. Mit dem Multi-Fluggerät-Modus steigern Sie die Wirtschaftlichkeit enorm, da ein Pilot bis zu
fünf Drohnen gleichzeitig koordinieren und steuern kann. Die austauschbaren Akkus können problemlos während des
Betriebs gewechselt werden, und die Antennen lassen sich zur leichten Wartung unkompliziert abnehmen.
In der Abbildung unten sind die Bewegungen dargestellt, die mit den beiden Steuerknüppel ausgeführt werden
können, wobei Modus 2 als Beispiel dient. Mit dem linken Steuerknüppel steuern Sie die Höhe und Flugrichtung der
Drohne, und mit dem rechten Steuerknüppel steuern Sie ihre Vorwärts-, Rückwärts-, Links- oder Rechtsbewegung.
Mit dem Gimbal-Rädchen wird die Neigung der Kamera verstellt.
* Die Fernsteuerung erreicht ihre maximale Übertragungsreichweite (FCC) auf offenem Gelände ohne elektromagnetische
Störquellen und bei einer Flughöhe von ca. 120 Metern.
1.Ein/Aus-Taste
2.Rückkehrtaste
3.Steuerknüppel
4.Lautsprecher
5.Lanyard-Öse
6.Status-LED
7.Akkuladezustands-LED
8.USB-C-Anschluss
9. 3,5-mm-Audiobuchse
10.Steckplatzfürdie
Micro-SD-Karte
11. Bildschirm
12. Ruhezustandstaste
13. Antennen
12
1
2
3
5
4
6
11
7
9
10
13
8
16 17 18 19
14 15
22
23
20
21
24
12
1
2
3
5
4
6
11
7
9
10
13
8
16 17 18 19
14 15
22
23
20
21
24
12
1
2
3
5
4
6
11
7
9
10
13
8
16 17 18 19
14 15
22
23
20
21
24
14. Gimbal-Rädchen
15. Schalträdchen zur
Fluggerätsteuerung
16. Videotaste
17. Pausenschalter
18. Fototaste
19. Reservierte Taste
20. Taste C1 (frei belegbar)
21. Taste C2 (frei belegbar)
22. Abdeckung des Akkufachs
23. Abdeckungsverriegelung des Akkufachs
24. Abdeckung des Dongle-Fachs
Linker Knüppel
Steigflug
Sinkflug
Rechter Knüppel Vorwärts
Rückwärts
RechtsdrehungLinksdrehung RechtsLinks
Gimbal-Rädchen

12
DE
Die PHANTOM 4 RTK verwenden
●ZumEntfernenderIntelligentBatteryöffnenSiedieAbdeckung,drückendieTastezumLösendesAkkus,haltensie
gedrücktunddrückendanndenAkkunachunten.
●DiePhantom4RTKFernsteuerungkannübereinen4G-DonglemitSIM-KarteoderübereineWi-Fi-Verbindungmit
demInternetverbundenwerden.EineVerbindungzueinemNetzwerk-RTK-Serverkannnurübereinen4G-Donglemit
SIM-Kartehergestelltwerden.ZumHoch-oderHerunterladenvonSystemprotokollenoderBetriebsdatenwirdeine
InternetverbindungübereinWi-Fi-Netzwerkempfohlen.
●Verwenden Sie nur einen von DJI zugelassenen Dongle.
●DerDongleunterstütztverschiedeneNetzwerkstandards.VerwendenSieeineSIM-Karte,diemitdemausgewählten
Mobilfunkanbieter kompatibel ist, und wählen Sie einen mobilen Datentarif entsprechend dem geplanten
Nutzungsumfang aus.
●Der Dongle und die SIM-Karte werden benötigt, damit die Fernsteuerung auf bestimmte Netzwerke und Plattformen
wie die DJI AG-Plattform zugreifen kann. Stellen Sie sicher, dass sie korrekt installiert sind, andernfalls ist der
Netzwerkzugriff nicht möglich.
2. Dongle und SIM-Karte installieren
3. Den Akkuladezustand prüfen
1. Akku der Fernsteuerung einsetzen
Die Fernsteuerung enthält eine herausnehmbare, austauschbare
Intelligent Battery, die einen langfristigen Betrieb gewährleistet.
1Schieben Sie die Verriegelung der Akkufachabdeckung auf der
RückseitederFernsteuerungnachunten,umdieAbdeckungzu
öffnen.
2SetzenSiedieIntelligentBatteryindasFachein,unddrückenSie
diese nach oben.
3Schließen Sie die Abdeckung.
Taste zum Lösen
des Akkus
3
2
HebenSiedieAbdeckungdes
Dongle-FachsanderLückeunten
rechts an, und entfernen Sie sie.
Verbinden Sie den Dongle mit dem
USB-Anschluss;dabeimusssichdie
SIM-KarteimDonglebenden.Führen
Sie anschließend einen Test durch. *
Bringen Sie die Abdeckung wieder an.
UmdieAbdeckungzusichern,öffnen
Sie die Silikonprotektoren, drehen Sie
zwei Kreuzschlitzschrauben ein, und
schließen Sie die Protektoren.
*Testverfahren:DrückenSiedieEin/Aus-TastederFernsteuerungeinmal,drückenSiedieseanschließenderneut,und
haltenSiesiegedrückt,umdieFernsteuerungeinzuschalten.TippenSieinderDJIGSRTKAppauf > und wählen
Sie„Netzwerkdiagnosen“aus.WennfüralleZuständeallerGeräteinderNetzwerkkettegrünangezeigtwird,funktionieren
Dongle und SIM-Karte einwandfrei.
DrückenSiedieTasteeinmal,umdenAkku-Ladezustandzuüberprüfen.DrückenSiedieTastenocheinmal,undhaltenSie
siegedrückt,umdasGerätein-/auszuschalten.
Niedrig Hoch Niedrig Hoch
Dongle

13
DE
B
A
B
A A
●LadenSiedieAkkusvorerstmaligemGebrauchvollständigauf.
●StellenSiesicher,dassdieIntelligentFlightBatteriesandieLadestationangeschlossensind,wieinderAbbildungoben
dargestellt.
●StellenSiesicher,dasssichderModusschalterderLadestationderIntelligentFlightBatteryinderStellungLademodus
bendet.
4. Akkus auaden
5. Fernsteuerung vorbereiten
Steckdose
100 – 240 V
ODER
Stark AufklappenSchwach
Das Fluggerät sollte sich immer innerhalb des
optimalenSendebereichsbenden.StellenSie
bei schwachem Signal die Antennen ein, oder
verringernSiedieEntfernung.
Optimaler Sendebereich
6. Auf den Start vorbereiten
DJI GS
RTK App
EntfernenSiedieGimbal-
Klemme von der Kamera.
Schalten Sie die Fernsteuerung
und die Drohne ein.
Rufen Sie die DJI GS RTK
App auf.
Bei erstmaliger Verwendung Ihrer Phantom 4 RTK aktivieren Sie das Gerät mithilfe der DJI GS RTK App. Stellen Sie
sicher, dass die Fernsteuerung auf das Internet zugreifen kann.
Internet

14
DE
7. Flug
Ready to Go (RTK)
Vergewissern Sie sich vor dem Losiegen, dass die Fluggerät-Statusleiste
in der DJI GS RTK App entweder Ready to Go (RTK)* oder Ready to
Go (GNSS) anzeigt.
Abheben Landen
●LaufendePropellerstelleneineGefahrdar.HaltenSieausreichendAbstandzusichdrehendenPropellernundMotoren.
StartenSiedieMotorenNICHTunterbeengtenPlatzverhältnissenoderinderNähevonPersonen.
●LegenSiedieFernsteuerungnichtausderHand,wennsichdieMotorendrehen.
●Motoren im Flug ausschalten: Führen Sie den CSC mit den Steuerknüppeln aus, um die Motoren auszuschalten.
Diese Funktion ist standardmäßig deaktiviert. Sie kann in der App aktiviert werden. Schalten Sie die Motoren
während des Fluges nur ab, wenn dadurch in einem Notfall Verletzungen oder Schäden vermieden werden können.
ODER
KnüppelkombinationzumEin-/
Ausschalten der Motoren
LinkerKnüppel(inModus2)
zum Abheben langsam
nach oben ziehen
LinkerKnüppellangsam
nachuntendrücken,
bis das Fluggerät den
Bodenberührt
HaltenSieihn3
Sekunden lang, um die
Motoren auszuschalten.
UmIhreeigeneSicherheitunddieSicherheitderMenscheninIhrerUmgebungzugewährleisten,isteswichtig,
dassSiedienötigenGrundregelnkennen.VergessenSievorallemnicht,dasDokument„Haftungsausschlussund
Sicherheitsvorschriften“ zu lesen.
●Stellen Sie vor jedem Flug sicher,
dass die Propeller fest sitzen.
Die schwarzen
Propellerringe passen
zu Motoren mit
schwarzem Punkt.
Die silbernen
Propellerringe passen
zu Motoren ohne
schwarzen Punkt.
Drücken Sie den Propeller auf die
Befestigungsplatte, und drehen Sie
ihn in die Verriegelungsrichtung , bis
er fest sitzt.
* Die RTK-Positionierung wird empfohlen. Navigieren Sie zu DJI GS RTK > Fly > > RTK, um das RTK-Modul zu aktivieren
undeineMethodezumEmpfangenderRTK-Signaleauszuwählen.

15
DE
●HebenSienurinfreiemGeländeab.
●EinVorgangkanndurchAktivierungdesPausenschaltersangehaltenwerden.DasFluggerätschwebtundzeichnet
denHaltepunktauf,undanschließendkannesmanuellgesteuertwerden.UmdenVorgangfortzusetzen,wählenSie
diesenerneutausderListeausundfahrendannfort.DasFluggerätkehrtautomatischzumHaltepunktzurückund
nimmt den Betrieb wieder auf.
●DasFluggerätkehrtnachAbschlussdesVorgangsautomatischzumStartpunktzurück.AnstellevonRTHkanndas
Fluggerätauchsoeingestelltwerden,dassandereFlugaktioneninnerhalbderAppdurchgeführtwerden.
8. Startvorgänge
9. Anwendungen
Fotogrammetrie- und Wegpunkt-Vorgänge können in der „PC GS Pro“-Software und der „DJI GS RTK“-App
vorgenommen werden. Im folgenden Beispiel nden Sie Anweisungen für die Durchführung von Fotogrammetrie-
Vorgängen mit der „DJI GS RTK“-App. Weitere Informationen nden Sie ggf. im PC GS Pro-Benutzerhandbuch.
Feldplanung
Importieren Sie Luftaufnahmen in PC GS Pro, um die Nachbearbeitung des Kartenmaterials
durchzuführen. Führen Sie dann die Feldplanung in PC GS Pro durch. Verwenden Sie eine Micro-
SD-Karte, um die in PC GS Pro erzeugte Feldplanungsdatei in die Fernsteuerung der Agras MG-
1S Advanced/MG-1P Serie zu importieren. Genauere Informationen sind den entsprechenden
Bedienungsanleitungen zu entnehmen.
Hochpräzise Kartierung
Importieren Sie die ursprünglichen Luftaufnahmen in PC GS Pro, und führen Sie die
Nachbearbeitung des Kartenmaterials durch, um eine hochpräzise Karte zu erstellen. Nähere
Informationen nden Sie in der Bedienungsanleitung von PC GS Pro.
* ZurPlanungvonFotogrammetrie-VorgängenkönnenBenutzerauchKML/KMZ-DateienübereineMicroSD-KarteindieApp
importieren.NähereInformationenhierzundenSieinderBedienungsanleitungderPhantom4RTK.
**WählenSiedenVorgangerneutmittelsfolgenderMethodeaus,wennderVorgangnichtsofortangewendetwurde.
NavigierenSiezumDJIGSRTK-Hauptbildschirm>Fly > auf der linken Seite, wählen Sie den Vorgang aus der Feldliste
aus, und tippen Sie auf Invoke.
WeitereInformationenüberPCGSProerhaltenSieunterfolgendemLink:
http://www.dji.com/pc-gs-pro
Berühren Sie im
Hauptmenü der App
Plan, wählen Sie
Photogrammetry*
Betätigen sie den
Schieberegler, um
den Vorgang zu
starten
Tippen Sie Start an
Berühren Sie in
der Kameraansicht,
um zu den
Kameraeinstellungen
zu gelangen.
Tippen Sie auf der
Karte die Eckpunkte
an und verschieben
ggf. diese, um die
Koordinaten-punkte
festzulegen
Einstellungen: Höhe,
Geschwindigkeit,
Fertigstellung,
Kamera und
erweiterte
Einstellungen
Auf Save tippen,
einen Namen und
eine Bemerkung
angeben und mit OK
bestätigen
Wenden Sie den
Einsatz aus**

16
DE
Technische Daten
● Fluggerät
Gewicht (mit Akku & Propellern) 1391 g
Dienstgipfelhöhe über N.N. 6.000 m
Max. Steiggeschwindigkeit 6 m/s (im automatischen Flug);
5 m/s (bei manueller Steuerung)
Max. Sinkgeschwindigkeit 3 m/s
Max. Fluggeschwindigkeit 50 km/h (Modus „P“); 58 km/h (Modus „A“)
Max. Flugzeit etwa 30 Minuten
Betriebstemperatur 0 bis 40 °C
Betriebsfrequenz 2,400 GHz bis 2,483 GHz (Europa, Japan, Korea)
5,725 GHz bis 5,850 GHz (USA, China)
EIRP 2,4 GHz
CE (Europa)/MIC (Japan)/KCC (Korea): < 20 dBm
5,8 GHz
FCC (USA)/SRRRC (China)/NCC (Taiwan (China)): < 26 dBm
Schwebeuggenauigkeit RTK ist aktiviert und funktioniert ordnungsgemäß:
Vertikal: ±0,1 m, horizontal: ±0,1 m
RTK ist deaktiviert:
Vertikal: ±0,1 m (mit optischer Positionsbestimmung); ±0,5 m (mit GNSS-Positionsbestimmung)
Horizontal: ±0,3 m (mit optischer Positionsbestimmung); ±1,5 m (mit GNSS-Positionsbestimmung)
Bildpositionsversatz Die Position des Kamerazentrums steht im Verhältnis zum Phasenzentrum der Onboard D-RTK-
Antenne unter der Fluggerätachse: (36, 0 und 192 mm) bereits auf die Bildkoordinaten in den EXIF-
Daten angewendet. Die positiven x-, y- und z-Achsen des Fluggeräts zeigen nach vorn, rechts und
nach unten.
● GNSS
Hochempndliches GNSS mit einer
Frequenz
GPS + BeiDou + Galileo* (Asien); GPS + GLONASS + Galileo* (andere Regionen)
Multifrequenz-Multisystem, hochpräzises
RTK GNSS
Verwendete Frequenz
GPS: L1/L2; GLONASS: L1/L2; BeiDou: B1/B2; Galileo*: E1/E5
Erste feste Zeit: < 50 s
Positioniergenauigkeit: Vertikal 1,5 cm + 1 ppm (RMS); Horizontal 1 cm + 1 ppm (RMS).
1 ppm deutet auf einen Fehler von 1 mm je 1 km zurückgelegter Strecke hin.
Geschwindigkeitsgenauigkeit: 0,03 m/s
● Kartierungsfunktionen
Kartierungsgenauigkeit** Die Kartierungsgenauigkeit erfüllt die Anforderungen der ASPRS-Genauigkeitsstandards für digitale
Orthophotos Klasse III.
Bodenauösung (GSD) (H/36,5) cm/Pixel, H steht für die Fluggeräthöhe in Bezug auf den Aufnahmebereich (Einheit: m).
Erfassungsezienz Max. Betriebsbereich von ca. 1 km2für einen einzelnen Flug (in einer Höhe von 182 m, d. h.
GSD ist ca. 5 cm/Pixel, erfüllt die Anforderungen der ASPRS-Genauigkeitsstandards für digitale
Orthophotos Klasse III).
● Gimbal
Kontrollierter Bereich Nickachse: -90° bis +30°
● Sichtsystem
Geschwindigkeitsbereich ≤ 50 km/h bei 2 m über dem Boden mit angemessener Beleuchtung
Höhenbereich 0 bis 10 m
Betriebsbereich 0 bis 10 m
Hinderniserkennungsbereich 0,7 bis 30 m
Betriebsumgebung Oberächen mit deutlichen Konturen und ausreichender Beleuchtung (> 15 lux)
● Infrarotsensorsystem
Hinderniserkennungsbereich 0,2 bis 7 m
Betriebsumgebung Dius reektierende Oberächen mit >8 % Reexionsgrad (Mauern, Bäume, Menschen usw.)
● Kamera
Sensor 1" CMOS, tatsächliche Anzahl der Pixel: 20M
Objektiv Sichtfeld (FOV) 84°, 8,8 mm (entspricht 35-mm-Format: 24 mm), f/2.8 bis f/11, Autofokus auf 1 m
bis ∞
* wird später unterstützt
** Die tatsächliche Genauigkeit hängt von den Lichtverhältnissen, den Oberächenstruktur, der Fluggeräthöhe, der verwendeten Kartierungs-
Software und anderen Faktoren bei der Aufnahme ab.
Y
2
8
9,5 mm
289
,
5
m
m
213 mm
16
7
mm
1
6
8 m
m
131 mm
72 mm
X
Z

17
DE
ISO-Bereich Video: 100 – 3200 (Auto); 100 – 6400 (Manuell); Fotos: 100 – 3200 (Auto);100 – 12800 (Manuell)
Mechanischer Verschluss 8 – 1/2000 s
Elektronischer Verschluss 8 – 1/8000 s
Max. Bildgröße 4864×3648(4:3);5472×3648 (3:2)
Videoaufnahmemodi H.264, 4K: 3840 × 2160 30p
Foto JPEG
Video MOV
Unterstützte Dateisysteme FAT32 (≤ 32 GB); exFAT (> 32 GB)
Unterstützte SD-Speicherkarten microSD, max. Kapazität: 128 GB. Klasse 10 oder UHS-1
Betriebstemperatur 0 bis 40 °C
● Fernsteuerung
Betriebsfrequenz 2,400 GHz bis 2,483 GHz (Europa, Japan, Korea)
5,725 GHz bis 5,850 GHz (USA, China)
EIRP 2,4 GHz
CE/MIC/KCC: < 20 dBm
5,8 GHz
FCC/SRRRC/NCC: < 26 dBm
Sendereichweite FCC/NCC: 7 km; CE/MIC/KCC/SRRRC: 5 km
(ohne Verschattung, störungsfrei)
Leistungsaufnahme 16 W (typischer Wert)
Anzeigegerät 5,5"-Bildschirm, 1920×1080, 1000 cd/m2, Android-System, 4G RAM + 16G ROM
Betriebstemperatur 0 bis 40 °C
● Intelligent Flight Battery (PH4-5870mAh-15.2V)
Kapazität 5870 mAh
Spannung 15,2 V
Akkutyp LiPo 4S
Energie 89,2 Wh
Nettogewicht 468 g
Betriebstemperatur -10° bis 40 °C
Max. Ladeleistung 160 W
● Intelligent Flight Battery Akkuladestation (PHANTOM 4 CHARGING HUB)
Spannung 17,5 V
Betriebstemperatur 5 bis 40 °C
● Intelligent Battery der Fernsteuerung (WB37-4920mAh-7.6V)
Kapazität 4920 mAh
Spannung 7,6 V
Akkutyp LiPo 2S
Energie 37,39 Wh
Betriebstemperatur -20 bis 40 °C
● Akkuladestation der Intelligent Battery (WCH2)
Eingangsspannung 17,3 bis 26,2 V
Ausgangsspannung und -strom 8,7 V, 6 A; 5 V, 2 A
Betriebstemperatur 5 bis 40 °C
● Netzteil (PH4C160)
Spannung 17,4 V
Nennleistung 160 W
Eine ausführliche Beschreibung nden Sie in der Anleitung unter:
http://www.dji.com/phantom-4-rtk
※Diese Kurzanleitung kann ohne vorherige Ankündigung geändert werden.
PHANTOMisteineMarkevonDJI.
Copyright © 2018 DJI Alle Rechte vorbehalten. Gestaltung: DJI. Gedruckt in China.
Y
2
8
9,5 mm
289
,
5
m
m
213 mm
16
7
mm
1
6
8 m
m
131 mm
72 mm
X
Z

18
ES
Phantom 4 RTK
El dron de imágenes y cartografía inteligente PHANTOMTM 4 RTK incluye funciones de cartografía de alta precisión.
La aeronave cuenta con un sistema D-RTK* de DJITM integrado que proporciona datos precisos para disfrutar de
un posicionamiento exacto a nivel de centímetro. La detección de obstáculos en varias direcciones se activa en
los sensores de visión e infrarrojos frontales, traseros e inferiores*. La cámara cuenta con un sensor CMOS de 1
pulgada y 20 megapíxeles alojado en el interior de un estabilizador de alta estabilidad. Cuando realiza operaciones de
cartografía, el obturador mecánico de alto rendimiento elimina la distorsión del obturador rotativo al capturar imágenes
en movimiento rápido. Los datos de imágenes se pueden utilizar para generar mapas de planicación sobre el terreno
cuando se utiliza una aeronave AGRASTM de DJI. Los usuarios también pueden importar fotografías a la aplicación PC
GS Pro de DJI o a un software de cartografía de terceros a n de componer mapas de gran precisión para diferentes
aplicaciones.
15
14 16
17
*SedebeutilizarconunservicioderedRTK,unD-RTK2EstaciónmóvilGNSSdealtaprecisióndeDJI(seadquieredeforma
adicional) o datos cinemáticos procesados posteriormente (PPK) (recomendados cuando la señal de RTK es débil durante el
funcionamiento).
Lossistemasdevisiónydetecciónporinfrarrojossevenafectadosporlascondicionesdelentorno.Lealarenunciade
responsabilidadylasdirectricesdeseguridadparaobtenermásinformación.
6
1
2
3
4
5
7
8
910
11
12
13
1.Estabilizadorycámara
2.Sistemadevisióninferior
3.PuertoMicroUSB
4.Botóndevinculacióneindicadorde
estadodevinculación/cámara
5. Ranura para tarjeta microSD de la
cámara
6.Sistemadevisiónfrontal
7.Sistemadedetecciónporinfrarrojos
8.IndicadoresLEDdelanteros
9. Motores
10.Hélices
11. Indicadores de estado de
la aeronave
12.AntenasOCUSYNCTM
13. Antena D-RTKTM integrada
14.Sistemadevisióntrasera
15. Batería de Vuelo
Inteligente
16.Botóndeencendido
17. Indicadores del nivel de
batería

19
ES
Control remoto
El control remoto del Phantom 4 RTK cuenta con un rango de transmisión de hasta 7 km (4,3 millas)* y permite
controlar la inclinación de la cámara y la captura de fotos. El control remoto también incluye la tecnología OcuSync
de DJI para transmitir imágenes HD en directo desde la cámara. Solo tiene que tocar la pantalla en la aplicación
GS RTK de DJI o importar archivos KML/KMZ para planicar una operación y hacer más cómoda la gestión de
proyectos. Los usuarios también pueden conectar el control remoto a un PC para acceder a la aplicación PC GS
Pro de DJI y ejecutar operaciones. El modo de control de varias aeronaves del control remoto se puede utilizar para
coordinar el funcionamiento de hasta cinco aeronaves a la vez, lo que permite a los pilotos trabajar de una forma
más ecaz. Las baterías reemplazables son fáciles de cambiar, y las antenas son fáciles de extraer para permitir un
mantenimiento rápido.
La siguiente imagen muestra la función de cada movimiento de las palancas de control, utilizando el Modo 2 como
ejemplo. La palanca izquierda controla la altitud y la dirección de la aeronave, mientras que la derecha controla los
movimientos hacia delante, atrás, izquierda y derecha. El selector del estabilizador controla la inclinación de la cámara.
*Elcontrolremotoescapazdealcanzarsudistanciamáximadetransmisión(FCC)enunaampliazonaabiertasininterferencias
electromagnéticas, y a una altitud de unos 120 metros (400 pies).
1.Botóndeencendido
2.BotónRTH
3. Palancas de control
4. Altavoz
5.Anclajeparacordón
6.IndicadorLEDdeestado
7.IndicadoresLEDdenivelde
batería
8.PuertoUSB-C
9. Conector de audio de 3,5 mm
10. Ranura para tarjeta microSD
11.Dispositivodevisualización
12.Botónde
suspensión/reactivación
13. Antenas
12
1
2
3
5
4
6
11
7
9
10
13
8
16 17 18 19
14 15
22
23
20
21
24
12
1
2
3
5
4
6
11
7
9
10
13
8
16 17 18 19
14 15
22
23
20
21
24
12
1
2
3
5
4
6
11
7
9
10
13
8
16 17 18 19
14 15
22
23
20
21
24
14. Dial del estabilizador
15. Dial interruptor de control
de la aeronave
16.Botóndegrabación
17. Interruptor de pausa
18.Botóndelobturador
19.Botónreservado
20.BotónC1(personalizable)
21.BotónC2(personalizable)
22. Cubierta del compartimiento de la batería
23. Cierre de la cubierta del compartimento
de la batería
24. Cubierta del compartimento de la llave
Palanca izquierda Arriba
Abajo
Palanca derecha Adelante
Atrás
Girar derechaGirar izquierda DerechaIzquierda
Dial del estabilizador
Other manuals for Phantom 4 RTK
7
Table of contents
Languages:
Other dji Drone manuals

dji
dji SPARK User manual

dji
dji Mini 3 User manual

dji
dji Phantom 2 Vision + User manual

dji
dji MAVIC PRO User manual

dji
dji R4D Instruction Manual

dji
dji MAVIC PRO User guide

dji
dji mavic Installation and operating manual

dji
dji MAVIC 2 ZOOM User manual

dji
dji Phantom 4 RTK User manual

dji
dji Inspire 1 Pro User manual