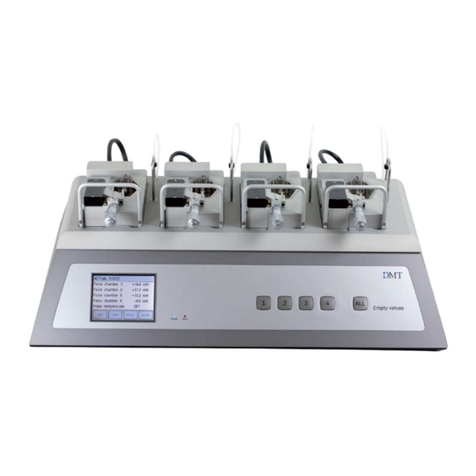
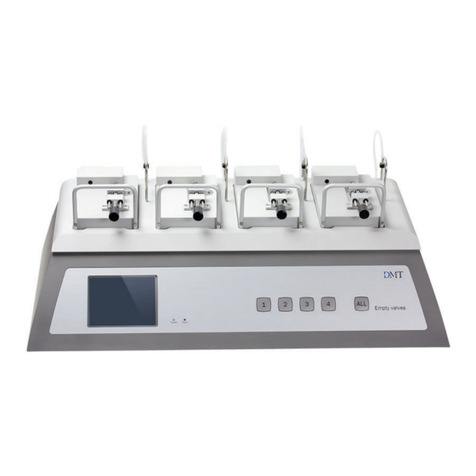
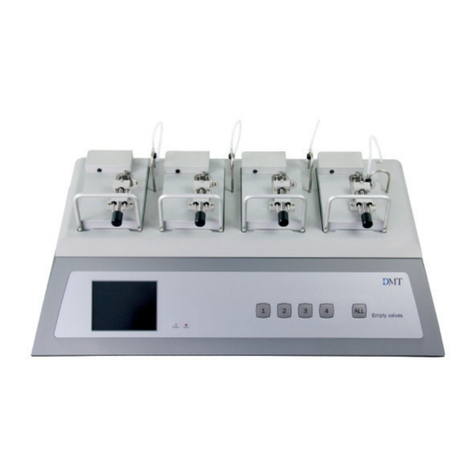
DMT 750 TOBS User manual

USER GUIDE, VOL.2.0
TISSUE ORGAN BATH SYSTEM - 750TOBS


CONTENTS
CHAPTER 1 - SYSTEM OVERVIEW 4
1.1 Tissue Organ Bath System - 750 TOBS: Front Panel 4
1.2 Tissue Organ Bath System - 750 TOBS: Rear Panel 5
1.3 Tissue Organ Bath System - 750 TOBS: Chamber 6
CHAPTER 2: SETTING UP THE TISSUE ORGAN BATH 8
2.1 Tissue chamber handling procedure 8
2.2 Adjusting the transducer 9
2.3 Dierent types of tissue sample holders 10
2.4 Isometric Transducer: 11
CHAPTER 3: CLEANING AND MAINTENANCE 12
3.1 Cleaning the Tissue Organ Bath System 12
APPENDIX 1 - BUFFER RECIPES 14
Physiological Saline Solution (PSS) 14

4
CHAPTER 1 - SYSTEM OVERVIEW
Micrometer positioner
1.1 TISSUE ORGAN BATH SYSTEM - 750 TOBS: FRONT PANEL
Perfusion buer inlet
Mounted to the lid inside the bottles:
A constant ow shunt or a ll/empty shunt
Tissue chamber
Sample holder
Chamber door Glass presence indicator
Oxygenation/CO2 regulator
Power indicator
Front door
Transducer

5
1.2 TISSUE ORGAN BATH SYSTEM - 750 TOBS: REAR PANEL
Communication indicator
USB connection
Analogue recorder output
Suction connection for vacuum pump
Oxygen/ Carbogen Pressure inlet,
max 10bar/145psi
115-230V/50-60Hz
automatic voltage selector
ON/OFF switch
Power connector

6
Figure A: 20ml Tissue chamber
1.3 TISSUE ORGAN BATH SYSTEM - 750 TOBS: CHAMBER
NOTE: The Chamber Detector registers when the tissue chamber is placed. If the chamber
is placed correctly the blue indicator lamp will be lit and the tissue organ bath will work.
Tissue chamber
Chamber detector
Air heating
Sample holder
(lower part shown)

7
NOTE: Regarding the oxygenation/CO2regulator: the regulators need to be greased AT
LEAST twice a year. Also, make sure that the regulators are turned at regular intervals
to prevent them from getting stuck. Use ONLY the grease that came with the system.
Perfusion Buer inlet
Temperature Probe
Glass indicator:
On: Glass mounted
O: Glass removed
Knob for dismounting
chamber disc and
temperature probe
Oxygenation/ CO2
regulator
Oxygenation/ Carbogen
airpipe tubing
Drainage tube

8
CHAPTER 2: SETTING UP THE TISSUE ORGAN BATH
2.1 TISSUE CHAMBER HANDLING PROCEDURE
The following is a description of how to handle the tissue chambers and the dierent kinds of sample
holders available.
4. Placing the glass:
Place the pipe stub at the
bottom of the chamber
inside the chamber
disc whilst aligning the
pipe stub to the stub
opening. Gently place
the pipe stub situated
on the inside of the
heating compartment
and secure in.
3. Removing the glass:
Carefully pull the top of
the chamber outwards
pressing down on the
bottom of the chamber
a few millimeters until
the chamber is free to
move upwards. Then lift
out the chamber.
1: Move the transducer
and mounting supports/
holders upwards. Ensure
the sample holder is free
of the chamber.
2: Open the chamber
door.

9
1. Vertical ne adjustment of the transducer:
Turn the micrometer screw clockwise to lower the transducer.
Turn counter clockwise to lift the transducer. The marked
line is the lowest position of the transducer. The micrometer
positioner has a working range of 0 - 26 mm above the line.
NOTE: The micrometer positioner has a slag of 1 to 2
turns when shifting from clockwise to counterclockwise
rotation and vice versa. It is easy to feel when the
micrometer positioner starts to move the transducer.
2. Final alignment of the transducer:
The transducer can be nally aligned in parallel to the tissue
holder and secured by rotating the locking bolt.
Locking
bolt
1.
2.
3.
4.
3. Horizontal adjustment of the transducer:
Turn the screw clockwise to free the transducer.
The transducer can now be moved horizontal.
Turn the screw counterclockwise to lock the
transducer.
4. Course adjustment of the lower tissue holder:
Turn the screw counter clockwise to unlock the
tissue holder. When unlocked, it is possible to
move the holder in 4 orientations, up, down,
left and right. Turn the screw clockwise to lock.
2.2 ADJUSTING THE TRANSDUCER
When tissue is placed in the sampleholder do a course adjustment on the tissue holder to t the tissue
just between the holder and the transducer without stretching it. With the tissue submerged in the buer
set the force to 0. Then use the micrometer positioner to stretch the tissue to the disired resting tension.

10
Figure D: Triangular hooks w/stimulation
electrodes clips (optional)
Figure E: Triangular hooks w/circular
stimulation electrodes (optional)
Figure B: Closing clips (optional) Figure C: Pins (optional)Figure A: Triangle hooks (standard)
NOTE: The above mounting supports are only examples of supports delivered by DMT. If
other mounting supports are needed ask your DMT sales representative.
2.3 DIFFERENT TYPES OF TISSUE SAMPLE HOLDERS

11
Prior to shipment the 750 TOBS has gone through 2 days of continuous testing, including a nal
force transducer calibration. However, to ensure that the Tissue Organ Bath is working at its highest
performance, DMT recommends that a new force transducer calibration is performed before the rst
use of the 750 TOBS system.
As part of the general maintenance of the 750 TOBS system, DMT also recommends that the bath is
weight calibrated at least once every month, every time the system has been moved or has not been
used over a long period.
The weight calibration procedure is described in detail in chapter 4 in the User Manual.
2.4 ISOMETRIC TRANSDUCER:
Figure 4.1.1: Transducer with calibration weight.

12
CHAPTER 3: CLEANING AND MAINTENANCE
3.1 CLEANING THE TISSUE ORGAN BATH SYSTEM
The 750TOBS is a very delicate and sophisticated piece of research equipment. In order to keep it working
at its best, DMT recommend that the following sections are read carefully and that the instructions are
followed at all times. DMT strongly recommends that the Tissue Organ Bath and surroundings should
be cleaned after each experiment. After a “normal” experiment use the following procedure to clean the
Tissue Organ Bath, chamber, tubing and tissue holders.
1. Turn pressure OFF
2. Use clean Schott Duran bottles
3. Fill with distilled water
4. Turn Pressure ON
5. Rinse the silicone tubing with double distilled water by activating the Fill & Empty Control several
times.
6. Change the tubing after use of unknown or toxic chemicals, or if any kind of hydrophobic reagent has
been used.
NOTE: Only works when a tissue chamber is in place
IMPORTANT:
It is VERY important that the tubing being used is the original tubing from DMT. The
quality, diameter and length are VERY important in order to insure the correct draining
and lling of the chamber.

13
7. Carefully dismount the tissue bath chamber and perform a normal glass wash.
8. If aggressive solution or drugs have been used it is possible to disconnect the temperature probe (see
gure 3.1 below) and take out the chamber disc. Clean both with double distilled water, and dry with
a paper towel.
IMPORTANT:
In exceptional cases it may be necessary to demount the sample holders for cleaning to
make sure that all surfaces are cleaned.
Temperature probe
Figure 3.1
Chamber disc and temperature probe

14
APPENDIX 1 - BUFFER RECIPES
PHYSIOLOGICAL SALINE SOLUTION (PSS)
1x PSS (1000ml):
Solution 1:
Chemical MW (g/mol) Conc. (mmol/l) Conc. (g/l)
NaCl 58.44 118.99 6.954
KCl 74.56 4.69 0.350
MgSO4 - 7H2O 246.48 1.17 0.289
KH2PO4 136.09 1.18 0.161
Solution 2:
Chemical MW (g/mol) Conc. (mmol/l) Conc. (g/l)
CaCl2 - 2H2O 147.02 2.50 0.368
Solution 3:
Chemical MW (g/mol) Conc. (mmol/l) Conc. (g/l)
NaHCO3 84.01 25.00 2.100
EDTA 372.24 0.03 0.010
Glucose 198.77 5.50 1.091
1. Dissolve the chemicals in 100 ml double distilled H2O as three individual solutions as described in the
table above. Gently heat solution 3 to dissolve the EDTA.
2. Solution 1 is added to a graduated bottle and the bottle is lled with double distilled H2O to a nal
volume of 500 ml.
3. Solution 3 is added to the graduated bottle, which afterwards is lled with additional double distilled
H2O to a nal volume of 850 ml.
4. Aerate the solution with carbogen (95% O2 + 5% CO2) for about 20 minutes.
5. Solution 2 is added and the graduated bottle is lled with additional double distilled H2O to reach the
nal volume of 1000 ml. Continue the carbogen bubbling until the pH of the buer solution reaches
4.4.

15
25x Concentrated PSS (1000ml)
Solution 1:
Chemical MW (g/mol) Conc. (mmol/l) Conc. (g/l)
NaCl 58.44 118.99 173.850
KCl 74.56 4.69 8.750
CaCl2 - 2H2O 147.02 2.50 9.200
Solution 2:
Chemical MW (g/mol) Conc. (mmol/l) Conc. (g/l)
MgSO4 - 7H2O 246.48 1.17 7.225
KH2PO4 136.09 1.18 4.025
Solution 3:
Chemical MW (g/mol) Conc. (mmol/l) Conc. (g/l)
EDTA 372.24 0.03 0.250
1. Dissolve the chemicals for solution 1 in about 800 ml double distilled H2O in a 1000 ml graduated
bottle. Dissolve the chemicals for solutions 2 and 3 in 75 ml double distilled H2O in individually
cylinders. Gently heat solution 3 to dissolve the EDTA.
2. Solution 2 and 3 is added to solution 1 and the graduated bottle is lled with additional double
distilled H2O to reach a nal volume of 1000.0 ml.
Before use:
3. Dilute the 25 x PSS stock solution 1:25 using double distilled H2O.
4. Add
1.091 g/l Glucose
2.100 g/l NaHCO3
5. Aerate the solution with carbogen (95%O2 + 5%CO2) for at least 20 minutes. If necessary wait further
for the pH of the buer to reach pH 4.4.

16
A.4.1.3 KPSS
1 x KPSS (1000ml):
Solution 1
Chemical MW (g/mol) Conc. (mmol/l) Conc. (g/l)
KCl 74.56 123.70 9.223
MgSO4 - 7H2O 246.48 1.17 0.289
KH2PO4 136.09 1.18 0.161
Solution 2
Chemical MW (g/mol) Conc. (mmol/l) Conc. (g/l)
CaCl2 - 2H2O 147.02 2.50 0.368
Solution 3
Chemical MW (g/mol) Conc. (mmol/l) Conc. (g/l)
NaHCO3 84.01 25.00 2.100
EDTA 372.24 0.03 0.010
Glucose 198.77 5.50 1.091
1. Dissolve the chemicals in approximately 100 ml double distilled H2O as three individual solutions as
described in the table above. Gently heat solution 3 to dissolve the EDTA.
2. Solution 1 is added to a graduated bottle and the bottle is lled with double distilled H2O to a nal
volume of 500 ml.
3. Solution 3 is added to the graduated bottle that is lled with additional double distilled H2O to a nal
volume of about 850 ml.
4. Aerate the solution with carbogen (95% O2 + 5% CO2) for about 20 minutes.
5. Solution 2 is added and the graduated bottle is lled with additional double distilled H2O to reach the
nal volume of 1000.0 ml. Continue the carbogen bubbling until the pH of the buer solution reaches
7.4.

17
25 x KPSS (1000ml)
Solution 1:
Chemical MW (g/mol) Conc. (mmol/l) Conc. (g/l)
KCl 74.56 123.70 230.575
CaCl2 - 2H2O 147.02 2.50 9.200
Solution 2:
Chemical MW (g/mol) Conc. (mmol/l) Conc. (g/l)
MgSO4 - 7H2O 246.48 1.17 7.225
KH2PO4 136.09 1.18 4.025
Solution 3:
Chemical MW (g/mol) Conc. (mmol/l) Conc. (g/l)
EDTA 372.24 0.03 0.250
1. Dissolve the chemicals for solution 1 in about 800ml double distilled H2O in a 1000 ml graduated.
Dissolve the chemicals for solutions 2 and
2. 3 in 75 ml double distilled H2O in individually cylinders. Gently heat solution 3 to dissolve the EDTA.
3. Solutions 2 and 3 are added to solution 1 and the graduated bottle is lled with additional double
distilled H2O to reach a nal volume of 1000 ml.
Before use:
4. Dilute the 25 x PSS stock solution 1:25 using double distilled H2O.
5. Add
1.091 g/l Glucose
2.100 g/l NaHCO3
6. Aerate the solution with carbogen (95% O2 + 5% CO2) for at least 20 minutes. If necessary wait for the
pH of the buer to reach pH 7.4.

DMT-China
Tel.: 86-21-6486 9685
Fax: 86-21-5877 0063
DMT-Asia Pacic
Tel.: +61 2 8814 1597
Danish Myo Technology A/S
E-mail: [email protected]
Tel.: +45 87 41 11 00
Fax: +45 87 41 11 01
DMT-USA,Inc.
E-mail: [email protected]
Tel.: +1 734 707 0250
Fax: +1 678 302 7013
Table of contents
Other DMT Laboratory Equipment manuals
Popular Laboratory Equipment manuals by other brands

Fisherbrand
Fisherbrand 88860021 Operational manual

Michell Instruments
Michell Instruments HygroCal100 user manual

Heidolph
Heidolph Hei-VAP Value operating instructions

Genevac
Genevac HT Series user manual

CORNING
CORNING X-LAB 6917 instruction manual

Kinematica
Kinematica MICROTRON MB 550 instruction manual

Selecta
Selecta Agimatic-Rev-TFT manual

bioMerieux
bioMerieux BACT/ALERT 3D 60 Service manual

cetoni
cetoni Qmix L Hardware manual

Phcbi
Phcbi cellIQ Series operating instructions

Waters
Waters Xevo TQD Operator's, overview and maintenance guide

Sartorius Stedim Biotech
Sartorius Stedim Biotech Flexsafe 3D Bag 100L user manual