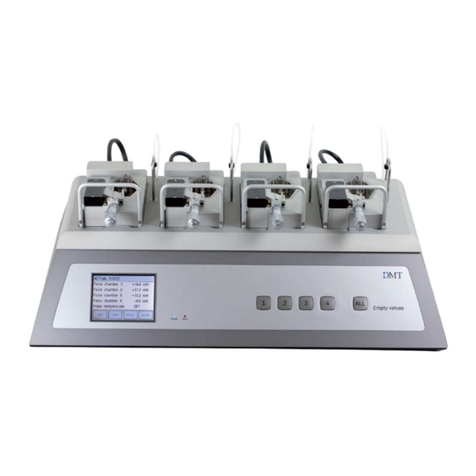
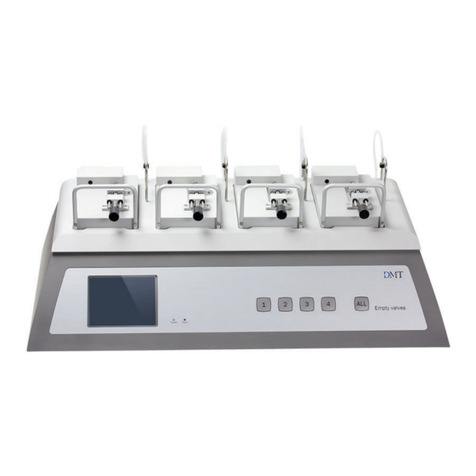
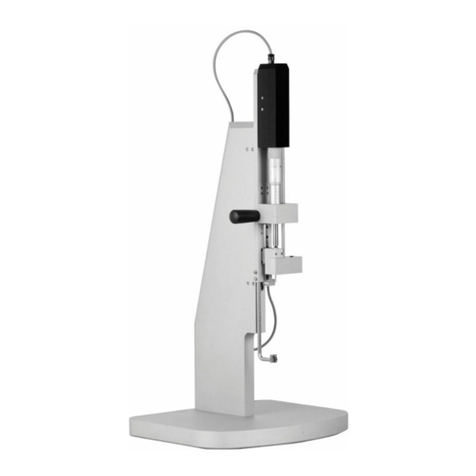
DMT 820MS User manual

USER MANUAL, VOL.2.0
MUSCLE STRIP MYOGRAPH SYSTEM - 820MS

2MUSCLE STRIP MYOGRAPH SYSTEM - MODEL 820MS USER MANUAL
MUSCLE STRIP MYOGRAPH SYSTEM
MODEL 820MS

3
MUSCLE STRIP MYOGRAPH SYSTEM
MODEL 820MS
TRADEMARKS
PowerLab® and LabChart® are registered trademarks of ADInstruments Pty Ltd.
The names of specic recording units, such as PowerLab 4/35, are trademarks of ADInstruments Pty Ltd.
Pentium is a registered trademark of the Intel Corporation. Windows, Windows 95, Windows 98, Windows ME, Windows NT,
Windows 2000, Windows XP, Windows Vista and Windows 7 are registered trademarks of Microsoft Corporation.
All other trademarks are the properties of their respective owners.
DMT reserves the right to alter specications as required.
This document was, as far as possible, accurate at the time of printing.
Changes may have been made to the software and hardware it describes since then.
New information may be supplied separately.
This documentation is provided with the DMT Muscle Strip Myograph System – Model 820MS
Document Number: 820MS – UG2.2A
All rights reserved. No part of this manual may be reproduced or transmitted in any form or by any means
without the written permission of Danish Myo Technology A/S.
Every attempt is made to ensure accurate information, misprints, construction- and specication changes can occur.
Danish Myo Technology A/S reserves the right to alter/change content as required and without any notice.
Copyright © Danish Myo Technology A/S
Trademarks

4MUSCLE STRIP MYOGRAPH SYSTEM - MODEL 820MS USER MANUAL
CONTENTS
Trademarks .......................................................................................................................................................................................................................................3
Introduction .....................................................................................................................................................................................................................................5
Safety ..................................................................................................................................................................................................................................................6
EMC / EMI ..........................................................................................................................................................................................................................................7
Approvals ..........................................................................................................................................................................................................................................7
Certicate of Conformity.............................................................................................................................................................................................................8
About this manual .........................................................................................................................................................................................................................9
Unpacking the myograph system......................................................................................................................................................................................... 10
Chapter 1 - System overview .................................................................................................................................................................................................. 11
1.1 Myo-Interface front panel............................................................................................................................................................... 11
1.2 Interface Rear Panel ...................................................................................................................................................................... 11
1.3 Muscle Strip myograph unit........................................................................................................................................................... 12
Chapter 2 - Setting-up............................................................................................................................................................................................................... 13
2.1 The complete Muscle Strip Myograph System - 820MS.............................................................................................................. 13
2.2 Setting up step-by-step .................................................................................................................................................................. 13
2.3 The rst weight calibration............................................................................................................................................................. 14
Chapter 3 - The Interface Menus............................................................................................................................................................................................ 15
3.1 Interface Menus – Navigation ....................................................................................................................................................... 15
3.2 Interface Menus – Calibrated Mode ............................................................................................................................................. 16
3.3 Interface Menus – Direct Mode .................................................................................................................................................... 22
Chapter 4 - The Muscle Strip Myograph unit..................................................................................................................................................................... 24
4.1 Calibration of the force transducer ............................................................................................................................................... 24
4.2 Checking the force transducer ...................................................................................................................................................... 26
4.3 Force Transducer Replacement..................................................................................................................................................... 26
4.4 Myograph Maintenance ................................................................................................................................................................. 28
4.5 Cleaning the myograph .................................................................................................................................................................. 29
Chapter 5 - The mounting supports and mounting in the 820MS chamber......................................................................................................... 30
Appendix 1 - System specications...................................................................................................................................................................................... 31

5
INTRODUCTION
The Muscle Strip Myograph System - 820MS represents the rst state-of-the-art 4-channel myograph system for muscle strips
of up to 15 mm in length. DMT developed this system for simultaneous measurement of up to 4 isolated muscle preparations,
mounted as strips, between clamp supports. Several types of mounting supports exist, depending on the user’s preferences.
Customized mounting supports can be made upon request. In addition, because of the somewhat rectangular chamber, the
myograph also can be used for the study of larger strips from other organs, including larger, longer strips of smooth muscle.
Stimulation electrodes are available (optional). The electrodes are built into the chamber cover and can be used to activate the
muscle via eld stimulation from a pulse/train stimulator, such as the DMT CS200.
The muscle bath unit is constructed of aluminum, while the centrally located rectangular chamber is stainless steel for easy
cleaning. The segment clamp supports are positioned in the chamber with one side attached to a force transducer and the other
side to a micro-manipulator. The micromanipulators permit the accurate setting of passive tension (which correlates with muscle
length) while the sensitive force transducers measure the developed isometric muscle tension during stimulation. Each unit has
individually controlled gas inow and suction. The system is automatically heated to a set temperature, up to 45° C.
Following mounting and equilibration, the optimal pre-load or passive tension for the muscle can be determined. The length of
the muscle is kept constant during the experiment; thereby any contractions measured from the isolated, mounted muscle strip
will be examined under isometric conditions. Compounds can be added directly to the chamber, and muscle tension can be
monitored to evaluate the chronotropic or inotropic effects of the compound. If desired, the buffer can be sampled for metabolic
factors during and after muscle contraction(s).
This myograph is well-suited for high-throughput analysis of muscle reactivity, especially when multiple units are arranged
conveniently side-by-side. The 820MS is ideal for drug development and testing related to striated muscle, as well as for
experiments where comparing multiple muscle samples from control and treated or gene-modied animals is required. The
multitude of data generated from the force transducers can be captured through external data acquisition via either calibrated
(ltered) or uncalibrated (unltered) analog outputs or in digital format via a serial connection.
INTRODUCTION

6MUSCLE STRIP MYOGRAPH SYSTEM - MODEL 820MS USER MANUAL
SAFETY
The Muscle Strip Myograph System - 820MS has been designed for use in teaching and research only. It is not intended for clinical
or critical life-care use and should never be used for these purposes. The 820MS also should not be used for the prevention,
diagnosis, curing, treatment, or alleviation of disease, injury, or handicap. The following are other safety concerns of note:
• Do not open the unit; the internal electronics pose a risk of electric shock.
• Do not use this apparatus near water.
• To reduce the risk of re or electric shock, do not expose this apparatus to rain or moisture. Objects lled with liquids should
not be placed on the system.
• Do not block any ventilation openings. Install in accordance with the manufacturer’s instructions.
• Do not install near any heat sources such as radiators, heat registers, stoves, or other items that produce heat.
• Only use attachments and accessories specied by the manufacturer.
• Unplug this system during lightning storms or when unused for long periods of time.
• Be advised that different operating voltages require the use of different types of line cord and attachment plugs. Check the
voltage in your area and use the correct type. See the table below:
Voltage Line plug according to standard
110–125 V UL81 and CSA C22.2 No. 42
220–230 V CEE 7 page VII, SR section 107-2-D1/IEC 83, page C4
240 V BS 1363 of 1984 Specication for 13A fused plugs and switched and
unswitched socket outlets.
Protect the power cord from being walked on or pinched: particularly at power plugs and the point where they connect to the
apparatus.
Refer all servicing to qualied service personnel. Servicing is required when the apparatus has been damaged in any way; such
as, the power-supply cord or plug is damaged, liquid has spilled onto or objects have fallen into the apparatus, the apparatus has
been exposed to rain or moisture, does not operate normally, or has been dropped.

7
EMC / EMI
This equipment has been tested and found to comply with the limits for a Class B Digital device, pursuant to part 15 of the
FCC rules. These limits are designed to provide reasonable protection against harmful interference in residential installations.
This equipment generates, uses and can radiate radio frequency energy and, if not installed and used in accordance with the
instructions, may cause harmful interference to radio communications. However, there is no guarantee that interference will not
occur in a particular installation. If this equipment does cause harmful interference to radio or television reception (which can
be determined by monitoring the interference while turning the equipment off and on), the user is encouraged to correct the
interference by one or more of the following measures:
• Reorient or relocate the receiving antenna.
• Increase the separation between the equipment and receiver.
• Connect the equipment into an outlet on a circuit different to that which the receiver is connected to.
• Consult the dealer or an experienced radio/TV technician for help.
APPROVALS
Complies with the EMC standards:
EMC 89/336/EEC: EN 61326-2-6:2005
EN 61000-3-2.
Certied with the safety standards:
Directive 2006/95/EC: EN 61010-1:2001
EN 61010-1/Corr.1:2003
EN 61010-2-101:2003
EMC/EMI

8MUSCLE STRIP MYOGRAPH SYSTEM - MODEL 820MS USER MANUAL
CERTIFICATE OF CONFORMITY
DMT A/S, Skejbyparken 152, 8200 Aarhus N., Denmark,
hereby declares its responsibility that the following product:
Muscle Strip Myograph System
Model 820MS
is covered by this certicate and marked with CE-label conforms with the following standards:
EN 61010-1:2001
EN 61010-1/Corr.1:2003
EN 61010-2-101:2003
EN 61326-2-6:2005
Safety requirements for electrical equipment for measurement, con-
trol, and laboratory use -
Part 1: General requirements.
Safety requirements for electrical equipment for measurement, con-
trol and laboratory use - Part 2-101: Particular requirements for in
vitro diagnostic (IVD) medical equipment.
Electrical equipment for measurement, control and laboratory use -
EMC requirements - Part 2-6: Particular requirements - In vitro diag-
nostic (IVD) medical equipment.
With reference to regulations in the following directives: 2006/95/
EC, 89/336/EEC

9
ABOUT THIS MANUAL
This manual contains a complete list of procedures that describe how to install, maintain and use the Muscle Strip Myograph
System – 820MS.
Chapter 1 provides an overview of the construction and basic features of the Myo-Interface and the myograph unit.
Chapter 2 describes step-by-step how to set-up the complete Muscle Strip Myograph System – 820MS including accessories.
Chapter 3 is a complete manual to the Myo-Interface. The chapter describes in detail the construction of the menu system and
how to use all the features of the Muscle Strip Myograph System - 820MS.
Chapter 4 contains procedures describing general as well as daily maintenance of the myograph unit; e.g. adjustment of sup-
ports and cleaning instructions.
Appendix contain system specications.
ABOUT THIS MANUAL

10 MUSCLE STRIP MYOGRAPH SYSTEM - MODEL 820MS USER MANUAL
UNPACKING THE MYOGRAPH SYSTEM
Take a few minutes to carefully inspect your new Muscle Strip Myograph System - 820MS for damage which may have occurred
during handling and shipping. If you suspect any kind of damage, please contact DMT immediately and the matter will be pursued
soon as possible. If the packing material appears damaged, please retain it until a possible claim has been settled.
We recommend that you store the packing material for any possible future transport of the Muscle Strip Myograph System. In
case of transport and the original packing material is unavailable, please contact DMT Sales Department for advice and packing
instructions.
After unpacking your new Myograph System, please use the following list to check that the system is complete:
• 1 interface unit
• 4 chamber units with mounted clamp supports
• 4 chamber covers
• 1 external temperature probe
• 1 power cord*
• 1 calibration kit (including bridge, balance and 2 g weight)
• 1 tube of high vacuum grease
• 1 tube of grease for screw thread
• 2 Allen keys
• 1 small screwdriver
• 1 CD with an user manual for Muscle Strip Myograph System
* The shape of the AC plug varies by country; be sure that the plug ts the outlets for your location.

11
CHAPTER 1 SYSTEM OVERVIEW
1.1 Myo-Interface front panel
CHAPTER 1
1.2 Interface Rear Panel
Power indicator
Myo-Interface display Valve buttons
ON/OFF switch
Power connector
RS 232 Port for serial connection to PC
Temperature probe
Gas input
Vacuum input
Gas regulator (needle valve)
4 Recorder outputs
Heat indicator
USB output
Figure 1.1 - Interface Front Panel with 820MS chambers
Figure 1.2 Interface Rear Panel
4 Transducer connections

12 MUSCLE STRIP MYOGRAPH SYSTEM - MODEL 820MS USER MANUAL
1.3 Muscle Strip myograph unit
Micrometer
Connection to Myo-Interface
Myograph clamp support connected to
micrometer
Force transducer pin
Myograph clamp support connected to
force transducer
Figure 1.4 Close up of myograph unit
Figure 1.3 Muscle Strip myograph unit

13
CHAPTER 2 SETTINGUP
2.1 The complete Muscle Strip Myograph System - 820MS
2.2 Setting up step-by-step
This chapter contains a complete step-by-step description of how to set up a complete Muscle Strip Myograph System - 820MS
as illustrated in gure 2.1 above.
1. Interface – PC Connection
Data acquisition is possible either by connecting the Interface directly to a PC or through a PowerLab data acquisition and
analysis system (optional).
l. Direct PC Connection
Connect the Interface to one of the COM-ports on the PC using a serial cable (cable not included).
ll. PowerLab (Optional)
Connect the Interface to the PowerLab unit using BNC cables. Connect Rec 1 on the Interface to Input 1 on the Power-
Lab, Rec 2 to Input 2 etc. Connect the PowerLab unit to one of the USB ports on the PC using the USB cable delivered
with the PowerLab system.
2. Oxygen supply
Connect the gas supply (95% O2, 5% CO2 or 21% 02, 5% CO2, balance N2) with tubing running from the gas supply to the gas
inlet on the back of the Interface. Oxygen is supplied to the chambers by tubing attached to the stainless steel vacuum pipe.
e oxygen and vacuum tubing need to be inserted into the chamber in order to aerate the heated buffer. Needle valves on
the back of the interface can be adjusted to regulate the amount of bubbling that occurs. Turning the regulator clockwise
increases the bubbling while turning it counter-clockwise decreases the bubbling. Each regulator has a lock device attached
that can be used when the desired bubbling is achieved (“Figure 2.2 - Oxygen supply and suction connection” on page 14).
Figure 2.1 The complete Muscle Strip Myograph System - 820MS
CHAPTER 2
DMT CS200 Pulse/Train Stimulator
(optional)
Myo-Interface rear panel
Myo-Interface front panel
BNC Cables
Suction bottle
(optional)
Connection to oxygen
supply
Vacuum pump (op-
tional)
PC USB connection
PC data acquisition and analysis software
(optional)
PowerLab data acquisition system
(optional)

14 MUSCLE STRIP MYOGRAPH SYSTEM - MODEL 820MS USER MANUAL
Figure 2.2 - Oxygen supply and suction connection
Figure 2.3 - Chamber cover Figure 2.4 - Chamber cover with built-in electrodes
(optional item)
Gas
Suction
NOTE: THE NEEDLE VALVES NEED TO BE GREASED USING THE GREASE FOR THE LINEAR SLIDES AND TURNED AT
REGULAR INTERVALS TO PREVENT THEM FROM STICKING OR PERMANENTLY FREEZING.
3. Vacuum Connection
The system has a built-in manifold with separate valves that allows each chamber to be drained individually. After connect-
ing the vacuum source at the back of the Interface, the vacuum pipes need to be inserted into the chambers in order for this
feature to work properly. The pipes are inserted into the chamber by gently pulling up on the curved part of the pipe, turning
it 90° counter- clockwise and gently lowering it into the chamber (as illustrated in “Figure 2.2 - Oxygen supply and suction
connection” on page 14). A chamber can then be emptied by pressing the corresponding numbered button. Pressing the “all”
button will empty all the chambers at the same time (see “Figure 1.1 - Interface Front Panel with 820MS chambers” on page
11 - “valve buttons”).
NOTE: WHEN DRAINING THE CHAMBERS USING THE AUTOMATIC VACUUM FUNCTION, PRESS THE APPROPRIATE BUT
TON FOR AN ADDITIONAL 35 SECONDS AFTER THE INITIAL EMPTYING. THIS WILL HELP DRAIN RESIDUAL BUFFER AND
SOLUTIONS RETAINED IN THE TUBING AND VALVES.
4. Chamber covers
The chamber covers are used to keep the temperature and other conditions (gas tension, pH) of the solution surrounding
the mounted segment as accurate as possible (“Figure 2.3 - Chamber cover” on page 14). Optional stimulation electrodes are
available built into the chamber cover and can be used to activate the muscle via eld stimulation (“Figure 2.4 - Chamber
cover with built-in electrodes” on page 14).
2.3 The rst weight calibration
Prior to the shipment of the Muscle Strip Myograph - 820MS it has gone through two days of continuous testing including a nal
weight calibration. However in order to ensure that the myograph is working at highest performance, DMT recommends that a
new weight calibration is performed before starting to use the myograph system. The weight calibration procedure is described
in detail in the FORCE CALIBRATION sub-menu under SETTINGS, as explained in chapter 3, on next page.

15CHAPTER 3
CHAPTER 3 THE INTERFACE MENUS
Menus on the 820MS interface are all accessible by a touch screen. To ac-
cess a menu, simply touch the screen. A setting can be changed by touching
the “SELECT” icon on the screen corresponding the “SELECT” icon on the
touch screen corresponding to the desired channel to be changed.
The line to be modied will turn blue, indicating that the interface is waiting
for input. When “ALL” is chosen, all lines corresponding to all 4 channels
will turn blue. Changing the numeric value for the chosen parameter can be
done by touching the up or down arrow keys.
Touch “ENTER” when the desired setting has been chosen. Touching the “X”
will exit the menu and automatically take the user to the “ACTUAL FORCE”
Display.
Chapter 3 is a complete manual for the 820MS Interface. This chapter contains a detailed description of how to navigate the
touch-screen menus and how to use the special features of the 820MS myograph. The 820MS system can be used in 2 different
modes. The rst mode is the Calibrated Mode, where the signal from the transducers is ltered and conditioned before the signal
is routed to the BNC outputs in the back of the interface for collection by a data acquisition system. The second mode is the Direct
Mode, and the signals from the transducers in this mode bypass the internal amplier and are routed directly to the NBC outputs
for data acquisition. Different menu options are available in each mode and will be described in more detail in this chapter.
3.1 Interface Menus – Navigation

16 MUSCLE STRIP MYOGRAPH SYSTEM - MODEL 820MS USER MANUAL
3.2 Interface Menus – Calibrated Mode
In calibrated mode, the internal amplier is engaged and signals from the transducer are ltered and conditioned before the
signal is sent to a data acquisition system via the BNC outputs on the rear of the interface. The total voltage output from the BNC
connectors is 2.5 volts.
Power-Up Screen
After turning on the 820MS Interface, an “Introduction” screen appears.
The system is auto-calibrating the A/D converters while this screen is dis-
played.
After a few seconds, the “ACTUAL FORCE” display will appear.
At any given time, if the force applied on any channel is out of range, the
force reading for the overloaded channel will turn yellow as a warning.
Three menus are accessible from the default “Actual Force” screen or dis-
play. These menus are: Zero, Heat,and Settings.

17CHAPTER 3
Zero Menu
This menu is used to zero the output of the transducers. When using a data
acquisition program like LabChart by AD Instruments ®, using this feature
will reset the baseline of the chart traces without affecting the calibrations
or physically changing any pre-load tensions placed on the mounted ves-
sels. The channels can be changed individually by pressing “SELECT” or all
at once by pressing “ALL”. Pressing “ENTER” will execute the zero function.
Heat Menu
The heating unit and temperature are controlled from this menu. To turn
the heat on or change the preset temperature for the system, access the
temperature control menu. Pressing the “HEAT” key will enter the menu and
allow the user to change the default system temperature, as well as turn the
heat on or off. Pressing “DEFAULT” will automatically reset the temperature
setpoint to 37°C. Manually change the temperature by pressing the up or
down arrows.
Turn the heat on by touching “ON” and the icon will turn green.
Pressing the white “X” in the red box will send the user back to the “ACTUAL
FORCE” display.
Settings Menu
The “Settings Menu” contains several sub-menus that can be accessed to
change functional aspects of the interface. These sub-menus include:
1. FORCE CALIBRATION
2. VALVE DELAY
3. FORCE REC. OUTPUT
4. MEASUREMENT RANGE
5. INTERFACE SETTINGS
These are the options that are present when the system is in Calibrated
Mode. Different options will appear when the system is in Direct Mode.

18 MUSCLE STRIP MYOGRAPH SYSTEM - MODEL 820MS USER MANUAL
1. Force calibration
NOTE: EVERYTIME A FORCE CALIBRATION IS PERFORMED THE MEAS
UREMENT RANGE IS SET TO DEFAULT 200 mN. SET MEASUREMENT
RANGE AFTER THE FORCE CALIBRATION.
Enter the FORCE CALIBRATION sub-menu to perform the calibration proce-
dure.
Touch “SELECT” to initiate the calibration for the chosen chamber and the
text will turn blue. Touching “ENTER” will start the 6-step procedure for cali-
brating the chosen force transducer.
The calibration procedure is listed in 6 individual steps and needs to be
performed for each channel or transducer when calibrating the system.
Step 1 involves setting up the chamber for calibration. Make sure the cham-
ber contains the clamp support. Fill the chamber with double-distilled water
for the volume to be used experimentally. Press “NEXT STEP”.
Step 2 involves setting up the calibration kit appropriately for the actual
weight calibration. Verify that the transducer arm pin does not touch the
clamp support, as instructed. The pin should be as close as possible to the
clamp support or mounting pin without touching in order to get the most
accurate calibration. Press “NEXT STEP” when the calibration kit has been
properly placed.

19CHAPTER 3
Step 3 Initiates the heating process for the chambers. In order to perform
an accurate calibration the transducers must be heated to the desired ex-
perimental temperature to accommodate heat-induced expansion of the
electronic parts in the transducer. Otherwise inaccurate readings and trans-
ducer drift may occur.
To start heating, press “HEAT ON”. Using the chamber covers will expe-
dite the heating. Place the temperature probe into the rst chamber to be
calibrated to monitor the temperature. Heating will take approximately 20-
30 minutes to reach 37°C. Press “NEXT STEP” when the chamber(s) has
reached the target temperature.
Step 4 is the rst step in the actual weight calibration process. A 4-digit
number will be displayed in blue at the bottom of the screen. If nothing has
been perturbed during the heating process, the zero, 0 gram, or 0.00 mN
calibration should be stable as indicated by the 4-digit number and “NEXT
STEP” can be pressed at this time. If the 4-digit number is not stable, then
wait until the number has stopped uctuating before pressing “NEXT STEP”.
Step 5 is the 2 gram weight calibration. Place the 2 gram weight in the
pan closest to the transducer as to simulate a vessel pulling on the clamp
attached to the transducer. Remember, a 2 gram weight in a 90° vector
is cut in half, and the transducer will only detect 1 gram or 9.81 mN of
force. The weight placement should cause a positive increase in the 4-digit
number. Wait at least 10 to 15 seconds for the applied force to stabilize
before pressing “NEXT STEP”. Once the 4-digit number has stabilized, press
“NEXT STEP”.
Step 6 is to verify that the calibration was performed correctly. The “Force
Chamber 1” reading should be 9.81 ± 0.1 mN. If the “Force Chamber 1”
reading is off by more than 0.1 mN, then remove the weight, press “BACK”
to return to Step 4, and repeat the calibration process. If the “Force Cham-
ber 1” reading is satisfactory, then press “NEXT STEP”. Calibrate the other
chambers in the same manner.

20 MUSCLE STRIP MYOGRAPH SYSTEM - MODEL 820MS USER MANUAL
2. Valve delay:
Pressing “VALVE DELAY” in the SETTINGS menu will allow the user to modify
the time duration that the vacuum valves stay open for washes. Factory
default is set at 1 second, but 1 second is not enough time to completely
empty a chamber with even as small a volume of 5 ml.
Pressing “SELECT” next to any given channel will cause the line selected
to turn blue. The up and down arrow keys can then be used to modify the
length of time the vacuum valves stay open after the valves have been acti-
vated with the push buttons on the front panel of the interface.
Pressing “ALL” will cause all the lines to turn blue, meaning all chambers
can be modied at the same time. Again, the up and down arrow keys can
be used to modify the length of time the vacuum valves stay open.
Pressing “ENTER” after modifying the value(s) for valve delay will lock in the
number(s) and be retained in memory every time the system is turned on.
3. Force Rec. out:
The FORCE RECORDING OUTPUT, or FORCE REC. OUT, sub-menu determines
the upper limit for force sent from the BNC analogue output connectors.
This will only affect the data collected from the interface to a data acquisi-
tion system such as AD Instruments PowerLab and LabChart software. The
factory default setting for FORCE REC. OUT is 20 mN, meaning that if the
force of the mounted vessel exceeds 20 mN, the force recorded in the data
acquisition software will not record more than 20 mN and will appear as a
at-line trace at 20 mN, even though the force readings on the interface
may exceed 20 mN. Therefore, change the FORCE REC. OUT settings to an
appropriate setting so as to capture any maximal response from the vessel
of interest. This value should not exceed the settings for the transducer
range, which is dened by the sub-menu, MEASUREMENT RANGE and is
explained in the next section.
The “SELECT” and “ALL” functions are the same in this menu as previously
described for the “VALVE DELAY” menu. Pressing “ENTER” will store the
numbers in memory for future experiments.
NOTE:
ANYTIME FORCE REC. OUT IS CHANGED, A NEW WEIGHT CALIBRATION
OF THE TRANSDUCERS SHOULD BE PERFORMED, ENTERING THE NEW
VOLTAGE VALUES INTO THE DATA ACQUISITION SYSTEM BEING USED.
Other manuals for 820MS
2
Table of contents
Other DMT Laboratory Equipment manuals
Popular Laboratory Equipment manuals by other brands

Agilent Technologies
Agilent Technologies ZORBAX Series user guide

VWR
VWR avantor Star-Blender 400 Silent instruction manual

Metrohm
Metrohm 885 Compact Oven SC manual

SciCan
SciCan statim 5000 G4 Setting up and using

Wabi Baby
Wabi Baby WA-8800N manual

Amersham Biosciences
Amersham Biosciences TE 70 user manual

MRC
MRC LOM-150-UV Operation manual

Thermo Electron
Thermo Electron MicroXR Service manual

Steinberg Systems
Steinberg Systems SBS-LZ-300D user manual

Thermo Scientific
Thermo Scientific Sorvall RC6 Plus Operation instructions

Benchmark
Benchmark Micro Bead Sterilizer B1201 Operation manual

Thermo Scientific
Thermo Scientific TRACE 1300 instruction manual