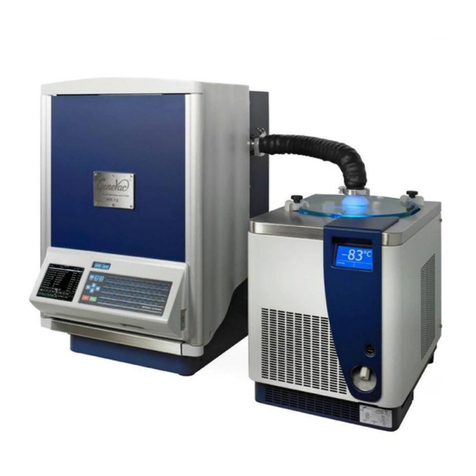
Genevac HT Series User manual

Genevac Inert Gas
Purge for HT Systems
User Manual
Original instructions
Part number 10-1474 Issue 3-6 March 2014


Contents
Introduction...........................................2
Safety.....................................................4
Warnings and cautions ...........................4
Risk assessment.....................................4
Precautions.............................................4
Combustible solvents..............................5
Electrical earthing ...................................5
Limitation of Use .....................................5
Basic Operation ....................................6
Power-up.................................................6
Purge mode ............................................6
Normal mode ..........................................6
Controls...................................................7
Reset.......................................................8
Pressure gauges.....................................8
Getting Started......................................9
Pre-start checks......................................9
Starting an evaporation run.....................9
Evaporation run in progress..................10
Stopping the evaporator........................10
Shutting down .......................................10
Maintenance........................................11
Periodic maintenance ...........................11
Installation........................................... 12
Overview...............................................13
Hose connections .................................14
Connections to purge box.....................15
Connections to vacuum pump..............16
Troubleshooting..................................17
Faults and errors...................................17
Rectifying faults and errors...................18
Clearing faults and errors .....................18
Technical Data.....................................19
Specifications........................................19
Inert purge gasses................................19
Schematic diagram...............................20
EC Declaration of Conformity...............21
Warranty statement ..............................22
Amendment control...............................23
Useful information.................................22

HT Series II Inert Gas Purge
User Manual
210-1474 Issue 3-6 March 2014
Introduction
The Genevac HT Series II inert gas purge system is designed to prevent ignition of low
auto-ignition point solvent vapours within the evaporator. The system purges the evaporator
of air, replacing it with inert gas prior to starting the evaporation; it also vents with inert gas at
the end of evaporation. Throughout the process, oxygen levels within the vacuum system
are maintained well below the minimum concentration required for combustion.
Genevac strongly recommend the use of an inert gas purge system when evaporating
flammable solvents, particularly solvents with a low auto ignition point, e.g. diethyl ether or
pentane.
Inert gas purge box
The supply of inert gas is controlled and monitored to ensure sufficient gas is supplied to the
evaporation system at all times. Inert gas supply pressure is monitored throughout the purge
cycle and during evaporation, gas flow rates are also checked during purging. If any fall
below pre-set safety limits, the purge system resets. A combination of warning LEDs on the
remote control and error messages on the evaporator’s LCD screen alert the user to the
problem.
Gas pressures and purging times are factory pre-set and are specific to the evaporator type.

User Manual
HT Series II Inert Gas Purge
10-1474 Issue 3-6 March 2014 3
The system is operated using simple START and CANCEL buttons on the remote control.
Once the evaporator is ready to go (samples loaded, run selected and the start button
pressed) simply press the START button on the remote control, the purging process is fully
automatic, requiring no further intervention from the user.
Remote control
During the purge cycle and throughout the evaporation run, the system status is shown by a
series of LED indicators on the remote control.
For processing samples that do not require inert gas purge, the purge system can be
switched off by turning the key switch to select NORMAL mode. To prevent unauthorised
tampering, the inert gas purge system can be locked in either PURGE mode or NORMAL
mode by setting and then removing the key.

HT Series II Inert Gas Purge
User Manual
410-1474 Issue 3-6 March 2014
Safety
Warnings and cautions
This symbol is used within this manual to highlight warnings and cautions.
Warning: highlights a risk of personal injury.
Caution: highlights a risk of material damage.
Risk assessment
Carry out a risk assessment for each solvent before use. Refer to the Material Safety Data
Sheet and consider the possible consequences of applying vacuum to all solvents used.
Precautions
Observe the following safety precautions when operating the evaporation system with the
inert gas purge system in PURGE mode (also observe the precautions listed in the
HT Series II evaporator user manual):
Check all hose connections to the inert gas purge box are fitted securely and are free
from kinks or constrictions that could affect gas flow.
Make sure the exhaust hoses are separately connected to a suitable laboratory fume
extraction system so fumes are taken away from the evaporation system and the user
(do not use T-connectors, or equivalent, to connect exhaust hoses together).
During operation, inert gas may leak from the system. Only operate the inert gas purge
system in a ventilated space.
Do not switch off the inert gas purge system until the evaporation run has ended and the
system has vented to atmospheric pressure.
Do not switch off the gas supply to the inert gas purge system until the evaporation run
has ended and the system has vented to atmospheric pressure.
If inert gas is supplied from a bottle, make sure there is sufficient gas in the bottle before
starting the evaporation run.
Always drain the condenser after evaporation with inert gas purge.
Only allow users who are familiar with all the issues outlined in this user manual, and in the
HT Series II evaporator user manual, to operate the equipment. If personnel lack the
training or experience to comprehend the hazards that can arise when operating the inert
gas purge system, do not allow them to use it; personnel without such training require
thorough instruction and the instructions contained within these user manuals may form the
basis of such training.

User Manual
HT Series II Inert Gas Purge
10-1474 Issue 3-6 March 2014 5
Combustible solvents
Warning: Risk of vapour ignition. Only operate the inert gas purge system in a
ventilated environment and consider safety when evaporating any combustible
solvents. Genevac's position regarding the evaporation of such solvents,
particularly with respect to the European ATEX directive, is available on our
website, at www.genevac.com or from your local Genevac distributor.
Electrical earthing
Warning: Risk of electric shock. This equipment must be earthed. This is a
safety class I product according to IEC classification. It must never be used with
any interruption to the safety earth conductor. It is an installation class II product
and is intended to operate from a normal single-phase supply.
Any maintenance or repair of this product, not detailed in this manual, must be carried out by
Genevac personnel (or approved representatives of Genevac) using only Genevac approved
spare parts.
Limitation of Use
The inert gas purge system is designed to be used in conjunction with the a Genevac
HT Series II evaporation system with which it was supplied. It must not be transferred to
another system.

HT Series II Inert Gas Purge
User Manual
610-1474 Issue 3-6 March 2014
Basic Operation
Power-up
The inert gas purge system powers up when the HT Series II evaporation system is switched
on; the POWER LED on the remote control lights up to confirm the system is powered.
Make sure the inert gas supply to the system is turned on.
Purge mode
On the remote control pad, turn the key switch to the PURGE position. The N2OK (inert gas
OK) LED lights up to indicate the inert gas pressure is adequate for the safe operation of the
system. If the N2OK lamp does not come on, check the inert gas supply.
With PURGE selected, the system will always purge with inert gas before allowing an
evaporation run to start, and will vent with inert gas at the end of the run, regardless of which
run is selected.
To “lock” the system in purge mode, with PURGE selected, remove the key from the remote
control switch.
Normal mode
To operate the evaporator in normal (non-purge) mode, turn the key switch to the NORMAL
position.
With NORMAL selected, the system does not purge before an evaporation run; venting is
still controlled by the purge box but the system is vented with air (not inert gas).
To “lock” the system in normal mode, with NORMAL selected, remove the key from the
remote control switch.
Caution: Risk of igniting vapours from a previous evaporation run. Always drain
the condenser before starting the evaporator in normal mode; low auto ignition
point solvents may be present from previous evaporation runs.
To operate the evaporator with the inert gas purge system in normal mode, refer to the
instructions in the HT Series II evaporator user manual; operation is the same as for a
standard (non-inert gas purge) system.

User Manual
HT Series II Inert Gas Purge
10-1474 Issue 3-6 March 2014 7
Controls
Remote control
1. START button: Press to start the purge cycle.
2. CANCEL button: Press to reset the inert gas purge system (once the cancel button
has been pressed, the only way to resume is to start a new purge cycle).
3. Key switch: Turn to switch between PURGE mode and NORMAL mode.
4. N2OK LED: Lights up to indicate system has detected safe operating pressure of
inert gas supply.
5. PURGING LED: Flashes yellow during the purge cycle to indicate the inert gas purge
system is operating.
6. READY LED: Lights up green to show the purge cycle has completed and the
evaporator is ready to start.
7. RESET LED: Lights up red to indicate the purge system has reset.
8. POWER LED: Lights up green when the system is powered up.
9. FAULT LED: Lights up red if the system detects an internal fault within the inert gas
purge control box. Refer to Troubleshooting.
2
3
4
5
6
7
8
1
9

HT Series II Inert Gas Purge
User Manual
810-1474 Issue 3-6 March 2014
Reset
The inert gas purge system will reset if the inert gas pressure decays below the safe
operating threshold during the purge cycle. The RESET LED lights up to indicate the system
has reset (the RESET LED also lights up if the CANCELbutton has been pressed).
Pressure gauges
The CHAMBER PURGE pressure and PUMP BLEED pressure can be monitored using the
pressure gauges on front of the inert gas purge box.
Chamber purge
pressure
Pump bleed
pressure
In addition to the N2OK LED, the pressure gauges on the control module provide an
indication of the inert gas supply pressure throughout the purge process.

User Manual
HT Series II Inert Gas Purge
10-1474 Issue 3-6 March 2014 9
Getting Started
The information in this section is applicable when using HT Series II evaporation system with
the inert gas purge system in PURGE mode. The following instructions should be read in
conjunction with instructions in the evaporator user manual.
Pre-start checks
Make sure the condenser has been drained before starting an evaporation run. If necessary,
defrost and drain the condenser.
Check the N2OK LED on the remote control is on (this indicates the inert gas supply
pressure is sufficient for safe operation of the system). If the LED is off, check the inert gas
supply.
Starting an evaporation run
Purging can be interrupted at any time during the purge cycle by pressing the CANCEL
button.
1. On the remote control, turn the key switch to select PURGE.
2. Load the samples into the evaporator and close the door / lid.
3. On the evaporator, select the required run and press START.
Note: The evaporator displays Not Ready / Purged and will not start until the purge cycle
has completed. The purge time is pre-set and is specific to the evaporator system type.
4. On the remote control, press the START button (the system purges with inert gas for a
pre-set purge time; for times, see: Specifications. During the purge cycle, the yellow
PURGING LED flashes to indicate the inert gas purge system is operating. When
purging is complete the green READY LED lights to show the system is ready and the
evaporation run starts automatically).
Note: If the N2OK LED goes off during the purge cycle, the system resets and the
evaporator cannot be started until a purge cycle has been restarted and successfully
completed.

HT Series II Inert Gas Purge
User Manual
10 10-1474 Issue 3-6 March 2014
If the inert gas purge cycle is started before the evaporator is started (the START button on
the inert gas purge remote control is pressed before the START button on the evaporator)
this is acceptable, providing samples have been pre-loaded and the evaporator lid / door
remains closed. However the evaporator must be started within a pre-set time, failure to
start within the must run time will cause the purge system to reset (for times, see:
Specifications).
Evaporation run in progress
Once a purge cycle is complete, the evaporator starts automatically. The purge system
monitors the vacuum within the evaporator chamber to make sure that a target vacuum level
is attained within a predetermined time; once achieved, the evaporation run proceeds under
the control of the HT Series II evaporator.
Warning: Risk of vapour ignition. The supply of inert gas to the system must be
maintained throughout the evaporation process. Do not switch off the inert gas
supply while the evaporator is operating, do not switch the key switch from
PURGE to NORMAL, if inert gas is supplied from a gas bottle make sure there is
sufficient gas before starting the evaporation run.
Stopping the evaporator
The evaporator may be stopped manually, or can be programmed to stop automatically at
the end of the run (see the evaporator user manual for details). Regardless of which method
is used, the inert gas purge system vents the evaporation chamber with inert gas before
stopping the evaporator.
The venting process takes longer when operating in purge mode than it does when operating
in normal mode. Once venting is complete, the purge system resets and the RESET LED on
the remote control comes on.
Shutting down
The inert gas purge system powers down automatically when the evaporator is powered
down; an isolation valve inside the purge box closes to prevent gas leakage.

User Manual
HT Series II Inert Gas Purge
10-1474 Issue 3-6 March 2014 11
Maintenance
Any repair of this product must be carried out by Genevac personnel or by an approved
representative of Genevac, using only Genevac approved spare parts.
Periodic maintenance
Check the condition of the hoses weekly. Make sure the hoses are securely fitted, are not
blocked and are free from kinks or sharp bends that could affect the flow of fluid.
When operating the evaporation system, periodically check the purge time and
must run time are as specified in the Technical Data section. If the times are outside the
specified limits, do not use the inert gas purge system, contact Genevac Service Department
for advice.

HT Series II Inert Gas Purge
User Manual
12 10-1474 Issue 3-6 March 2014
Installation
Inert gas purge systems must be installed and commissioned by a suitably trained Genevac
representative. The information in this section is provided for maintenance purposes and to
allow the user to check the installation has not been altered.
Warning: Risk of suffocation. Inert gas may leak from the evaporator during
operation. For this reason, the evaporator must only be used in a ventilated
space, Genevac recommend installing evaporation systems with inert gas purge,
in a fume cupboard.
Warning: Risk of solvent auto-ignition. Back-pressure in the waste solvent
container can prevent the condenser draining. Make sure that all exhaust hoses
and ventilation hoses to waste solvent containers are independently connected to
the fume extraction system.
Carry out a risk assessment when selecting a suitable location to install the inert gas purge
system.

User Manual
HT Series II Inert Gas Purge
10-1474 Issue 3-6 March 2014 13
Overview
The following illustrations show the hose and electrical cable connections to HT-4X and
HT8/12SII evaporation systems.
HT-4X
HT-8SII and HT-12SII

HT Series II Inert Gas Purge
User Manual
14 10-1474 Issue 3-6 March 2014
Hose connections
Before connecting or reconnecting inert gas purge hoses, make sure the ends are cut
square. Bad connections may cause inert gas leaks or vacuum loss.

User Manual
HT Series II Inert Gas Purge
10-1474 Issue 3-6 March 2014 15
Connections to purge box
1. PURGE IN: Inert gas supply inlet to system –hose with 8 mm push in connector
(supplied) connects to a pressure regulated inert gas supply.
2. REMOTE: Electrical connector for remote control.
3. FILTER DRAIN: Connect to a suitable container to collect moisture condensed from
inert gas supplied to the system.
4. PUMP BLEED: Inert gas feed (2 psi) to pump ballast adapter.
5. VENT VALVE: Inert gas feed to evaporator vent valve.
6. EVAPORATOR: Electrical connector for control cable to evaporator.
7. PUMP: Electrical connector for control cable to vacuum pump.
8. FUME HOOD: Expels purge gas and fumes from evaporator - connect to a suitable
laboratory fume extraction system.
9. CHAMBER EXHAUST: Allows the purge system to detect vacuum and flow
rate-connect to T-piece at vacuum pump inlet.
For further information, see the schematic diagram in the Technical Data section.
1
5
6
7
8
9
3
2
4

HT Series II Inert Gas Purge
User Manual
16 10-1474 Issue 3-6 March 2014
Connections to vacuum pump
For nXDS6i vacuum pumps, connect the Pump bleed hose to the pump ballast adapter and
connect the chamber exhaust hose to a T-piece, fitted to the pump vacuum inlet.
Pump ballast adapter (nXDS6i pump)
For older systems with XDS5 vacuum pumps, the pump bleed connects to a fitting under the
pump control box moulding.
Pump bleed (XDS5 pump)
Chamber exhaust connected to T-piece (pump vacuum inlet)

User Manual
HT Series II Inert Gas Purge
10-1474 Issue 3-6 March 2014 17
Troubleshooting
Faults and errors
The inert gas purge system monitors gas pressure and flow rate throughout the purge cycle.
If either falls below pre-set limits, the purge system resets and prevents the evaporator
starting.
Once the evaporator starts, the inert gas supply pressure is monitored throughout the
evaporation process and any loss of pressure will cause the purge system to reset.
When the N2OK LED is on, this indicates that inert gas is detected
and the supply pressure is adequate for the safe operation of the
system.
If the N2OK LED is off and the RESET LED is on, this means the
inert gas purge system has reset. This may be because the inert
gas supply pressure is too low or may have dipped temporarily
below safe operating pressure during the purge cycle.
If the FAULT LED in on, this means the system has detected an
internal fault within the inert gas purge box. If this light comes on,
do not use the system in PURGE mode, contact the Genevac
Service department for advice.

HT Series II Inert Gas Purge
User Manual
18 10-1474 Issue 3-6 March 2014
Rectifying faults and errors
Symptom
Cause
Rectification
Evaporator starts without
inert gas purge, POWER
LED on remote control
is off
The inert gas purge
system is not powered
Check the electrical cables between
the evaporator, purge box and pump
are connected.
System will not start,
POWER LED is on but
N2OK LED is off
Inert gas supply not
detected or supply
pressure is too low
Check the inert gas supply is
connected.
Check inert gas supply is turned on /
regulator is correctly set.
Inert gas purge system
resets a few seconds
after purge cycle starts
Inert gas supply
pressure or flow rate
insufficient
Check the inert gas supply can
maintain pressure and flow rate
throughout the purge cycle. Refer to
Specifications.
Inert gas leaking
Check all inert gas supply pipes are
connected and secure, and are not
blocked.
Check the following are closed:
evaporator lid / door, drain valves,
flush valve (if fitted).
Inert gas purge cycle
starts but the purge
system resets during
purge cycle
Momentary dip in purge
gas pressure, may be
caused by blockage /
constriction in pipes
Check pipes. Inert gas supply
pressure must be maintained at max
flow rate.
Regulator / filter may need servicing,
contact Genevac Service
Department.
Pressure gauge on
control module drops
below 0.9 mbar
Regulator adjustment required.
Contact Genevac Service
Department.
Gas flow detect
threshold setting
incorrect
Purge box calibration setting require
adjustment. Contact Genevac
Service Department.
FAULT LED lights and
Inert gas purge system
resets when it has been
purging for a few
seconds
Too much inert gas in
system
Check purge box is the correct unit
for the evaporation system.
Purge box settings require
adjustment. Contact Genevac
Service Department.
Purge box resets when
the evaporator spins up
Vent valve closes long
before pump isolation
valve opens
Series 2 software version must be
V1.08 or later. Contact Genevac
Service Department.
Clearing faults and errors
Once the cause of the fault has been rectified, re-start a purge cycle by pressing the START
button. The inert gas purge cycle must be allowed to complete from the beginning.
This manual suits for next models
4
Table of contents
Other Genevac Laboratory Equipment manuals

Genevac
Genevac EZ-2 Series User instructions

Genevac
Genevac II Series User manual

Genevac
Genevac EZ-2 Elite User manual

Genevac
Genevac EZ-2 Elite User instructions

Genevac
Genevac EZ-2 Series User manual

Genevac
Genevac HT-24 User manual

Genevac
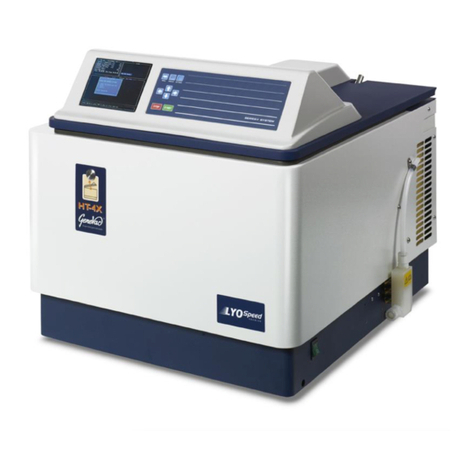
Genevac HT-4X User manual

Genevac
Genevac HT-8SII User manual

Genevac
Genevac Rocket 4D User manual
Genevac
Genevac 04-6682 User manual