5
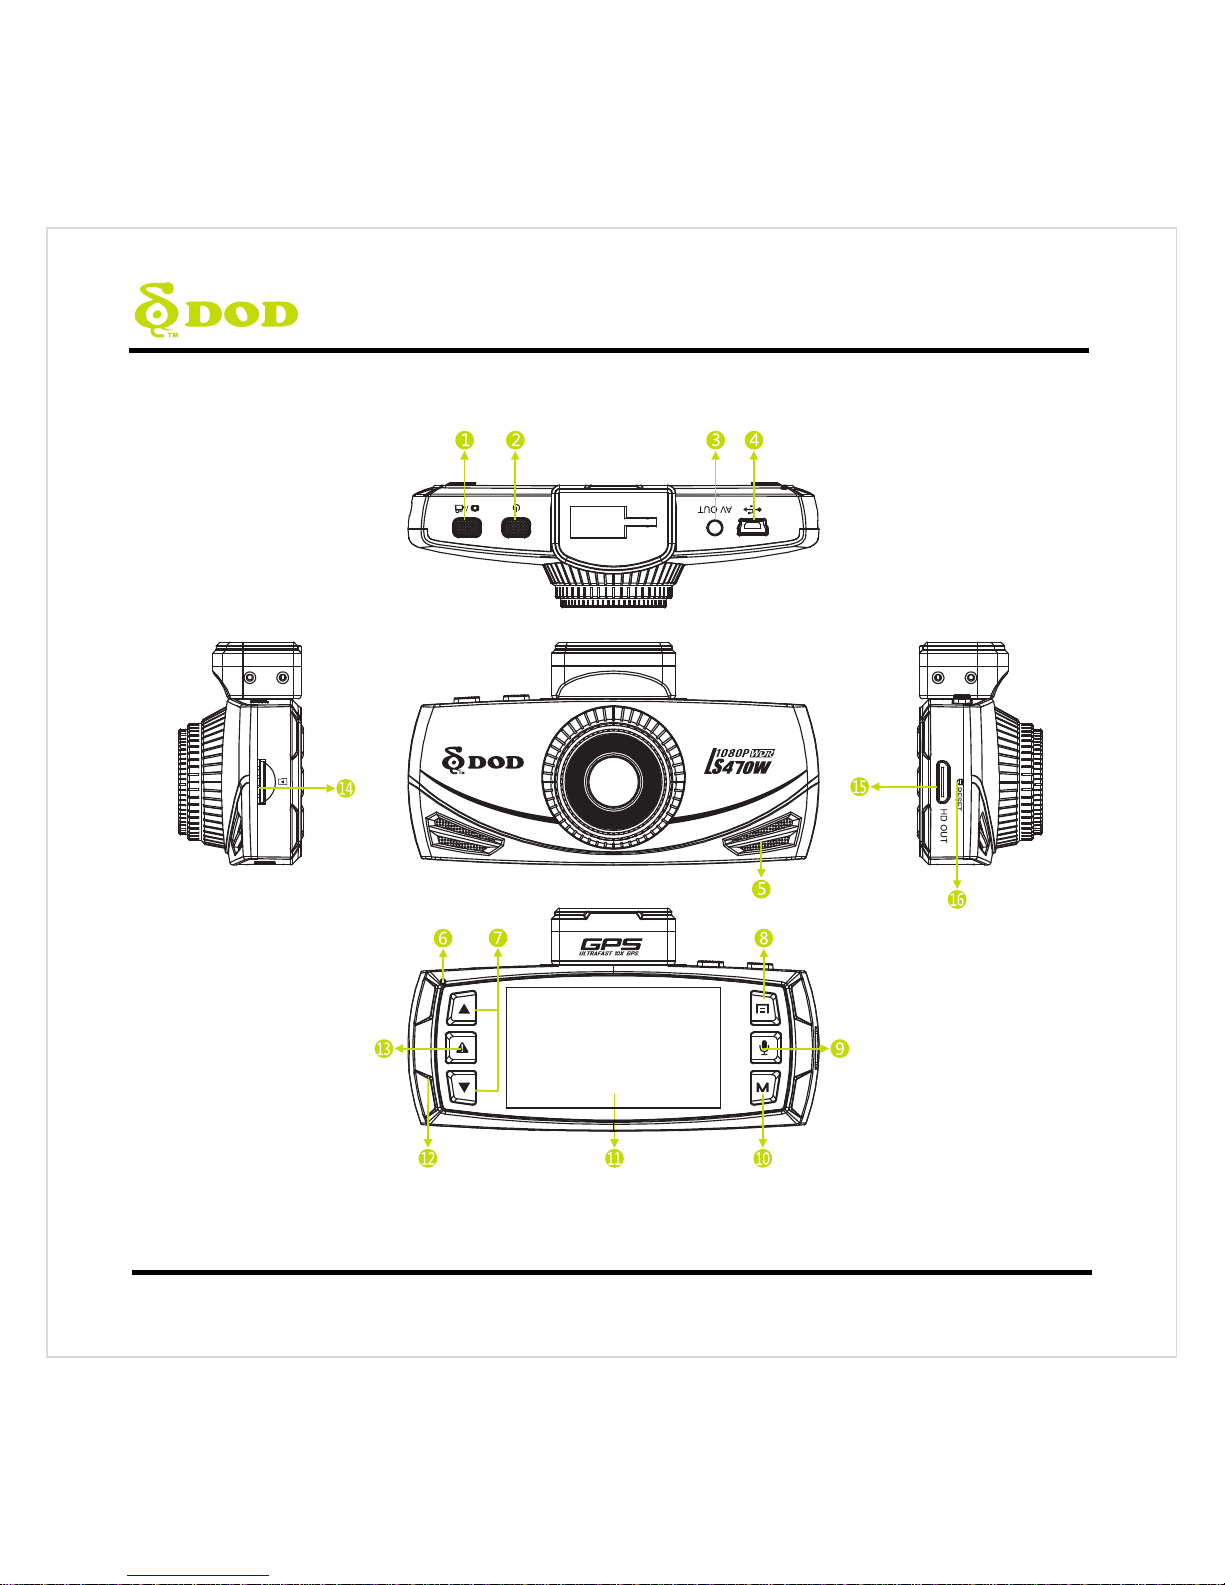
Camera Controls
●
1Record/Shutter/Confirm [ ]
Video Recording- Starts/Stops recording.
Photo- Takes a photo.
Video Playback- Plays/Pauses video.
Settings- Selects highlighted item.
●
2Power [ ] Turn on/off the unit.
●
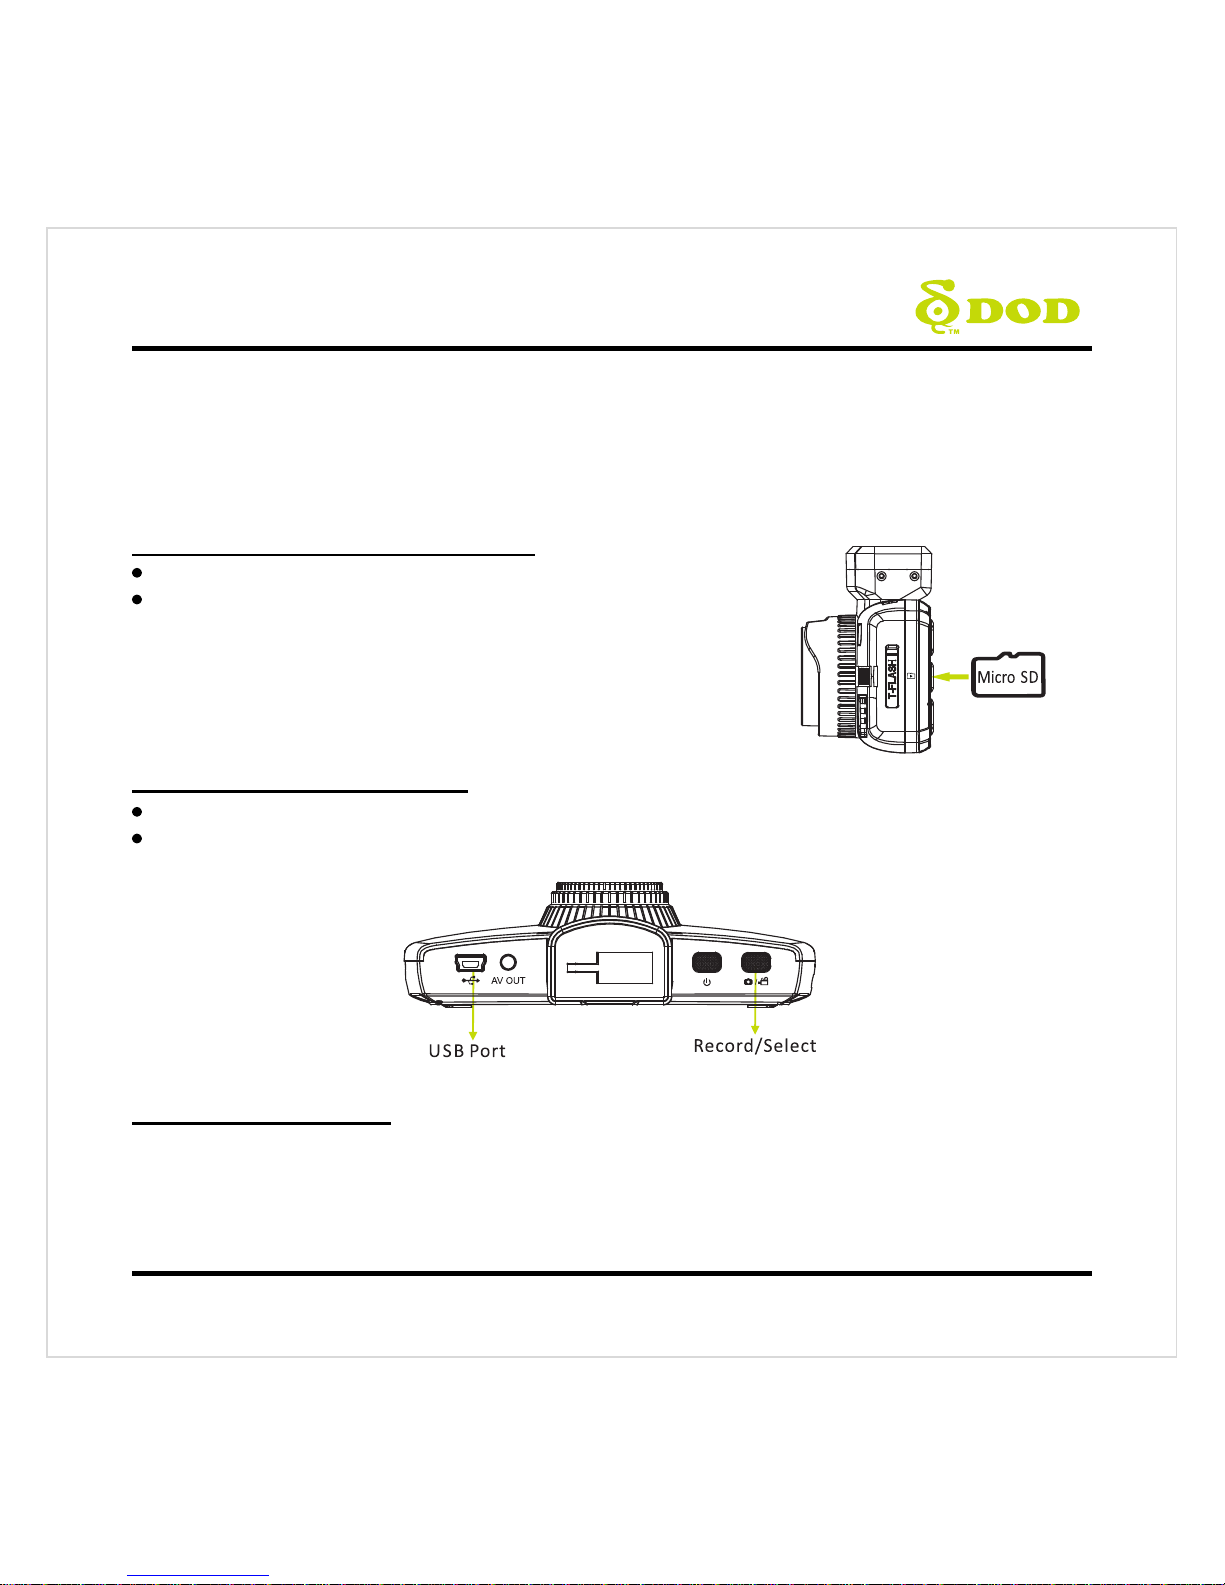
3A/V Video Out Port
●
4USB Port
●
5Speaker
●
6Operation Status LED
Indicates the device operating status.
Steady Blue- Powered off and charging.
Steady Pink- Powering up while charging or is in
Playback Mode.
Steady Red- In Standby Mode but not charging.
Flashing Red- Recording video, not charging.
Flashing Blue & Pink- Recording video and
charging.
●
7Arrow Key [] / []
Used to navigate through menus and select videos
for playback.
●
8Menu [ ]
While recording the video
Press [ ]to stop recording.
Enter the Standby Mode, and
Press [ ] once to access the Camera Menu.
Press [ ] twice to access the
System Menu.
Note: Cannot access menu while recording.
In the Photo Mode
Switch between two menu settings by pressing
[].
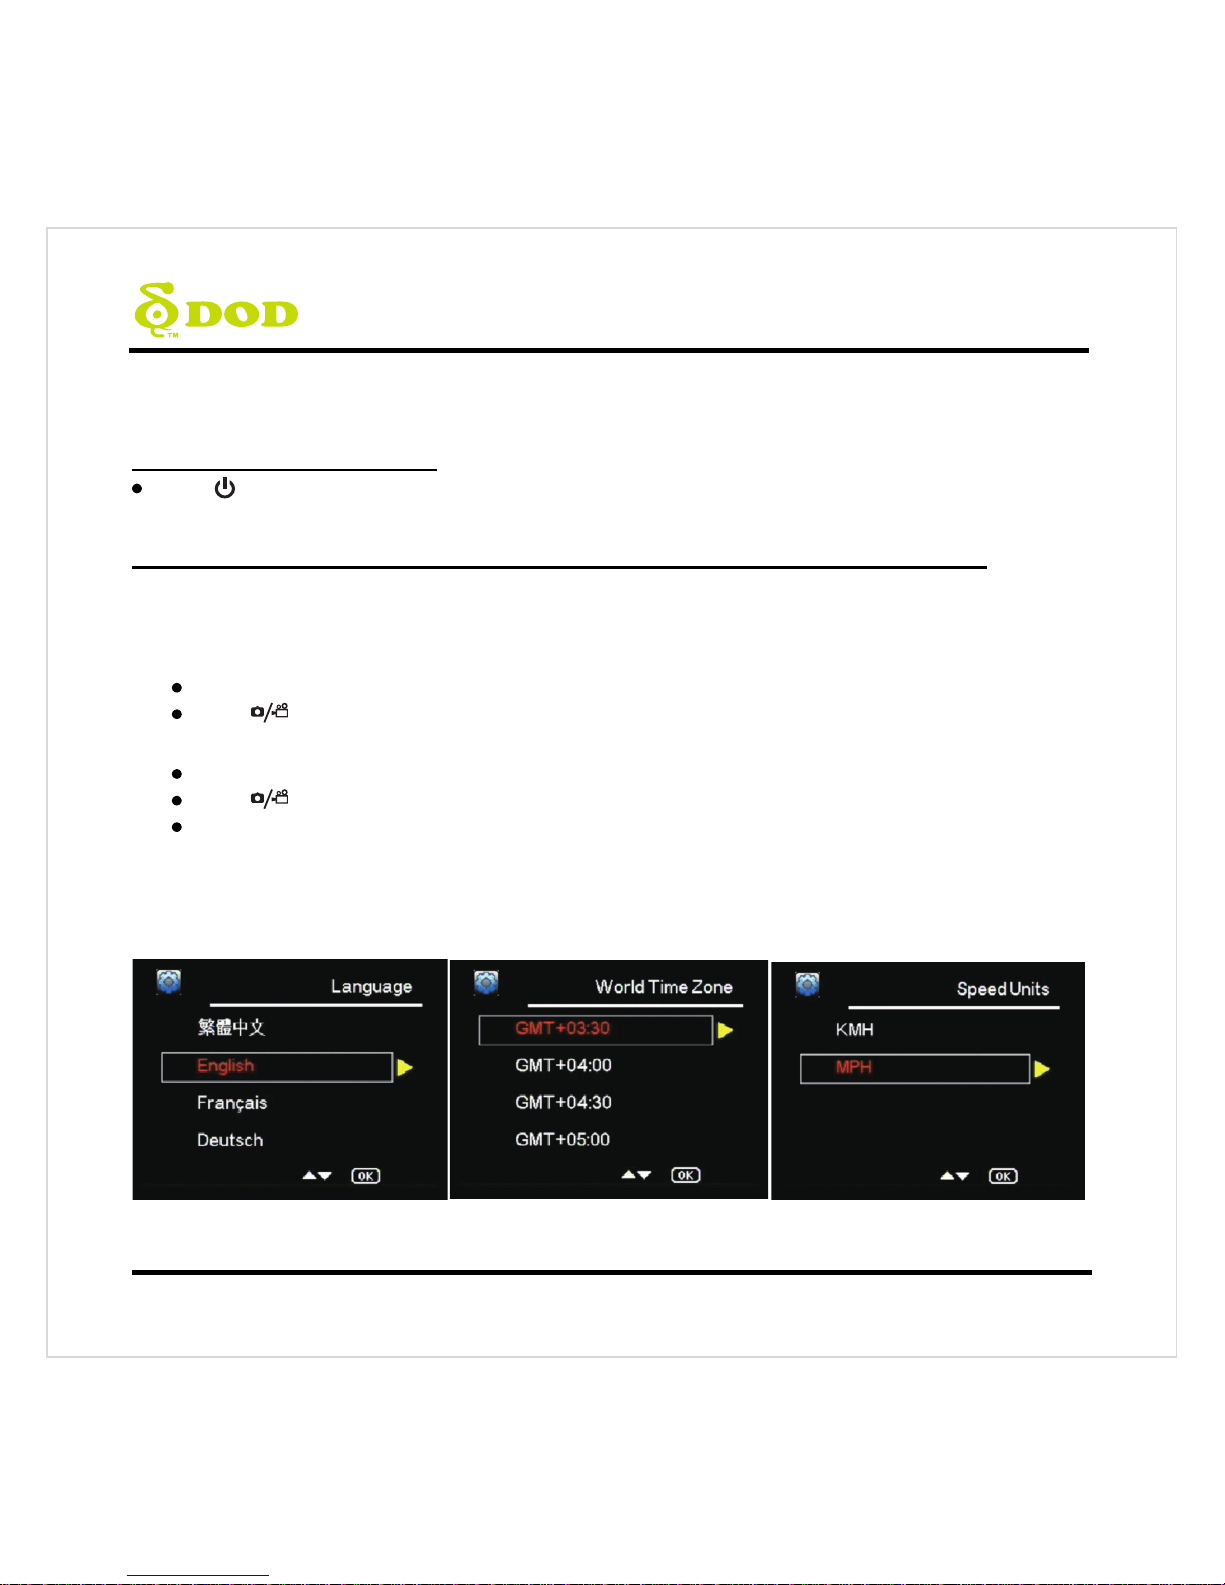
Camera Menus Settings.
System Menu Settings.
In the Video Playback Mode
Press [ ] to enter the menu settings.
Delete file /protect file/create a slideshow.
●
9Mutes Microphone[ ]
To turn off the audio recording, press [ ] and hold
it until the icon appears.
●
10 Mode[ ]
Press [ ]to stop recording.
Enter the Standby Mode.
Switch between 3 Modes by pressing [ ]:
Video Recording- Starts/Stops recording.
Photo- Takes a photo.
Video Playback- Plays/Pauses video.