2
F5
F5
F5
F5 2
2
2
2 0LS
0LS
0LS
0LS
使用說明書
目錄
前言
.......................................................................................................
.......................................................................................................
.......................................................................................................
....................................................................................................... 22
22
22
22
產品概述
.................................................................................................
.................................................................................................
.................................................................................................
................................................................................................. 23
23
23
23
產品特性
...............................................................................................
...............................................................................................
...............................................................................................
............................................................................................... 24
24
24
24
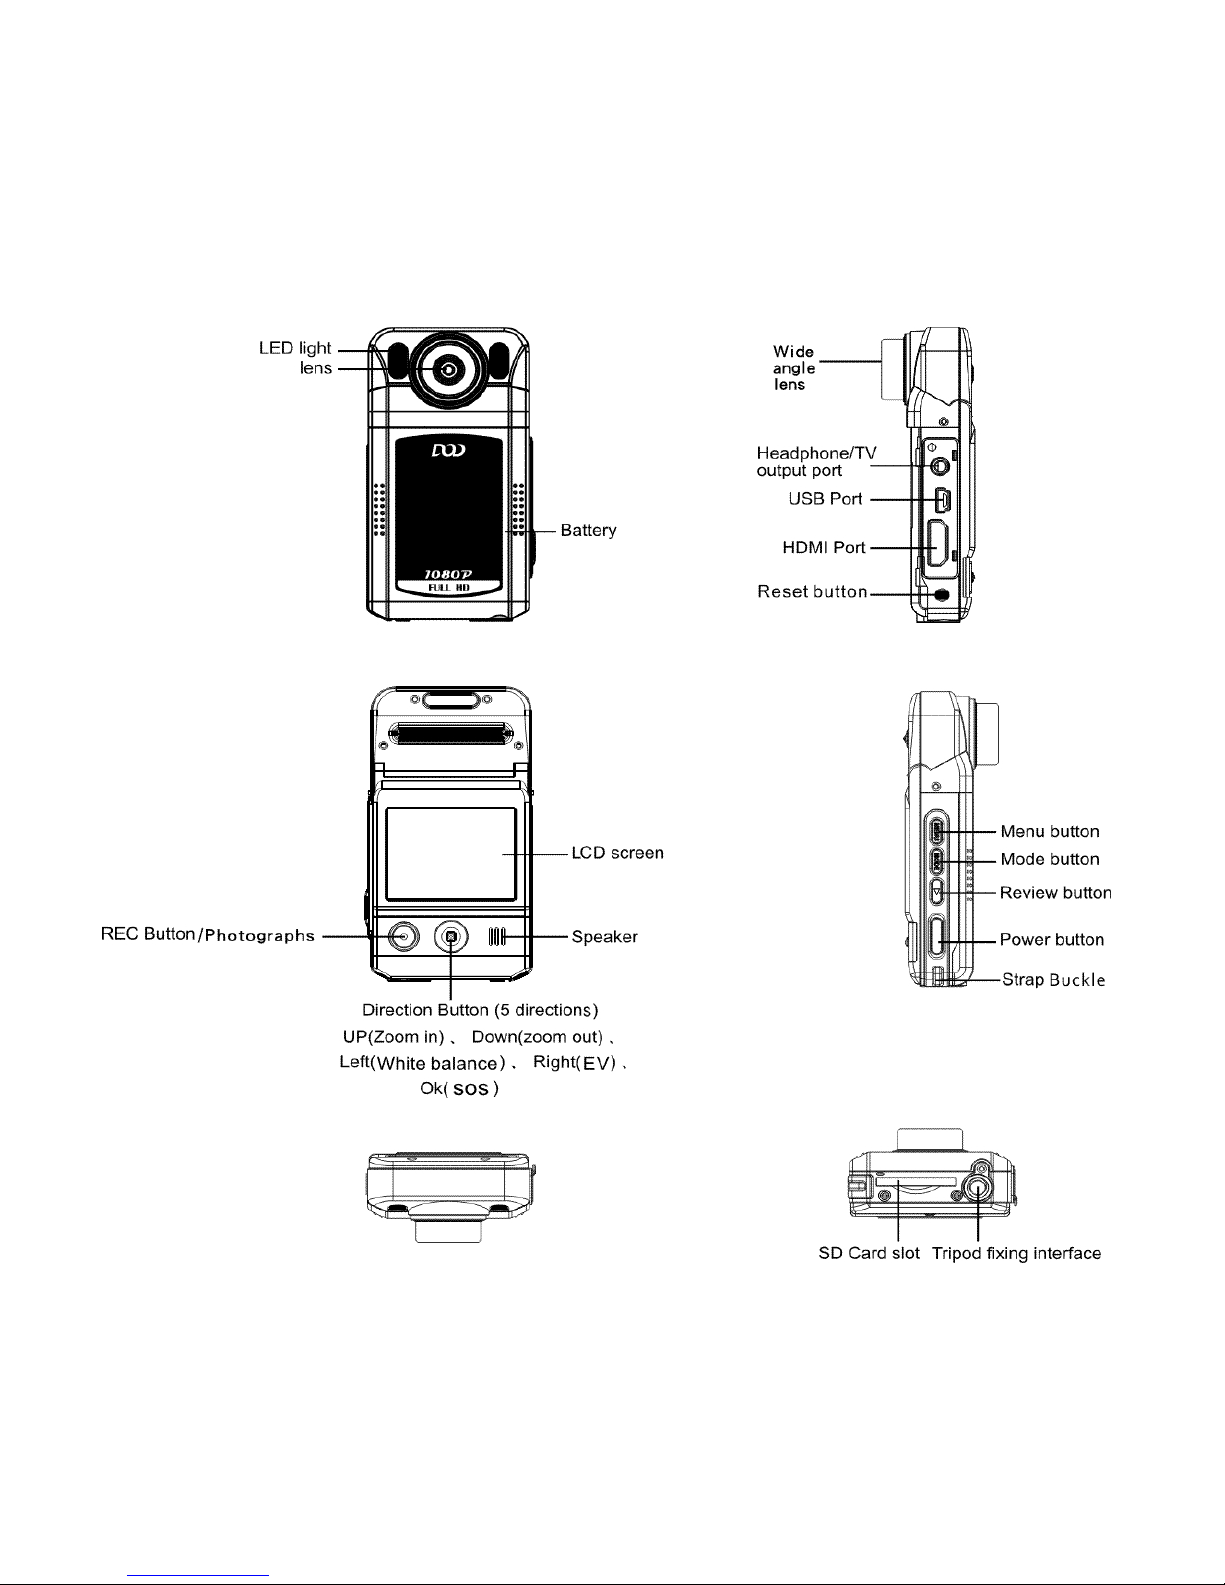
產品結構
................................................................................................
................................................................................................
................................................................................................
................................................................................................ 26
26
26
26
使用安裝
................................................................................................
................................................................................................
................................................................................................
................................................................................................ 27
27
27
27
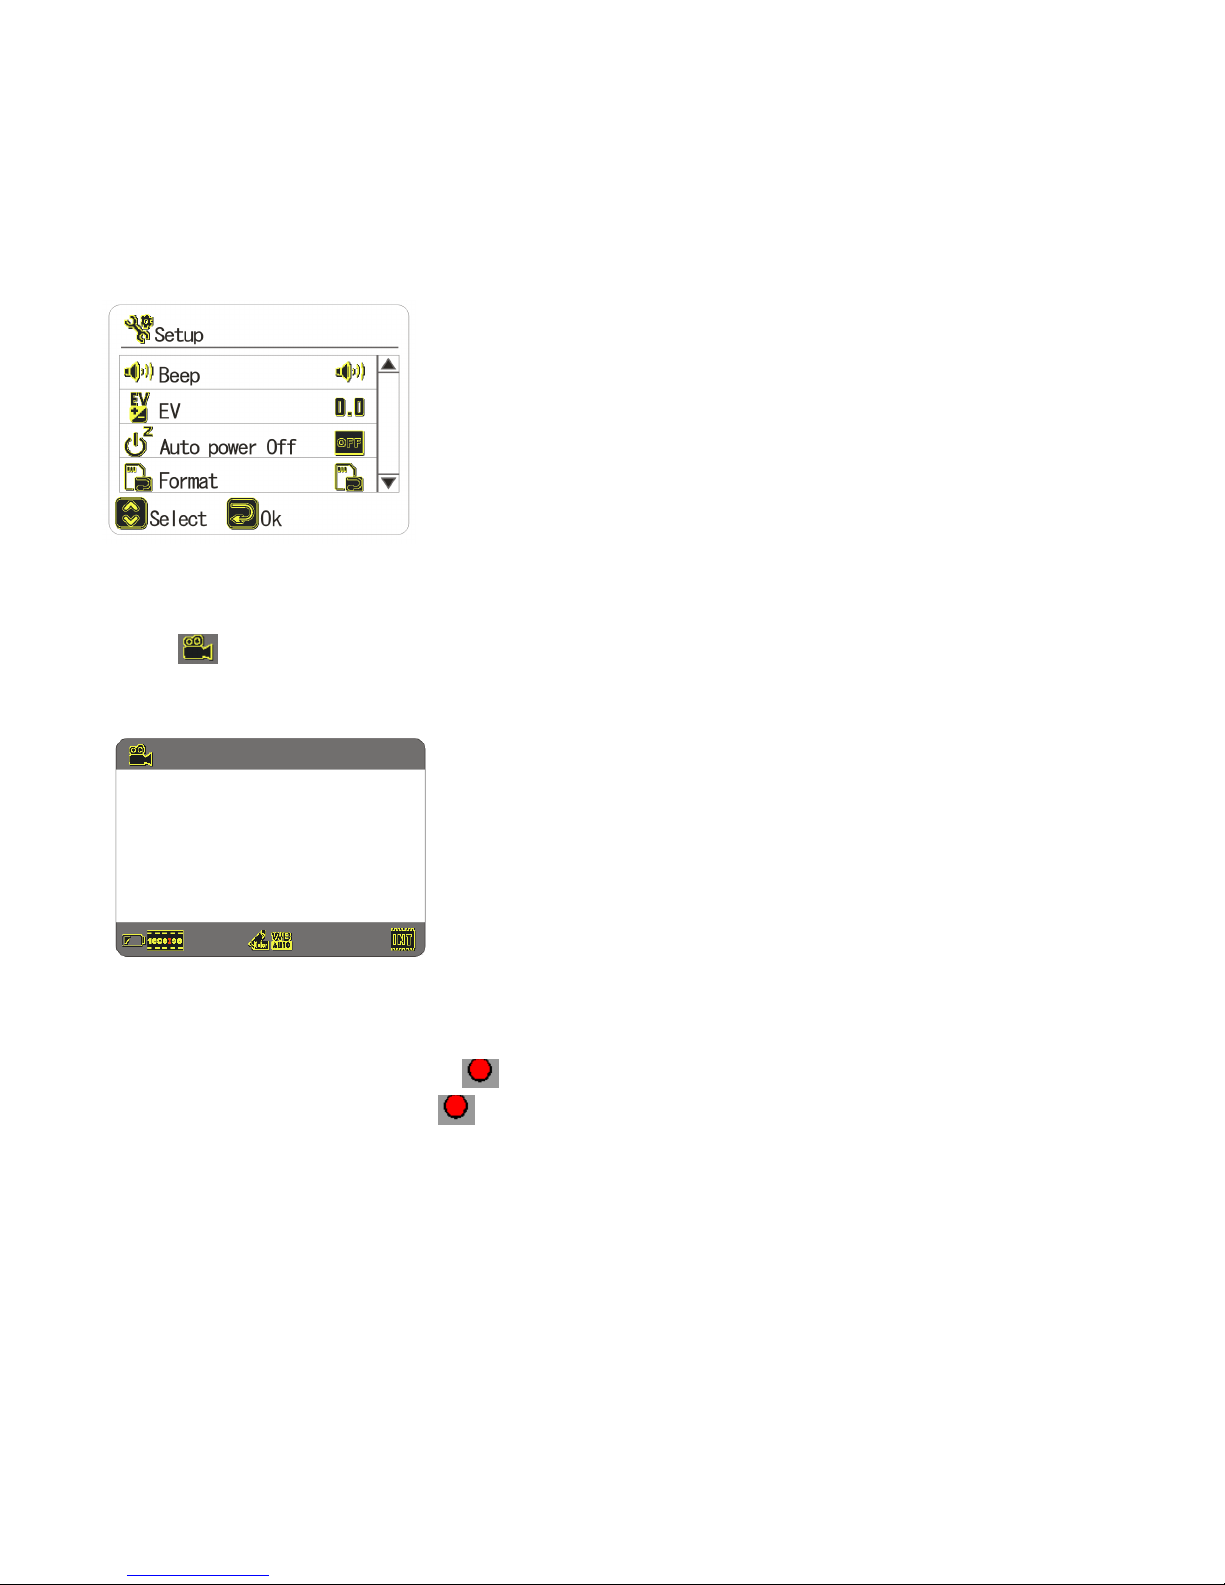
操作指南
.................................................................................................
.................................................................................................
.................................................................................................
................................................................................................. 28
28
28
28
檔 案 儲存及視訊播放
..............................................................................
..............................................................................
..............................................................................
.............................................................................. 32
32
32
32
按鍵功能及功能圖示
..............................................................................
..............................................................................
..............................................................................
.............................................................................. 33
33
33
33
選單設定
..................................................................................................
..................................................................................................
..................................................................................................
.................................................................................................. 35
35
35
35
產品規格 ..................................................................................................
..................................................................................................
..................................................................................................
.................................................................................................. 36
36
36
36
包裝附件
..................................................................................................
..................................................................................................
..................................................................................................
.................................................................................................. 37
37
37
37
簡易問題排除
..........................................................................................
..........................................................................................
..........................................................................................
.......................................................................................... 38
38
38
38
支架安裝說明
..........................................................................................
..........................................................................................
..........................................................................................
.......................................................................................... 39
39
39
39