DOD RX8W User manual

USER MANUAL

Copyright 2014 DOD Tech
All Rights Reserved
C

1
Table of Contents
Safety Precautions
Package Contents
Camera Controls
Getting Started
Installing Your Camera
Basic Camera Operation
Camera Modes
Video Recording Mode
Photo Mode
Playback Mode
Camera Settings
Video Recording Settings
Photo Settings
Video Playback Settings
Transferring Files
Video Output
DOD Video Player
Firmware Update
...........................................................................................2
...........................................................................................3
.............................................................................................4
................................................................................................6
....................................................................................9
.................................................................................11
..............................................................................................12
...............................................................................12
.............................................................................................13
.........................................................................................14
............................................................................................15
............................................................................15
..........................................................................................18
..............................................................................19
...........................................................................................20
.................................................................................................20
..........................................................................................21
...........................................................................................22

2
Safety Precautions
Do not disassemble, repair, or modify your camera or power related
accessories
For warranty service, please contact DOD Tech Support.
Avoid exposing your camera to extended periods of humidity and/or heat
Prolonged exposure may reduce the camera's lifespan.
Do not spray water or cleaning agents directly onto the camera
Fluids may cause fire, electric shocks or malfunctions.
Do not adjust the camera while driving
Avoid installing the camera where it may obstruct the driver's view or
airbag deployment
Use only the power adapter supplied with your unit.
Other power adapters may create a safety hazard or damage the unit.
Do not use damaged power adapters or cards.
If damaged, disconnect the power adapter and contact DOD Tech Support for
assistance.

3
* Supplied accessories may vary by region.
Package Contents
DOD RX8W Dash Camera User manual
Power Adapter
12
3

4
Camera Controls
2
99
1
4
567
8
3
10 12
13
11

5
Camera Controls
1
2
3
4
5
6
7
8
9
Power Button [ ]
Turn on/off the unit.
Menu/SOS Emergency File Lock [ ]
Access the settings menu.
Press while recording videos to lock the
current file from being overwritten.
Arrow Keys [ ] , [ ]
Used to navigate through menus and
select videos for playback.
Record / Select Button[ ]
Video Mode: Start/Stop Recording
Camera Mode: Takes a Photo
Video Playback Mode: Play / Pause Video
Settings Mode: Selects Highlighted Item
Change Camera Modes (Video, Photo, Playback)
Changes camera modes when not recording videos.
LED Notification Light
LCD Screen
USB Port
MicroSD Slot
HD OUT Port
A/V Video Out Port
Reset Button
If camera freezes, use a small pin to press button.
Mute Button [ ]
11
12
13
10

6
Watch the Video
Before you start, watch our installation video at http://dod-tech.ca/GetStarted
Setting Up Your Camera
Set up your camera inside your vehicle to ensure easy access to power.
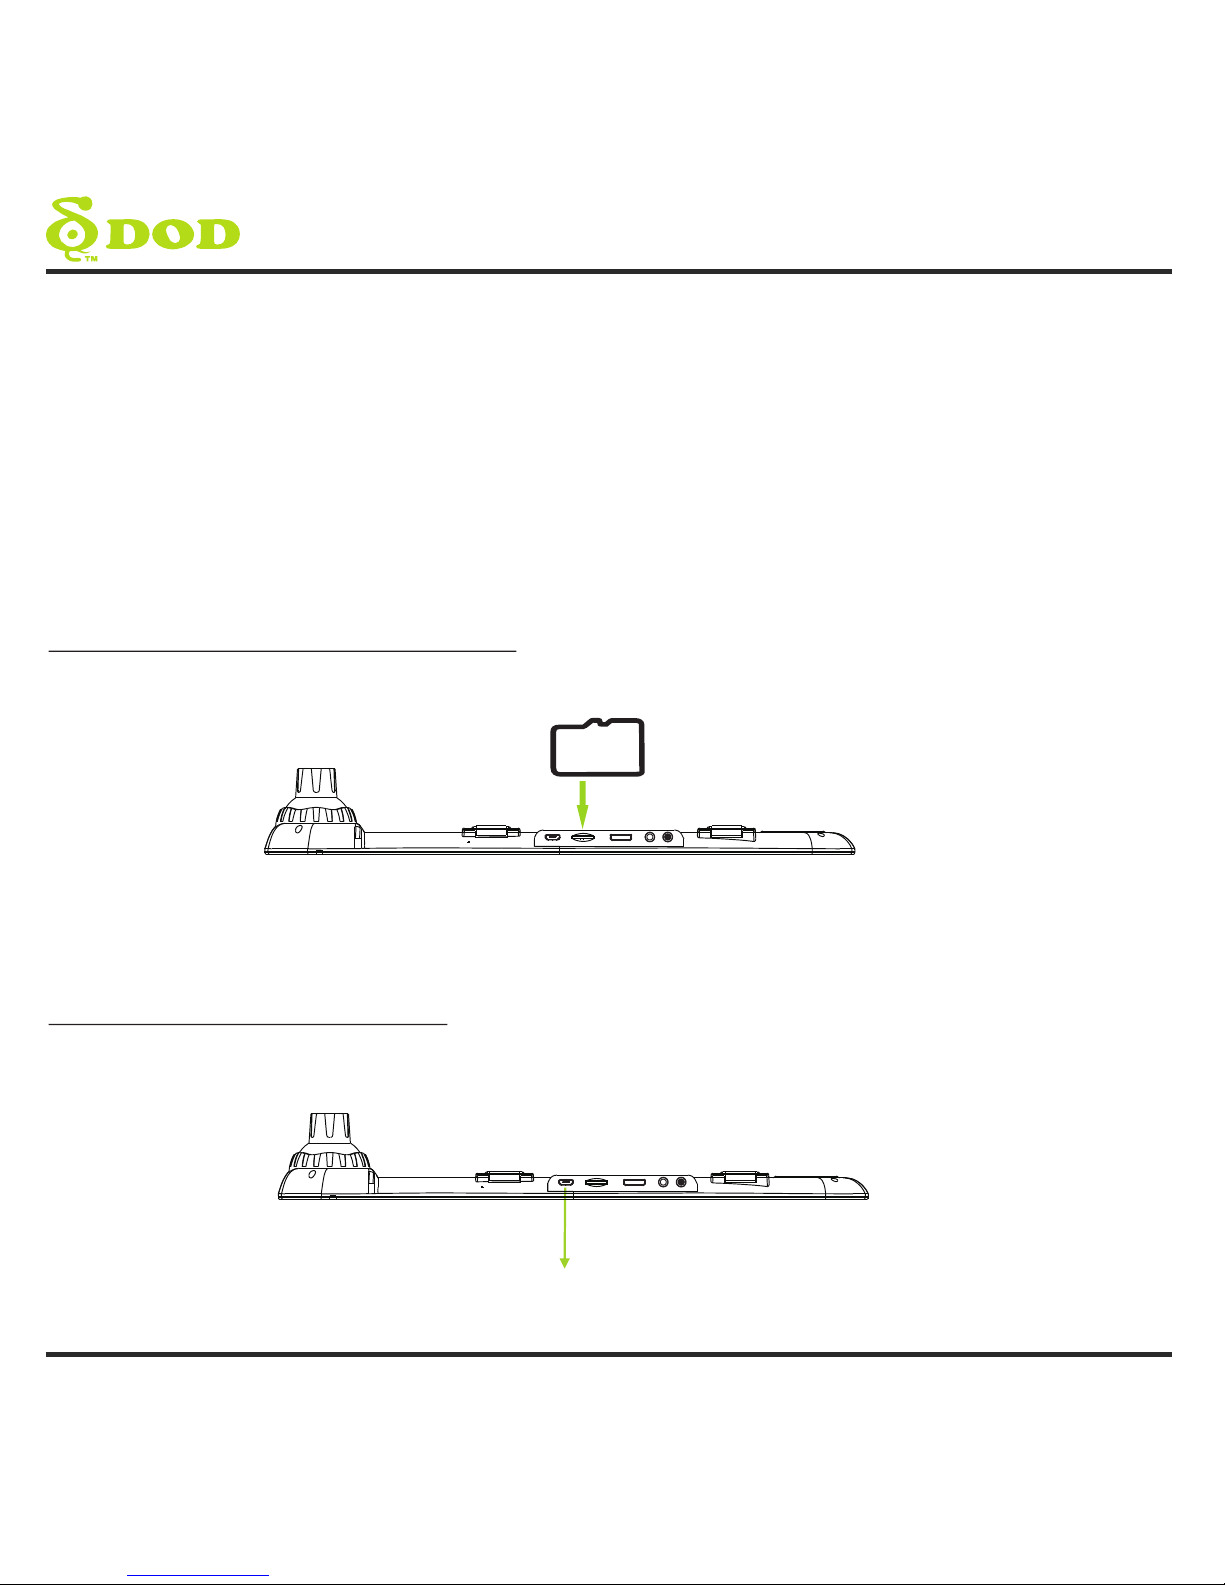
1. Insert the MicroSD Memory Card
* Note: Please purchase a microSD card for use with this unit
2. Connect the Power Adapter
Plug the DOD power adapter into your vehicle's power outlet and insert the USB
plug into the USB port.
Getting Started
Micro SD
USB Port

3. Turn On Your Vehicle.
In most vehicles this will send power to the outlet and automatically turn on your
camera. In some vehicles the power outlet is continously powered even when the
vehicle is off.
4. Select language
Upon powering up the camera for the first time, use the arrow keys located on the
left side of the LCD Screen and select the language of your choice. Press the
“record/select”button found on top of your unit to confirm your selection.
5. Turn off recording
In order to access the menu to setup the time and date you will need to turn off the
recording. Press the “record/select” button. You should no longer see a flashing red
dot on the screen.
7
Getting Started

8
Getting Started
6. Set the Time zone
Your RX8W will automatically sync the time and date to the atomic clock once the
time zone is correctly set.
Press the Menu button [ ]. Inside, scroll down and select “World Time Zone”.
Find and select your respective time zone. Press the “record/select button” [ ].
Note: The timezone must be manually adjusted for daylight savings.

9
Installing Your Camera
1. Clean Windshield
Wipe down both the interior and exterior glass for the best image quality and to
keep the mount secured to the windshield.

10
Installing Your Camera
2. Insert SD card
Please insert Micro SD card to the unit, and fix the unit on the vehicle's rearview
mirror with the mounting straps.
3. Adjust the Angle
Adjust the camera lens to the best angel, which do not blocked by the rearview
mirror.
4. Fix the unit
Tighten the mounting strap to the rearview mirror, and avoid falling loose. Cut off the
excess tapes.
5. Install the Cigarette Adapter
If you have not done so previously plug the cigarette adapter into your vehicle's
power port. Insert the USB plug (opposite end of the power adapter) into the USB
port on the camera. The wiring can be hidden in the headliner and the various
seams and rubber strips around the perimeter of the windshield.
6. Remove the Protective Lens Cover
Your camera is now installed and ready for daily use.
Tips:
If grease, fingerprints, or blots are found on the external/internal windshield of the
car, please wipe it clean or install the unit on an unaffected area. Blots may worsen
the recording quality or may cause the bracket to be unstable.

11
Basic Camera Operation
Everyday Operation
Your dash camera will automatically turn on and start recording when it starts receiving
power. The camera will record over the oldest videos when the memory card is full
(looped recording) by default.
Continuously Powered Electrical Outlet
If your electrical outlet is always powered, the adapter must be manually removed to
shut down the camera. Alternatively, the camera may be left on while parked to capture
video while you are away.
This operation will slowly drain your vehicle’s battery and may eventually prevent
your vehicle from starting.
Manually Turning On / Off Your Camera
Press the power button [ ] to turn on/off your camera. Press the record/select
[ ] button to begin recording

When the camera is not recording video, you can switch between three modes by
pressing the mode button [ ]:
1. Video Recording 2. Photo 3. Video Playback.
Video Recording Mode
The camera defaults to video recording when the camera is first turned on.
12
Camera Modes
WDR Enabled
Recording Status
Video Recording mode Icon
Video Resolution Loop recording length
Exposure
Microphone (on)
Power Status
GPS Status (on)
White balance (auto)
Head-up Display
GPS speed warning
Driver fatigue warning
Date/Time
Memory card Inserted
Time Elapsed
Time lapse (200ms)
Motion detection (on)

13
Camera Modes
LED Light Notification
Steady Blue – Powered off and is charging
Steady Pink – Powering up while charging or is in playback mode
Steady Red – In Standby Mode
Flashing Red – Recording video, not charging
Flashing Blue and Pink – Recording video and charging
Video Recording Shortcuts
Muting the Microphone
Press the microphone button [ ]
SOS/Emergency Lock
Pressing the SOS lock while a video is playing will lock the camera from overwriting
the video.
Photo Mode
In Photo Mode press the record/select [ ] button to take a photo
WDR Enbled
Camers Mode Icon
Image Resolution Shake Reduction
Exposure Value ISO Setting
Power connected
White Balance
Memory card Inserted
Image Quality

Playback Mode
In Playback mode you can watch previously recorded videos.
Selecting a Video
Use the arrow keys[ ]to navigate between videos.
How to Watch a Video
Press the record/select button [ ]to play and pause. To change videos or access
the menu while paused press the mode button [ ] before using the arrow keys
[ ].
14
Play/Pause Indicator
Playback Made Icon Video File Name
Video Resolution
Power Connected
Camera Modes

Each mode has a unique set of settings. See the description below.
Video Recording Settings
There are two settings pages. Access the second page by pressing the menu button
[ ] twice. If you move the cursor before pressing the menu button, you must exit
and try again.
15
Camera Settings
First Video Settings Page
Date Stamp
Imprints the time and date on the recorded video.
Driver Fatigue Warning
Sets a timed delay before showing a visible alert
reminding the driver to take a break.
Exposure
Sets the brightness/darkness of the video. Video too
bright? Set between -1 to -3. Video Too Dark? +1 to
+3
Recommended Setting: 0
GPS Speed Warning
Shows a visual warning on the Heads Up Display
when the set speed has been exceeded.
GPS Track
Turns on/off GPS tracking. If disabled your camera
will no longer measure your speed and position nor
synchronize the time/date with the atomic clock.
Password Settings
Set a password lock which will prevent files from
being deleted or the settings changed on the device.
Note: This does not prevent other users from
extracting the memory card or changing the files
Plate Stamp
Imprints a customized set of 6 digits to the recorded
video. Add license plates or other identifying
features.
Record Audio
Switches the microphone on or off. This can also be
changed during recording by pressing the
microphone button [ ].
Resolution
Changes the video resolution. Lower the resolution
for smaller file sizes but this reduces video quality.
Recommended setting:1080P FHD

16
Camera Settings
G-Sensor
The G-Sensor measures shock forces. The settings
from “low to high” determine the amount of force
needed to lock the file from being overwritten.
Recommended Setting: Low
Loop Recording
If loop recording is set to 2/3/5 minutes, video
recordings of that length will be created. When the
memory card is filled the oldest files will be
overwritten (excluding locked clips). Turning off loop
recording will prevent the camera from writing new
files when the memory card is filled.
Motion Detection
For use when parked not when driving. Saves
memory space by only recording when motion is
detected. Motion detection must be manually
disabled before driving.
If motion detection is activated while driving you
may have significant gaps in the recorded video.
Time-lapse
Open this function, can be set to 200 ms /500 ms / 1
seconds /5 seconds to record 1 frames.
Parking stall for this function, the power to be
connected to a constant,
In the process of driving, please close the time-lapse
video recording function
Speed Units
Select Metric or Imperial units.
Standby Speed Display
After a customized period of time a new screen will
appear showing speed and direction. If enabled, the
GPS speed warning will appear on this screen.
WDR (Wide Dynamic Range)
Cannot be changed. Shows WDR processing is
enabled.
White Balance
Sets the white balance.
Recommended Setting: Auto
World Time Zone
Sets the current time zone for GPS time and date
calibration. Note the time zone must be manually
adjusted for daylight savings.

Second Video Settings Page
Accessed by pressing the menu button twice.
17
Camera Settings
Beep Sound
Turns on and off notification sounds.
Date/Time
If GPS tracking is disabled the Date and Time can be
manually set.
Default Settings
Sets all settings back to the original settings.
Frequency
Adjusts the camera's frequency setting to minimize
flickering and banding in the recorded video.
Recommended Setting: 60HZ in Canada/USA.
Format
Completely deletes all files including locked videos
on on the memory card and optimizes the card for
recording. 64GB cards should use DOD's formatting
program for proper functionality. See the support
section online.
Language
Sets the language.
Screen Saver
Turns off the screen after the set time.
Speed Stamp
Imprints your current speed onto the recorded
video.
TV Mode
Switches between the NTSC and PAL video output
standard.
Version
Shows the model name and current firmware
version.

18
Camera Settings
Photo Settings
Accessed in “Photo Mode”
Anti-Shaking
Helps reduce the effects of shaking when taking a
photo.
Capture Mode
Sets a timed delay before taking a photo.
Color
Apply a color filter to the photo.
Date Stamp
Imprints the date onto the captured photo.
Exposure
Adjusts the exposure in one-stop increments.
Image Size
Adjusts the size of the image. Higher megapixels
increses file size and details.
ISO
Changes the ISO settings. Higher ISO reduces motion
blur at night but lowers video quality.
Quality
Changes the photo quality.
Sharpness
Change the amount of sharpening.
WDR
Shows that WDR is enabled.
Other manuals for RX8W
1
Table of contents
Other DOD Dashcam manuals