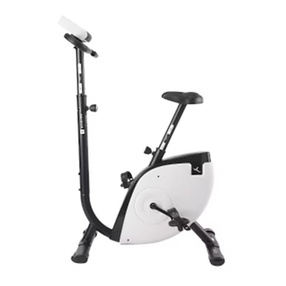
Domyos VE 680 User manual

2222
ENGLISH
This product is DIS compatible.
You have chosen a piece of fitness equipment by DOMYOS. We thank you for your confidence in us. We have created the DOMYOS
brand to provide a way for all athletes to stay in shape. This product has been designed by athletes for athletes. We would be pleased
to receive your comments and suggestions concerning DOMYOS products. Therefore, your store team is ready to listen, as is
the DOMYOS products design department. You can also find us at www.DOMYOS.com. We wish you successful training and hope
that you will enjoy using this DOMYOS product.
This product is a new-generation fitness device. It is equipped with a magnetic resistance system for optimal, silent and smooth pedalling
comfort. This product combines the circular movements of cycling, the horizontal movements of running and the vertical movements of
stepping. The elliptical movement of your legs combined with arm movements develops your buttock muscles, quadriceps, calves, back
muscles, pectorals and biceps. The elliptical bike is an excellent form of cardiovascular exercise. The elliptical device helps you to tone
your legs, buttocks and upper body (chest, back and arms). Your calf muscles and lower abs are also involved in the workout.
You can concentrate work on your buttocks by pedalling backwards. Training on this apparatus will increase your cardiovascular
capacity. This will help to improve your physical fitness and your endurance, and you will also burn calories (a necessary
step in losing weight, in conjunction with a diet).
PRESENTATION
To reduce the risk of serious injury, please read the following
important user precautions before using the product.
1. Read all the instructions in this manual before using the product.
Only use this product in the manner described in this manual.
Keep this manual for the entire life of the product
2. The owner is responsible for ensuring that all users of this product are
properly informed as to how to use this product safely
3. DOMYOS cannot be held liable for claims of injury or damage sustai-
ned by any person or property originating from the use or misuse of
this product by the purchaser or by any other person. Do not use this
product in a commercial, rental, or institutional setting.
4.
This device complies with European standards (standard CE, stan-
dards (EN-957-1 and EN 957-9 category HA) concerning fitness
equipment in domestic, non-therapeutic use (equivalent to GB17498).
Do not use this product in a commercial, rental, or institutional setting.
5. Use the product indoors on a flat surface in a dry, dust-free uncluttered
place.
6. Ensure that you have enough space to access and move around the
device safely. Do not store or use this product outdoors.
7. It is the user’s responsibility to inspect and if necessary tighten all parts
before using the product.
8. Immediately replace any worn or defective parts.
9. Any assembly or disassembly of the product should be carried out
with care.
10. Do not modify your product
11. If your product deteriorates, do not use it any longer and take it to
your Decathlon store.
12. Do not store this product in a damp place (e.g. edge of a pool,
bathroom etc.)
13. For its protection, cover the floor under the product with a suitable
floor mat, available in Decathlon stores.
14. Never allow more than one person to use the product at any one
time.
15. Keep your hands and feet away from moving parts
16. Keep your back straight while exercising.
17. Put your hair up so that it does not get in the way during exercise
18. DO NOT wear loose or baggy clothing, since it may get caught in
the machine.
19. Always hold the fixed handlebars while climbing onto or off the
product.
20. Keep children and pets away from the product at all times
21. There are many factors that may affect the precision of the readout
from the pulse sensor; it is not a medical device..
22. TIt is designed merely to help you determine your approximate heart
rate.
23. WARNING! Heart rate monitoring systems may be inaccurate. Over
exercise may result in serious injury or death. If you feel faint or any
pain, stop exercising immediately.
Medical warning
24. People wearing a pace maker, a defibrillator, or any other electronic
implant are advised that they use the pulse sensor at their own risk.
25. Before the first use, a test exercise under the supervision of a doctor
is thus recommended.
26. Pregnant women are advised not to use the pulse sensor.
27. Before any use consult your doctor.
28. As you finish your workout, gradually reduce your pedalling speed
until the pedals come to a complete stop.
29.
Maximum user weight: 130kg – 287lbs.
SAFETY
Getting into shape must be done in a CONTROLLED manner. Before beginning any exercise program, consult your doctor.
CThis is especially important for people aged over 35 or who have previously had health problems,
and those who have not done any sport for a number of years. Read all instructions before use.
WARNING
2323
ENGLISH
LEVELLING THE BICYCLE
WARNING : you must get off the elliptical bike to adjust the level
of the product.
In the event that the bike becomes unstable during use, turn one or both of the
level adjusters until the bike is stable.
ADJUSTING THE RESISTANCE
According to the EN (European Norm) definition, this product is an item of
“pedal crank training equipment”.
You can adjust the braking torque not only with your pedalling speed but
also by manually choosing your resistance level (by turning the torque control
knob on non-motorised products and by pressing the +/- buttons on motorised
products).
However, if you retain the same level of resistance, the braking torque will
increase/decrease as your pedalling speed increases and decreases.
SAFE ACCESS
Ensure that it is safe to climb on and off the product by locking the handles and
pedals with the thumb wheel.
ADJUSTING THE POSITION OF THE PEDALS
You can adjust the position of the pedals during assembly.
You have three adjustment positions:
Forward: closest to the handlebar.
Centre.
Rear: furthest from the handlebar.
The optimal set position is the central position.
However, in order to boost performance and best adapt
to your body shape, this setting will optimise your position on the elliptical bike.
The forward position will perfectly suit people under 175cm in
height and the rear position will particularly suit people over 185cm in height.
4
ADJUSTMENTS
WARNING : You must get off the elliptical bike to move it in any way.
Standing on the floor in front of your product, hold the handlebars and pull the bike towards you. The product is then resting on the castors
and you can move it. When you have finished moving it, move down to the floor with the rear legs.
Use a soft cloth to remove dust.
Persistent stains (like sweat) can be removed with a slightly damp cloth.
MOVING THE PRODUCT
MAINTENANCE
1
OFF
0N
3
4
2
3
1
2

24
24
ENGLISH
DISPLAY
BUTTON FUNCTIONS
The navigation system for your FC650 console consists of:
- a central adjustment and confirmation button, E,
- 2 buttons for navigating through the screens, B and D, and
- 2 buttons for changing values, A and C
1. Programme display zone – MAIN SCREEN
2. Programme selection indicator
3. Display of SPEED (Km/h - Mi/h), DISTANCE (Km - Mi), or HEART RATE
(BPM), according to the display choice made by the user.*
4. HEIGHT selection indicator (cm – inch)
5. WEIGHT selection indicator (kg or llbs)
6. SEX selection indicator (Male or Female)
7. Target heart rate setting indicator:
HIGH (100% of max. value)
LOW /(70% of max. value)
8. Indicates that you are exiting your target heart rate zone.
9. Exiting target heart rate zone indicator alarm.
10. Alternating display (changing every 10 seconds) of DISTANCE covered
and pedalling rate per minute.
Average HEART RATE during exercise, displayed at the end of the pro-
gramme.
11. Display of CALORIES expended
12. Display of DISTANCE or HEART RATE, according to the display choice
made by the user on the main screen.
13. Countdown display; default setting is 20 minutes (duration can be set at
between 10 and 180 minutes, in intervals of 5 minutes).
a. If the remaining time is more than 1 hour Display in hours and
minutes (HH:MM)
b. If the remaining time is less than 1 hour Display in minutes and
seconds (MM:SS)
If you do not pedal for more than 5 seconds, the countdown and the CALORIE
counter both stop.
The countdown and the CALORIE counter restart as soon as you start pedalling
again.
14. Display of SPEED or HEART RATE, according to the display choice made
by the user on the main screen.
15. Indicator of selection of user’s AGE.
* The user can change the display during exercise by pressing the B or D
buttons
Resetting the product:
- The product goes into standby mode after about 10 minutes of inactivity.
- The indicators are reset to 0 when the product goes into standby mode (the
data is not saved)
- Press the RESET button
- The counter is activated as soon as the pedals start turning or if one of the
buttons is pressed
B
A
D
E
FC650 CONSOLE
C

25
25
ENGLISH
Speed: This function indicates estimated speed, either in km/h or mph,
depending on the position of the switch at the rear of the product (see
diagram).
Distance: This function indicates estimated distance since the beginning
of the exercise session.
This can be displayed in km (kilometres) or M (miles) depending on the
position of the switch on the rear of the product.
Time: This function indicates how much time has elapsed since the
beginning of the session; this indication is in Minutes : Seconds (MM : SS)
for the first hour, then it switches to Hours: Minutes (HH : MM)
Calories: This function displays an estimation of calories expended since
the beginning of the exercise session.
RPM (Revolutions per minute): Number of pedalling rotations per
minute.
Body Fat Level: Body fat level measurement.
Heart rate*: Your heart rate is measured by the pulse sensors on the
handlebars. Your heart rate is displayed in beats per minute.
*Please note: this figure is only an estimate and it should under no
circumstances be considered medically reliable.
*Attention : *Please note: For a period of around 30-40 seconds, or
when there is a sudden change in heart rate, the value displayed may not
correspond to your actual heart rate. This is due to the mechanism starting
up.
*Please note: A strong magnetic field may cause the number of heartbeats
counted to be affected.
FUNCTIONS
SETTINGS BEHIND THE CONSOLE
Switch 1 : Selection of type of apparatus that you are using
with the console: VM (magnetic bike) ---- VE (elliptical bike)
Switch 2 : Selection of unit of measurement for DISTANCE.
MI (Miles) ---- KM (Kilometres)
Switch 3 : Selecting the device’s region of use: EU (Europe)/
AS (Asia)
SWITCH 1
SWITCH 2
SWITCH 3
DIS connections
RESET
transmitter
1. Parts and components
HEART RATE MONITOR BELT
Elastic belt 3V CR2032 Lithium Battery Seal Battery compartment cover
2. Installing the battery
• Insert the CR2032 battery (included) as shown below.
• First insert the battery with the + pole upwards.
• Place the seal and then the compartment cover with the two little
dots aligned.
Important !
Ensure that the compartment cover is fully tightened (approx. ½
turn) to avoid sweat or water getting into the compartment.
3. Using the belt
• Before placing the transmitter on your chest, moisten the two electrodes
with water or a water-based gel to ensure that the signal is transmitted
correctly.
• Center the heart rate monitor belt under your
breasts or pectoral muscles, directly above your
sternum, with the battery cover facing inwards.
• Adjust the belt so that the transmitter is always in full contact with your
skin. Do not overtighten it to avoid breathing difficulties.
• If the heart rate monitor belt is loose or placed wrongly, you may get
erroneous or irregular readings.

2626
ENGLISH
SETTING
To enter setting mode, hold down button E when the screen displays the
word SEL.
If you have not started your exercise, holding down E will take you directly
to setting mode.
If you were in the middle of a training session, holding down E will halt the
current programme. The word STOP will be displayed on the main screen
for 15 seconds.
During this time you will see the data from your last training session
displayed on the screen. The screen will then display the word SEL.
Hold down E again to go to setting mode.
In setting mode, you can enter your SEX, AGE and WEIGHT.
The device then offers you a target heart rate zone, which, by default, is a
maximum of 100% of the recommended heart rate and a minimum 70% of
this maximal value.
You can alter these 2 values using buttons A and C.
You can increase or decrease these values by pressing buttons A and C.
Pressing continuously on the buttons allows you to scroll through the values
more quickly.
Button B allows you to confirm your selection and move on to the next
setting. If you make a mistake, you can use button D to take you back to
the previous screens.
B
A/C
Setting your Sex (Male/Female)
Setting your age
Setting your weight
B
A/C
A/C
B
A/C
A/C
A/C
B
B
Once you have finished entering your settings, press button E to confirm your settings and exit settings mode.
To set your personal objectives, refer to the table and the guidelines CARDIO-TRAINING.
Activating/deactivating
the alarm warning you
that you are exiting
your target heart rate
zone.
Min target heart rate
Max target heart rate

2727
ENGLISH
To enter “BODY FAT LEVEL CALCULATION” mode, hold down button C when the screen displays the word SEL.
You can use buttons A and C to increase and decrease the values. You can scroll through the values more quickly by holding down these buttons.
Use button B to confirm your selection and to go to the next setting. If you make a mistake, use button D to go back to a previous screen.
The console is mains and / or battery operated.
The console switches off after 10 minutes of inactivity.
We advise you to remove the batteries if you are not going to use your console for a long time or if you regularly use it connected to the mains.
B
A/C
Setting your Sex (Male/Female)
B
A/C
Setting your age
Place your hands on the pulse sensors for the whole time that the
word HOLD is displayed
B
A/C
Adjusting the size
Your body fat level appears on the screen after it is calculated
Press button E to enter the programme selection function
USE
BODY FAT LEVEL CALCULATION
B
A/C
Setting your weight
E
MALE
FEMALE
ATHLETIC
< 13%
< 23%
GOOD
13-25,9%
23-35,8%
AVERAGE
26-30%
36-40%
HIGH
> 30%
> 40%

PROGRAMME
Reminder: Holding down button E stops the current programme.
You can scroll through the programmes by pressing buttons B and D, and select by pressing button E.
Programme 11: Fat burn.
Allows you to work at between 60 and 70% of your maximum heart rate
Select your exercise time with buttons A and C, and confirm with button E.
Once the programme has started, you can increase the intensity of the
exercise with buttons A and C
If your measured heart rate is below 60% of your maximum HR, the bike
will increase its resistance to return your HR to the target heart zone.
If your measured heart rate is above 70% of your maximum HR, the bike
will reduce its resistance to return your HR to the target heart zone.
For greater comfort of use, we recommend that you pedal at a stable
speed.
Programme 12: PERF
Allows you to work at between 70 and 80% of your maximum heart rate
Select your exercise time with buttons A and C, and confirm with button E.
Once the programme has started, you can increase the intensity of the
exercise with buttons A and C
If your measured heart rate is below 70% of your maximum HR, the bike
will increase its resistance to return your HR to the target heart zone.
If your measured heart rate is above 80% of your maximum HR, the bike
will reduce its resistance to return your HR to the target heart zone.
For greater comfort of use, we recommend that you pedal at a stable
speed.
Programmes 1 to 10
Select your exercise time with buttons A and C, and confirm with button E.
Once the programme has started, you can increase the intensity of the exercise with
buttons A and C.
If your heart rate signal is not detected for a long period, resistance will automatically be gradually reduced to the minimum
level. The programme resumes when your heart rate is detected again.
28
ENGLISH

29
ENGLISH
1. Lift the console out of its support, remove the battery cover located at the
back of the product, and place four LR14 (1.5 V) batteries in the battery
compartment behind the screen.
2. Make sure the batteries are installed correctly and are flush with the
springs.
3. Put the battery compartment lid back on and check to ensure that it is
secure.
4. If the display is illegible or incomplete, remove the batteries, wait 15 seconds
and then put them back in.
5. If you remove the batteries, the computer memory is erased.
RECYCLING :
The “crossed-out bin” symbol indicates that this product and the
batteries it contains cannot be disposed of with household waste.
Recycling your electronic waste will protect the environment and
your health.
BATTERY INSTALLATION
- If you note abnormal distances or speeds, check that the switch
behind the console is in the VM position for magnetic bikes and
VE for elliptical bikes. Press the RESET button so that the change
takes effect.
- On magnetic bikes each turn of the pedals corresponds to a
distance of 4 metres, and on elliptical bikes 1 movements corres-
ponds to a distance of 1.6 metres. (These values correspond to
average distances on a bike or walking.)
- If the heart rate indicator (3, 12 or 14) is not flashing or is
flashing erratically, check that the heart strap is correctly fitted (refer
to the heart strap instructions).
- If the following screen appears during calculation of body fat per-
centage, check that your hands are positioned properly on the heart
rate sensors and that the sensors are not too moist.
- If you note that the counter does not display the correct units of
distance, check that the switch behind the console is in the Mi
position to display in miles, or in the Km position to display in
kilometres.
Press the RESET button so that the change takes effect.
If the counter does not turn on :
- If you are using the battery: check that the batteries have been pla-
ced in the correct +/- position.
- If the problem persists, start again with new batteries
- If the bicycle is connected to the mains: check that the adaptor is
correctly connected to the bicycle.
- In both cases, check that the cables are correctly connected
behind the console and where the stem set joins the main frame of
the bicycle.
If the problem persists: Bring the product back to the nearest
DECATHLON store.
If a noise emanates from inside the casing or you cannot adjust
your intensity level when in manual mode, do not try to repair it.
Bring the product back to the nearest DECATHLON store.
If the problem persists: Bring the product back to the nearest
DECATHLON store.
Only use your product with the adaptor supplied.
TROUBLESHOOTING
TROUBLESHOOTING

30
ENGLISH
Cardio training is aerobic exercise (muscle development using oxygen); it enables you to improve your cardiovascular capacity.
More specifically, you improve the tone of your heart muscle and blood vessels.
Cardiovascular training takes oxygen from the air you breathe into your muscles.
The heart pumps this oxygen throughout the entire body, and especially to the muscles that are doing the work.
Taking your pulse regularly while exercising is essential for controlling
your training.
If you don’t have an electronic measuring instrument, this is how you do
it:
To take your pulse, place 2 fingers over:
your neck, beneath the ear, or inside the wrist next to the thumb
Don’t press too hard:
Pressing too hard lessens the blood flow and can slow down the heart
rhythm.
After counting the beats for 30 seconds, multiply by 2 to get the number
of beats per minute.
Example:
A count of 75 beats gives 150 beats/minute
CONTROL YOUR PULSE RATE
CARDIO-TRAINING
A – Warm-up phase: progressive effort
The warm-up is the preparatory phase for exercise and gets your body
COMPLETELY READY to start working out.
It is a way to PREVENT INJURIES TO TENDONS AND MUSCLES.
It involves two stages:
WAKING UP THE MUSCULAR SYSTEM, AND OVERALL WARM-UP.
1) You wake up your muscles with a SERIES OF SPECIFIC STRETCHES that
PREPARE YOU FOR EXERCISE: every muscle group is used, and the joints
are stimulated.
2) The overall warm-up makes it possible to put the cardio-vascular and
respiratory system into action gradually, for a better blood supply to
the muscles and better preparation for the exercise. It should be long
enough: 10 minutes for a recreational sport, and 20 minutes for a com-
petitive sport. Note that you should warm up for longer: in the morning
and if you are over 55.
B – Training
The workout is the main phase of your physical activity.
By working out on a REGULAR basis, you can improve your physical fitness.
• Anaerobic work for improving endurance.
• Aerobic work for improving cardio-pulmonary strength.
C – Warming down
This corresponds to low-level activity; it is the gradual “resting” phase. WAR-
MING DOWN returns your cardiovascular, respiratory and circulatory sys-
tems and your muscles to normal functioning (thereby preventing undesirable
side effects such as the build-up of lactic acid, which is one of the major causes
of muscle pain namely, cramps and stiffness).
D - Stretching
You should stretch after warming down. Stretching after exercise: Minimises
MUSCULAR STIFFNESS caused by the build-up of.
PHASES OF PHYSICAL ACTIVITY
• Training at 80 to 90% and over of maximum heart rate: Anaerobic and red zones reserved for competitive, specialist
athletes.
• Training at 70 to 80% of maximum heart rate: Endurance training.
• Training at 60 to 70% of maximum heart rate: Getting fit/Burning off fat.
• Training at 50 to 60% of maximum heart rate: Staying in shape/Warm-up.
Male Female
Beats per minute
Age
Beats per minute
Age
If your age differs from those given in the table, you can use the following formulae to calculate your maximum heart rate which corresponds to 100%.
For men: 220 - age
For women: 227 - age
CARDIOVASCULAR TRAINING: EXERCISE ZONE

31
ENGLISH
If you are just starting out, begin by exercising for several days at a low resistance and speed, without forcing it, taking breaks if necessary.
Gradually increase the number or duration of the sessions.
Maintenance/Warm-up: Gradual effort
starting with 10 minutes.
For maintenance work to keep yourself in shape or
get back into shape, you can train every day for
about ten minutes.
This type of exercise will wake up your muscles
and joints, or it can be used as a warm-up before
another type of physical activity.
To increase muscle tone in the legs, choose a
greater resistance and increase the duration of the
exercise.
Obviously, you can vary the pedalling resistance
over the course of your workout.
Aerobic exercise for getting into shape:
Moderate effort for a relatively long time
(35 minutes to 1 hour).
If you wish to lose weight, this type of exercise,
combined with a diet, is the only way to increase
the amount of energy your body consumes. To
do so, there is no need to push yourself beyond
these limits. Training on a regular basis is what
will produce the best results.
Choose a relatively low pedalling resistance and
do the exercise at your own pace, but for at least
30 minutes.
This exercise should cause you to build up a mild
sweat, but it certainly should not leave you out of
breath.
It is the duration of the exercise at a slow pace
that will cause your body to dip into your fat
reserves to get its energy, as long as you pedal
for more than about thirty minutes at least three
times a week.
Aerobic training for endurance: Sustained
effort for 20 to 40 minutes.
This type of training aims to strengthen the heart
muscles significantly and improve respiration.
Pedalling resistance and/or speed is increased
in order to increase breathing speed during the
workout session.
This type of exercise is more sustained than when
you are working out to get into shape.
Little by little, as you train, you will be able to
work out for longer, at a faster pace or with a
higher resistance.
You can do this type of workout at least three
times a week.
After each workout, set aside several minutes to
pedal at a lower speed and resistance, to slow
down and gradually relax your body.
USE
DOMYOS guarantees the materials and workmanship of this product under normal conditions of use for 5 years for the structure and 2 years
for parts subject to wear and tear and for workmanship, starting at the date of purchase as indicated by the date on the till receipt.
DOMYOS’S obligation with regard to this guarantee is limited to the replacement or repair of the product, at the discretion of DOMYOS.
All products for which the warranty is applicable must be received by DOMYOS at one of its approved facilities, delivery prepaid, accompa-
nied by adequate proof of purchase.
This warranty does not apply to cases of:
• Damage caused during transport
• Improper or abnormal use
• Repairs carried out by technicians not accredited by DOMYOS
• Use for commercial purposes
• Use in a non-domestic setting
This warranty does not exclude any legal guarantees applicable according to country and/or province.
OXYLANE - 4 BOULEVARD DE MONS – BP299 – 59665 VILLENEUVE D’ASCQ – France
WARRANTY
Other manuals for VE 680
2
Table of contents
Other Domyos Exercise Bike manuals

Domyos
Domyos VM 790 User manual

Domyos
Domyos VM 580 User manual

Domyos
Domyos VS 900 User manual

Domyos
Domyos VA 530 User manual

Domyos
Domyos VS 900 User manual

Domyos
Domyos E-SEAT User manual

Domyos
Domyos VM ERGO User manual

Domyos
Domyos VM 740 User manual

Domyos
Domyos MINI BIKE 100 User manual

Domyos
Domyos COMFORT BIKE User manual

Domyos
Domyos COMFORT BIKE User manual

Domyos
Domyos VM 740 User manual

Domyos
Domyos E-SEAT BIKE User manual

Domyos
Domyos VM 510 User manual

Domyos
Domyos VS 700 User manual

Domyos
Domyos VM 660 User manual

Domyos
Domyos VM 500 User manual

Domyos
Domyos VM 680 User manual

Domyos
Domyos VM 190 User manual

Domyos
Domyos VM 230 User manual