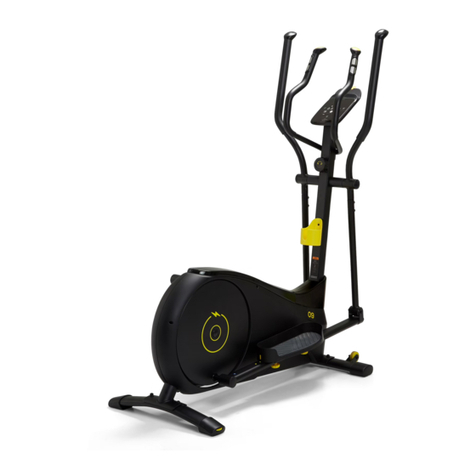
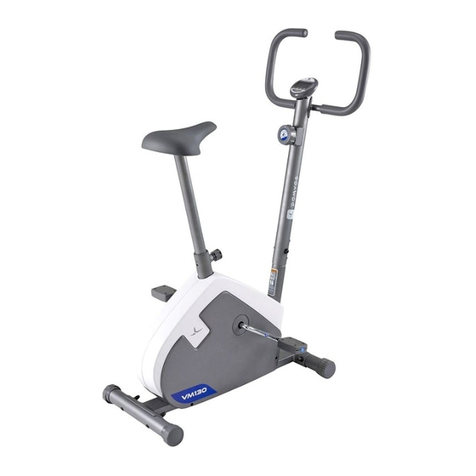
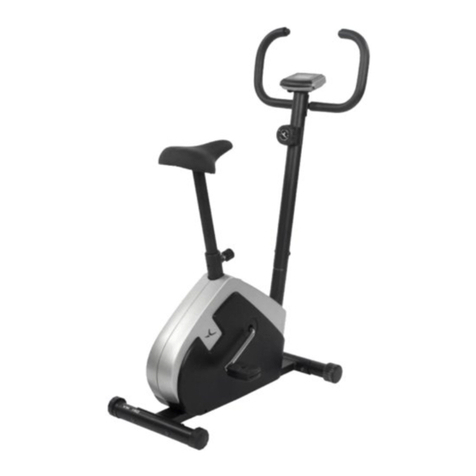
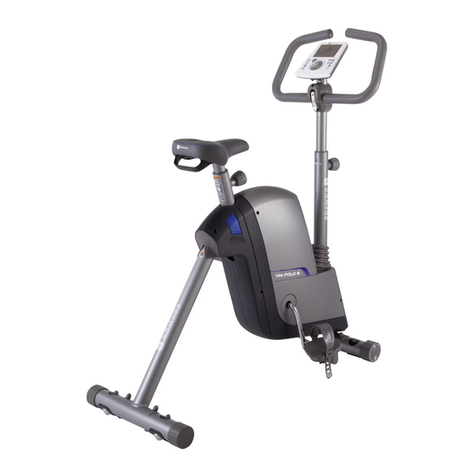
Domyos VM ERGO 08 User manual

VM ERGO 08
Notice à conserver
Keep these instructions
Conservar instrucciones
Bitte bewahren Sie diese Hinweise auf
Istruzioni da conservare
Bewaar deze handleiding
Instruções a conservar
Zachowaj instrukcję
Őrizze meg a használati útmutatót
Сохранить инструкцию
Păstraţi instrucţiunile
Návod je potrebné uchovať
Návod je třeba uchovat
Spara bruksanvisningen
Запазете упътването
Bu kılavuzu saklayınız
Збережіть цю інструкцію
DECATHLON - 4, Boulevard de Mons - 59665 Villeneuve d'Ascq - France
Réf. pack : 1051.137 - CNPJ : 02.314.041/0001-88 -
Made in China - Hecho en China - Произведено в Китае
NOTICE D’UTILISATION
OPERATING INSTRUCTIONS
MODO DE EMPLEO
GEBRAUCHSANWEISUNG
ISTRUZIONI PER L’USO
GEBRUIKSHANDLEIDING
MANUAL DE UTILIZAÇÃO
INSTRUKCJA UŻYTKOWANIA
HASZNÁLATI ÚTMUTATÓ
INSTRUCŢIUNI DE UTILIZARE
NÁVOD NA POUŽITIE
NÁVOD K POUŽITÍ
BRUKSANVISNING
KULLANIM KILAVUZU
使用说明

VM ERGO 08
Notice à conserver
Keep these instructions
Conservar instrucciones
Bitte bewahren Sie diese Hinweise auf
Istruzioni da conservare
Bewaar deze handleiding
Instruções a conservar
Zachowaj instrukcję
Őrizze meg a használati útmutatót
Сохранить инструкцию
Păstraţi instrucţiunile
Návod je potrebné uchovať
Návod je třeba uchovat
Spara bruksanvisningen
Запазете упътването
Bu kılavuzu saklayınız
Збережіть цю інструкцію
DECATHLON - 4, Boulevard de Mons - 59665 Villeneuve d'Ascq - France
Réf. pack : 1051.137 - CNPJ : 02.314.041/0001-88 -
Made in China - Hecho en China - Произведено в Китае

3

4
A
M8*P1.25*20L19* 8*2T
M8*16L 8
M3*14L
M8*16L
M5*12L
M8*50L
19* 8*2T
19* 8*2T
8
B
D
E
F
G

L
R
A
B
B
A
5
MONTAGE • ASSEMBLY •MONTAjE • MONTAGE • MONTAGGIO • AFwErkING
• MONTAGEM •
MONTAŻ • SZERELéS •
• MONTARE • MONTÁž
• MONTÁž •
MONTErING • • MONTAj • •
•
安装
1
2
L
R
A
B
B
A

C
C
D
D
6
MONTAGE • ASSEMBLY •MONTAjE • MONTAGE • MONTAGGIO • AFwErkING
• MONTAGEM •
MONTAŻ • SZERELéS •
• MONTARE • MONTÁž
• MONTÁž •
MONTErING • • MONTAj • •
•
安装
MONTAGE • ASSEMBLY •MONTAjE • MONTAGE • MONTAGGIO • AFwErkING
• MONTAGEM •
MONTAŻ • SZERELéS •
• MONTARE • MONTÁž
• MONTÁž •
MONTErING • • MONTAj • •
•
安装
OK Not OK
! WARNING !
3

7
MONTAGE • ASSEMBLY •MONTAjE • MONTAGE • MONTAGGIO • AFwErkING
• MONTAGEM •
MONTAŻ • SZERELéS •
• MONTARE • MONTÁž
• MONTÁž •
MONTErING • • MONTAj • •
•
安装
MONTAGE • ASSEMBLY •MONTAjE • MONTAGE • MONTAGGIO • AFwErkING
• MONTAGEM •
MONTAŻ • SZERELéS •
• MONTARE • MONTÁž
• MONTÁž •
MONTErING • • MONTAj • •
•
安装
E
F
G
F
E
G
4

8
MONTAGE • ASSEMBLY •MONTAjE • MONTAGE • MONTAGGIO • AFwErkING
• MONTAGEM •
MONTAŻ • SZERELéS •
• MONTARE • MONTÁž
• MONTÁž •
MONTErING • • MONTAj • •
•
安装
5

9
VM ERGO 08
108 x 53 x 123 cm
43 x 21 x 48 inch
34,5 kg
76 lbs
Tube porte-selle - Seat tube
Tubo portasillín - Sattelstützrohr
Tubo porta-sella - Stang zadelsteun
Tubo porta-selim - Rurka podtrzymująca siodełko
Nyeregtartó cső - Опора седла
Tub sprijin şa - Nosná rúra sedla
Trubka nesoucí sedlo - Sadelstolpe
Носеща тръба на седлото - Sele borusu
Підсідельна трубка -
鞍座支管
Bouton de réglage du tube porte-selle
Seat-tube adjustment knob
Botón de ajuste del tubo portasillín
Einstellrad des Sattelstützrohrs
Bottone di regolazione del tubo
porta-sella
Instellingsknop stang zadelsteun
Botão de regulação do tubo
porta-selim
Przycisk regulacji rurki
podtrzymującej siodełko
A nyeregtartó cső szabályozó
gombja
Ручка регулировки опоры седла
Buton de reglare al tubului de sprijin
pentru şa
Nastavovací gombík nosnej rúry
sedla
Tlačítko pro nastavení trubky nesoucí
sedlo
Justeringsknapp för sadelstolpen
Бутон за регулиране на носещата тръба
на седлото
Sele borusu ayar düğmesi
Рукоятка регулювання
坐垫高度调节旋钮
Pédale - Pedal
Pedal - Pedal
Pedale - Pedaal
Pedal - Pedał
Pedál - Педаль
Pedală - Pedál
Šlapky - Pedal
Педал - Pedal
Педаль -
踏板
Tube support-guidon - Handlebar tube
Tubo soporte-manillar - Lenkerstützrohr
Tubo supporto-manubrio - Stang stuursteun
Tubo suporte-guiador - Rurka podtrzymująca kierownicę
Kormánytartó cső - Опора руля
Tub suport-ghidon - Nosná rúra riadidiel
Podpůrná trubka řidítek - Hållarrör - styre
Носеща тръба на кормилото - Gidon dayanak borusu
Підкермова трубка -
手把立管
Guidon - Handlebars
Manillar - Lenker
Manubrio - Stuur
Guiador - Kierownica
Kormány - Руль
Ghidon - Riadidlá
Řidítka - Styre
Кормило - Gidon
Кермо -
手把
Siège - Seat
Asiento - Sattel
Sedile - Zadel
Assento - Siodełko
Ülés - Седло
Scaun - Sedadlo
Sedlo - Sits
Седло - Oturak
Сідло -
座位
Molette de réglage de la résistance
Resistance adjustment knob
Rueda de ajuste de la resistencia
Widerstands-Einstellrädchen
Rotella di regolazione della resistenza
Knop instelling weerstand
Botão rotativo de regulação da resistência
Rolka regulująca opór
Ellenállás-szabályzó kerék
Переключатель уровня нагрузки
Moletă pentru reglarea nivelului de dificultate
Nastavovacie koliesko odporu
Kolečko pro nastavení odporu
Tumhjul för inställning av motståndet
Ролка за регулиране на съпротивлението
Dayanıklılık ayarlama kolu
Рукоятка регулювання опору
松紧调节齿轮
Console - Console
Consola - Konsole
Console - Console
Consola - Konsola
Műszerfal - Дисплей
Consolă - Konzola
Konzole - Konsol
Табло - Konsol
Приставка -
控制面板
Capteurs de pulsations - Pulse sensors
Sensores de pulso - Pulssensoren
Sensori di pulsazioni - Hartslagsensoren
Sensores de pulsações - Czujniki pulsu
Pulzusszám-érzékelők - Датчики пульса
Captatori de pulsaţii - Snímač pulzu
Snímače tepu - Pulsgivare
Датчици на пулса - Nabız algılayıcılar
Пульсові сенсори -
脉搏测试仪

10
m WARNING
• Misuse of this product may
result in serious injury.
• Read user’s manual and
follow all warnings and
operating instructions prior
to use.
• Do not allow children on
or around machine.
• Replace label if damaged,
illegible, or removed.
• Keep hands, feet and hairs
away from moving parts.
AVERTISSEMENT
• Tout usage impropre de ce produit
risque de provoquer des blessures
graves.
• Avant toute utilisation, veuillez lire
attentivement le mode d’emploi et
respecter l’ensemble des avertisse-
ments et instructions qu’il contient.
• Ne pas permettre aux enfantsd’uti-
liser cette machine et les tenir
éloignés de cette dernière.
• Si l’autocollant est endommagé,
illisible ou manquant, il convient de
le remplacer.
• Ne pas approcher vos mains,pieds
et cheveux de toutes les pièces en
mouvement.
ADVERTENCIA
• Cualquier uso impropio de este
producto puede provocar heridas
graves.
• Antes de cualquier utilización, lea
atentamente el modo de empleo y
respetar todas las advertencias e
instrucciones que contiene.
• No permitir a los niños utilizar esta
máquina y mantenerlos alejados
de la misma.
• Si faltase la pegatina, o si la
misma estuviera dañada o ilegible,
conviene sustituirla.
• No acercar sus manos, pies y
cabello de todas las piezas en
movimiento.
WARNHINWEIS
• Jede unsachgemäße Benutzung
dieses Produktes kann schwere
Verletzungen zur Folge haben.
• Vor jedem Gebrauch bitte diese
Gebrauchsanweisung aufmerksam
lesen und alle darin enthaltenen
Warnhinweise und Anweisungen
befolgen.
• Kindern ist die Benutzung dieser
Maschine zu untersagen und sie
sind davon fernzuhalten.
• Ist der Aufkleber beschädigt, unle-
serlich oder nicht mehr vorhanden,
muss er ersetzt werden.
• Ihre Hände, Füße und Haare von
allen drehenden Teilen fernhalten.
AVVERTENZA
• Ogni uso improprio del presente
articolo rischia di provocare gravi
incidenti
• Prima di qualsiasi utilizzo, vi
preghiamo di leggere attentamente
le istruzioni per l’uso e di rispettare
le avvertenze
e le modalità d’impiego.
• Tenere i bambini lontani dalla
macchina e non permettere loro di
utilizzarla.
• Se l’etichetta è danneggiata, illeggi-
bile o assente, occorre sostituirla.
• Non avvicinare mani, piedi e capelli
ai pezzi in movimento.
WAARSCHUWING
• Onjuist gebruik van dit product kan
ernstige verwondingen veroorzaken.
• Voordat u het product gaat gebrui-
ken, moet u de gebruiksaanwijzing
lezen en alle waarschuwingen en
instructies die hij bevat toepassen.
• Deze machine niet door kinderen
laten gebruiken en niet in de buurt
ervan laten komen.
• Als de sticker beschadigd,
onleesbaar of
afwezig is, moet hij vervangen
worden.
• Uw handen, voeten of haar niet in
de buurt van de bewegende delen
brengen.
AVISO
• Qualquer utilização imprópria deste
produto comporta o risco de causar
danos graves.
• Antes de cada utilização, leia aten-
tamente as instruções de utilização
e respeite o conjunto dos avisos
e instruções incluídas.
• Mantenha este aparelho afastado
das crianças e não permita a sua
utilização por estas.
• Se o autocolante estiver danicado,
ilegível ou ausente, é conveniente
substituí-lo.
• Não aproxime as suas mãos, pés e
cabelos das peças em movimento.
UWAGA
• Nieprawidłowe użytkowanie
produktu
może być przyczyną wypadków.
• Przeczytaj instrukcję obsługi i
przestrzegaj wszystkich zaleceń i
instrukcji.
• Nie zezwalaj dzieciom na zabawę
na i w pobliżu urządzenia.
• Wymień etykiety w przypadku
uszkodzenia, nieczytelności lub
ich braku.
• Nie zbliżać rąk, nóg i włosów do
elementów w ruchu.
FIGYELMEZTETéS
• A szerkezet helytelen használata
súlyos sérülésekhez vezethet
• Használat előtt olvassa el a
felhasználói kézikönyvet és tartson
be minden gyelmeztetést, illetve
használati útmutatást
• Ne hagyja, hogy a gyerekek a
gépre vagy közelébe kerüljenek
• Cserélje ki a címkét, ha sérült,
olvashatatlan vagy hiányzik
• Tartsa távol a kezeket, lábakat, a
hajat a mozgó alka wtrészektől
• Некорректная эксплуатация данного
изделия может вызвать тяжелые
поражения
• Перед использованием внимательно
прочитайте инструкцию по эксплуатации
• Соблюдайте все предосторожности и
рекомендации, которые содержит этот
документ
• Не позволяйте детям использовать эту
машину. Не допускайте детей близко
к аппарату.
• Если клейкая этикетка повреждена,
стерта или отсутствует, ее необходимо
заменить
• Необходимо следить за тем, чтобы руки,
ноги и волосы находились вдали от
движущихся частей аппарата
ATENŢIE
• Utilizarea necorespunzătoare a acestui
produs riscă să provoace răniri grave.
• Înainte de utilizare, vă rugăm să citiţi
cu atenţie modul de folosire şi să
respectaţi toate
• Atenţionările şi instrucţiunile pe care
acesta le conţine.
• Nu permiteţi copiilor să utilizeze această
maşină şi ţineţi-i departe de aceasta.
• Dacă autocolantul este deteriorat, ilizibil
sau lipseşte, este indicat să-l înlocuiţi
• Nu vă apropiaţi mâinile, picioarele şi
părul de piesele în mişcare.
UPOZORNENIE
• Akékoľvek nevhodné použitie
tohoto výrobku môže vyvolať vážne
poranenia.
• Pred akýmkoľvek použitím výrobku
si starostlivo prečítajte návod
na použitie a rešpektujte všetky
upozornenia a pokyny, ktoré sú tu
uvedené.
• Nedovoľte deťom, aby tento prístroj
používali a približovali sa k nemu.
• V prípade, že je samolepiaci štítok
poškodený, nečitateľný alebo štítok
chýba na výrobku, je potrebné ho
vymeniť.
• Nepribližujte ruky, nohy a vlasy k
súčiastkam, ktoré sa pohybujú.
UPOZORNĚNÍ
• Jakékoliv nevhodné použití to-
hoto výrobku může způsobit vážná
poranění.
• Před jakýmkoliv použitím výrobku
si pečlivě pročtěte návod k použití
a respektujte všechna upozornění a
pokyny, která jsou zde uvedena.
• Zabraňte dětem, aby tento přístroj
používaly a přibližovaly se k němu.
• Jestliže je samolepicí štítek
poškozen, je nečitelný nebo na výro-
bku chybí, je nutné jej vyměnit.
• Nepřibližujte ruce, nohy a vlasy k
pohybujícím se součástkám.
VARNING
• Felaktig användning av denna pro-
dukt riskerar att förorsaka allvarliga
personskador.
• Läs noga bruksanvisningen innan du
använder produkten och ta hänsyn
till alla varningar och instruktioner
som den innehåller.
• Låt inte barn använda denna maskin
och håll dem på avstånd från den.
• Om dekalen är skadad, oläslig
eller saknas, måste den ersättas
med en ny.
• Låt inte händerna, fötterna eller
håret komma i närheten av rörliga
delar.
• Всяко неправилно използване на този
продукт може да доведе до сериозни
наранявания.
• Преди да използвате продукта,
моля прочетете внимателно начина
на употреба и спазвайте всички
предупреждения и инструкции, които
той съдържа.
• Не позволявайте тази машина да бъде
използвана от деца и ги дръжте на
разстояние от нея.
• Ако самозалепващата лента е
повредена, нечетлива или липсва, тя
трябва да бъде сменена.
• Не доближавайте ръцете, краката и
косите си до движещите се части.
UYARI
• Bu ürünün herhangi bir yanlış
kullanımı ağır yaralara yol açabilir.
• Her kullanımdan önce, kullanım
yöntemini dikkatle okumanız ve
içindeki tüm uyarı ve talimatlara
uymanız gerekir.
• Çocukların bu makineyi
kullanmalarına izin vermeyin ve
onları bu makineden uzak tutun.
• Yapışkan etiket zarar görmüş,
okunaksız veya mevcut değilse,
yenisi ile değiştirilmesi uygun
olacaktır.
• Ellerinizi, ayaklarınızı ve saçlarınızı
hareket halindeki parçalara
yaklaştırmayın.
• Всяке не відповідне застосування
виробу утворює ризик тяжких
поранень.
• Перед застосуванням прочитайте
інструкцію використання та
дотримуйтеся усіх попереджень та
порад, які вона містить.
• Не дозволяйте дітям користатися
цим апаратом та не підпускайте їх
близько до нього.
• Якщо наклейка пошкоджена,
нерозбірлива або відсутня, треба
її замінити.
• Не наближайте руки, ноги та
волосся до деталей, що рухаються.
䇋ֱᣕ⬙䗮
䇋ֱᣕ⬙䗮
.
.
.
.
.
•
•
•
•
•
This product, which complies with
EN 957 class HC, GB17498 standard,
is not designed for therapeutic use.
MAXI
130 kg / 287 lbs

22
Getting into shape must be done in a CONTROLLED manner. Before beginning any exercise program, consult your doctor.
This is especially important for people aged over 35 or who have previously had health problems, and those who have not done
any sport for a number of years. Read all instructions before use.
WARNING
PRESENTATION
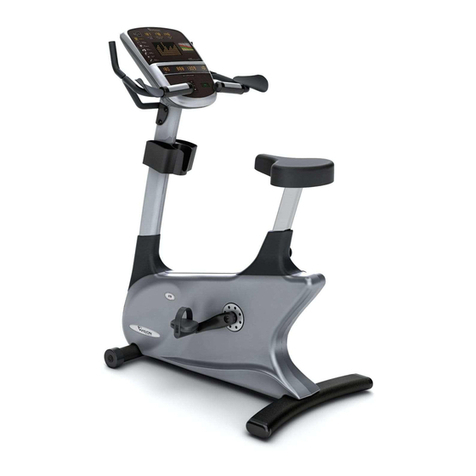
This product is a new-generation fitness bicycle. Thanks to its specially-designed shape, this bike places you in an anatomical position.
The ergonomic form of the handlebars makes it easy to find the ideal position for your hands. This product is equipped with a magnetic
transmission system for optimal and smooth pedalling comfort. Resistance is regulated using an advanced electronic system which means that
your bike can automatically control your training according to your objectives. The stationary bicycle is an excellent means of cardiovascular
exercise. Training on this apparatus will increase your cardiovascular capacity. This will help to improve your physical fitness and your
endurance, and you will also burn calories (a necessary step in losing weight, in conjunction with a diet). The stationary bicycle will
enable you to tone your legs and buttocks. Your calf muscles and lower abs are also used in the workout.
This product is DIS (Domyos Interactive System) compatible
You have chosen a piece of fitness equipment by DOMYOS. We thank you for your confidence in us. We have created the
DOMYOS brand to provide a way for all athletes to stay in shape. This product has been designed by athletes for athletes.
We would be pleased to receive your comments and suggestions concerning DOMYOS products. Therefore, your store team is ready
to listen, as is the DOMYOS products design department. You can also find us at www.DOMYOS.com. We wish you successful training
and hope that you will enjoy using this DOMYOS product.
ENGLISH

23
1. Read all the instructions in this manual before using the product.
2. Only use this product in the manner described in this manual.
3. Keep this manual for the entire life of the product.
4. This device complies with European, American and Chinese
standards pertaining to fitness products for domestic, non-
therapeutic purposes (EN-957-1 and 5 class HA / GB17498 /
ASTMF 1250).
5. This piece of equipment must be assembled by an adult.
6. The owner is responsible for ensuring that all users of this product
are properly informed as to how to use this product safely.
7. DOMYOS cannot be held liable for claims of injury or damage
sustained by any person or property originating from the use or
misuse of this product by the purchaser or by any other person.
8. This product is intended for domestic use only.
9. Do not use this product in a commercial, rental, or institutional
setting.
10. Use the product indoors on a flat surface in a dry, dust-free
uncluttered place.
11. Ensure that you have enough space to access and move around
the device safely.
12. Protect the floor under the product by covering it.
13. It is the user’s responsibility to inspect and if necessary tighten all
parts before using the product.
14. If your product deteriorates, do not use it any longer and take it
to your Decathlon store.
15. Do not store this product in a damp place (e.g. edge of a pool,
bathroom etc.).
16. Wear athletic shoes to protect your feet while exercising.
17. DO NOT wear loose or baggy clothing, since it may get caught
in the machine.
18. Take off all jewellery.
19. Put your hair up so that it does not get in the way during
exercise.
20. If you feel any pain or if you become dizzy while exercising, stop
immediately, rest, and consult a physician.
21. Keep children and pets away from the product at all times
22. Keep your hands and feet away from moving parts.
23. Do not exceed the limits of the adjusting mechanisms.
24. Do not modify your product.
25. When exercising, do not arch your back: keep it straight.
26. There are many factors that may affect the precision of the
readout from the pulse sensor; it is not a medical device.
27. It is designed merely to help you determine your approximate
heart rate.
28. People wearing a pace maker, a defibrillator, or any other
electronic implant are advised that they use the pulse sensor at
their own risk.
29. Before the first use, a test exercise under the supervision of a
doctor is thus recommended.
30. Pregnant women are advised not to use the pulse sensor.
31. Before any use consult your doctor.
32. Always hold the handlebars while climbing onto or off the
product.
33. Any assembly or disassembly of the product should be carried
out with care.
34. As you finish your workout, gradually reduce your pedalling
speed until the pedals come to a complete stop.
35. Maximum user weight: 130kg – 287lbs.
36. Only one person may use the product to exercise at any one
time.
37. Clean with a damp sponge.
38. Rinse well and dry.
SAFETY
To reduce the risk of serious injury, please read the following important user precautions before using the product.
ENGLISH

24
ENGLISH
ADJUSTMENTS
WARNING: you must get off the bicycle to make any adjustments (seat, handlebars).
HOW DO YOU ADJUST THE POSITION OF THE SEAT
AND THE HANDLEBARS?
For an effective workout, the seat and handlebars must be adjusted
properly.
While you are pedalling, your knees should be slightly bent when the
pedals are in the lowest position.
In order to adjust the seat, unscrew and pull the knob on the seat post.
To lock it, reinsert the thumb wheel into the seat tube and tighten it
completely.
Next, repeat the same operation for the handlebars.
To find the position corresponding to your height, please refer to the
table below titled: «Adjusting the Handlebars»:
IMPORTANT:
make sure that you put the
knob back into place in
the seat post and tighten it
completely.
Never exceed the maxi-
mum seat height.
IMPORTANT:
Never exceed the maxi-
mum handlebar height
4
1
Height in cm
Adjusting the height
155 à 160 1
161 à 166 2
167 à 172 3
173 à 178 4
179 à 184 5
185 à 190 6
191 à 195 7
2
3
4
1
Height in cm
Adjusting the seat
0 <155 0
155 à 160 1
161 à 164 2
165 à 169 3
170 à 173 4
174 à 177 5
178 à 181 6
182 à 186 7
187 à 195 8
>195 9
3
2
1
HOW TO ADJUST THE PEDAL STRAPS ?
The new-generation toe clips are easy to use and require no adjustment.
LEVELLING THE BICYCLE
In the event that the bike becomes unstable during use, turn one or both of the plastic end knobs on the rear support
leg until the bike is stable.
ADJUSTING THE RESISTANCE:
According to the EN (European Norm) definition, this product is an item of “pedal crank training equipment”.
You can adjust the braking torque not only with your pedalling speed but also by manually choosing your
resistance level (by turning the torque control knob on non-motorised products and by pressing the +/- buttons
on motorised products). However, if you retain the same level of resistance, the braking torque will increase/
decrease as your pedalling speed increases and decreases.
3

25
ENGLISH
DISPLAY
BUTTON FUNCTIONS
The navigation system for your FC700 console consists of:
- a central adjustment and confirmation button (E)
- two buttons enabling you to navigate the screens (B and D)
- two value adjustment buttons (A and C)
1. Programme display zone – MAIN SCREEN
2. Indication of programme selection
3. Display of SPEED, DISTANCE, or HEART RATE, according to the display
choice made by the user.*
4. Indicator not used on the FC700
5. Indicator not used on the FC700
6. SEX selection indicator (Male/Female)
7. Indicator for target heart rate setting :
HIGH (100% of max. value)
LOW. (70% of max. value)
8. Display of the output for target heart rate zone.
9. Indicator for activation of sound warning for target heart rate zone output.
10. Display of DISTANCE covered
11. Estimation of CALORIES expended (Cal)
12. Display of DISTANCE or HEART RATE, according to the display choice
selected by the user on the main screen.
13. Display of countdown; default setting is 20 minutes (duration can be set at
between 10 and 180 minutes, in intervals of 5 minutes).
a. If time remaining is over 1h ·Display HH : MM
b. If time remaining is under 1h ·Display MM : SS
If you do not pedal for more than 5 seconds, the countdown timer
and the CALORIE counter both stop.
The countdown and the CALORIE counter restart as soon as pedalling
recommences.
14. Display of SPEED or HEART RATE, according to the display choice selected
by the user on the main screen.
15. Indictor of selection of user’s AGE.
* The user can change the display during exercise by pressing button B or D.
Resetting the product :
The product goes into standby mode after about 10 minutes of inactivity.
The indicators are reset to 0 when the product goes into standby mode (the
data is not saved).
The counter is activated as soon as the pedals start turning or if one of the
buttons is pressed.
B
A
D
E
FC700 CONSOLE
C

26
ENGLISH
Speed: This function indicates estimated speed, either in km/h or mph,
depending on the position of the switch at the rear of the product (see
diagram).
Distance: This function indicates estimated distance since the beginning
of the exercise session.
This can be displayed in km (kilometres) or M (miles) depending on the
position of the switch on the rear of the product.
Time: This function indicates how much time has elapsed since the
beginning of the session; this indication is in Minutes : Seconds (MM : SS)
for the first hour, then it switches to Hours: Minutes (HH : MM)
Calories: This function displays an estimation of calories expended since
the beginning of the exercise session.
RPM (Revolutions per minute): Number of pedalling rotations per
minute.
Body Fat Level: Body fat level measurement.
Heart rate*: Your heart rate is measured by the pulse sensors on the
handlebars. Your heart rate is displayed in beats per minute.
*Please note: this figure is only an estimate and it should under no
circumstances be considered medically reliable.
*Attention : *Please note: For a period of around 30-40 seconds, or
when there is a sudden change in heart rate, the value displayed may not
correspond to your actual heart rate. This is due to the mechanism starting
up.
*Please note: A strong magnetic field may cause the number of heartbeats
counted to be affected.
FUNCTIONS
SETTINGS BEHIND THE CONSOLE
Switch 1 : Selection of type of apparatus that you are using
with the console: VM (magnetic bike) ---- VE (elliptical bike)
Switch 2 : Selection of unit of measurement for DISTANCE.
MI (Miles) ---- KM (Kilometres)
Switch 3 : Selecting the device’s region of use: EU (Europe)/
AS (Asia)
SWITCH 1
SWITCH 2
SWITCH 3
DIS connections
RESET
transmitter
1. Parts and components
HEART RATE MONITOR BELT
Elastic belt 3V CR2032 Lithium Battery Seal Battery compartment cover
2. Installing the battery
• Insert the CR2032 battery (included) as shown below.
• First insert the battery with the + pole upwards.
• Place the seal and then the compartment cover with the two little
dots aligned.
Important !
Ensure that the compartment cover is fully tightened (approx. ½
turn) to avoid sweat or water getting into the compartment.
3. Using the belt
• Before placing the transmitter on your chest, moisten the two electrodes
with water or a water-based gel to ensure that the signal is transmitted
correctly.
• Center the heart rate monitor belt under your
breasts or pectoral muscles, directly above your
sternum, with the battery cover facing inwards.
• Adjust the belt so that the transmitter is always in full contact with your
skin. Do not overtighten it to avoid breathing difficulties.
• If the heart rate monitor belt is loose or placed wrongly, you may get
erroneous or irregular readings.

27
ENGLISH
SETTING
To enter setting mode, hold down button E when the screen displays the
word SEL.
If you have not started your exercise, holding down E will take you directly
to setting mode.
If you were in the middle of a training session, holding down E will halt the
current programme. The word STOP will be displayed on the main screen
for 15 seconds.
During this time you will see the data from your last training session
displayed on the screen. The screen will then display the word SEL.
Hold down E again to go to setting mode.
In setting mode, you can enter your SEX, AGE and WEIGHT.
The device then offers you a target heart rate zone, which, by default, is a
maximum of 100% of the recommended heart rate and a minimum 70% of
this maximal value.
You can alter these 2 values using buttons A and C.
You can increase or decrease these values by pressing buttons A and C.
Pressing continuously on the buttons allows you to scroll through the values
more quickly.
Button B allows you to confirm your selection and move on to the next
setting. If you make a mistake, you can use button D to take you back to
the previous screens.
B
A/C
Setting your Sex (Male/Female)
Setting your age
Setting your weight
B
A/C
A/C
B
A/C
A/C
A/C
B
B
Once you have finished entering your settings, press button E to confirm your settings and exit settings mode.
To set your personal objectives, refer to the table and the guidelines CARDIO-TRAINING.
Activating/deactivating
the alarm warning you
that you are exiting
your target heart rate
zone.
Min target heart rate
Max target heart rate

28
ENGLISH
To enter “BODY FAT LEVEL CALCULATION” mode, hold down button C when the screen displays the word SEL.
You can use buttons A and C to increase and decrease the values. You can scroll through the values more quickly by holding down these buttons.
Use button B to confirm your selection and to go to the next setting. If you make a mistake, use button D to go back to a previous screen.
The console is mains and / or battery operated.
The console switches off after 10 minutes of inactivity.
We advise you to remove the batteries if you are not going to use your console for a long time or if you regularly use it connected to the mains.
B
A/C
Setting your Sex (Male/Female)
B
A/C
Setting your age
A/C
Place your hands on the pulse sensors for the whole time that the
word HOLD is displayed
B
A/C
Adjusting the size
A/C
Your body fat level appears on the screen after it is calculated
Press button E to enter the programme selection function
USE
BODY FAT LEVEL CALCULATION
B
A/C
Setting your weight
E
MALE
FEMALE
ATHLETIC
< 13%
< 23%
GOOD
13-25,9%
23-35,8%
AVERAGE
26-30%
36-40%
HIGH
> 30%
> 40%

29
ENGLISH
Reminder: holding down button E stops the current programme.
You can scroll through the programmes by pressing buttons B and D. Select them using button E.
Programme 10: WATTS
Select your exercise time with buttons A and C, and confirm with button E.
Pedal and adjust the resistance (buttons A and C) until you reach your
desired resistance; the value is indicated in WATTS on the main screen.
Confirm with button E
Then pedal and adjust the resistance (buttons A and C) until you reach your
desired resistance; the value is indicated under WATT on the main screen.
The higher your pedalling speed, the lower the resistance will be, and vice
versa.
You have the option of changing the WATT value during the workout by
pressing button E once.
The bike will adapt its resistance, depending on your pedalling speed, to
maintain the power confirmed at the start of the workout.
Confirm with button E
For increased comfort of use, we recommend that you pedal at a steady
speed.
Programme 11: Fat burn
This allows you to work at between 60 and 70% of your maximum HR
(Heart Rate)
Select your exercise time with buttons A and C, and confirm with button E.
You can increase your exercise intensity using buttons A and C when the
programme has started
If your measured heart rate is below 60% of your maximum HR, the bike
will increase its resistance in order to boost your HR into the target cardiac
zone.
If your measured heart rate is above 70% of your maximum HR, the bike
will decrease its resistance in order to push your HR down into the target
cardiac zone.
For increased comfort of use, we recommend that you pedal at a steady
speed.
Programme 12: PERF
This allows you to work at between 70 and 80% of your maximum HR
(Heart Rate)
Select your exercise time with buttons A and C, and confirm with button E.
You can increase your exercise intensity using buttons A and C when the
programme has started
If your measured heart rate is below 70% of your maximum HR, the bike
will increase its resistance in order to boost your HR into the target cardiac
zone.
If your measured heart rate is above 80% of your maximum HR, the bike
will decrease its resistance in order to push your HR down into the target
cardiac zone.
For increased comfort of use, we recommend that you pedal at a steady
speed.
PROGRAMMES
Programmes 1 to 9
Select your exercise time with buttons
A and C, and confirm with button E.
Once the programme has started,
you can increase the intensity of the
exercise with buttons A and C.
INFORMATION:
In accordance with standard EN957 class HA, this Domyos ergometer has
been calibrated according to the following table.
During the two-year warranty period, if you notice a deviation from the resistive torque (of over 10%), stop using your bike and contact
your nearest store.
Level of
resistance
Power
in Watts
Pedalling speed
(Revolutions per minute)
8132026354653
14 21 35 47 59 78 91
20 31 49 66 87 109 128
25 40 64 87 112 142 166
32 51 81 108 140 174 205
37 62 96 128 165 207 243
44 72 114 148 190 234 278
50 82 126 170 218 269 318
56 94 141 190 256 301 358
62 104 156 210 274 336 395
67 114 172 231 297 362 429
77 130 195 250 340 410 485
1
2
3
4
5
6
7
8
9
10
11
12
30 40 50 60 70 80 90

30
ENGLISH
1. Lift the console out of its support, remove the battery cover located at the
back of the product, and place four LR14 (1.5 V) batteries in the battery
compartment behind the screen.
2. Make sure the batteries are installed correctly and are flush with the
springs.
3. Put the battery compartment lid back on and check to ensure that it is
secure.
4. If the display is illegible or incomplete, remove the batteries, wait 15 seconds
and then put them back in.
5. If you remove the batteries, the computer memory is erased.
RECYCLING :
The “crossed-out bin” symbol indicates that this product and the
batteries it contains cannot be disposed of with household waste.
Recycling your electronic waste will protect the environment and
your health.
BATTERY INSTALLATION
- If you note abnormal distances or speeds, check that the switch
behind the console is in the VM position for magnetic bikes and
VE for elliptical bikes. Press the RESET button so that the change
takes effect.
- On magnetic bikes each turn of the pedals corresponds to a
distance of 4 metres, and on elliptical bikes 1 movements corres-
ponds to a distance of 1.6 metres. (These values correspond to
average distances on a bike or walking.)
- If the heart rate indicator (3, 12 or 14) is not flashing or is
flashing erratically, check that the heart strap is correctly fitted (refer
to the heart strap instructions).
- If the following screen appears during calculation of body fat per-
centage, check that your hands are positioned properly on the heart
rate sensors and that the sensors are not too moist.
- If you note that the counter does not display the correct units of
distance, check that the switch behind the console is in the Mi
position to display in miles, or in the Km position to display in
kilometres.
Press the RESET button so that the change takes effect.
If the counter does not turn on :
- If you are using the battery: check that the batteries have been pla-
ced in the correct +/- position.
- If the problem persists, start again with new batteries
- If the bicycle is connected to the mains: check that the adaptor is
correctly connected to the bicycle.
- In both cases, check that the cables are correctly connected
behind the console and where the stem set joins the main frame of
the bicycle.
If the problem persists: Bring the product back to the nearest
DECATHLON store.
If a noise emanates from inside the casing or you cannot adjust
your intensity level when in manual mode, do not try to repair it.
Bring the product back to the nearest DECATHLON store.
If the problem persists: Bring the product back to the nearest
DECATHLON store.
Only use your product with the adaptor supplied.
TROUBLESHOOTING
TROUBLESHOOTING

31
ENGLISH
Cardio training is aerobic exercise (muscle development using oxygen); it enables you to improve your cardiovascular capacity.
More specifically, you improve the tone of your heart muscle and blood vessels.
Cardiovascular training takes oxygen from the air you breathe into your muscles.
The heart pumps this oxygen throughout the entire body, and especially to the muscles that are doing the work.
Taking your pulse regularly while exercising is essential for controlling
your training.
If you don’t have an electronic measuring instrument, this is how you do
it :
To take your pulse, place 2 fingers over :
your neck, beneath the ear, or inside the wrist next to the thumb
Don’t press too hard :
Pressing too hard lessens the blood flow and can slow down the heart
rhythm.
After counting the beats for 30 seconds, multiply by 2 to get the number
of beats per minute.
Example :
A count of 75 beats gives 150 beats/minute
CONTROL YOUR PULSE RATE
CARDIO-TRAINING
A – Warm-up phase: progressive effort
The warm-up is the preparatory phase for exercise and gets your body
COMPLETELY READY to start working out.
It is a way to PREVENT INJURIES TO TENDONS AND MUSCLES.
It involves two stages:
WAKING UP THE MUSCULAR SYSTEM, AND OVERALL WARM-UP.
1) You wake up your muscles with a SERIES OF SPECIFIC STRETCHES that
PREPARE YOU FOR EXERCISE: every muscle group is used, and the joints
are stimulated.
2) The overall warm-up makes it possible to put the cardio-vascular and
respiratory system into action gradually, for a better blood supply to
the muscles and better preparation for the exercise. It should be long
enough: 10 minutes for a recreational sport, and 20 minutes for a com-
petitive sport. Note that you should warm up for longer: in the morning
and if you are over 55.
B – Training
The workout is the main phase of your physical activity.
By working out on a REGULAR basis, you can improve your physical fitness.
• Anaerobic work for improving endurance.
• Aerobic work for improving cardio-pulmonary strength.
C – Warming down
This corresponds to low-level activity; it is the gradual “resting” phase. WAR-
MING DOWN returns your cardiovascular, respiratory and circulatory sys-
tems and your muscles to normal functioning (thereby preventing undesirable
side effects such as the build-up of lactic acid, which is one of the major causes
of muscle pain namely, cramps and stiffness).
D - Stretching
You should stretch after warming down. Stretching after exercise: Minimises
MUSCULAR STIFFNESS caused by the build-up of.
PHASES OF PHYSICAL ACTIVITY
• Training at 80 to 90% and over of maximum heart rate: Anaerobic and red zones reserved for competitive, specialist
athletes.
• Training at 70 to 80% of maximum heart rate: Endurance training.
• Training at 60 to 70% of maximum heart rate: Getting fit/Burning off fat.
• Training at 50 to 60% of maximum heart rate: Staying in shape/Warm-up.
Male Female
Beats per minute
Age
Beats per minute
Age
If your age differs from those given in the table, you can use the following formulae to calculate your maximum heart rate which corresponds to 100%.
For men: 220 - age
For women: 227 - age
CARDIOVASCULAR TRAINING: EXERCISE ZONE
Table of contents
Other Domyos Exercise Bike manuals

Domyos
Domyos VM 480 User manual

Domyos
Domyos VM FOLD 6 User manual

Domyos
Domyos VM FOLD 6 User manual

Domyos
Domyos VS 930 User manual

Domyos
Domyos VS 930 User manual

Domyos
Domyos VM 120 User manual

Domyos
Domyos VM 200 User manual

Domyos
Domyos VM 530 User manual

Domyos
Domyos vm 460 User manual

Domyos
Domyos VM150 EDITION User manual

Domyos
Domyos VS 700 User manual

Domyos
Domyos VM 590 User manual

Domyos
Domyos BIKING100 Operation and maintenance manual

Domyos
Domyos COMFORT BIKE User manual

Domyos
Domyos VM 510 User manual

Domyos
Domyos VS 930 User manual

Domyos
Domyos VE 430 User manual

Domyos
Domyos ESSENTIAL 2 User manual

Domyos
Domyos WM 160 User manual

Domyos
Domyos vm 460 User manual