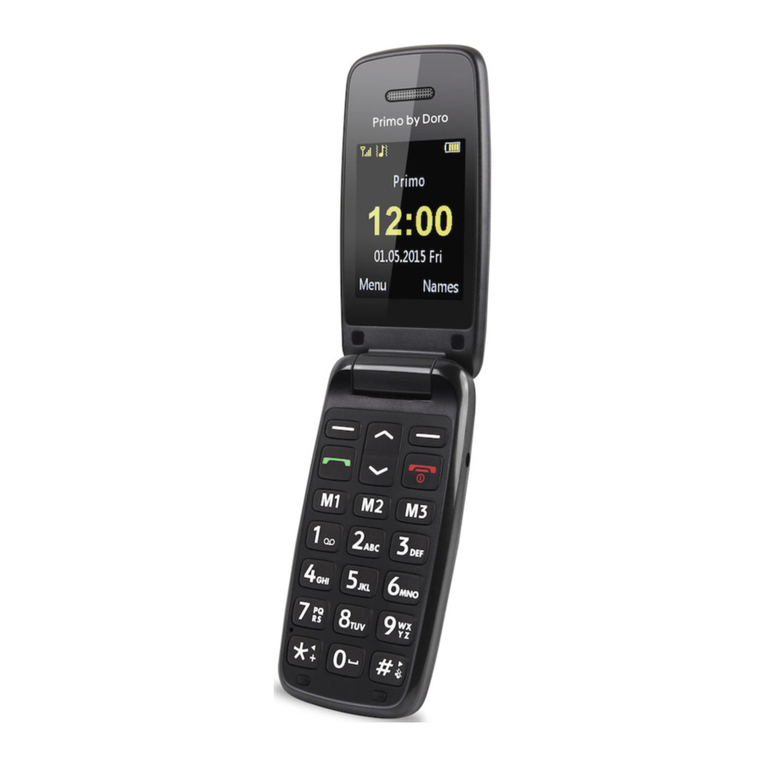
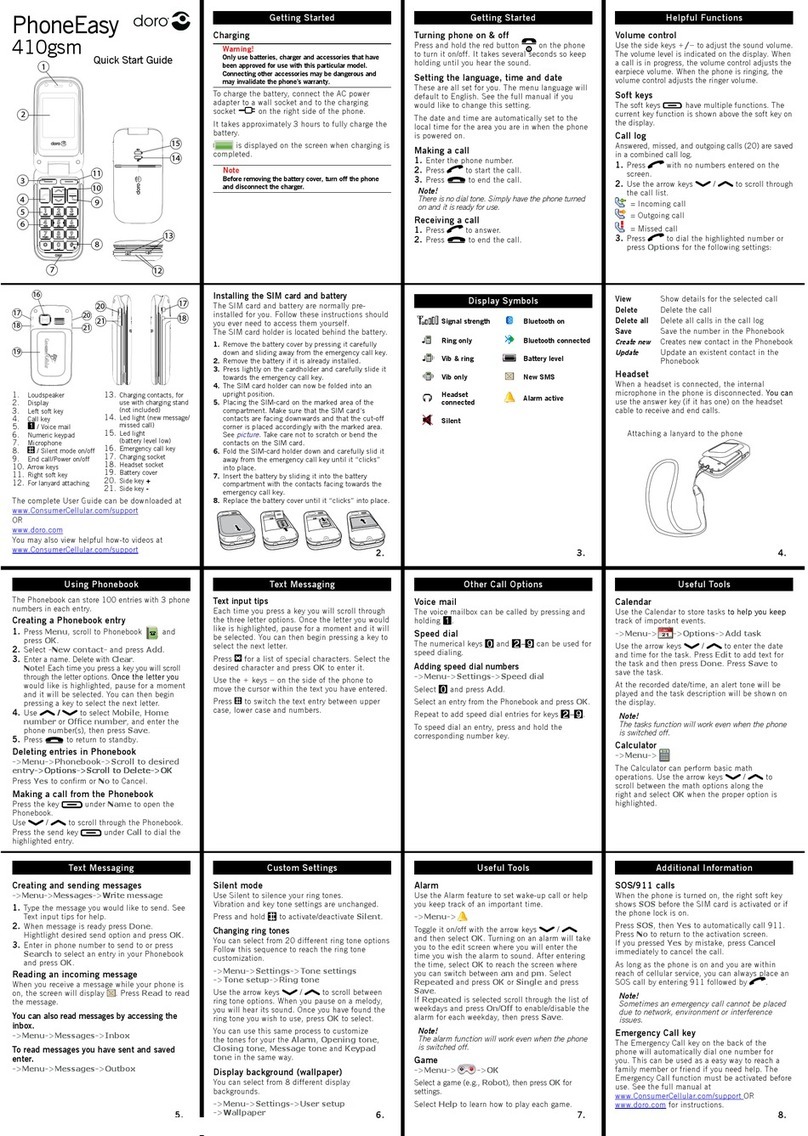
Doro Primo 305 User manual

Primo 305 by Doro
User Manual

U2

i
1. Speaker
Phone with the mobile phone at the ear.
2. Navigation buttons
For navigating in menus and text input. In
addition by default quick access (see also
page 58):
Up ( ▲): nter camera mode
Down ( ▼): Write SMS
Left ( ◄ ): nter alarm menu
Right ( ►): nter ring tone menu.
3. Left softkey
nter the main menu.
4. Call button
Dial and answer calls; open call history.
5. Numerical buttons
In standby mode: nter phone number; press
and hold 1: Call to voicemail box (phone
number must be stored); enter numbers and
letters. Pressing a number in standby mode
displays all names in the phonebook starting
with one of the letters on the button.
6. *button (additional function)
In standby mode: Menu (left softkey ),
followed by * button activates/deactivates
keylock; for text entries: Open table with
special characters.

ii
7. 0button (additional function)
In standby mode: press and hold to enter “+”,
“p” and “w”.
8. Central button
In standby mode: Open main menu; in
menus: K.
9. Right softkey
In standby mode: Open phonebook; press
and hold: torch on/off.
10. End button
nd call; return to standby mode; press and
hold in standby mode: switch telephone
on/off.
11. #button (additional function)
In standby mode: Press and hold to switch
ring tone on/off. When entering numbers and
letters: change input mode.
12. Camera lens
13. Hands-free speaker and ringing
14. Torch LED
15. Headset jack for 3.5mm standard headset.
16. Micro USB port
Charging port or connect to PC.

1
Co te ts
Installation . . . . . . . . . . . . . . . . . . . . . . . . . .5
In the box . . . . . . . . . . . . . . . . . . . . . . . . . .5
Insert SIM card, memory card
and battery . . . . . . . . . . . . . . . . . . . . . . . . .5
Charging . . . . . . . . . . . . . . . . . . . . . . . . . . .7
Icons . . . . . . . . . . . . . . . . . . . . . . . . . . . . . .9
Menu icons . . . . . . . . . . . . . . . . . . . . . . . . .9
Status icons . . . . . . . . . . . . . . . . . . . . . . .10
peration . . . . . . . . . . . . . . . . . . . . . . . . . .11
Switch telephone on . . . . . . . . . . . . . . . .11
Standby mode . . . . . . . . . . . . . . . . . . . . .12
Change language, time and date . . . . . . .12
Making a call . . . . . . . . . . . . . . . . . . . . . .12
Dial numbers from the phonebook . . . . . .13
Answering a call . . . . . . . . . . . . . . . . . . .14
Volume control . . . . . . . . . . . . . . . . . . . . .14
Text entry . . . . . . . . . . . . . . . . . . . . . . . .14
Call Options . . . . . . . . . . . . . . . . . . . . . . .15
Call waiting . . . . . . . . . . . . . . . . . . . . . . . .17
Call information . . . . . . . . . . . . . . . . . . . .17
Keylock . . . . . . . . . . . . . . . . . . . . . . . . . .17
Silent . . . . . . . . . . . . . . . . . . . . . . . . . . . .18

2
Headset . . . . . . . . . . . . . . . . . . . . . . . . .19
mergency calls . . . . . . . . . . . . . . . . . . . .19
Phonebook . . . . . . . . . . . . . . . . . . . . . . . .20
Create phonebook entry . . . . . . . . . . . . .20
Manage phonebook entries . . . . . . . . . . .21
Messaging . . . . . . . . . . . . . . . . . . . . . . . . .25
Create and send SMS . . . . . . . . . . . . . . .25
Create and send MMS . . . . . . . . . . . . . . .26
Inbox, Sent, Outbox . . . . . . . . . . . . . . . .29
Call log . . . . . . . . . . . . . . . . . . . . . . . . . . . .30
Camera (Photo) . . . . . . . . . . . . . . . . . . . . .31
Image viewer . . . . . . . . . . . . . . . . . . . . . . .33
Video recorder . . . . . . . . . . . . . . . . . . . . . .34
Video player . . . . . . . . . . . . . . . . . . . . . . . .36
File manager . . . . . . . . . . . . . . . . . . . . . . . .37
FM Radio . . . . . . . . . . . . . . . . . . . . . . . . . . .38
Connect phone to computer . . . . . . . . . .39
Move data between telephone
and computer . . . . . . . . . . . . . . . . . . . . . .40
Disconnect USB cable safely . . . . . . . . . .40
Settings . . . . . . . . . . . . . . . . . . . . . . . . . . .41

3
Signal tones . . . . . . . . . . . . . . . . . . . . . .41
Phone settings . . . . . . . . . . . . . . . . . . . . .43
Call settings . . . . . . . . . . . . . . . . . . . . . . .48
Voicemail . . . . . . . . . . . . . . . . . . . . . . . .51
Advanced Settings . . . . . . . . . . . . . . . . . .52
Network settings . . . . . . . . . . . . . . . . . . .54
Security settings . . . . . . . . . . . . . . . . . . . .55
Connections . . . . . . . . . . . . . . . . . . . . . .59
Reset to factory settings . . . . . . . . . . . . .62
SMS settings . . . . . . . . . . . . . . . . . . . . . .63
MMS settings . . . . . . . . . . . . . . . . . . . . . .65
Service notification . . . . . . . . . . . . . . . . . .66
Bluetooth® . . . . . . . . . . . . . . . . . . . . . . . .66
Calendar . . . . . . . . . . . . . . . . . . . . . . . . . .69
Extras . . . . . . . . . . . . . . . . . . . . . . . . . . . .69
Torch . . . . . . . . . . . . . . . . . . . . . . . . . . .69
Alarm . . . . . . . . . . . . . . . . . . . . . . . . . . .70
Calculator . . . . . . . . . . . . . . . . . . . . . . . .71
Appendix . . . . . . . . . . . . . . . . . . . . . . . . . .72
Safety precautions . . . . . . . . . . . . . . . . . .72
Network services and network costs . . . .72
Operating environment . . . . . . . . . . . . . .72
Medical devices . . . . . . . . . . . . . . . . . . . .73
Pacemakers . . . . . . . . . . . . . . . . . . . . . .74

4
xplosive areas . . . . . . . . . . . . . . . . . . . .74
Hearing protection . . . . . . . . . . . . . . . . . .75
mergency calls . . . . . . . . . . . . . . . . . . . .76
Vehicles . . . . . . . . . . . . . . . . . . . . . . . . .76
Cleaning and Maintenance . . . . . . . . . . .77
Warranty and Service Information . . . . . .79
Technical specifications . . . . . . . . . . . . . .80
Specific absorption rate (SAR) . . . . . . . . .81
Approval and conformity . . . . . . . . . . . . .81

5
I stallatio
In the box
• 1 mobile phone
• 1 energy efficient switch-mode power supply
• 1 battery pack Li-ion 3.7V / 800mAh
• 1 user manual
IMPORTANT
Turn the telephone off and disconnect from
charger before opening the battery
compartment.
Insert SIM card, memory card and battery
The SIM card and memory card holders are
located under the battery.
1. Carefully press with your thumb on the rear
casing cover and move it up. Lift the cover
off. In case the battery is inserted, lift it with
your fingernail and remove it.
2. Insert the SIM card under the metal
bracket. nsure that the SIM card contacts
face down and the chamfered corner
matches the bracket.

6
The SIM card contacts are not to be
scratched or bent. Do not touch the
contacts with your fingers.
3. MicroSD memory card
For using the high storage features of your
telephone, particularly for photos, audio,
etc. you need to insert a microSD memory
card.
Insert the memory card in the slot: slightly
press on the card holder and move it
carefully up. The memory card holder can
be flipped open. Place the memory card
level in the black plastic holder.

7
nsure that the contacts of the memory
card face down and that the projection
matches the marked area. The memory
card contacts are not to be scratched or
bent. Flip the holder down and lock.
4. Insert the battery in the battery
compartment, with the contacts top left.
5. Replace the cover and carefully press down
with your thumb until it clicks in place.
IMPORTANT
Only use compatible memory cards. Compatible
card types: microSD, microSDHC. Incompatible
cards can damage the card, the telephone and
the saved data.
CHARGING
CAUTION
Only use batteries, chargers and accessories
approved for this model. Connecting other
accessories from third party suppliers can be
hazardous and can void the operating permit
for the telephone as well as the warranty.

8
The empty battery icon will flash and an alert
is sounded if the battery capacity is low. To
charge the battery, connect the power supply
to mains power and the charger jack at the
bottom of the telephone.
If the mobile phone is switched on:
Charger connected is displayed when the
charger is connected and Charger removed is
displayed when the charger is removed. When
the mobile phone is switched on or off: the
battery icon is animated during the charging
cycle. A full charging cycle is approx. 3 hours.
Disconnect the telephone from the charger
after the battery is fully charged.
Save energy
After fully charging the battery and disconnecting
the telephone from the charger, please
disconnect the charger from mains power.
Note!
The display backlight turns off after a while to
save energy. ress any button to reactivate the
display backlight. Full battery capacity is only
achieved after 3 - 4 charging cycles. During the

9
course of time battery capacity is reduced. This
means that the talk and standby times are
reduced over time.
Ico s
Menu icons
Multimedia
Phonebook (Contacts)
Call log
Settings
Mesaging (SMS/MMS)
Calendar
FM Radio

10
xtras
Bluetooth
Status icons
Signal strength
Battery status
Keylock activated
Alarm time programmed
Bluetooth activated
Headset connected
MMS sent
Profile “General” activated
Profile “Silent” activated
Profile “Outside” activated
Unread SMS/MMS

11
SD card inserted
Operatio
Switch telephone on
Press and hold the red button for 4
seconds to switch the telephone on/off. If the
SIM card is locked with a PIN code (Personal
Identification Number), then the display shows
Enter PIN.
nter the SIM PIN code and press K (
top left on the keypad). To delete press Delete
( top right on the keypad).
Note!
Contact your network provider if you did not
receive IN and UK codes with your SIM
card or IN and UK codes are not available.
Remaining attempts shows the number of
remaining attempts for entering the PIN code.
PIN blocked is displayed if no attempts are left.
In this case the SIM card must be unblocked
with the PUK code (Personal Unblocking Key).

12
1. nter the PUK code and press K to
confirm.
2. nter a new PIN code and press K to
confirm.
3. nter the new PIN code again and press
K to confirm.
Standby mode
If the telephone is operational and you have not
pressed any buttons, then it is in standby mode.
The left softkey in standby mode is Menu.
The right softkey in standby mode is Names.
Tip:
ress to return to standby mode.
Change language, time and date
The SIM card determines the default language.
See telephone settings from page 53 to
change language, time and date.
Making a call
1. nter phone number and prefix.
Press Delete to delete your input.
After pressing the first number all names
from the phonebook are displayed that

13
start with one of the letters on that
numerical button. This can be used for
quick search of saved numbers. Press ▼
to select a displayed name.
2. Press to make a call. Press End to
cancel the call.
3. Press to end the call.
Tip:
For international calls enter + before the
country code, so you can best use the
phonebook in any country. To enter the
international code press and hold 0 button
until + is displayed.
Dial numbers from the phonebook
1. Press Names to open the phonebook.
2. Use the navigation buttons ▲▼ to scroll
through the phonebook or make a quick
search by entering the first letter with the
respective button, see Text entry, page 17.
3. Press to dial the respective number
or press Back to return to standby mode.

14
Answering a call
1. Press or Answer to answer the call,
or press Reject to reject the call (busy
signal).
Alternatively press to directly reject
the call.
2. Press to end the call..
Volume control
Use the navigation buttons ▲▼ to set the
volume during a call. The volume level is
displayed. Use the navigation buttons ▲▼ to
set the ring tone volume while the phone is
ringing.
The last setting is saved.
Text entry
nter text by repeatedly pressing the
respective numerical buttons. Press the
respective button repeatedly until the desired
letter is displayed. Wait until the blue
background of the current character disappears
before entering the next character.
Press the * button to display a list of special

15
characters. Select the desired character with
the navigation buttons ▲▼◄ ► aand press
K to enter.
Use the navigation buttons ▲▼◄ ► to move
the cursor within the text.
Use the # button to toggle between upper and
lower case letters and numbers. The icon top
left shows the input mode:
Abc Upper case of the first letter after a full
stop (beginning of sentence)/ no umlaut!
ABC UPP R CAS /no umlaut!
abc lower case/no umlaut!
De Upper case of the first letter after a full
stop (beginning of sentence)
DE UPP R CAS
de lower case
123 Numbers
Call ptions
During a call you have access to further
functions with the softkeys ( ):
Hands-free (right softkey)
Turn on hands-free function.

16
Cautio :
To avoid loud noise and damaging
your hearing, hold the phone at
least 1 m away from your ear
before turning on the hands-free
function!
Note!
When using the hands-free option only
one person can speak. Change between
talking/listening is voice-triggered. Loud
background noise (music etc.) can influence
the hands-free function.
ption (left softkey)
A menu with following options is displayed:
Hold/End hold
Hold current call/continue.
End single call
nd current call (as with ).
New call
Make a second call.
Phonebook
Browse phonebook.
Other manuals for Primo 305
1
Table of contents
Other Doro Cell Phone manuals

Doro
Doro 5516 User manual

Doro
Doro PHONEEASY 520X User manual

Doro
Doro Liberto 820 Mini User manual

Doro
Doro PHONEEASY 505 User manual

Doro
Doro PhoneEasy 740 User manual

Doro
Doro 8080 User manual

Doro
Doro 6520 User manual

Doro
Doro PhoneEasy 409s gsm User manual

Doro
Doro PhoneEasy 626 User manual
Doro
Doro 5861 User manual