manuals.online logo
Brands
  1. Home
  2. •
  3. Brands
  4. •
  5. DSC
  6. •
  7. Security Sensor
  8. •
  9. DSC BRAVO5 User manual

DSC BRAVO5 User manual

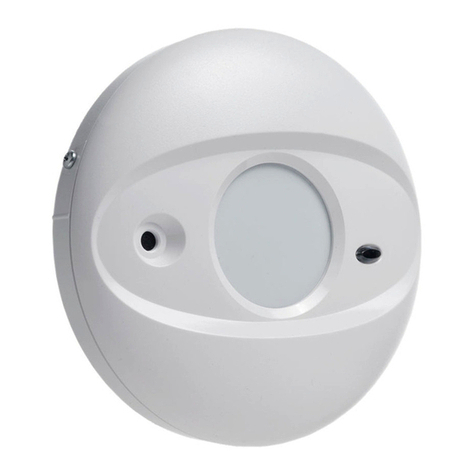
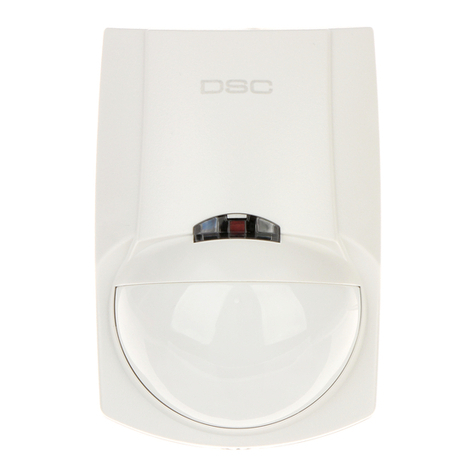
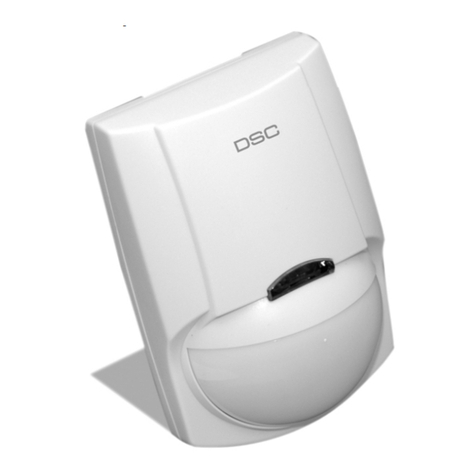
The Bravo5 is a ceiling mount detector designed to
provide reliable motion detection for residential
and commercial applications. The Bravo5 uses a
special Fresnel lens made for 360° detection in
conjunction with a quad element PIR sensor
optimized for uniform detection all around its field
of view. Special attention is given to false alarm
immunity against RF, static, electrical transient to
ensure trouble free operation for many years.
Features
• Multi-Level Signal Processing *
• 360° coverage
• Quad element PIR sensor
• High level static and transient protection
• Excellent RF immunity
• Temperature compensation
• Fast/Slow detection jumper
• LED ON/OFF jumper
• SMD construction
• Super quiet operation
• 5 year warranty
Specifications
Electrical
• Input Voltage: 9 - 14.5 VDC
• Current (nominal): 18/15 mA (alarm on/off) @12 VDC
Contact Rating
• Alarm Relay: 0.1A @24VDC
• Tamper Switch: 0.1A @24VDC
Size (diameter x height)
4.6" x 1.4" / 117 mm x 36 mm
*
Patented
INSTALLATIONINSTRUCTIONS
CeilingMount
PIR Detector
Operation
• Maximum detection range (diameter)
Detector placed 8 ft./ 2.4 m from floor: 24 ft./ 7.3 m
Detector placed 10 ft./ 3.0 m from floor: 30 ft./ 9.2 m
Detector placed 12 ft./ 3.6 m from floor: 40 ft./ 12.2 m
• Additional operating modes
LED ON/OFF Jumper J1
Pulse count (fast/slow) Jumper J2, J2 ON is fast count.
Environmental/Immunity
• RF Immunity: 20V/m ( 100Hz - 1.2GHz)
• Transients @ wiring terminal: 2.4KV @ 1.2joules
• Operating temperature: 32 -122°F / 0 - 50°C
• Humidity 5 - 95% RH non-condensing
Product Information
• BV-500: Form ‘A’ alarm contact
• BV-501: Form ‘A’ alarm contact and tamper switch
• BV-502: Form ‘C’ alarm contact and tamper switch
Coverage
Top View (at 8 ft./ 2.4 m height)
Side View
Locating the Detector
The Bravo5 is designed to be mounted on the ceiling of a
dry indoor location for 360° coverage. Ensure that the
expected path of an intruder is perpendicular to the beam
path. Use the coverage pattern indicated on the coverage
diagram to determine the best sensor location.
Surveythe mounting location and the area being protected
for the following potential problems. Avoid the following
sources of false alarms:
Reflective Surfaces
Do not aim the detector at reflective surfaces such as
mirrorsorwindowsasthismaydistortthecoverage pattern
or reflect sunlight directly onto the detector.
Air Flow
Avoid locations that are subject to direct high air flow such
as near an air duct outlet.
Moisture
Do not locate the detector near sources of steam or oil.
The Sun
Donotaimthedetectorsuchthatitwillreceivedirectsunlight.
Obstructions
Do not limit the coverage by placing large objects within the
detectionarea(suchasplants,highshelves,filingcabinetsetc.).
Mounting
To open the case, insert a small screwdriver in the tab
restraining clip. Gently pry tab downward and twist the top
covercounter-clockwiseandliftitupfromthebottomcover.
Use a small screwdriver to remove the appropriate
knockouts for wiring. Mount the bottom cover using the
screws supplied.
Toclose the case, use thelocatingline on the bottomcover
to align the tab on the top cover. Once the top cover is
engaged, twist the top cover clockwise to lock it in place.
NOTE: Since no adjustment is necessary for the circuit
board, it is not recommended that the installer remove the
circuit board from the case.
Wiring
Refer to the following diagram for wiring instructions:
Power Up
Upon application of power, the LED will be on for
approximately90secondstoindicatethattheunitiswarming
up.Duringthisperiod,therelayisheldinitsalarmstate.After
the90 second warm-up period, the LEDwillturn off and the
unit will respond to motion in the protected area.
Testing
IMPORTANT NOTE: Upon installation, test the unit
thoroughly tested to ensure it works properly. The end user
should be instructed on how to perform walk tests, and
should perform a walk test of the detector weekly.
Walk Test
Create movement in the entire area where coverage is
needed.
TheLEDontheunitwillturnonwhenevermotionisdetected
(jumper J1 must be on).
If coverage is incomplete, relocate the unit. You can make
minoradjustmentsbyrotatingthedetectorseveraldegrees.
Refer to the coverage pattern diagrams as a guide to
reposition the detector for better coverage.
Oncethedetectorcoverageisasrequired,youmayturnoff
the alarm LED by removing the jumper from J1.
Changing the Sensitivity
Bravo5 features Fast and Slow detection modes, which are
setonjumper J2. Jumper J2 is set at the factory fortheFast
detection mode. In a normal operating environment, this
setting provides the best detection.
Incertainenvironmentswhererapidairmovement,heaters
and other variables present problems, use Slow detection
mode to stabilize the detection.
Tochangethesetting from Fast to Slow, take the jumper off
the header.
© 1999 Digital Security Controls Ltd.
Toronto, Canada • Tech Line: 1-800-387-3630
www.dscgrp.com 29002462 R002
Limited Warranty
Digital Security Controls Ltd. warrants that for a period of five years
from the date of purchase, the product shall be free of defects in
materials and workmanship under normal use and that in fulfilment
of any breach of such warranty, Digital Security Controls Ltd. shall,
at its option, repair or replace the defective equipment upon return
of the equipment to its repair depot. This warranty applies only to
defects in parts and workmanship and not to damage incurred in
shipping or handling, or damage due to causes beyond the control of
Digital Security Controls Ltd. such as lightning, excessive voltage,
mechanical shock, water damage, or damage arising out of abuse,
alteration or improper application of the equipment.
The foregoing warranty shall apply only to the original buyer, and is
and shall be in lieu of any and all other warranties, whether expressed
or implied and of all other obligations or liabilities on the part of
Digital Security Controls Ltd. Digital Security Controls Ltd. neither
assumes, nor authorizes any other person purporting to act on its
behalf to modify or to change this warranty, nor to assume for it any
other warranty or liability concerning this product.
In no event shall Digital Security Controls Ltd. be liable for any direct,
indirect or consequential damages, loss of anticipated profits, loss of
time or any other losses incurred by the buyer in connection with the
purchase, installation or operation or failure of this product.
Motion detectors can only detect motion within the designated ar-
eas as shown in their respective installation instructions. They can-
not discriminate between intruders and intended occupants. Motion
detectors do not provide volumetric area protection. They have
multiple beams of detection and motion can only be detected in
unobstructed areas covered by these beams. They cannot detect
motion which occurs behind walls, ceilings, floor, closed doors, glass
partitions, glass doors or windows. Any type of tampering whether
intentional or unintentional such as masking, painting, or spraying
of any material on the lenses, mirrors, windows or any other part of
the detection system will impair its proper operation.
Passive infrared motion detectors operate by sensing changes in tem-
perature. However their effectiveness can be reduced when the ambi-
ent temperature rises near or above body temperature or if there are
intentional or unintentional sources of heat in or near the detection
area. Some of these heat sources could be heaters, radiators, stoves,
barbeques, fireplaces, sunlight, steam vents, lighting and so on.
Warning: Digital Security Controls Ltd. recommends that the entire
system be completely tested on a regular basis. However, despite frequent
testing, and due to, but not limited to, criminal tampering or electrical
disruption, it is possible for this product to fail to perform as expected.
Important Information: Changes or modifications not expressly approved
by Digital Security Controls Ltd. could void the user’s authority to operate
this equipment.

This manual suits for next models

3

Other DSC Security Sensor manuals

DSC F2-220 User manual

DSC

DSC F2-220 User manual

DSC AC-500 User manual

DSC

DSC AC-500 User manual

DSC SG SECURITY MLR2-DV User manual

DSC

DSC SG SECURITY MLR2-DV User manual

DSC WLS912 User manual

DSC

DSC WLS912 User manual

DSC Bravo 6 User manual

DSC

DSC Bravo 6 User manual

DSC PG9984(P) User manual

DSC

DSC PG9984(P) User manual

DSC LC-103PIMSK User manual

DSC

DSC LC-103PIMSK User manual

DSC The NEW FORCE 2 F2-210 User manual

DSC

DSC The NEW FORCE 2 F2-210 User manual

DSC AMB-600 User manual

DSC

DSC AMB-600 User manual

DSC GS3050-A User manual

DSC

DSC GS3050-A User manual

DSC AMB-500 User manual

DSC

DSC AMB-500 User manual

DSC Force2 User manual

DSC

DSC Force2 User manual

DSC WLS904P-433 User manual

DSC

DSC WLS904P-433 User manual

DSC Communique VPM5580TC User manual

DSC

DSC Communique VPM5580TC User manual

DSC LC-120-PI User manual

DSC

DSC LC-120-PI User manual

DSC ws8904 User manual

DSC

DSC ws8904 User manual

DSC PG9944 User manual

DSC

DSC PG9944 User manual

DSC COMMUNIQUE VPM4580 User manual

DSC

DSC COMMUNIQUE VPM4580 User manual

DSC WS4904P User manual

DSC

DSC WS4904P User manual

DSC PG9905 User manual

DSC

DSC PG9905 User manual

DSC LC-100PI User manual

DSC

DSC LC-100PI User manual

DSC LC-105DGB User manual

DSC

DSC LC-105DGB User manual

DSC MAXSYS RF4164-433 User manual

DSC

DSC MAXSYS RF4164-433 User manual

DSC Digital ENCORE EC-300DP User manual

DSC

DSC Digital ENCORE EC-300DP User manual

Popular Security Sensor manuals by other brands

SENSIT Technologies IRED instruction manual

SENSIT Technologies

SENSIT Technologies IRED instruction manual

DURRIDGE RAD7 Connectivity guide

DURRIDGE

DURRIDGE RAD7 Connectivity guide

ATP Electronics TIF RX-1A owner's manual

ATP Electronics

ATP Electronics TIF RX-1A owner's manual

Hama 00186425 operating instructions

Hama

Hama 00186425 operating instructions

CWSI 360 user manual

CWSI

CWSI 360 user manual

REMEDI IoDS-2401 user manual

REMEDI

REMEDI IoDS-2401 user manual

DITEC Rem manual

DITEC

DITEC Rem manual

Analytical Technology PortaSens III D16 instruction manual

Analytical Technology

Analytical Technology PortaSens III D16 instruction manual

hilmor LDIR150 Operation and maintenance instructions

hilmor

hilmor LDIR150 Operation and maintenance instructions

Ortus GBD-R Operation manual

Ortus

Ortus GBD-R Operation manual

Paradox NV780 installation manual

Paradox

Paradox NV780 installation manual

Mindray MR6401 Operator's manual

Mindray

Mindray MR6401 Operator's manual

Deta Connect 9721WHW manual

Deta

Deta Connect 9721WHW manual

Selcom Security CAYMAN operating manual

Selcom Security

Selcom Security CAYMAN operating manual

ITALIANA SENSORI 8066-ISR052 Programming and operating manual

ITALIANA SENSORI

ITALIANA SENSORI 8066-ISR052 Programming and operating manual

Ingersoll-Rand FALCON 1690 Touchbar installation instructions

Ingersoll-Rand

Ingersoll-Rand FALCON 1690 Touchbar installation instructions

YATO YT-73138 Original instruction

YATO

YATO YT-73138 Original instruction

MWf NAVVY user manual

MWf

MWf NAVVY user manual

manuals.online logo
manuals.online logoBrands
  • About & Mission
  • Contact us
  • Privacy Policy
  • Terms and Conditions

Copyright 2025 Manuals.Online. All Rights Reserved.