manuals.online logo
Brands
  1. Home
  2. •
  3. Brands
  4. •
  5. DTM System
  6. •
  7. Receiver
  8. •
  9. DTM System GALACTIC NANO 868 User manual

DTM System GALACTIC NANO 868 User manual

ONE CHANN E L R A D I O R E C E I V E R
NANO 868
insta l l a t i o n m a n u a l v. 1.5
GENERAL INFORMATION
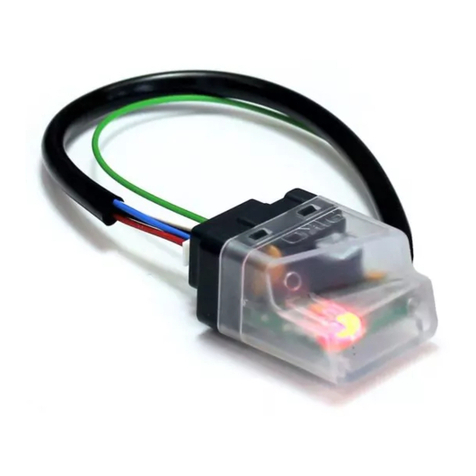
NANO receiver is DTM remote control system additional device. It is a simplified one channel receiver designed to
work with gates, roller shutter and other devices where remote control impulse is required.
NANO receiver is a simple and inexpensive device to expand functionality of simpler installation with remote
control.
GALACTIC function allows to add remotes programmed and configured outside of the installation, without need
to use receiver button.
TECHNICAL SPECIFICATIONS
4clear and simple user interface based on single button with built-in LED;
4easy remote registering and GALACTIC function allows to add remotes without need to use receiver button;
4verifying number of registered remotes;
4complimentary 104-bit IRS variable rolling code ;
4 power supply 12...24V AC/DC ±10%;
4 max current consumption 60mA (relay on);
4memory up to 200 remotes DTM868MHz series;
4one separate NO relay output, permissible resistive load 1A/24V AC/DC;
4 monostable mode backup time 1s;
4superheterodyne receiver, frequency: 868 MHz;
4 work temperature -20°C to +55°C;
4 IP-20 protection, designed to be installed in gate drivers or indoors;
4dimensions / with
mounting brackets
[mm]: 48 x 42 x 22 / 64
x 42 x 22.
Fig.1. NANO868 receiver electric connection description
programming button with LED
Antenna
( )
( )
12...24V AC/DC
C1 (NO)
GALAC T I C
2. Receiver programming
2.1. Registering remote to receiver's memory
While holding receiver button press remote button.
LED blink. Selected button will control the output
channel of receiver. Any remote button can be
registered.
2
11
PRESS AND HOLD
C1 BUTTON
C1 LED
BLINK
PRESS REMOTE
BUTTON
C1 LED
BLINK
THREE TIMES
4
Fig. 2. Remote button programming.
BLINK 3x
CZAS
3
4Registering another button does not erase
previously registered button.
4Holding receiver button for more than 15
seconds will erase memory.
4Attempt of registering 201 transmitter will
fail. LED will not blink.
2.2. Easy remote registering
Easy remote registering function allows registering
new remotes without access to receiver button.
Previously registered remote is needed.
4press and hold for 15 seconds previously
registered remote button in receiver radio
range,
4in no more than 3 seconds press and hold new
remote button for 15 seconds, new remote is
registered with the same active button as in the
previously registered remote.
11
CZAS
2
PRESS AND HOLD
FOR 15 SECONDS
ANY BUTTON
OF„OLD” REMOTE
BREAK TIME
MAX 3 SECONDS
PRESS AND HOLD
FOR 15 SECONDS
ANY BUTTON
OF „NEW” REMOTE
Fig.3. Easy remote registering.
REMOTES IN RECEIVER RADIO RANGE
Failure in registering may be caused by:
4low battery of the remote,
4radio interference during the procedure,
4full memory of the receiver.
1. Installation
Receiver designed for use inside buildings or inside other automation equipment. Ensure proper working
conditions in line with technical parameters. Do not mount in locations exposed to high humidity and frequent
sudden changes of temperature.
Due to externally accesible screw connection provide galvanic isolation from other devices and wires.
Attention to thermal insulation of automation elements which can reach high temperatures (motors,
transformers, circuits implementing, heat sink etc.). For electrical connection see Fig. 1.
Factory wire antenna connected to antenna terminal. Optionally external antenna can be used. Connect external
antenna with 50Ω impedance coaxial cable to ( ) terminal - center core, to ( ) terminal- shield.
2.3. Easy remote registering function LOCK / UNLOCK
To protect receiver against unauthorized attempts of registering remote (important in access protected user
zones) easy remote registering function must be locked. To lock/unlock easy remote registering function:
4turn off receiver power supply;
4press and hold C1 button;
4turn on receiver power supply;
4While holding the button, C1 LED will alternately light on and light off every 5 seconds. To lock/unlock
easy remote registering release button when:
LED light on - easy remote registering locked,
LED light off - easy remote registering unlocked.
2.6. Registering remote with Galactic function
To register remote with Galactic function
authentication codes of the receiver and remote must
be compatible.
To register remote press and hold for 5 seconds two
buttons of the remotes, in receiver radio range.
Successful registering indicates C1 LED blink three
times. To activate the remote at the receiver's
memory, press any button on the remote.
CZAS
2
C1 LED
BLINK 3 TIMES
PRESS ANY
BUTTON
TO ACTIVATE
Fig. 5. Registering remote with Galactic function.
REMOTE IN RECEIVER RADIO RANGE
2.4. Entering Galactic authentication code to NANO receiver
To enter an authentication code to receiver it is
necessary to have remote with programmed
authentication code.
To enter an authentication code to receiver press the C1
button twice. LED goes out for 8 seconds. During this
time press and hold for 5 seconds two buttons of the
remote. Successful entering of the code indicates the
C1 LED that blinks three times. From that moment the
receiver has authentication code set and
programmable remotes with Galactic function can be
added.
If within 8 seconds after pressing C1 button twice, the
code is not entered, or code entering fails, the LED will
not blink three times but immediately light up.
2.5. Removing Galactic authentication code from NANO receiver
To remove the authentication code it is necessary to have a remote which the code has been entered.
To remove the authentication code press C1 button twice. LED goes out for 8 seconds. During this time press and
hold two buttons of the remote. Successful removing of the code indicates the C1 LEDs blink three times. If within
8 seconds after pressing C1 button twice, the code is not removed, or code removing fails, the LED will not blink
three times but immediately light up.
Memory format removes the authentication code from receiver.
2
11
PRESS TWICE
C1 BUTTON
C1 LED
GOES OUT
FOR 8 SEC
PRESS AND HOLD
FOR 5 SEC
TWO BUTTONS
ON THE REMOTE
C1 LED WILL
BLINK 3 TIMES
CODE ENTERED
SUCCESSFULLY
4
Fig. 4. Entering Galactic authentication code.
C1 LED
GOES OUT
3x
Failure in registering may be caused by:
4incompatibility of authentication codes in
receiver and remote,
4low battery of the remote,
4radio interference during the procedure,
4full memory of the receiver (attempt to
enter 201 remote).
BLINK
2x
1
3
PRESS AND HOLD
FOR 5 SECONDS
TWO BUTTONS
OF THE REMOTE
3x
BLINK
Fig. 6. Removing single remote.
PRESS AND HOLD
C1 BUTTON
ON THE RECEIVER
C1 LED
BLINK
PRESS ACTIVE
BUTTON
OF THE REMOTE
C1 LED
GOES OUT
REMOVING
SUCCESSFUL
2
11
4
BLINK
3
2.7. Removing single remote
While holding receiver C1 button, press active button
on the remote. If removing is valid, LED goes out.
Holding receiver button for more than 15
seconds will erase memory.
2.8. Memory format.
To format receiver memory, press and hold for 15
seconds receiver C1 button. Release the button when
LED light goes out.
Memory format:
- removes all remotes from the receiver,
- sets easy remote registering function
unlocked,
- removes the authentication code from
the receiver.
11
Fig. 7. Memory format.
2.9. Verifying number of registered remotes
To verify number of registered remotes, prior registering or removing remote is required.
After registering or removing remote, hold receiver button for 5 more seconds. LED will blink showing number of
registered remotes. First number of tens (from 0 to 20 long pulses), then number of units (from 0 to 9 short pulses).
Fig. 8. Pulses example, showing number of registered remotes - 46.
number of tens - 4x10 number of units - 6
WARRANTY
DTM System provides operational and ready to use devices. The producer gives 24 months warranty from the
selling date to the end customer. This time is counted according to the producer warranty labels or serial numbers
placed on every product. Producer obliges himself to repair the device for free if during the warranty period there
are problems which come because of his fault. Broken device should be supplied on customer's expense to the
place of purchase and enclose clear and brief description of the breakage. The cost of mount/dismount is covered
by the user. The warranty does not cover: batteries in the remote controls, faults caused by improper usage, user
self repairs and adaptations, lightning strikes, voltages or short circuits in the electrical grid. Appropriate legal acts
regulate details of the warranty.
spółka z ograniczoną odpowiedzialnością spółka komandytowa
C1 LED
BLINK
C1 LED GOES OUT
- FORMAT SUCCESSFUL
PRESS AND HOLD
C1 BUTTON FOR
15 SECONDS
15 SECONDS
The intention of the WEEE Directive (Directive 2002/96/EC on waste electrical and electronic equipment) is to reduce the
amount of hazardous substances in waste. The underlying purpose is to promote the avoidance, recovery and risk-free
disposal of waste.
DTM System hereby declares that the radio receiver complies with Directive 2014/53 / EU. The full text of
the EU Declaration of Conformity is available at the Internet address.

Other DTM System Receiver manuals

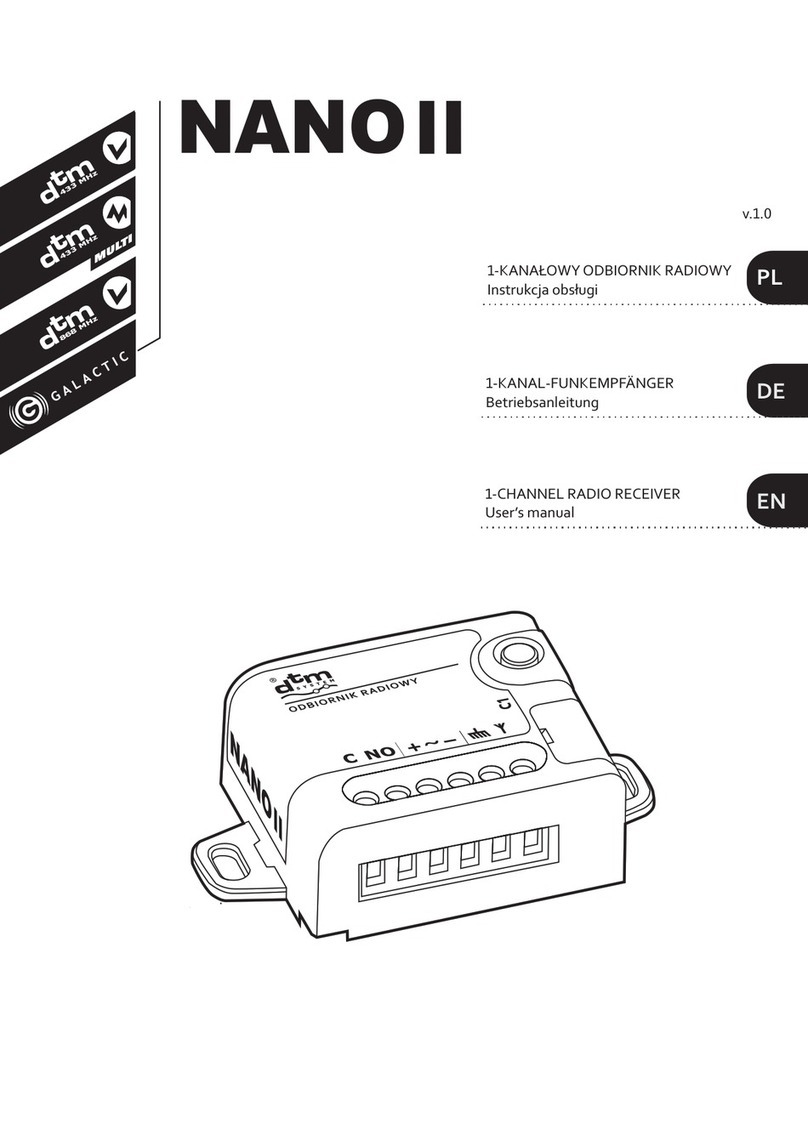
DTM System NANO II Series User manual

DTM System

DTM System NANO II Series User manual

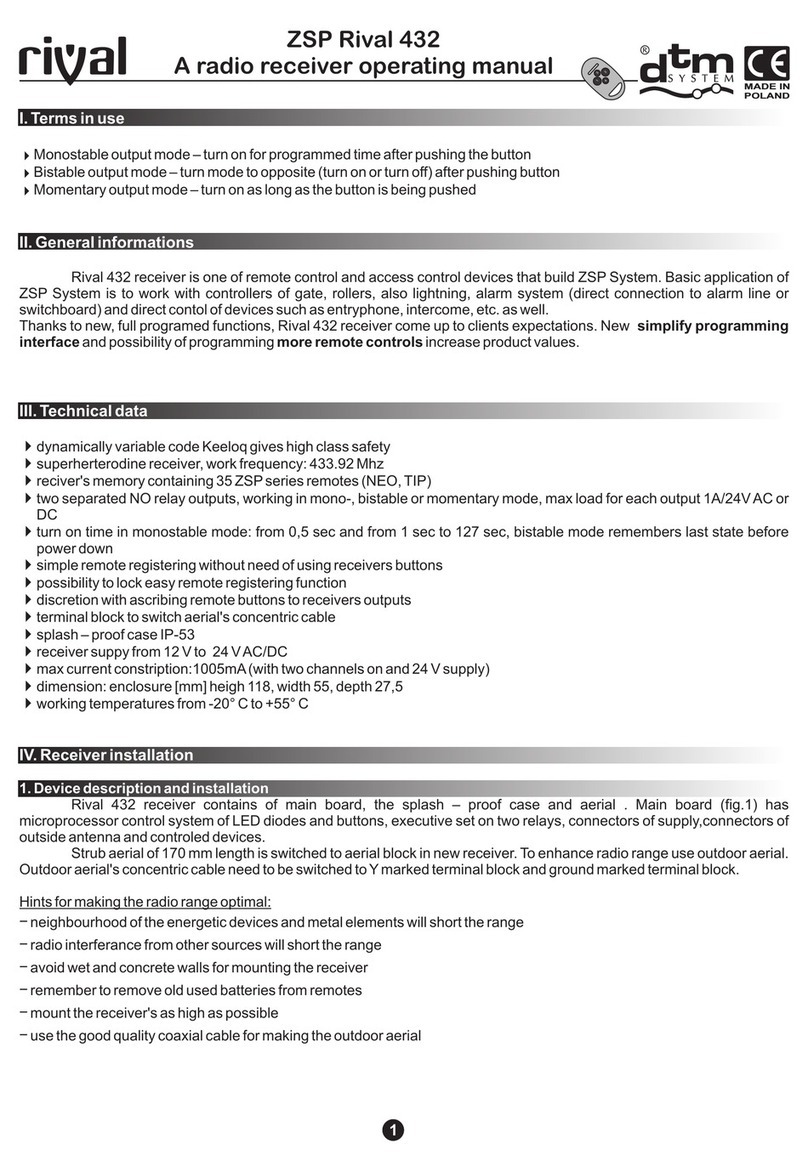
DTM System ZSP Rival 432 User manual

DTM System

DTM System ZSP Rival 432 User manual

DTM System Rival 431 User manual

DTM System

DTM System Rival 431 User manual

DTM System PIKO User manual

DTM System

DTM System PIKO User manual

DTM System NANO II Series User manual

DTM System

DTM System NANO II Series User manual

DTM System MAX BT User instructions

DTM System

DTM System MAX BT User instructions

DTM System cloud FLEX Manual

DTM System

DTM System cloud FLEX Manual

DTM System mini User instructions

DTM System

DTM System mini User instructions

DTM System MAX II User manual

DTM System

DTM System MAX II User manual

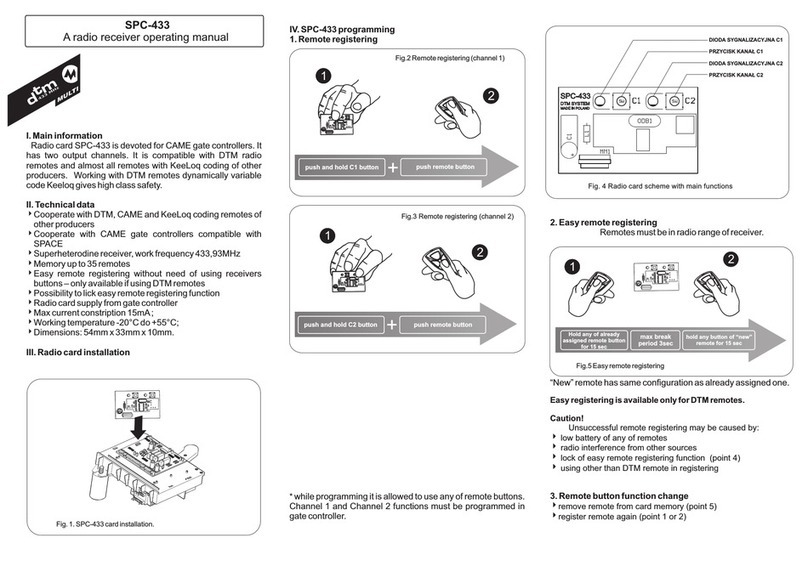
DTM System SPC-433 User manual

DTM System

DTM System SPC-433 User manual

DTM System S-FIX User manual

DTM System

DTM System S-FIX User manual

DTM System UVR-2 User manual

DTM System

DTM System UVR-2 User manual

DTM System PERFECT SOS User manual

DTM System

DTM System PERFECT SOS User manual

Popular Receiver manuals by other brands

Hammarlund HQ-110 Service manual

Hammarlund

Hammarlund HQ-110 Service manual

Audio Resource Group TX72 Bodypack transmitter Manual & user guide

Audio Resource Group

Audio Resource Group TX72 Bodypack transmitter Manual & user guide

Miccus Home RTX user manual

Miccus

Miccus Home RTX user manual

Audio enhancement K-SRC14 manual

Audio enhancement

Audio enhancement K-SRC14 manual

NAD T 758 owner's manual

NAD

NAD T 758 owner's manual

Toa WT-2100 operating instructions

Toa

Toa WT-2100 operating instructions

Grundig DTR 1760 MICRO user manual

Grundig

Grundig DTR 1760 MICRO user manual

Fortec Star FS-4500 user guide

Fortec Star

Fortec Star FS-4500 user guide

Strong SRT 6500 user manual

Strong

Strong SRT 6500 user manual

Aiphone TD-H Series Installation & operation manual

Aiphone

Aiphone TD-H Series Installation & operation manual

Denon AVR-1912 owner's manual

Denon

Denon AVR-1912 owner's manual

Teufel IP 3000 BR Mk 2 Technical description and operating instructions

Teufel

Teufel IP 3000 BR Mk 2 Technical description and operating instructions

steute RF GFSI SW868 Mounting and wiring instructions

steute

steute RF GFSI SW868 Mounting and wiring instructions

Stratus 1S pilot's guide

Stratus

Stratus 1S pilot's guide

Carrier TSTATCCREC01 installation instructions

Carrier

Carrier TSTATCCREC01 installation instructions

Strong SRT 5004 user manual

Strong

Strong SRT 5004 user manual

TechniSat DigiPal1 operating manual

TechniSat

TechniSat DigiPal1 operating manual

i3-TECHNOLOGIES i3SYNC USB-C TX user manual

i3-TECHNOLOGIES

i3-TECHNOLOGIES i3SYNC USB-C TX user manual

manuals.online logo
manuals.online logoBrands
  • About & Mission
  • Contact us
  • Privacy Policy
  • Terms and Conditions

Copyright 2025 Manuals.Online. All Rights Reserved.