OPERATING INSTRUCTIONS
MAINTENANCE/CLEANING
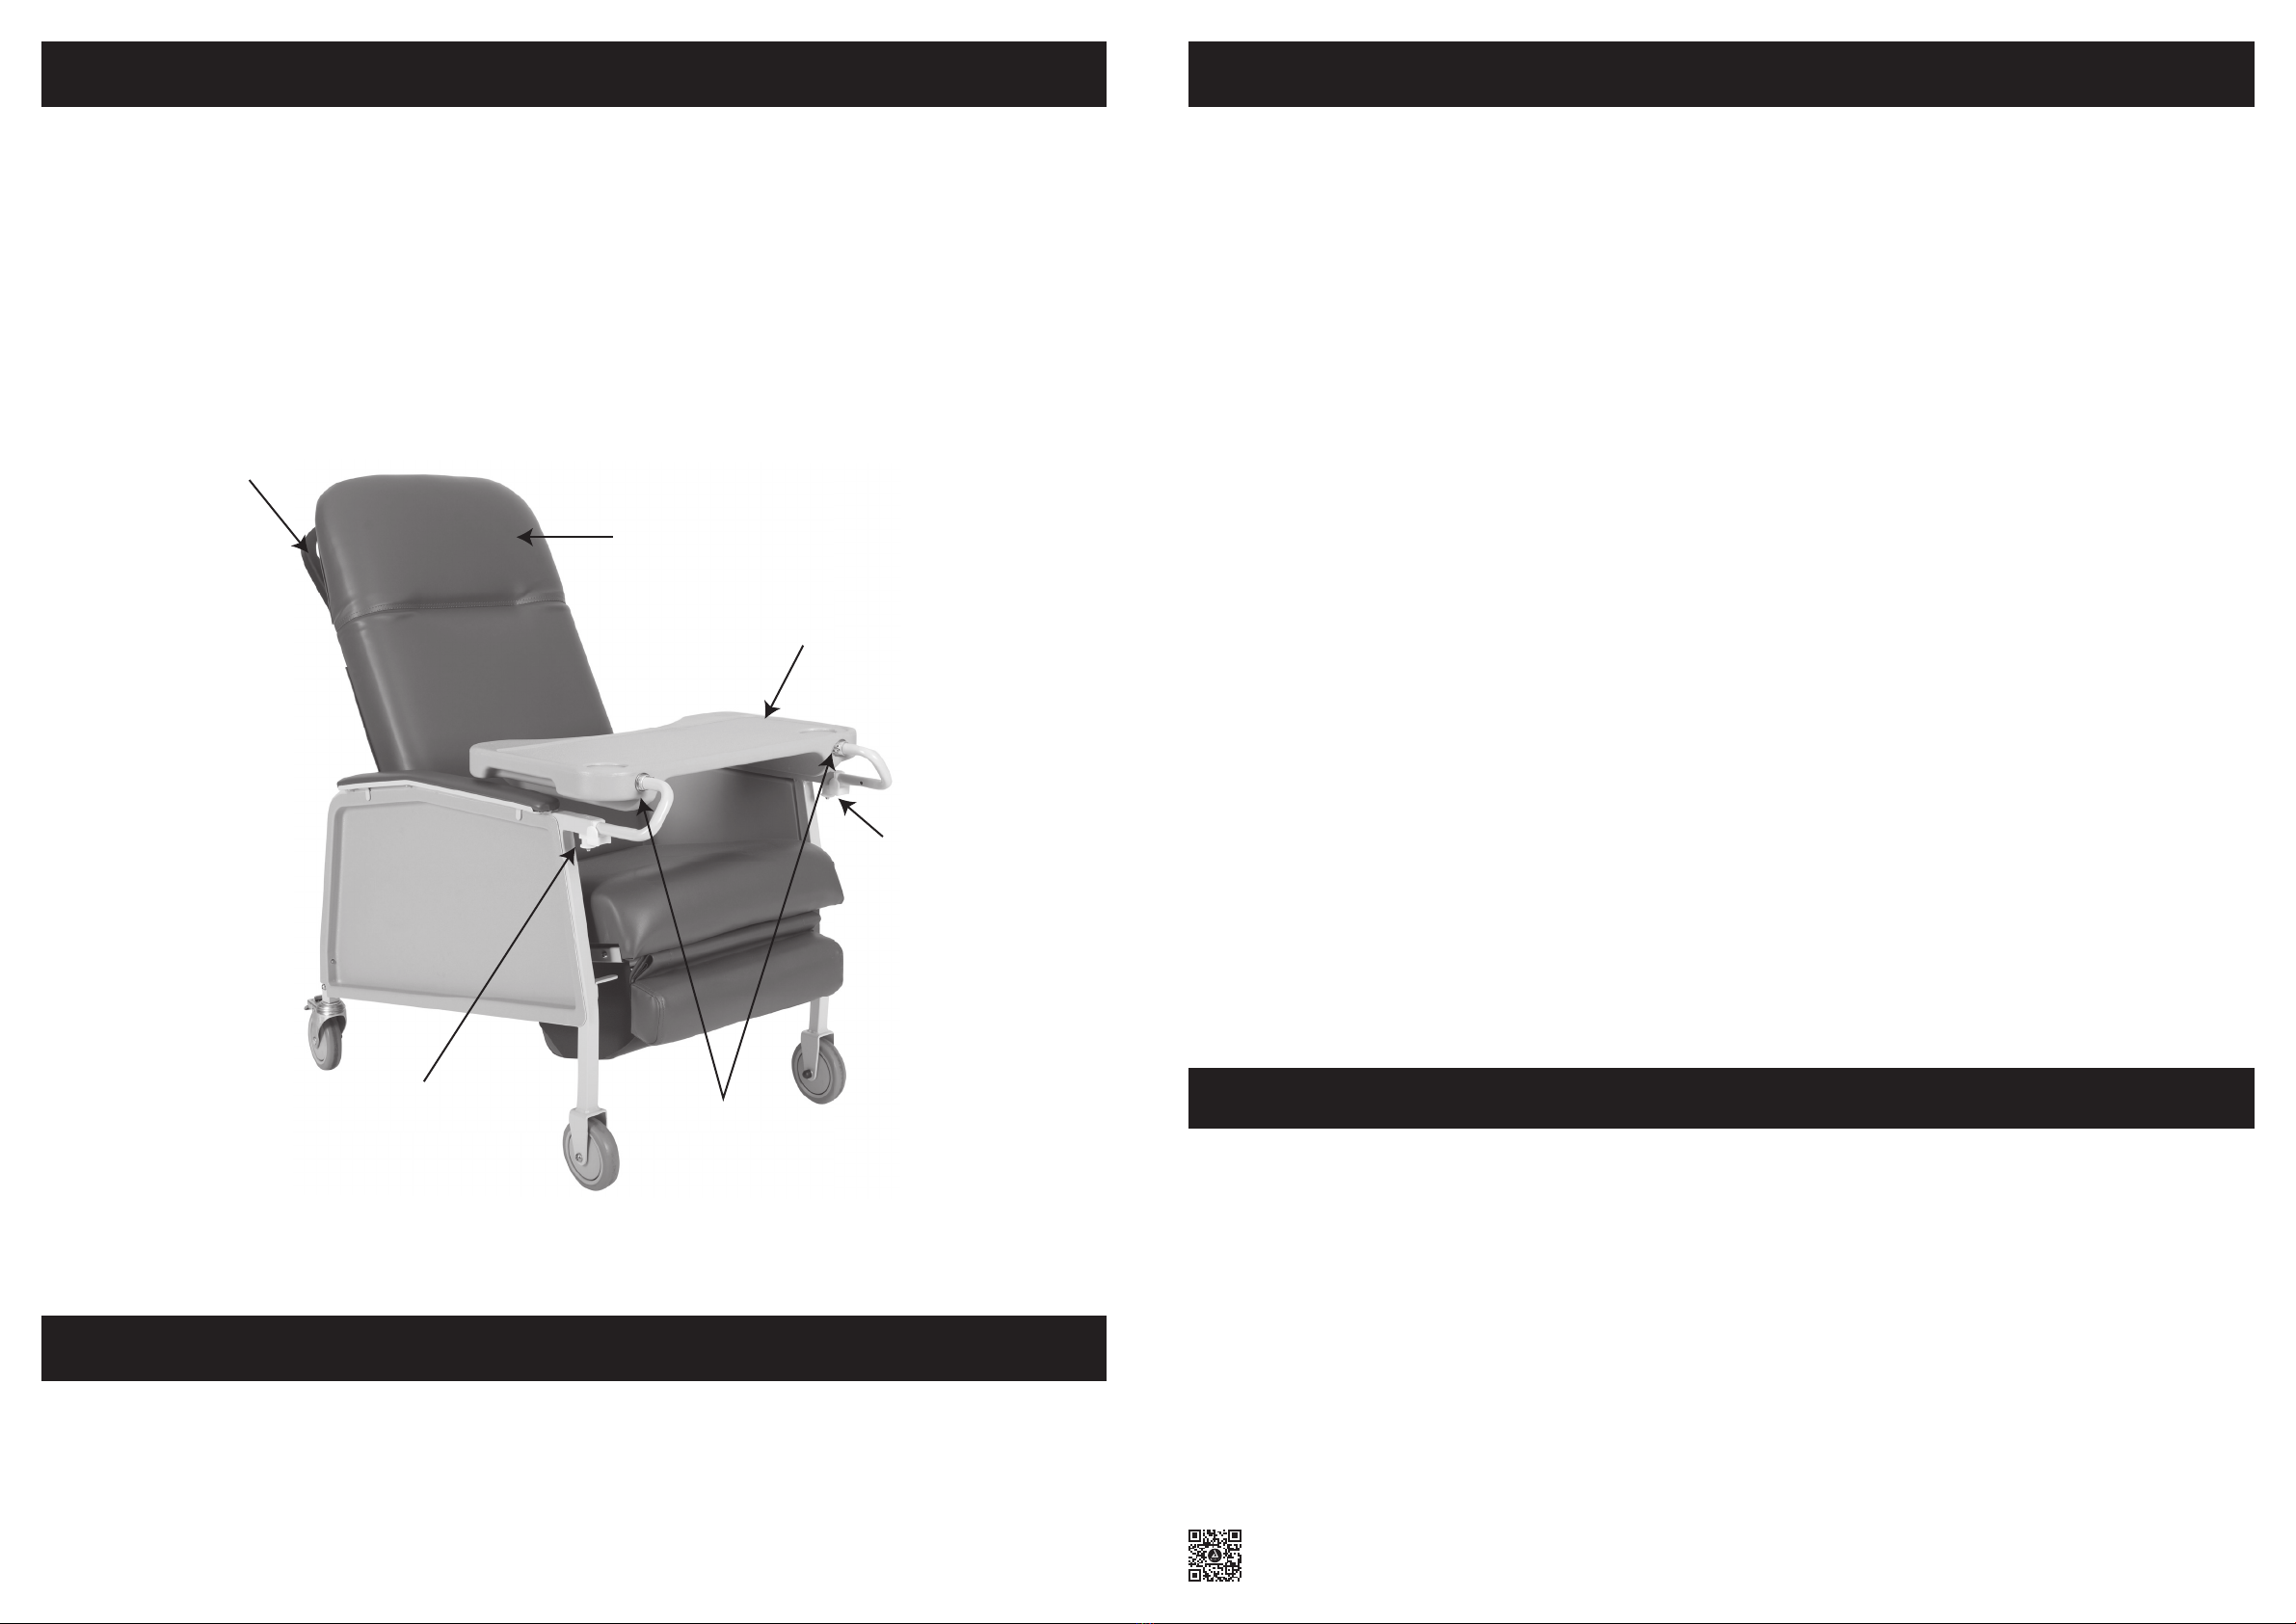
Articulating headrest may be adjusted to desired position by
pulling forward or pushing back.
Operating Instructions for Blow Molded Table:
1. Underneath each arm, pull down and hold pull button and
slide lock out keys forward on both sides.
2. Pick up table by circular table arm and slide into receiving
tubes in front of each arm.
3. Table can slide on and off by keeping lock out key forward.
4. Table can be locked into one of five positions. Pull down
the pull button. Hold the pull button and slide the key
backwards. Proceed to the other arm and move that key
backwards. Table will now be locked.
Storage:
The blow molded table stores in the small round tube
underneath the left armrest, leaving the tabletop facing out.
Every Three Months:
• Check and clean casters.
• Tighten nuts.
• Check brakes on casters.
• Check and clean lock recline mechanism.
SYMBOL GLOSSARY
For an explanation of symbols
used in Dynarex packaging, visit
dynarex.com/symbols.php R200701
WARRANTY
Your Dynarex Geri Chair Recliner is warrantied to be free of
defects in materials and workmanship for a limited lifetime on the
frame, and One (1) year on upholstery and all moving parts, from
original date of purchase, for use by the original purchaser. This
item was built to exacting standards and carefully inspected prior
to shipment. This Warranty is an expression of our confidence in
the materials and workmanship of our products and our assurance
to the consumer of dependable service.
The Warranty shall not apply under the following conditions:
problems arising from normal wear; problems arising from failure
to adhere to the product instructions; problems arising from
misuse, negligence, accident or improper operation, maintenance
or storage; problems arising from modifications or unauthorized
repairs, parts or attachments; products where the serial number
has been removed or defaced; problems with non-durable
components, such as rubber accessories, casters, and grips,
which are subject to normal wear and need periodic replacement.
Dynarex shall not be liable for any consequential or incidental
damages whatsoever. Dynarex shall repair or replace defective
products at its option. The foregoing warranty is exclusive and in
lieu of other express warranties, if any, including the implied
warranties of merchantability and fitness of a particular purpose.
The remedy for any violation of the implied warranty shall be
limited to repair or replacement of the defective product pursuant
to the terms contained herein.
If you have a question about your Dynarex device or this warranty,
please contact an authorized Dynarex dealer.
Articulating
Headrest
Table
Left Pull
Button
Lock Out
Keys
PVC Push
Handle
Right Pull
Button
Figure 2
WARNING/CAUTION
• DO NOT use this product or any available optional
equipment without first completely reading and
understanding these instructions and any additional
instructional material such as owner’s manuals, service
manuals or instruction sheets supplied with this product
or optional equipment. If you are unable to understand the
warnings, cautions or instructions, contact a healthcare
professional, dealer or technical personnel before
attempting to use this equipment otherwise, injury or
damage may occur.
• ALWAYS keep hands and fingers clear of moving parts
to avoid injury.
• DO NOT use near an open flame or heat source, as all
upholstery materials, even though treated with flame
retardant, can ignite when exposed to open flame.
• Rear caster wheels MUST be locked during user transfer to
or from recliner and while tilting and/or reclining or inclining
(sitting up).
• Ensure that casters are free of debris.
• DO NOT enter or exit the recliner when footrest is elevated.
• DO NOT sit on the footrest when recliner is extended. The
recliner will tip and bodily injury may occur.
• DO NOT push or pull footrest to position the recliner.
• DO NOT place hands or feet into any openings when
adjusting the recliner. Attendant or care provider should
always verify placement of user’s hands and feet prior to
adjusting the recliner. Failure to do so may result in serious
bodily injury.
• Operation of recliner with missing or broken footrest or
recline mechanism guards may result in bodily injury.
Periodic inspection of the footrest guard and recline
mechanism guard MUST be made four times a year. Torn,
cracked or otherwise damaged guards MUST be replaced
prior to use. Recliner MUST be removed from service until
replacement guards are installed.
• DO NOT lift the recliner by the footrest. Lifting by means of
the footrest may result in injury to the user and/or damage
to the recliner.
• DO NOT attempt to stop the recliner with the wheel locks,
while in motion. Wheel locks are not brakes.
• Before attempting to transfer in or out of the recliner, every
precaution should be taken to reduce the gap distance.
Turn the recliner toward the object you are transferring
onto. When transferring to and from the recliner, ALWAYS
engage both wheel locks. Special care MUST BE taken
with people that have physical limitations which may
require an assistant.
• DO NOT traverse, climb or go down ramps or slopes
greater than 9°.
• Test the recline feature of the recliner first without an
occupant to ensure the locking lever and pins are opera-
tional. DO NOT operate the recliner if the locking lever or
pins are not operational.
• ALWAYS make sure that the recliner is stable before using
the recline option. Make sure the patient is properly
positioned in the recliner before reclining or inclining to
maintain maximum stability and safety.
• Excessive force or effort is never necessary to change the
seating position of the chair. Do not operate recliner by
applying force or pressure to leg rest.
• When returning the occupant of the recliner to the full
upright position, more body strength will be required for
approximately the last twenty degrees of incline (sitting up).
Make sure to use proper body mechanics (use your legs)
or seek assistance to avoid injury.
• Physical limitations of a user and larger occupants of the
recliner can present conditions that can injure the assistant.
When in doubt, assure that additional assistants are
present before operating the recline feature.
• Check all parts for shipping damage. In case of
damage, DO NOT use. Contact Carrier/Dealer for
further instructions.


