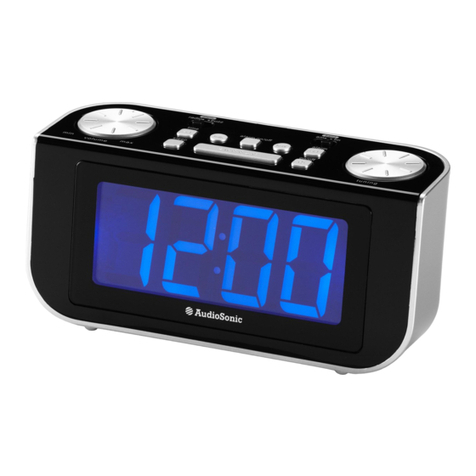
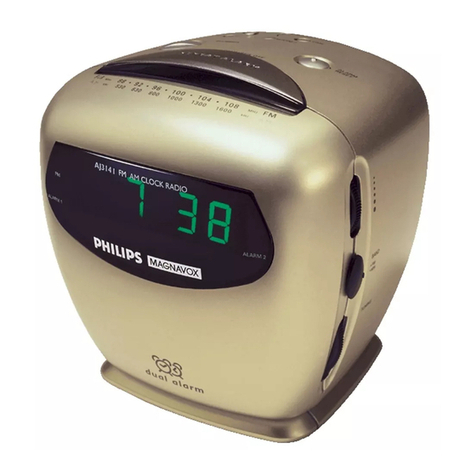
E-Bench KH 2237 User manual

KH 2236 KH 2237
KH 2238 KH 2239
CLOCK RADIO
CLOCK RADIO
Operating instructions
KELLORADIO
Käyttöohje
CLOCKRADIO
Betjeningsvejledning
KLOKKERADIO
Bruksanvisning
ΡA∆IOΦΩNO-ΞYΠHTHPI
Οδηγίες χρήσης
RADIOWECKER
Bedienungsanleitung
KLOCKRADIO
Bruksanvisning
3
KOMPERNASS GMBH · BURGSTRASSE 21 · D-44867 BOCHUM
www.kompernass.com
ID-Nr.: KH2236-39 - 09/07-V1
CV_KH2236_39_V6450_LB3 29.10.2007 10:28 Uhr Seite 1

KH 2239
KH 2238
KH 2236
KH 2237
CV_KH2236_39_V6450_LB3 29.10.2007 10:28 Uhr Seite 7

LIST OF CONTENTS PAGE
Intended Use 2
Technical data 2
Items supplied 2
Safety instructions 2
Operating Elements 5
Commissioning 5
Inserting the batteries 5
Setting the clock 6
Radio Reception 6
Adjusting Alarm-Timings 7
Switching the Alarm ON 7
Switching the Alarm OFF 8
Sleep Timer 8
Adjust display brightness (Nightlight-Function) 9
Cleaning and Care 9
Disposal 9
Importer 10
Warranty & Service 10
Read these operating instructions carefully before using the appliance for the first time and preserve
this manual for later reference. Pass this manual on to whoever might acquire the appliance
at a future date.
- 1 -
IB_KH2236-39_GB_LB3 15.10.2007 18:50 Uhr Seite 1

- 2 -
RADIO ALARM
KH 2236/KH 2237/
KH 2238/KH 2239
Intended Use
The intended uses for this appliance are
the reception of FM/AM radio transmis-
sions and as a wake-up alarm, using signal
tones or the radio itself. This appliance is
intended for use only in domestic settings.
It is not suitable for use in commercial or
industrial areas.
Technical data
Mains voltage: 230–240V/50Hz
Back-up power: 9V block battery
Type 6 LR61
(Not supplied )
Power consumption: 5 W
Frequency ranges:
AM (MW): 540–1600 KHz
FM (USW): 88–108 MHz
Alarm functions: Radio, alarm signal
Operating
temperature range: +5°... +40° C
Humidity: 5 ~90 %
(no condensation)
Dimensions (L x D x H):
KH 2236 183 x 138 x 62mm
KH 2237 182 x 140 x 55 mm
KH 2238 134 x 151 x 77 mm
KH 2239 183 x 141 x 67 mm
Weight:
KH 2236 ca. 530 g
KH 2237 ca. 530 g
KH 2238 ca. 570 g
KH 2239 ca. 530 g
Items supplied
Radio Alarm
Operating Instructions
Safety instructions
• This appliance is not suitable for children
or for those whose physical, sensorial
or intellectual faculties prevent the safe
usage of the appliance without sup-
port or supervision. Children should
be watched-over to ensure that they
do not play with the appliance.
• Check the appliance and all parts for
visible damage. The safety concept
can work only if the appliance is in a
faultless condition.
IB_KH2236-39_GB_LB3 15.10.2007 18:50 Uhr Seite 2

- 3 -
To avoid life-threatening
electric shocks:
• Connect the appliance only to
correctly installed and properly
earthed power sockets. Ensure that the
rating of the local power supply tallies
completely with the details given on
the rating plate of the appliance.
• Make sure that the power cable
never becomes wet or damp during
operation. Lay the cable such that it
does not get clamped or otherwise
damaged.
• Arrange for defective power plugs
and/or cables to be replaced at
once by qualified technicians or our
Customer Service Department.
• Arrange for customer service to
repair or replace connecting cables
and/or appliances that are not
functioning properly or have been
damaged.
• Only use the appliance in dry rooms.
NEVER submerse the appliance in
water. Wipe it only with a slightly
damp cloth.
• Make sure that fluids or any other
objects do not get inside the device.
• Do not place water-filled receptacles
(e. g. flower vases) on the appliance.
• Position the appliance close to an
electrical wallsocket. Make sure that
the wall socket is easily accessible.
• To avoid the risks of tripping, do not
use an extension cable. In the event
of danger, the plug must be quickly
and easily accessible.
• You may not open the housing or repair
the appliance yourself. Should you
do so, appliance safety can no
longer be assured and the warranty
will become void. Repairs are to be
carried out exclusively by a specialist
firm or the service centre.
Notice regarding power
disconnection
• The slider switch (ON/OFF/AUTO)
on this appliance does not complete-
ly separate it from the power net-
work. Additionally, the appliance
consumes electricity when in standby
modus. To completely separate the
appliance from the power network
the plug must be removed from the
wall socket.
IB_KH2236-39_GB_LB3 15.10.2007 18:50 Uhr Seite 3

- 4 -
Explosion hazard!
• Do not throw batteries into a fire.
Do not recharge the batteries.
To avoid the risks of fire
or injury:
• Do not place candles or other open
fire sources on the appliance.
• Do not use the appliance in the
vicinity of hot surfaces.
• Do not keep the appliance in places
exposed to direct sunlight. Otherwise,
it may overheat and become irreparably
damaged.
• Place the appliance in a location with
adequate ventilation to prevent heat
build up.
• Never cover the ventilation openings!
• Avoid any additional heat build up, e.g.
direct sunlight, heaters, other devices, etc.
• Keep children away from the connec-
ting cable and the appliance.
Children frequently underestimate the
danger from electrical appliances.
• Ensure that the appliance stands with
a safe and secure positioning.
• Do not operate the appliance if it has
sustained a fall or is damaged. Arrange
for the appliance to be checked and/or
repaired by qualified technicians.
• Keep batteries away from children.
Children can put batteries into their
mouths and swallow them.
Thunderstorms!
In the event of a thunderstorm with
risk of lightning, please disconnect the
appliance from the power network!
Electro-magnetic fields
This appliance lies within the legal limits
for electromagnetic compatibility! If you
still have any doubts regarding its use in
bedrooms:
• It is completely safe to install the
clock at a distance of half a meter
away from the bed. From this
distance the fields are not present,
even for electro-sensitive people.
Note:
Check the battery for power-cut
protection annually, and replace it
if necessary.
Note:
This appliance is equipped with non-
slip rubber feet. As furniture surfaces
may be made of a variety of materials
and are treated with many different
types of cleaning agents, it cannot
be completely ruled out that some sub-
stances contain ingredients which may
corrode the rubber rests and soften
them. If possible place an anti-slip ma-
terial under the feet of the appliance.
IB_KH2236-39_GB_LB3 15.10.2007 18:50 Uhr Seite 4

- 5 -
Operating Elements
qButton HOUR
wButton MIN
eButton ALARM
rButton TIME
tSLEEP Button
yFrequency scale
uButton SNOOZE
iDisplay
oSlider switch (ON/OFF/AUTO)
aBattery compartment
sTUNING knob
dVolume controller VOLUME/BUZZ
fWave band selector (AM/FM)
gSlider switch for display brightness
(HI/MED/LOW)
hWire aerial
jPower cable
kButton ALARM OFF
(Only Model KH 2238)
Commissioning
Placing
• Take the radio alarm and all
ancillaries out of the packaging.
• Remove all transport restraints and
adhesive tape/films.
Important!
Do not permit small children to play
with plastic packaging. There is a risk
of suffocation!
• Position the radio alarm on a level
and horizontal surface.
Inserting the batteries
Power-cut protection
With the insertion of a 9 V block battery
(Typ 6LR61) you can avoid that the functi-
oning of the appliance is interrupted and
programmed data, for example time and
alarm times, are lost through a power cut.
The battery ensures that the appliance
continues to function in emergency opera-
tion during the power cut. When power is
restored, the correct time automatically
appears on the display i.
Note:
The alarm, radio and display do not
function with battery-power alone.
• Open the battery compartment aon
the underside and insert a 9 V block
battery (Type 6LR61).
IB_KH2236-39_GB_LB3 15.10.2007 18:50 Uhr Seite 5

- 6 -
Interaction with batteries
Leaking batteries can cause damage to
the radio alarm.
• If you do not intend to use the appli-
ance for an extended period, remove
the batteries.
• Should the batteries leak, clean the
battery compartment with a dry cloth
whilst wearing protective gloves.
Note:
Rechargable batteries cannot be
charged via the battery connection.
In the event of an extended power
cut (several hours), the clock and
alarm times must be checked and
possibly re-adjusted.
Assembly
Before operating the device, make sure
that it is in a faultfree condition. Do not use
it if it is not.
• Then insert the plug into the wall
power socket. Select a wall power
socket that is at all times easily
accessible so that the plug can be
easily withdrawn in the event of
a malfunction.
Setting the clock
If you are setting up the appliance for the
first time after inserting a new battery:
• Whilst holding the button TIME r
pressed down:
• Press several times in succession, or
simply press and hold the button
HOUR q, to adjust the hour setting.
• Release the button HOUR q, as soon
as the desired hour setting appears in
the display i.
• Press several times in succession,
or simply press and hold the button
MIN w, to adjust the minute setting.
• Release the button MIN was soon
as the desired minute setting appears
in the display i.
The adjusted time will be automatically
accepted as soon as the button TIME r
is released.
Radio Reception
• Push the slider switch ointo the
position ON.
• Turn the volume controller
VOLUME dto a medium position.
IB_KH2236-39_GB_LB3 15.10.2007 18:50 Uhr Seite 6

- 7 -
• Select the radio wavelength by me-
ans of the AM/FM wave band selec-
tor f.
• Now select the desired transmitter
through turning the tuning knob s.
Note:
To improve the reception of transmit-
ters in the FM range slowly move the
end of the wire aerial in various direc-
tions. When you have found the best
reception for the desired transmitter,
fix the wire aerial into this position
e.g. with adhesive tape. For the re-
ception of AM transmitters, an aerial
is built into the appliance. For impro-
ved reception, alter the position of the
appliance in radio mode.
Adjusting Alarm-Timings
If the clock is set correctly, as described
above:
Whilst pressing and holding down the
button ALARM e:
• Press several times in succession,
or simply press and hold the button
HOUR q, to adjust the hour setting.
• Release the button HOUR q, as soon
as the desired hour setting appears in
the display i.
• Press several times in succession, or
simply press and hold the button
MIN w, to adjust the minute setting.
• Release the button MIN was soon
as the desired minute setting appears
in the display i.
The adjusted time will be automatically
accepted as soon as the button ALARM e
is released.
Switching the Alarm ON
If the clock and alarm time are set
correctly, as described above:
• Push the slider switch ointo the posi-
tion AUTO. The alarm is now switched
on. For control purposes, a point
appears to the left in the display i.
You will be woken by the radio if...
• the volume controller VOLUME dis
set to a level high enough to awaken
you.
You will be woken by the signal tone if...
• the volume controller VOLUME dis
turned down so far that it switches off
with an audible click, i. e. it is in the
position BUZZ.
IB_KH2236-39_GB_LB3 15.10.2007 18:50 Uhr Seite 7

- 8 -
Switching the Alarm OFF
• Press the button SNOOZE uand the
alarm tone will be repeated after 9
minutes. (With the Models KH 2237
and KH 2239, the button SNOOZE
umust only be touched to interrupt
the alarm tone).
• Move the slider switch oto the posi-
tion OFF to fully deactivate the alarm
function.
• Place the push switch oback into the
position AUTO to activate the alarm
function for the next day.
Only model KH 2238
• Press the button ALARM OFF kto
switch the alarm function off for
24 hours.
Sleep Timer
If you want to listen to the radio for
some time before going to sleep and
want the device to switch itself off:
• Place the slider switch ointo the
position OFF or AUTO.
• Press the button SLEEP t. The radio
will now play for 59 minutes.
You can extend the time up to
switching off by ...
• pressing and holding down the button
SLEEP tand, at the same time by
using the button HOUR q, extend
the switching off time to 1 hour and
59 minutes.
You can reduce the time to switching
off by ...
• pressing and holding down the button
SLEEP tand, at the same time by
using the button MIN w, adjust the
remaining period.
• By pressing the button SNOOZE u
the Sleep-Timer is deactivated.
• On re-pressing the button SLEEP t,
the switch-off time will revert to
59 minutes.
IB_KH2236-39_GB_LB3 15.10.2007 18:50 Uhr Seite 8

- 9 -
Adjust display brightness
(Nightlight-Function)
The brightness of the display ican be set
to 3 levels.
• Place the sliding switch ointo the
position HI, MED or LOW to adjust the
desired brightness of the display i.
Cleaning and Care
Important!
Danger of electric shock!
Before cleaning the appliance:
• Disconnect the power plug from
the power socket.
• Never open the casing of the
device. There are no operating
elements inside.
• Only clean the applicance with
a lightly moistened cloth.
• Do not use detergents or solvents.
They can damage the plastic
surfaces.
Disposal
Disposing of the appliance
Do not dispose of the appliance
in your normal domestic waste.
Dispose of the appliance through an ap-
proved disposal centre or at your commu-
nity waste facility. Observe the currently
applicable regulations. In case of doubt,
please contact your waste disposal centre.
Battery disposal
First of all remove the battery
before you dispose of the appli-
ance. Old batteries should not
be disposed of with the household waste.
Return old batteries to your dealer, or take
them to the nearest recycling point.
Disposal of packaging
Dispose of the packaging
materials in an environmentally
responsible manner.
IB_KH2236-39_GB_LB3 15.10.2007 18:50 Uhr Seite 9

- 10 -
Importer
KOMPERNASS GMBH
BURGSTRASSE 21
D-44867 BOCHUM
www.kompernass.com
Warranty & Service
This appliance is guaranteed for 3 years
from the date of purchase. It has been
carefully produced and meticulously
checked before delivery. Please keep
your receipt as proof of purchase. Contact
your service centre by telephone in case
of questions pertaining to the warranty.
Your goods can be transmitted free of cost
only in this manner.
The warranty covers only material or
manufacturing faults, not normal wear or
damage to fragile parts such as switches
or rechargeable batteries.
The appliance is intended solely for private,
not commercial, use. If this product has
been subjected to improper or inappro-
priate handling, abuse, or interventions not
carried out by one of our authorised sales
and service outlets, the warranty will be
considered void. This warranty does not
affect your statutory rights.
DES Ltd
Units 14–15
Bilston Industrial Estate
Oxford Street
Bilston
WV14 7EG
Tel.: 0870 787 6177
Fax: 0870 787 6168
e-mail: support.uk@kompernass.com
Kompernass Service Ireland
c/o Irish Connection
41 Harbour view
Howth Co. Dublin
Tel: 087-99 62 077
Fax: 18398056
e-mail: support.ie@kompernass.com
IB_KH2236-39_GB_LB3 15.10.2007 18:50 Uhr Seite 10

SISÄLLYSLUETTELO SIVU
Käyttötarkoitus 12
Tekniset tiedot 12
Toimituslaajuus 12
Turvaohjeet 12
Käyttöelementit 15
Käyttöönotto 15
Paristojen asettaminen 15
Kellonajan asettaminen 16
Radiovastaanotto 16
Herätysajan asettaminen 17
Herätyksen kytkeminen päälle 17
Herätyksen katkaiseminen 18
Nukahtamisajastin 18
Näytön kirkkauden säätäminen (Nightlight-toiminto) 19
Puhdistus ja hoito 19
Hävittäminen 19
Maahantuoja 20
Takuu & huolto 20
Lue käyttöohje huolellisesti ennen ensimmäistä käyttöä ja säilytä se myöhempää käyttöä varten.
Jos myyt laitteen, anna ohje myös seuraavalle omistajalle.
- 11 -
IB_KH2236-39_FI_LB3 15.10.2007 18:53 Uhr Seite 11

- 12 -
RADIO-
HERÄTYSKELLO
KH 2236/KH 2237/
KH 2238/KH 2239
Käyttötarkoitus
Tämä laite on tarkoitettu FM/AM-radio-
asemien vastaanottoon sekä herättämi-
seen merkkiäänen tai radion avulla.
Tämä laite on tarkoitettu ainoastaan
kotikäyttöön. Sitä ei ole tarkoitettu käytettä-
väksi kaupallisilla tai teollisilla alueilla.
Tekniset tiedot
Verkkojännite: 230–240 V / 50 Hz
Kellonaikamuisti: 9 V neppariparisto
tyyppiä 6 LR61 (ei
sisälly toimitukseen)
Tehontarve: 5W
Taajuusalueet:
AM (KA): 540–1600 kHz
FM (ULA): 88–108 MHz
Herätystoiminnot: radio, merkkiääni
Käyttölämpötila-alue:+5°... +40° C
Kosteus: 5 ~90 %
(ei kondensaatiota)
Mitat (P x L x K):
KH 2236 183 x 138 x 62mm
KH 2237 182 x 140 x 55 mm
KH 2238 134 x 151 x 77 mm
KH 2239 183 x 141 x 67 mm
Paino:
KH 2236 n. 530 g
KH 2237 n. 530 g
KH 2238 n. 570 g
KH 2239 n. 530 g
Toimituslaajuus
Radioherätyskello
Käyttöohje
Turvaohjeet
• Tätä laitetta ei ole tarkoitettu lasten
tai muiden henkilöiden käytettäväksi,
jos heidän fyysiset, aistilliset tai henki-
set kykynsä estävät heitä käyttämästä
laitetta turvallisesti ilman apua tai
valvontaa. Lapsia on valvottava ja
on varmistettava, etteivät he leiki
laitteella.
• Tarkista laite ja kaikki osat näkyvien
vaurioiden varalta. Laitteen turvallisuus-
järjestelmä toimii vain, kun laite on vir-
heettömässä kunnossa.
IB_KH2236-39_FI_LB3 15.10.2007 18:53 Uhr Seite 12

- 13 -
Hengenvaarallisen
sähköiskun välttämiseksi:
• Liitä laite ainoastaan määräysten mu-
kaisesti asennettuun ja maadoitettuun
pistorasiaan. Verkkojännitteen on vas-
tattava laitteen tyyppikilven tietoja.
• Pidä huolta siitä, ettei virtajohto kastu
konetta käytettäessä. Vedä virtajohto
siten, ettei se tartu, puristu tai vaurioidu
muulla tavalla.
• Anna vaurioitunut verkkopistoke tai
virtajohto heti valtuutetun ammattihen-
kilöstön tai huoltopalvelun vaihdetta-
vaksi vaarojen välttämiseksi.
• Anna huoltopalvelun korjata tai vaihtaa
välittömästi kaikki liitäntäjohdot tai lait-
teet, jotka eivät toimi moitteettomasti tai
ovat vaurioituneet.
• Käytä laitetta vain kuivissa tiloissa.
Älä koskaan kasta laitetta
veteen. Pyyhi laite ainoastaan
kevyesti kosteutetulla liinalla.
• Pidä huoli siitä, ettei laitteeseen
koskaan pääse nesteitä eikä
vieraita esineitä.
• Älä aseta mitään vedellä täytettyä
säiliötä (esim. kukkamaljakkoa)
laitteen päälle.
• Aseta laite verkkopistorasian lähei-
syyteen. Varmista, että verkkopistora-
sia on helposti käden ulottuvilla.
• Älä käytä jatkojohtoja kompastukset
välttääksesi. Vaaratilanteessa tulee
verkkopistokkeen olla nopeasti käsillä.
• Älä koskaan itse avaa laitteen koteloa
tai yritä korjata sitä. Jos laitteen kotelo
avataan itse, turvallisuus ei ole taattu
ja takuu raukeaa. Korjauksia saa suo-
rittaa ainoastaan ammattitaitoinen
alan liike tai huoltoliike.
Ohje verkosta irrottamiseen
• Tämän laitteen työntökytkin
(ON/OFF/AUTO) ei erota laitetta
täysin sähköverkosta. Lisäksi laite
ottaa virtaa valmius-tilassa. Irrota
laite verkosta kokonaan vetämällä
verkkopistoke verkkopistorasiasta.
Räjähdysvaara!
• Älä heitä paristoja tuleen. Älä lataa
paristoja uudelleen.
IB_KH2236-39_FI_LB3 15.10.2007 18:53 Uhr Seite 13

- 14 -
Palo- ja loukkaantumis-
vaarojen välttämiseksi:
• Älä aseta kynttilöitä tai muita
avotulen lähteitä laitteen päälle.
• Älä aseta laitetta lämmönlähteiden
lähelle.
• Älä sijoita laitetta paikkaan, jossa se
altistuu suoralle auringonvalolle.
Muutoin laite saattaa ylikuumentua
ja vaurioitua käyttökelvottomaksi.
• Aseta laite niin, ettei sen ympäristö
ylikuumene, ts. hyvin tuuletettuun
paikkaan, jossa sen ympärillä on
vapaata tilaa.
• Älä koskaan peitä ilmanottoaukkoja!
• Älä altista laitetta ylimääräiselle
lämmölle, esim. suoralle auringon-
säteilylle, lämmittimille tai muille
laitteille.
• Pidä liitäntäjohto ja laite poissa lasten
ulottuvilta. Lapset aliarvioivat usein
sähkölaitteiden vaaran.
• Huolehti siitä, että laite on turvallisessa
kunnossa.
• Jos laite putoaa tai vahingoittuu, sitä
ei saa ottaa käyttöön. Jätä laite päte-
vän ammattihenkilön tarkastettavaksi
ja tarvittaessa korjattavaksi.
• Paristoja ei saa jättää lasten käsiin.
Lapset saattavat pistää paristot
suuhunsa ja niellä ne.
Ukkosvaroitus!
Irrota laite sähköverkosta ennen
myrskyä ja/tai ukkosta ja salamani-
skun vaaraa!
Sähkömagneettiset kentät
Tämä laite noudattaa sähkömagneettisen
yhteensopivuuden lakisääteisiä raja-arvo-
ja! Jos silti arveluttaa asettaa laitetta
makuu-huoneeseen:
• Voit halutessasi varmuuden vuoksi pitää
noin puolen metrin turvavälin laitteen
ja vuoteen välillä. Viimeistään tällä
etäisyydellä kenttä on sähkölle herk-
kienkin ihmisten kannalta olematon.
Huomaa:
Tarkasta virtakatkossuojan paristo
kerran vuodessa ja vaihda se
tarvittaessa uuteen.
Huomaa:
Tämä laite on varustettu liukumatto-
milla kumijaloilla. Koska huonekalujen
pinnat koostuvat erilaisista materiaalei-
sta ja niitä hoidetaan erilaisilla aineilla,
on mahdollista, että jotkut näistä mate-
riaaleista sisältävät ainesosia, jotka
vaurioittavat kumijalkoja ja pehmentä-
vät niitä. Aseta tarvittaessa laitteen
jalkojen alle liukumaton alusta.
IB_KH2236-39_FI_LB3 15.10.2007 18:53 Uhr Seite 14

- 15 -
Käyttöelementit
qHOUR-painike
wMIN-painike
eALARM-painike
rTIME-painike
tSLEEP-painike
yTaajuusasteikko
uSNOOZE-painike
iNäyttö
oTyöntökytkin (ON/OFF/AUTO)
aParistokotelo
sTUNING-säädin
dÄänenvoimakkuuden säädin
VOLUME/BUZZ
fTaajuusalueen valintakytkin
(AM/FM)
gNäytön kirkkauden työntökytkin
(HI/MED/LOW)
hHeittoantenni
jVirtajohto
kPainike ALARM OFF
(Vain mallissa KH2238)
Käyttöönotto
Pystytys
• Poista radioherätyskello ja
lisävarusteet paikkauksesta.
• Poista kaikki kuljetusvarmistukset
ja teipit/muovit.
Huomio!
Älä anna pikkulasten leikkiä muoveilla.
On olemassa tukehtumisvaara!
• Aseta radioherätyskello tasaiselle,
vaakasuoralle pinnalle.
Paristojen asettaminen
Virtakatkossuojaus
Asettamalla laitteeseen 9V:n nepparipa-
riston (tyyppi 6LR61) vältät mahdollisen
sähkökatkoksen sattuessa sen, että laitteen
toiminta keskeytyy ja näin asetetut tiedot,
kuten kellonaika ja herätysaika, häviävät.
Pariston avulla radioherätyskello toimii
edelleen myös sähkökatkoksen aikana.
Sähkövirran kytkeytyessä uudelleen päälle
näytössä inäkyy automaattisesti oikea
aika.
Huomaa:
Herätyskello, radio ja näyttö eivät
toimi paristolla.
• Avaa paristokotelo alaitteen pohjas-
sa ja aseta sinne 9 V:n neppariparisto
(tyyppi 6LR61).
IB_KH2236-39_FI_LB3 15.10.2007 18:53 Uhr Seite 15

- 16 -
Paristojen käsittely
Vuotavat paristot saattavat vaurioittaa
radioherätyskelloa.
• Jos laite on pidempään käyttämättä,
poista paristot.
• Jos paristot vuotavat, käytä suoja-
käsineitä ja puhdista paristokotelo
kuivalla liinalla.
Huomaa:
Paristoliitännän kautta ei voi ladata
paristoja. Pidemmän sähkökatkoksen
(useiden tuntien) jälkeen tulee kellon-
ja herätysaika tarkastaa ja tarvittaes-
sa asettaa uudelleen.
Liittäminen
Varmista ennen laitteen käyttöönottoa,
että laite on moitteettomassa kunnossa.
Muuten sitä ei saa käyttää.
• Aseta sitten verkkopistoke pistora-
siaan. Valitse pistorasia, joka on
aina käsillä, jotta pistoke voitaisiin
vikatapauksessa irrottaa nopeasti
pistorasiasta.
Kellonajan asettaminen
Kun otat laitteen uudelleen käyttöön
pariston vaihdon jälkeen:
• Pidä TIME-painiketta rpainettuna:
• Säädä tunnit painamalla HOUR-
painiketta quseamman kerran
peräkkäin tai pitämällä sitä painettuna.
• Vapauta HOUR-painike qheti, kun
haluttu tuntinäyttö näkyy näytössä i.
• Säädä minuutit painamalla MIN-pai-
niketta wuseamman kerran peräkkä-
in tai pitämällä sitä painettuna.
• Vapauta MIN-painike wheti, kun
haluttu tuntinäyttö näkyy näytössä i.
Asetettu kellonaika otetaan automaattisesti
käyttöön heti, kun TIME-painike rvapau-
tetaan.
Radiovastaanotto
• Aseta työntökytkin oasentoon ON.
• Käännä äänenvoimakkuuden säädin
VOLUME dkeskiasentoon.
• Valitse radioaaltoalue taajuuden
valintakytkimellä AM/FM f.
• Säädä nyt haluamasi radioasema
TUNING-säädintä skiertämällä.
IB_KH2236-39_FI_LB3 15.10.2007 18:53 Uhr Seite 16

- 17 -
Huomaa:
Paranna radioaseman vastaanottoa
FM-taajuusalueella kääntämällä heit-
toantennin päätä hitaasti eri suuntiin.
Kun lähetyksen vastaanottotaso on
sopiva, kiinnitä heittoantenni tähän
asentoon esimerkiksi liimanauhalla.
KA-radioasemien vastaanottoa varten
on laitteeseen asennettu kiinteästi
vastaanottoantenni. Voit parantaa
lähetyksen vastaanottotasoa siirtä-
mällä radiota silloin, kun radio on
käytössä.
Herätysajan asettaminen
Jos kellonaika on säädetty edellä kuvatulla
tavalla:
Pidä ALARM-painiketta epainettuna:
• Säädä tunnit painamalla HOUR-
painiketta quseamman kerran
peräkkäin, tai pitämällä sitä painettuna.
• Vapauta HOUR-painike qheti, kun
haluttu tuntinäyttö näkyy näytössä i.
• Säädä minuutit painamalla MIN-
painiketta wuseamman kerran
peräkkäin tai pitämällä sitä painettuna.
• Vapauta MIN-painike wheti, kun
haluttu tuntinäyttö näkyy näytössä i.
Asetettu herätysaika otetaan automaattise-
sti käyttöön heti, kun ALARM-painike e
vapautetaan.
Herätyksen
kytkeminen päälle
Jos kellonaika ja herätys on säädetty
oikein edellä kuvatulla tavalla:
• Aseta työntökytkin oasentoon
AUTO. Herätyskello on nyt kytketty
päälle. Vahvistukseksi ilmestyy
näyttöön ivasemmalle piste.
Radio herättää, kun ...
• äänenvoimakkuuden säädin
VOLUME don säädetty riittävän
kovalle, jotta siihen herää.
Hälytysääni herättää, kun ...
• äänenvoimakkuuden säädin
VOLUME d on käännetty niin
alhaiseksi, että se kytkeytyy
kuuluvasti pois päältä, eli on
asennossa BUZZ.
IB_KH2236-39_FI_LB3 15.10.2007 18:53 Uhr Seite 17

- 18 -
Herätyksen katkaiseminen
• Paina SNOOZE-painiketta u, ja
herätys toistetaan 9 minuuttin kuluttua.
(Malleissa KH2237 ja KH 2239 tulee
SNOOZE-painiketta uvain koskettaa
herätyksen keskeyttämiseksi)
• Aseta työntökytkin oasentoon OFF,
kun haluat sammuttaa herätystoimin-
non kokonaan.
• Aseta liukukytkin ouudelleen asen-
toon AUTO aktivoidaksesi herätystoi-
minnon seuraavaksi päiväksi.
Vain malli KH 2238
• Paina painiketta ALARM OFF q
sammuttaaksesi herätyksen 24 tunniksi.
Nukahtamisajastin
Jos haluat kuunnella radiota ennen
nukahtamista ja antaa laitteen
kytkeytyä itsestään pois:
• Aseta työntökytkin oasentoon OFF
tai AUTO.
• Paina SLEEP-painiketta t. Radio on
nyt päällä 59 minuuttia.
Sammumisaikaa voidaan pidentää
seuraavalla tavalla:
• Pidä SLEEP-painiketta tpainettuna
ja nosta samanaikaisesti sammutusai-
kaa HOUR-painikkeella q1 tuntiin
ja 59 minuuttiin.
Sammumisaikaa voidaan lyhentää
seuraavalla tavalla:
• Pidä SLEEP-painiketta tpainettuna
ja aseta samanaikaisesti jäljellä oleva
aika MIN-painikkeen wavulla.
• Nukahtamisajastin otetaan pois päältä
SNOOZE-painiketta upainamalla.
• Kun SLEEP-painiketta tpainetaan
uudelleen, sammutusaika palautetaan
59 minuuttiin.
IB_KH2236-39_FI_LB3 15.10.2007 18:53 Uhr Seite 18
This manual suits for next models
4
Table of contents
Languages:
Other E-Bench Clock Radio manuals

E-Bench
E-Bench KH 2294 User manual

E-Bench
E-Bench KH 2236 User manual

E-Bench
E-Bench KH 2254 User manual

E-Bench
E-Bench KH 2255 User manual

E-Bench
E-Bench KH 1200 User manual

E-Bench
E-Bench KH 75 User manual

E-Bench
E-Bench KH 2255 User manual

E-Bench
E-Bench KH 2295 User manual

E-Bench
E-Bench KH 2271 User manual

E-Bench
E-Bench KH 2217 User manual