E-line Turbo Muin User manual

IT
EN
DE
FR
ES
NL
ISTRUZIONI
INSTRUCTIONS
BEDIENUNGSANLEITUNG
MODE D’EMPLOI
INSTRUCCIONES
INSTRUCTIES

B
G
H
3
H
C
G
4
1
A
E
D
2
A
B
C
D
F
G
H
E
I
L

5
I
6
I
7
L
8
9 10
F
11 12

13 14
15 16
0 mm
0 inch
17 18
6 mm
0,23 inch
3 mm
0,11 inch
19 20
NO
max 3 mm
max 0,11 inch
max 6 mm
max 0,23 inch

28
CLICK
29
D
E
22 23
I
H
G
24
G
I
H
I
H
25
27
26

30
x1
31
32
x1
33

INTRODUZIONE 9
AVVERTENZE GENERALI DI SICUREZZA 9
DISCLAIMER 9
NOME E LISTA DEI COMPONENTI 10
ATTENZIONE 10
ASSEMBLAGGIO TURBO MUIN 10
INSTALLAZIONE CASSETTA PIGNONI SUL TURBO MUIN
10
ASSEMBLAGGIO DELLA BICI SUL TURBO MUIN 11
RIMOZIONE DELLA BICICLETTA 11
CONSIGLI DI UTILIZZO 11
ISTRUZIONI INSTALLAZIONE CORPETTO RUOTA
LIBERA COMPATIBILE CON CASSETTE PIGNONI
CAMPAGNOLO® 9/10/11 VELOCITÀ
12
MANUTENZIONE 12
ATTENZIONI 12
INFORMAZIONI SULLO SMALTIMENTO DEL PRODOTTO 13
GARANZIA 39
INTRODUCTION 14
GENERAL SAFETY WARNINGS 14
DISCLAIMER 14
NAME AND LIST OF COMPONENTS 15
CAUTION 15
ASSEMBLING YOUR TURBO MUIN 15
INSTALLING THE CASSETTE ON TURBO MUIN 15
INSTALLING THE BICYCLE ON TURBO MUIN 16
REMOVING THE BICYCLE 16
RECOMMENDATIONS FOR USE 16
INSTALLATION OF CAMPAGNOLO® 9/10/11 SPEED
COMPATIBLE CASSETTE FREEHUB BODY 16
MAINTENANCE 17
WARNINGS 17
INFORMATION ON PRODUCT DISPOSAL 18
GARANZIA 39
EINLEITUNG 19
ALLGEMEINE SICHERHEITSHINWEISE 19
HAFTUNGSAUSCHLUSS 19
NAME UND LISTE DER KOMPONENTEN 20
ACHTUNG! 20
MONTAGE TURBO MUIN 20
MONTAGE DER KASSETTE AUF DEM TURBO MUIN 21
MONTAGE DES FAHRRADS AUF DEM TURBO MUIN 21
DEMONTAGE DES FAHRRADS 21
EMPFEHLUNGEN ZUR BENUTZUNG 22
MONTAGEANWEISUNG DES LOSRADKÖRPER MIT
9-/10-/11-FACH KASSETTE VON CAMPAGNOLO® 22
WARTUNG 22
ACHTUNG 23
HINWEISE ZUR ENTSORGUNG DES PRODUKTS 23
GARANZIA 39
IT - ITALIANO
EN - ENGLISH
DE - DEUTSCH

FR -
FRANÇAIS
ES -
ESPAÑOL
NL -
DUTCH
INTRODUCTION 24
AVERTISSEMENTS GENERAUX EN MATIERE DE SECURITE 24
CLAUSE DE NON-GARANTIE 24
NOM ET LISTE DES PIECES 25
ATTENTION 25
ASSEMBLAGE DU TURBO MUIN 25
INSTALLATION DE LA CASSETTE SUR LE TURBO MUIN 26
ASSEMBLAGE DE LA BICYCLETTE AU TURBO MUIN 26
COMMENT RETIRER LA BICYCLETTE 26
CONSEILS D’UTILISATION 26
INSTRUCTIONS D’INSTALLATION DU CORPS DE
ROUE LIBRE COMPATIBLE AVEC DES CASSETTES
CAMPAGNOLO® 9/10/11 VITESSES 27
ENTRETIEN 27
AVERTISSEMENTS 27
INFORMATIONS SUR LA DESTRUCTION DU PRODUIT 28
GARANZIA 39
INTRODUCCIÓN 29
ADVERTENCIAS GENERALES DE SEGURIDAD 29
EXENCIÓN DE RESPONSABILIDAD 29
NOMBRE Y RELACION DE COMPONENTES 30
ATENCIÓN 30
ENSAMBLAJE DE TURBO MUIN 30
INSTALACIÓN DEL CASSETTE DE PIÑONES EN EL
TURBO MUIN 30
MONTAJE DE LA BICICLETA EN EL TURBO MUIN 31
RETIRAR LA BICICLETA 31
CONSEJOS DE UTILIZACIÓN 31
INSTRUCCIONES DE INSTALACIÓN RUEDA LIBRE
COMPATIBLE CON CASSETTE DE PIÑONES
CAMPAGNOLO® 9/10/11 VELOCIDADES 32
MANTENIMIENTO 32
ATENCIÓN 32
INFORMACIONES ACERCA DE LA ELIMINACIÓN DEL
PRODUCTO 33
GARANZIA 40
INLEIDING 34
ALGEMENE VEILIGHEIDSMEDEDELINGEN 34
DISCLAIMER 34
BENAMING EN LIJST VAN DE ONDERDELEN 35
OPGELET! 35
TURBO MUIN ASSEMBLEREN 35
CASSETTE OP TURBO MUIN INSTALLEREN 35
DE FIETS OP TURBO MUIN ASSEMBLEREN 36
DE FIETS DEMONTEREN 36
GEBRUIKSTIPS 36
INSTALLATIEAANWIJZINGEN BEHUIZING BODY
COMPATIBEL MET CASSETTEEN CAMPAGNOLO®
SNELHEID 9/10/11 37
ONDERHOUD 37
OPGELET 37
INFORMATIE OVER DE VERWIJDERING VAN HET
PRODUCT 38
GARANZIA 40

9
INTRODUZIONE
Questo rullo permette di allenarsi con efficacia
e semplicità aiutando il miglioramento delle
prestazioni di utilizzatori di qualsiasi livello.
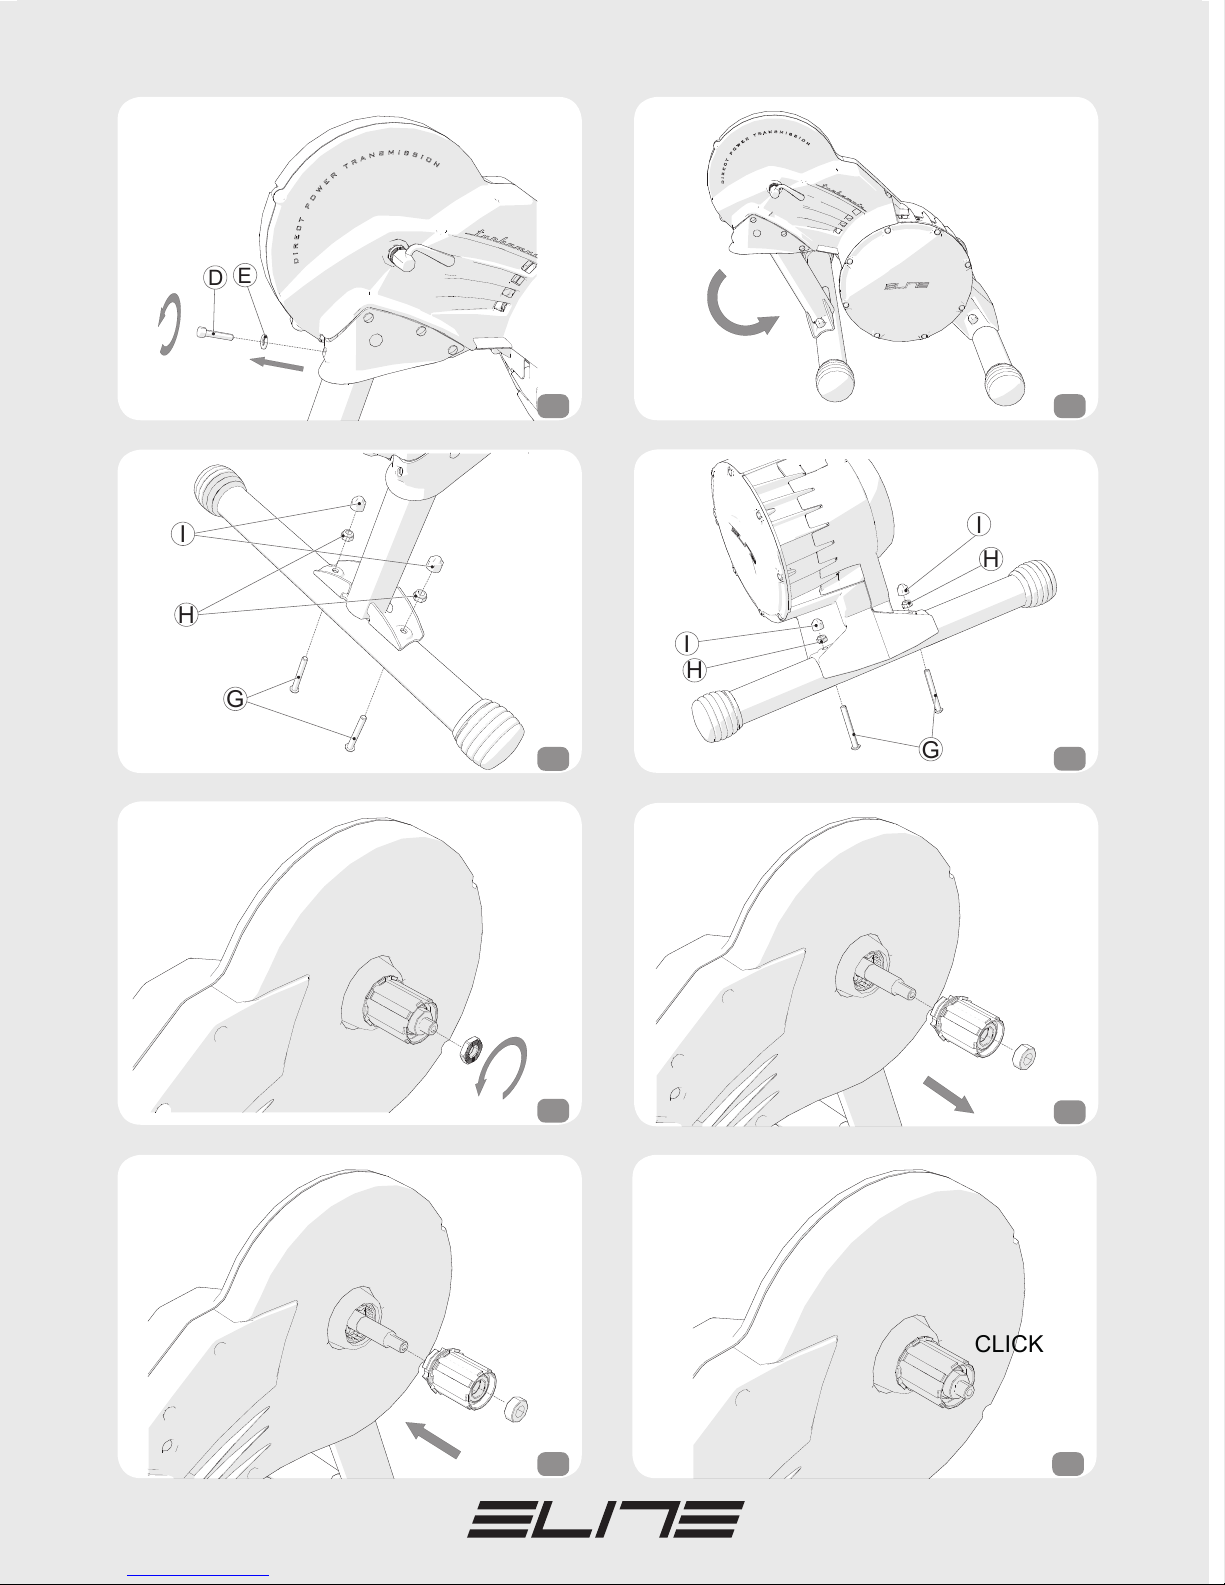
Turbo Muin è caratterizzato dalla trasmissione
diretta della potenza erogata dall’atleta in quanto
il sistema è collegato direttamente alla catena
della bicicletta. Tramite un sistema a pulegge
con cinghia di trasmissione di ultimissima
generazione progettato da Elite, lo sforzo
applicato ai pedali si trasferisce sempre e in modo
omogeneo all’unità di resistenza garantendo così
l’ottimizzazione dell’allenamento indoor.
La resistenza alla pedalata viene generata da
una integrata unità frenante a tecnologia fluida
che garantisce la massima silenziosità durante
l’allenamento. Tale resistenza fluida, simile
ma potenziata rispetto a quella che offre l’aria
all’avanzare della bicicletta nell’utilizzo su
strada, aumenta automaticamente con la velocità
e si possono usare i rapporti lunghi del cambio
per i lavori di potenza e i rapporti corti per i lavori
di agilità. Il campo di resistenze realizzabile è
molto ampio, utile sia al neofita del ciclismo che
all’atleta professionista.
Turbo Muin è stato progettato, sviluppato e rea-
lizzato sulla base di anni di studi e sperimenta-
zioni su atleti professionisti, amatori, praticanti o
neofiti del ciclismo (strada, mountain bike, pista)
per permettere di effettuare allenamenti indoor di
alto livello in base alle esigenze specifiche indivi-
duali o test di valutazione delle performance.
AVVERTENZE GENERALI DI
SICUREZZA
Prima di iniziare ad utilizzare il rullo di allena-
mento, leggete attentamente le avvertenze di
seguito elencate per la vostra salute e sicurezza.
1. Prima di iniziare l’allenamento sottoponetevi
ad un’accurata visita medico-sportiva, che certi-
fichi il Vostro stato di buona salute.
2. Scegliete una modalità di allenamento che sia
compatibile con le Vostre condizioni di salute e
capacità di resistenza fisica.
3. In ogni caso utilizzate il rullo di allenamento
adeguando il programma di allenamento scelto
alle Vostre condizioni di salute e capacità di
resistenza fisica.
4. Se durante l’allenamento avvertite sensazioni
di particolare affaticamento o di dolore, interrom-
pete immediatamente l’utilizzo del rullo e consul-
tate il Vostro medico.
Le avvertenze sopra elencate hanno carattere
generale e non esaustivo di tutte le cautele che
devono essere adottate per un utilizzo corretto e
sicuro del rullo di allenamento, di cui l’utente è
responsabile in via esclusiva.
DISCLAIMER
Elite S.r.l. non è responsabile di eventuali dan-
ni temporanei o permanenti all’integrità fisica
dell’utente che siano conseguenza diretta o indi-
retta dell’utilizzo del rullo di allenamento.
ITALIANO
Molte grazie per avere acquistato il rullo Turbo Muin Elite
IT

10
ATTENZIONE!
Il Turbo Muin viene fornito da ELITE con un cor-
petto ruota libera compatibile con cassette pi-
gnoni 9/10/11 velocità Shimano® / SRAM® e altri
costruttori che utilizzano lo Standard Shimano®.
È disponibile come accessorio un corpetto ruota
libera compatibile con cassette pignoni 9/10/11
velocità Campagnolo®. In questo caso è necessa-
rio sostituire il corpetto presente originariamente
sul Turbo Muin con quello accessorio, seguendo
le istruzioni riportate a pagina 11 per procedere
correttamente.
Il Turbo Muin è compatibile con biciclette aventi
mozzi da 130 o 135 mm e bloccaggi rapidi diame-
tro 5 mm.
In caso di dubbi sul tipo di cambio presente sulla
Vostra bicicletta, consultare la documentazione
della bicicletta o rivolgersi al Vostro rivenditore
per garantire la corretta compatibilità con il Tur-
bo Muin.
ASSEMBLAGGIO TURBO MUIN
ATTENZIONE: il corpo del Turbo Muin è molto pe-
sante, maneggiare con cautela il corpo ed essere
sicuri di sostenerlo correttamente durante l’assem-
blaggio delle gambe. Si consiglia di eseguire l’as-
semblaggio sopra ad una superficie robusta, come
ad esempio un tavolo.
ATTENZIONE: assicurarsi di avere tutti i componenti
elencati e illustrati prima di iniziare l’assemblaggio.
• Posizionare il corpo del Turbo Muin (A) con il car-
ter in plastica rivolto verso l’alto; aprire la gamba
anteriore (Fig. 1) ed avvitare la vite e la rosetta di
sicurezza M6 (D + E) con la corretta forza di fissag-
gio di 3Nm - 26,5 in-lbs (Fig. 2).
• Fissare il tubo gamba anteriore (B) , quello aven-
te interasse 120 mm (4.8 in) tra i fori Ø 8,5 (0.3 in),
con la viteria (G + H) (Fig.3).
ATTENZIONE: attenzione al verso di fissaggio della
gamba, l’estremità più lunga va posizionata nello
stesso lato del carter in plastica.
ATTENZIONE: la testa della vite deve essere rivolta
verso il pavimento.
• Fissare il tubo gamba posteriore (C), quello
avente interasse 140 mm (5.5 in) tra i fori Ø 8,5(0.3
in), con la viteria (G + H) (Fig. 4).
ATTENZIONE: attenzione al verso di fissaggio della
gamba, l’estremità più lunga va posizionata nello
stesso lato del carter in plastica.
ATTENZIONE: la testa della vite deve essere rivolta
verso il pavimento.
• Posizionare su una superficie piana il Turbo
Muin , maneggiandolo sempre con la massima at-
tenzione (Fig. 5).
• Posizionare i quattro copridadi M8 (I) sopra al
dado M8 (H) (Fig. 6 e Fig. 7).
INSTALLAZIONE CASSETTA
PIGNONI SUL TURBO MUIN
• Inserire i pignoni sul corpetto ruota libera alli-
neando i profili scanalati.
NOME E LISTA DEI COMPONENTI
Il tuo Turbo Muin dovrebbe includere i seguenti componenti:
CORPO TURBO MUIN
1 Rif. A
TUBO GAMBA ANTERIORE
1 Rif. B
TUBO GAMBA POSTERIORE
1 Rif. C
VITE DI SICUREZZA M6
1 Rif. D
ADATTATORE CARRO
1 Rif. F
VITE M8 DI FISSAGGIO GAMBE
4 Rif. G
DADO M8 DI FISSAGGIO GAMBE
4 Rif. H
COPRIDADO M8
4 Rif. I
DISTANZIALE CORPETTO RUOTA LIBERA
2 Rif. L
ROSETTA DI SICUREZZA M6
1 Rif. E
CHIAVE ESAGONALE
RIFERIMENTO
QUANTITA’
QUANTITA’
RIFERIMENTO
IT
*La quick release non è in dotazione con questo prodotto.

11
• Nel caso in cui si debba assemblare una casset-
ta 9/10 velocità Shimano® / SRAM® o altri costrut-
tori che utilizzano lo Standard Shimano® è ne-
cessario posizionare i distanziali (L) sul corpetto
ruota libera prima d’inserire la cassetta pignoni
(Fig. 8).
• Nel caso in cui si debba assemblare una cassetta
11 velocità Shimano® / SRAM® o altri costruttori
che utilizzano lo Standard Shimano® è necessario
posizionare la cassetta pignoni sul corpetto ruota
libera senza utilizzare i distanziali (L) (Fig. 9).
• Utilizzando una chiave dinamometrica serrare
la ghiera di fissaggio fornita in dotazione al pacco
pignoni sul corpo ruota libera (Fig. 10).
ATTENZIONE!
Attenersi rigorosamente alle istruzioni di mon-
taggio del costruttore della Vostra cassetta pi-
gnoni per quanto riguarda specifiche tecniche
d’assemblaggio, eventuali ulteriori distanziali e
coppie di serraggio di chiusura.
NOTA: in caso di dubbi o non siete in grado di as-
semblare la cassetta pignoni contattate il Vostro
rivenditore; la garanzia non risponde per DANNI
conferiti alla bici e/o al Turbo Muin in caso d’as-
semblaggio non corretto .
ASSEMBLAGGIO DELLA BICI
SUL TURBO MUIN
• Inserire la quick release e l’adattatore carro (F)
sull’albero del pacco pignoni (Fig. 11).
• Allentare il freno posteriore e posizionare la ca-
tena della bicicletta sul pignone più piccolo della
ruota posteriore e della corona anteriore. Aprire
la quick release e rimuovere la ruota posteriore
dalla bicicletta.
• Inserire la catena della bicicletta sul pignone
più piccolo del Turbo Muin (Fig 12)
• Inserire completamente i forcellini posteriori
della bicicletta sull’albero del pacco pignoni del
Turbo Muin (Fig. 13), prestando attenzione di po-
sizionare correttamente l’adattatore carro (F) a
seconda della tipologia di bicicletta.
- Adattatore carro (F) esterno per bici da corsa e
da crono (carro 130 mm) (Fig.14).
- Adattatore carro (F) interno per mountain bike
(carro 135 mm) (Fig.15).
NOTA: la faccia zigrinata dell’adattatore carro (F)
deve essere rivolto contro il forcellino della bici.
• Fissare stabilmente la bicicletta al Turbo Muin
chiudendo con forza la quick release assicurando
un corretto serraggio. La pressione ottenuta deve
consentire di mantenere bloccati i forcellini della
bicicletta alla struttura del Turbo Muin.
• Verificare la stabilità della bicicletta tirando e
spingendo il tubo orizzontale del telaio ed agen-
do sulla sella. Qualora la bicicletta non risultasse
stabilmente fissata al Turbo Muin, chiudere con
maggior forza la quick release.
• Posizionare il sistema Turbo Muin + bicicletta su
una superficie piana.
• Ora potete cominciare a pedalare. Si consiglia
di pedalare molto lentamente e gradualmente
prendendo confidenza con le funzionalità del Tur-
bo Muin.
• Elite fornisce dei piedi a design variabile per sop-
perire ad eventuali problemi di planarità del pavi-
mento e per consentire una perfetta verticalità della
bicicletta montata sul rullo. Il piede ha 3 livelli di
escursione semplicemente selezionabili ruotandolo
rispetto alla base di appoggio: 0mm (0 inch) in posi-
zione standard, 3 mm (0.11 inch) e 6 mm (0.23 inch);
vedi Fig. 16, 17, 18, 19, 20, 21.
RIMOZIONE DELLA BICICLETTA
• Posizionare la catena della bicicletta sul pigno-
ne più piccolo della cassetta del Turbo Muin e del-
la corona anteriore della bicicletta.
• Aprire la quick release e rimuovere la bicicletta
dal Turbo Muin.
• Per il trasporto o per ridurre gli ingombri quan-
do non si utilizza il rullo si consiglia di rimuovere
la vite e la rosetta di sicurezza M6 (D + E) dal corpo
del Turbo Muin (A) (Fig. 22) e ripiegare la gamba
anteriore (Fig. 23).
• Se si vuole minimizzare ulteriormente lo spazio
d’ingombro si consiglia di disassemblare il tubo
gamba anteriore (B) e posteriore (C) rimuovendo
la viteria di fissaggio (G+ H + I) dal corpo del Turbo
Muin (A) (Fig. 24 e Fig. 25).
CONSIGLI DI UTILIZZO
• Per utilizzare al meglio il Vostro Turbo Muin è
utile scegliere la cassetta pignoni più idonea alle
Vostre esigenze:
1) per atleti professionisti ed amatori agonisti in
grado di sviluppare potenze elevate è consigliato
utilizzare una cassetta pignoni avente dentatura
IT

12
da 11 a 23/25;
2) Per tutti gli altri ciclisti è consigliato utilizzare
una cassetta pignoni che disponga di un numero
di denti maggiore, ad esempio da 12/13 a 27/29.
• Generalmente il cambio della bicicletta funzio-
na correttamente dopo il montaggio sul Turbo
Muin, occasionalmente può essere necessario
una regolazione idonea per garantire il corretto
funzionamento. In caso di dubbi rivolgersi al Vo-
stro rivenditore per garantire il corretto funziona-
mento con il Turbo Muin.
ISTRUZIONI INSTALLAZIONE
CORPETTO RUOTA LIBERA
COMPATIBILE CON
CASSETTE PIGNONI CAMPAGNOLO®
9/10/11 VELOCITÀ
• Sostituire il corpetto ruota libera presente origi-
nariamente sul Turbo Muin con quello accessorio
compatibile con cassette pignoni 9/10/11 velocità
Campagnolo® seguendo le seguenti operazioni:
1) Svitare il dado presente sull’albero pacco pi-
gnoni utilizzando una chiave 17 mm (Fig. 26).
2) Estrarre distanziale e successivamente il cor-
petto ruota libera dall’albero del Turbo Muin (Fig.
27).
3) Inserire completamente il corpetto compatibile
con cassette pignoni Campagnolo® e successiva-
mente il distanziale (Fig. 28 e Fig. 29).
4) Fissare il dado utilizzando la chiave 17 mm con
una coppia di serraggio di 5Nm (44in-lbs). Per
bloccare il dado sull’albero utilizzare il frenafiletti
di media resistenza oleocompatibile.
• Ora possibile montare la cassetta pignoni
9/10/11 velocità Campagnolo® posizionandola di-
rettamente sul corpetto ruota libera senza utiliz-
zare i distanziali (L) (Fig. 30).
ATTENZIONE!
Attenersi rigorosamente alle istruzioni di mon-
taggio del costruttore della Vostra cassetta pi-
gnoni per quanto riguarda specifiche tecniche
d’assemblaggio, eventuali ulteriori distanziali e
coppie di serraggio di chiusura.
NOTA: in caso di dubbi o non siete in grado di as-
semblare la cassetta pignoni contattate il Vostro
rivenditore; la garanzia non risponde per DANNI
conferiti alla bici e/o al Turbo Muin in caso d’as-
semblaggio non corretto .
MANUTENZIONE
Il Turbo Muin non richiede alcun programma spe-
cifico di manutenzione. È consigliato di seguire le
seguenti attenzioni:
• pulire con un panno il rullo dopo ogni allenamento
prevenendo così il deposito di polvere e di sudore;
• non eseguire nessuna operazione di pulizia della
bicicletta o di sgrassamento della catena quando la
bicicletta è montata sul Turbo Muin in quanto i de-
tergenti potrebbero danneggiare irreparabilmente
i cuscinetti o altri organi meccanici interni;
• controllare il corretto fissaggio e la completa
funzionalità della quick release prima di ogni alle-
namento;
• la tensione della cinghia interna di trasmissione
viene tarata e controllata su ogni singolo prodot-
to nel reparto di assemblaggio di Elite; è possibile
che dopo utilizzi prolungati o estremamente inten-
si tale tensione si riduca con conseguente non per-
fetta trasmissione dello sforzo esercitato dall’uti-
lizzatore sul sistema di resistenza. In questo caso
potrebbe esser necessario aumentare la tensione
della cinghia di trasmissione operando come spie-
gato di seguito:
1) svitare la vite di bloccaggio del registro di un giro
in modo da poter poi agire sul registro (Fig. 31 ).
2) Agire sul registro, avvitando la vite di mezzo giro
in modo da tensionare correttamente la cinghia
(Fig. 32).
NOTA: se eseguita questa operazione e la cinghia
risulta ancora non omogenea, ripetere l’operazio-
ne 2) e testare nuovamente.
3) Avvitare la vite di bloccaggio registro (del punto
1) di un giro, in modo da fissare il registro (Fig. 33).
ATTENZIONI
• Il Turbo Muin si riscalda quando in uso. È neces-
sario aspettare che si raffreddi prima di toccare i
gusci.
• Utilizzare il rullo Turbo Muin come descritto nel
manuale.
• Turbo Muin non è dotato di un freno di emer-
genza.
• Turbo Muin è stato progettato e realizzato in
modo da garantire la massima sicurezza dell’u-
tilizzatore e/o di soggetti terzi ma è necessario
evitare che persone, bambini o animali possano
avvicinarsi al rullo durante l’utilizzo in quanto i
IT

13
componenti in movimento del rullo e della bici-
cletta possono produrre danni o ferite in caso di
contatto.
• Evitare assolutamente di introdurre dita, piccoli
oggetti o monili all’interno delle fessure presenti
nel Turbo Muin in quanto vi è il rischio elevato di
danneggiare il rullo e/o provocare danni anche
gravi alla persona fisica.
• Prima di iniziare l’allenamento, posizionare il
trainer in un luogo adatto, lontano da oggetti po-
tenzialmente pericolosi (mobili, tavoli, sedie...) in
modo da evitare ogni rischio di contatto involonta-
rio e accidentale con gli oggetti stessi.
• Il cavalletto é studiato per l’uso da parte di un
solo ciclista.
• Verificare la sicurezza e la stabilità della bici-
cletta sul Turbo Muin prima di ogni allenamento.
• Non ci sono componenti utilizzabili singolar-
mente all’interno. La garanzia è nulla se l’unità
viene aperta o manomessa.
• Poiché i piedini sono costruiti in materiale mor-
bido antiscivolo, potrebbe verificarsi che durante
l’uso lascino tracce di gomma sul pavimento.
• Qualora il rullo debba essere spedito per assi-
stenza e/o altre motivazioni, dovrà essere spedito
nella scatola in cui era imballato originariamen-
te. Il danneggiamento dovuto al mancato utilizzo
dell’imballo originale non è coperto dalle condi-
zioni di garanzia.
Nota: comunque sempre prima di spedire il rullo
o qualche sua componente in assistenza, consul-
tare prima Elite o il suo distributore o il proprio
negoziante. Eventuali invii non concordati saran-
no respinti.
1) NELL’UNIONE EUROPEA
Questo prodotto è conforme alle Direttive EU 2002/95/CE, 2002/96/CE and
2003/108/CE.
Il simbolo del cassonetto barrato riportato sull’apparecchiatura o sulla sua confezione indica che il pro-
dotto alla fine della propria vita utile deve essere raccolto separatamente dagli altri rifiuti.
L’utente dovrà, pertanto conferire l’apparecchiatura giunta a fine vita agli idonei centri di raccolta diffe-
renziata dei rifiuti elettronici, oppure riconsegnarla al rivenditore al momento dell’acquisto di una nuova
apparechiatura di tipo equivalente, in ragione di una a uno.
L’adeguata raccolta differenziata per l’avvio successivo dell’apparecchiatura dimessa al riciclaggio, al
trattamento e allo smaltimento ambientalmente compatibile contribuisce ad evitare possibili effetti ne-
gativi sull’ambiente e sulla salute e favorisce il reimpiego e/o riciclo dei materiali di cui è composta
l’apparecchiatura.
Lo smaltimento abusivo del prodotto da parte dell’utente comporta l’applicazione delle sanzioni ammi-
nistrative previste dalla normativa vigente.
2) IN PAESI CHE NON FANNO PARTE DELL’UNIONE EUROPEA
Se si desidera eliminare il presente prodotto, contattare le autorità locali e informarsi sul metodo di
smaltimento.
INFORMAZIONI SULLO SMALTIMENTO DEL PRODOTTO
IT

14
INTRODUCTION
Training with the Turbo Muin is a simple and
effective way to improve the performance of
riders at all levels.
The design of the Turbo Muin is based the principle
of the direct transmission of the athlete’s power.
The trainer connects directly to the bicycle chain
and a cutting-edge system of timing belt pulleys,
designed by Elite, uniformly transmits the force
applied to the pedals to the resistance unit to
optimise indoor training.
A silent built-in fluid-technology braking unit
generates pedalling resistance. This fluid
resistance, similar to that provided by air during
outdoor cycling but enhanced, automatically
increases with speed. Higher gear ratios can be
used to build power and lower ratios for high
pedalling cadence. The trainer offers a wide range
of resistance for both beginners and professional
athletes.
Turbo Muin has been designed, developed and
produced, after years of study and testing of
professional, amateur and recreational cyclists
(on the road, the trail and the track), to create a
high level indoor trainer to fit specific individual
goals and to test and evaluate performance levels.
GENERAL SAFETY WARNINGS
Before using your trainer, carefully read the war-
nings listed below for your health and safety.
1. Before beginning a training programme, under-
go a physical examination certifying good health.
2. Choose a training level compatible with your
physical endurance and the status of your health.
3. When using the trainer, select a training pro-
gram and adjust it so that it is compatible with
your fitness level and health.
4. If you feel particularly fatigued or sore while
exercising, stop using the trainer immediately
and consult your doctor.
The above warnings are general and not exhaustive
of all the precautions that should be taken for the
proper and safe use of the trainer; which is solely
the responsibility of the user.
DISCLAIMER
Elite S.r.l. is not liable for any temporary or perma-
nent damage to the physical integrity of the user,
whether direct or indirect, resulting from the use
of the trainer.
ENGLISH
Congratulations on your purchase of the Turbo Muin Elite cycling simulator
EN

15
EN
NAME AND LIST OF COMPONENTS
Your Turbo Muin electronic trainer is made of the following components:
TURBO MUIN BODY
1 Ref. A
FRONT LEG TUBE 1 Ref. B
REAR LEG TUBE 1 Ref. C
M6 SAFETY SCREW 1 Ref. D
TRIANGLE ADAPTER 1 Ref. F
M8 LEG FIXING SCREW 4 Ref. G
M8 LEG FIXING NUT 4 Ref. H
M8 NUT COVER 4 Ref. I
FREEHUB BODY SPACERS 2 Ref. L
M6 LOCK WASHER 1 Ref. E
HEX WRENCH
REFERENCE
QUANTITY
QUANTITY
REFERENCE
CAUTION!
Turbo Muin is equipped with a freehub body com-
patible with 9/10/11-speed cassettes by Shimano®
/ SRAM® or by other manufacturers that use the
Shimano® Standard.
An accessory freehub body compatible with Cam-
pagnolo® 9/10/11 speed cassettes is available to re-
place the original Shimano compatible body provi-
ded on Turbo Muin; body replacement instructions
can be found on page 15.
Turbo Muin is compatible with 130 or 135 mm hubs
and 5mm diameter quick-release.
If you are unsure about the type of derailleur on
your bicycle, refer to the bicycle documentation
or contact your dealer to ensure compatibility with
Turbo Muin.
ASSEMBLING YOUR TURBO MUIN
CAUTION: the body of Turbo Muin is heavy, handle
with care and be sure to support it properly while
assembling the legs. It is recommended that this
operation be performed on a flat rugged surface,
such as a table.
CAUTION: before assembly, make sure you have all
the parts listed above and illustrated below.
• Position your Turbo Muin body (A) with the pla-
stic cover facing upward; open the front leg (Fig. 1)
tighten the M6 safety screw and lock washer (D + E)
with the correct torque of 3Nm /26.5 in-lbs (Fig. 2).
• Fix the front leg tube (B) with a 120 mm distance
(4.8 in) between the Ø8.5 (0.3 in) holes, using the
provided screws (G + H) (Fig. 3).
CAUTION: confirm that the direction of leg instal-
lation is correct; the longer end of the leg should
be positioned on the same side as the plastic cover.
CAUTION: the screw heads should be towards the
floor upon final assembly.
• Fix the rear leg tube (C), with a 140 mm distance
(5.5 in), between the Ø8.5 (0.3 in) holes, using the
provided screws (G + H) (Fig. 4).
CAUTION: confirm that the direction of leg instal-
lation is correct; the longer end of the leg should
be positioned on the same side as the plastic cover.
CAUTION: the screw heads should be towards the
floor upon final assembly.
• Place Turbo Muin on a flat surface, always ma-
king sure to handle it with care (Fig. 5).
• Place the four M8 nut covers (I) over the M8 nuts
(H) (Fig. 6 and Fig. 7).
INSTALLING THE CASSETTE
ON TURBO MUIN
• Fit the cassette onto the freehub body aligning the
spline patterns. See below for specific instructions
for different cassettes.
• If are installing a 9/10-speed cassette by Shima-
no® / SRAM® or by other manufacturers that use
the Shimano® Standard, place the spacers (L) onto
the freehub body before fitting the cassette (Fig. 8).
• If you are installing an 11-speed cassette by Shi-
mano® / SRAM® or by other manufacturers that use
* Quick release lever not supplied with this product.

16
EN
the Shimano® Standard, place the cassette onto the
freehub body without using the spacers (L) (Fig. 9).
• Using the torque wrench, tighten the lock ring
supplied with the cassettes onto the freehub body
(Fig. 10).
CAUTION!
Strictly follow the instructions provided by the cas-
sette manufacturer with regard to specific installa-
tion techniques, the need for additional spacers and
torque specifications.
NOTE: please contact your dealer if you have que-
stions or are unable to install the cassette. The
warranty does not cover any DAMAGE to the bicycle
and/or Turbo Muin in the event of incorrect instal-
lation.
INSTALLING THE BICYCLE
ON TURBO MUIN
• Fit the quick release and the triangle adapter (F)
to the cogset (Fig. 11).
• Loosen the rear brake and shift the bicycle chain
to the smallest rear sprocket and the smallest front
chainring. Open the quick release and remove the
rear wheel.
• Place the bicycle chain onto the smallest spro-
cket of Turbo Muin (Fig 12).
• Fully fit the bicycle’s rear dropouts onto Turbo
Muin’s cassette (Fig. 13), paying careful attention to
the correct internal or external position, based on
the type of bicycle:
- External triangle adapter (F) for road and time
trial bikes (130mm triangle) (Fig.14).
- Internal triangle adapter (F) for mountain bikes
(135mm triangle) (Fig. 15).
NOTE: the knurled side of the triangle adapter (F)
must be facing the bicycle dropout.
• Securely fix the bicycle to Turbo Muin and firmly
close the quick release. The resulting pressure
should keep the bicycle dropouts locked to the Tur-
bo Muin.
• Check for stability by holding the bicycle top tube
and pulling and pushing by the saddle. If the bicycle
is not firmly fixed to Turbo Muin, further tighten the
quick release and close it.
• Place the Turbo Muin + bicycle on a flat surface.
• Start pedalling. Ride very slowly at first and incre-
ase your speed gradually until you become familiar
with the features of Turbo Muin.
• The feet of Elite hometrainers feature a variable
design that adapts to any type of floor and ensures
that the bicycle is perfectly vertical when mounted
on the hometrainer. You can also select from 3
height levels by simply switching the positions of
the feet where they contact the surface. 0mm (0
inches) is the standard position, with 3 mm (0.11 in-
ches) and 6 mm (0.23 inches) heights also available;
see Pic. 16, 17, 18, 19, 20, 21.
REMOVING THE BICYCLE
• Shift the bicycle chain on the smallest cassette
sprocket of Turbo Muin and of the smallest front
chainring of the bicycle.
• Open the quick release and remove the bicycle
from Turbo Muin.
• For transportation or to save space when the
trainer is not in use, it is recommended that the M6
safety screw and lock washer (D + E) be removed
from the Turbo Muin body (A) (Fig. 22) and that the
front leg be folded (Fig. 23).
• To further reduce the footprint, disassembly of
the front (B) and rear leg tube (C), by removing the
fixing screws (G+ H + I) from the Turbo Muin body
(A), is recommended (Fig. 24 and Fig. 25).
RECOMMENDATIONS FOR USE
Choose a cassette range that is compatible with
your goals and fitness level:
1) cassettes with a range of 11 to 23/25 teeth are
recommended for professional athletes and ama-
teurs who are able to develop high power output.
2) Cassettes with a greater number of teeth, such
as 12/ 13 to 27 /29, are recommended for all other
cyclists.
• Derailleurs should work properly after bicycle
installation on Turbo Muin. Occasionally, an
adjustment may be necessary for proper opera-
tion. If you have any questions, please contact your
dealer to ensure proper derailleur operation with
Turbo Muin.
INSTALLATION OF CAMPAGNOLO®
9/10/11 SPEED COMPATIBLE
CASSETTE FREEHUB BODY
• To replace the original freehub body installed on
Turbo Muin with the accessory body compatible
with Campagnolo® 9/10/11 speed cassettes, follow

17
EN
the procedure below:
1) Unscrew the nut on the cogset shaft using a 17
mm wrench (Fig. 26).
2) Remove the spacer and the freehub body from
the Turbo Muin shaft (Fig. 27).
3) Fully insert the Campagnolo ® cassette compa-
tible freehub body and replace the spacer (Fig. 28
and Fig. 29).
4) Tighten the cog set shaft nut using a 17 mm
wrench to a torque of 5 Nm (44in-lbs). Use a me-
dium-strength oil tolerant threadlocker to lock the
nut on the shaft.
• You can now mount your Campagnolo® 9/10/11
speed cassette onto the freehub body without using
the spacers (L) (Fig. 30).
CAUTION!
Strictly follow the instructions provided by the cas-
sette manufacturer with regard to specific installa-
tion techniques, the need for additional spacers and
torque specifications.
NOTE: Please contact your dealer if you have que-
stions about installation or if you cannot install the
cassette. The warranty does not cover any DAMAGE
to the bicycle and/or Turbo Muin in the event of in-
correct installation.
MAINTENANCE
Turbo Muin does not require any specific scheduled
maintenance, however the following precautions
are recommended:
• wipe the trainer clean with a cloth after each trai-
ning session to prevent the accumulation of dust
and sweat;
• do not clean or degrease the bicycle chain while
the bike is mounted on Turbo Muin as solvents can
cause irreparable damage to the bearings or other
internal mechanical parts;
• Check that the quick release is properly secured
and fully working before every training session;
• the tension of the internal drive belt of every unit
is adjusted and checked by Elite’s technical staff.
However, prolonged or intense use can result in
a decline in the tension causing a reduction in the
transmission of the rider’s force to the resistance
system. In this case it might be necessary to increa-
se the tension of the drive belt, as explained below:
1) loosen the adjustment locking screw by one full
turn, so that you can then turn the adjusting nut
(Fig. 31).
2) Turn the adjusting nut half a turn to tighten the belt
correctly (Fig. 32).
NOTE: if the belt is still uneven after performing this
operation, repeat step 2) and retest.
3) Tighten the adjustment locking screw (under point
1) by one full turn to set the adjustment (Fig. 33).
WARNINGS
• Turbo Muin becomes hot during use. Wait for it
to cool before touching the resistance unit covers.
• Use the Turbo Muin trainer as described in the
manual.
• Turbo Muin is not equipped with an emergency
brake.
• Turbo Muin has been designed and manufactu-
red to ensure maximum safety of the user and/or
third parties, but people, children and pets should
be kept away from the trainer during use as contact
with the moving parts of the trainer and the bicycle
may result in damage or injury.
• Never put your fingers or foreign objects of any
kind through the slots on Turbo Muin, as there will
be high risk of damage to the trainer and/or serious
physical injury.
• Before you start training, place the trainer in a
suitable location, away from any potentially dan-
gerous objects (furniture, tables, chairs...) so as to
avoid any risk of accidental or inadvertent contact.
• The Turbo Muin is to be used by only single rider
at a time.
• Always check the safety and stability of the bicycle
on Turbo Muin before training.
• No part of the product has any use beyond its
original application. The warranty will be void if the
unit has been opened or tampered with.
• Since the feet are made of soft non-slip material,
they may leave traces of rubber on the floor during
use.
• If the trainer needs to be shipped for technical
support and/or any other reason, it must be ship-
ped in its original box. Damage due to a failure to
use the original packaging is not covered by the
warranties.
Note: before shipping your trainer or any of its parts
for technical support, you must first consult Elite
or its distributor or your dealer. Any items received
without prior agreement will be rejected

18
EN
1) WITHIN THE EUROPEAN UNION
This product conforms with European Directives 2002/95/CE, 2002/96/
CE and 2003/108/CE.
The crossed bin symbol given on the equipment or on the packaging indicates that at the end of its
service life the product must be collected separately from other waste.
Therefore at the end of its useful life the user must take the equipment to an appropriate centre for
the differentiated collection of electronic and electrotechnical waste, or return it to the dealer when
purchasing a new product of equivalent type.
Adequate differentiated collection for subsequent sending of the scrapped equipment to recycling,
treatment and environmentally-friendly disposal can help prevent possible negative consequences for
the environment and the health of people and favours the reuse and/or recycling of the materials from
which the equipment is made.
Improper disposal of the product by the user could involve penalties as specified by the regulations
in force.
2) IN NON-EU COUNTRIES
If you want to dispose of this product, please contact your local authorities and ask them what disposal
method applies.
INFORMATION ON PRODUCT DISPOSAL

19
DE
DEUTSCH
Wir danken Ihnen für den Kauf des Elite Turbo Muin
EINLEITUNG
Dieser Rollentrainer gestattet ein effizientes und
einfaches Training und unterstützt so die Verbes-
serung der Leistungen der Benutzer auf jedem
Niveau.
Der Turbo Muin zeichnet sich durch die direkte
Übertragung der vom Athleten ausgeübten Kraft
aus, da das System direkt mit der Kette des Fahr-
rads verbunden ist. Über ein von Elite entwickel-
tes System mit Riemenscheiben mit Übertra-
gungsriemen der neuesten Generation wird die
auf die Pedale ausgeübte Kraft gleichmäßig auf
die Widerstandseinheit übertragen, wodurch eine
Optimierung des Indoor-Trainings erzielt wird.
Der Tretwiderstand wird durch eine integrier-
te Bremseinheit mit Fluid-Technologie erzeugt,
die während des Trainings eine ausgesprochen
geräuscharme Benutzung garantiert. Dieser Flu-
idwiderstand, der dem Luftwiderstand bei der Be-
nutzung des Fahrrads auf der Straße ähnelt, aber
stärker ist, steigt automatisch mit der Geschwin-
digkeit. Dabei können lange Übersetzungen für
Ausdauerarbeiten und kurze Übersetzungen für
Sprintarbeiten eingesetzt werden. Der Bereich
der realisierbaren Widerstände ist sehr groß, so
dass sowohl Anfänger also auch Fortgeschrittene
und Radprofis auf Ihre Kosten kommen.
Der Turbo Muin wurde auf der Grundlage von
jahrelanger Forschung und Entwicklung, an wel-
cher Profis, Amateure und Radsport-Anfänger
(Straße, Mountainbike und Bahn) beteiligt waren,
konzipiert. Dadurch kann ein effizientes Indoor-
Training auf höchstem Niveau entsprechend der
individuellen Anforderungen gestaltet werden.
ALLGEMEINE
SICHERHEITSHINWEISE
Prima di iniziare ad utilizzare il rullo di allenaBitte
lesen Sie aus Sicherheitsgründen und zum Schutz
Ihrer eigenen Gesundheit vor der Benutzung des
Rollentrainers folgende Hinweise:
1. Lassen Sie sich vor Beginn des Trainings einer
sorgfältigen sportärztlichen Untersuchung unter-
ziehen, um ihren aktuellen Gesundheitszustand
auszumachen.
2. Wählen Sie eine Trainingsmodalität, die Ihrem
Gesundheitszustand und Ihrer individuellen Lei-
stungsfähigkeit angemessen ist.
3. Passen Sie das Trainingsprogramm des Rol-
lentrainers Ihrem Gesundheitszustand sowie Ih-
rer individuellen Leistungsfähigkeit an.
4. Brechen Sie das Training umgehend ab und
konsultieren Sie Ihren Arzt, wenn Sie während
des Trainings unerwartete Ermüdungserschei-
nungen oder Schmerzen verspüren.
Die vorausgehenden Hinweise haben allgemeinen
Charakter und sie umfassen nicht alle Vorsichts-
maßnahmen, die für eine korrekte und sichere
Benutzung des Rollentrainers beachtet werden
müssen, für die ausschließlich der Benutzer ve-
rantwortlich ist.
HAFTUNGSAUSCHLUSS
Elite S.r.l. haftet nicht für eventuelle vorüber-
gehende oder bleibende Schäden an der kör-
perlichen Unversehrheit des Benutzers, die eine
direkte oder indirekte Folge der Benutzung des
Rollentrainers sind.

20
DE
ACHTUNG!
Der Turbo Muin wird von ELITE mit einem
Losradkörper geliefert, der mit 9-/10-/11-fach
Kassetten von Shimano® / SRAM® sowie anderen
Herstellern, welche den Shimano® Standard an-
wenden, kompatibel ist.
Als Zubehör ist ein Losradkörper lieferbar, der mit
einer 9-/10-/11-fach Kassette von Campagnolo®
kompatibel ist. In diesem Fall muss der Körper,
der ursprünglich auf dem Turbo Muin vorhanden
ist, durch das Zubehörteil ausgewechselt werden;
für die korrekte Ausführung müssen die Anwei-
sungen auf Seite 21 beachtet werden.
Der Turbo Muin ist mit Fahrrädern mit 130 oder
135 mm Naben und Schnellspannern mit einem
Durchmesser von 5 mm kompatibel.
Wenn Sie bezüglich der Ausstattung (Schaltung,
Nabe, Schnellspanner, etc.) Ihres Fahrrads unsi-
cher sind, wenden Sie sich an den Händler Ihres
Vertrauens, damit die korrekte Anwendung sowie
Kompatibilität mit dem Turbo Muin garantiert
werden kann.
MONTAGE TURBO MUIN
ACHTUNG! Der Körper des Turbo Muin ist sehr
schwer; gehen Sie mit Vorsicht vor und stellen Sie
sicher, dass er während der Montage der Beine
richtig abgestützt wird. Wir empfehlen, die Montage
auf einer robusten Oberfläche wie zum Beispiel ei-
nem Tisch vorzunehmen.
ACHTUNG! Stellen Sie vor Beginn der Montage si-
cher, dass alle aufgeführten und illustrierten Kom-
ponenten vorhanden sind.
• Positionieren Sie den Körper des Turbo Muin (A)
mit der Kunststoffverkleidung nach oben; öffnen
Sie das vordere Bein (Abb. 1) und schrauben Sie die
Schraube und die Sicherheitsrossette M6 (D + E) mit
dem richtigen Anzugsmoment von 3 Nm - 26,5 in-
lbs (Abb. 2) an.
• Befestigen Sie das Rohr des vorderen Beins (B),
mit dem Achsabstand 120 mm (4.8 in) zwischen den
Bohrungen Ø8,5 (0.3 in) mit den Schrauben (G + H)
(Abb. 3).
ACHTUNG! Achten Sie auf die Befestigungsrichtung
des Beins; das längere Ende weist in die gleiche
Richtung, wie die Kunststoffverkleidung.
ACHTUNG! Der Kopf der Schraube muss zum Bo-
den weisen.
• Befestigen Sie das Rohr des hinteren Beins (C),
mit dem Achsabstand 140 mm (5.5 in) zwischen
den Bohrungen Ø8,5(0.3 in) mit den Schrauben (G +
H) (Abb. 4).
ACHTUNG! Achten Sie auf die Befestigungsrichtung
des Beins; das längere Ende weist in die gleiche
Richtung, wie die Kunststoffverkleidung.
ACHTUNG! Der Kopf der Schraube muss zum Bo-
den weisen.
• Stellen Sie den Turbo Muin auf eine ebenen
Fläche und gehen Sie immer mit der größtmögli-
chen Vorsicht vor (Abb. 5).
• Setzen Sie die 4 Mutterabdeckungen M8 (I) auf
die jeweilige Mutter M8 (H) (Abb. 6 und Abb. 7).
NAME UND LISTE DER KOMPONENTEN
Ihr Turbo Muin sollte die folgenden Komponenten umfassen:
KÖRPER TURBO MUIN
1 Bez. A
ROHR VORDERES BEIN
1 Bez. B
ROHR HINTERES BEIN
1 Bez. C
SICHERHEITSSCHRAUBE M6
1 Bez. D
WAGENADAPTER
1 Bez. F
BEFESTIGUNGSSCHRAUBE M8 BEINE
4 Bez. G
BEFESTIGUNGSMUTTER M8 BEINE
4 Bez. H
MUTTERABDECKUNG M8
4 Bez. I
DISTANZSTÜCKE LOSRADKÖRPER
2 Bez. L
SICHERHEITSROSSETTE M6
1 Bez. E
SECHSKANTSCHLÜSSEL
BEZUGNAHME
MENGE
MENGE
BEZUGNAHME
*Quick release wird mit diesem Produkt nicht mitgeliefert.
Table of contents
Languages:
Other E-line Fitness Equipment manuals
Popular Fitness Equipment manuals by other brands

ONE FITNESS
ONE FITNESS GYM WALKER Manual instruction

Precor
Precor CW-116 Assembly guide

Bowflex
Bowflex Max Trainer SE Service manual

First Degree Fitness
First Degree Fitness FluidExercise ARM CYCLE E650 user guide

Balanced Body
Balanced Body Contrology Cadillac manual

Marcy
Marcy ECLIPSE UB1000 owner's manual