10
Wir danken Ihnen, dass Sie sich zum Kauf von Quick-
Motion entschlossen haben
01_ALLGEMEINE SICHERHEITSHINWEISE
Bitte lesen Sie aus Sicherheitsgründen und
zum Schutz Ihrer eigenen Gesundheit vor
der Benutzung des Rollentrainers folgende
Hinweise:
1. Dieses Gerät ist nicht für die Verwen-
dung durch Personen vorgesehen (Kinder
eingeschlossen), die verminderte körperli-
che, sensorielle oder geistige Fähigkeiten
haben oder nicht über ausreichende Er-
fahrung und Kenntnisse verfügen, außer
sie werden beaufsichtigt oder haben
entsprechende erhalten.
2. Kinder sollten beaufsichtigt werden, um
sicherzustellen, dass sie nicht mit dem
Gerät spielen.
3. Lassen Sie sich vor Beginn des Trainings
einer sorgfältigen sportärztlichen Untersu-
chung unterziehen, um ihren aktuellen Ge-
sundheitszustand auszumachen.
4. Wählen Sie eine Trainingsmodalität, die
Ihrem Gesundheitszustand und Ihrer indi-
viduellen Leistungsfähigkeit angemessen
ist.
5. Brechen Sie das Training umgehend
ab und konsultieren Sie Ihren Arzt, wenn
Sie während des Trainings unerwartete
Ermüdungserscheinungen oder Schmer-
zen verspüren.
Die vorausgehenden Hinweise haben al-
lgemeinen Charakter und sie umfassen
nicht alle Vorsichtsmaßnahmen, die für
eine korrekte und sichere Benutzung des
Rollentrainers beachtet werden müssen,
für die ausschließlich der Benutzer verant-
wortlich ist.
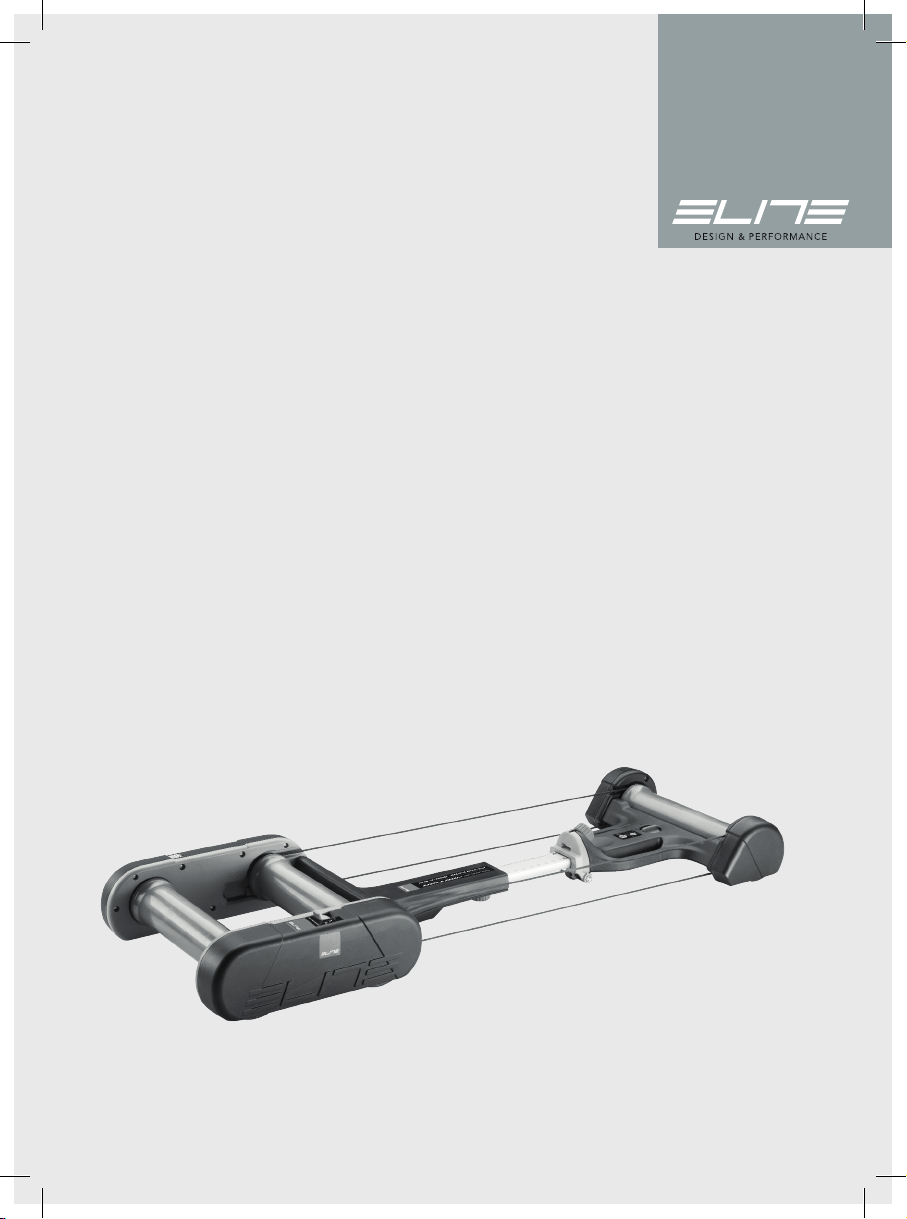
02_EINLEITUNG
• Der Rollentrainer stellt ein Trainingsgerät dar, mit dem
jeder Radsportler die Bestform erreichen kann.
Über die integrierte, auf drei Stufen einstellbare magne-
tische Widerstandseinheit erzielt man einen weichen,
homogenen und progressiven Widerstand. Der in Verbin-
dung mit dem von Elite entwickelten Längsschwingsystem
unvergleichliche Stabilität und Einfachheit im Gebrauch
garantiert. Durch diese Funktionen kann die Rolle an jede
Anforderung und Leistung angepasst werden.
• Die Rollen aus Technopolymer-Material sind so geformt,
dass sie bestmögliche Kontrolle bei der Fahrt gewährlei-
sten.
• Die qualitativ hochwertigen zylindrischen Lager garan-
tieren einen langjährigen Gebrauch. Dadurch können Pro-
bleme, wie zum Beispiel Geräusche, die durch Materielver-
schleiß entstehen vermieden werden.
• Der Rahmen des Modells Quick-Motion ist sehr praktisch,
leicht, bequem zu handhaben, einfach im Gebrauch und
Platz sparend.
• Quick-Motion verfügt nämlich über einen klappbaren
Rahmen, der seine Abmessungen zur Verstauung um ca.
die Hälfte verringert; er beweist sich daher auch für den
Transport selbst als optimale Wahl.
03_HAFTUNGSAUSCHLUSS
Elite S.r.l. haftet nicht für eventuelle vorübergehende oder
bleibende Schäden an der körperlichen Unversehrheit des
Benutzers, die eine direkte oder indirekte Folge der Be-
nutzung des Rollentrainers sind.
!ACHTUNG!
• Achten Sie auf die Position der Hände beim
Schließen der Rolle, um Quetschungen zu vermeiden
beim Schließen.
• Eine falsche Position der Rollen in Bezug auf den
Achsenabstand des Fahrrades kann das Produkt be-
schädigen.
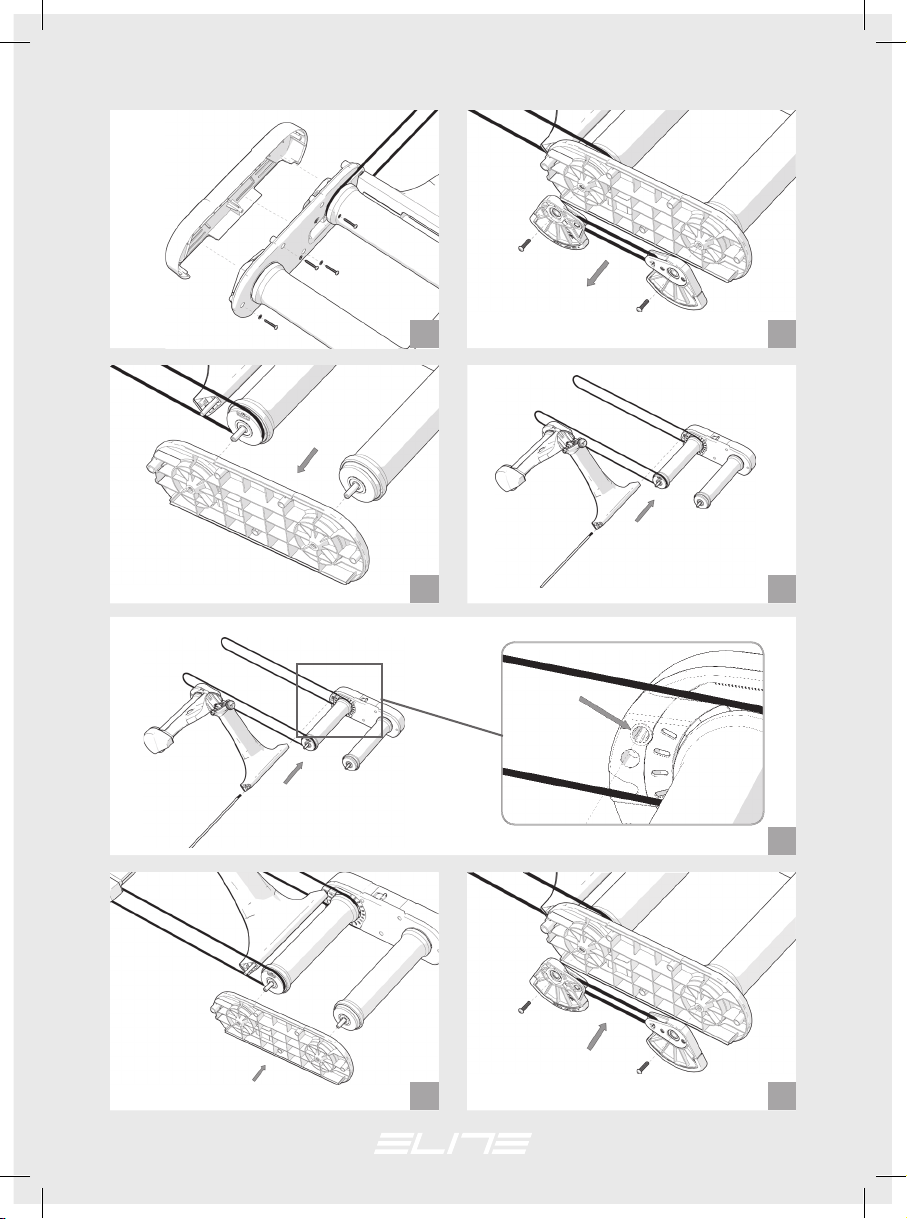
04_BEZEICHNUNG UND LISTE DER
KOMPONENTEN
Vordere Rolle 1 Abb. A
Oberer Drehknopf 1 Abb. B
Antriebsriemen 2 Abb. C
Mittlere Rolle 1 Abb. D
Positionsschieber 1-2-3 1 Abb. E
Hintere Rolle 1 Abb. F
Vorderes Schieberad 2 Abb. G
Unterer Drehknopf 1 Abb. H
Schwingräder 4 Abb. I
Sicherheitsdrehknopf 1 Abb. L