E-Pill Medimi 862101 User manual

1
is guide is intended for easy set-up of e-pill® Medimi™ the rst time e-pill® Medimi™ is used. All set-
tings are available from the e-pill® Medimi™ menu under the “Tools” heading. To change settings and
perform more advanced settings, please refer to the User Guide.
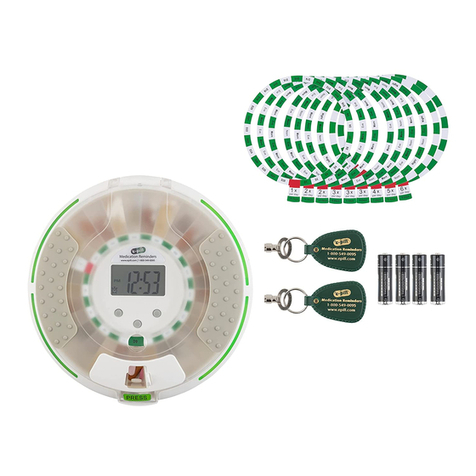
Package contents
e-pill®Medimi™ component parts
Getting started with your e-pill®Medimi™.
e-pill®Medimi™ start-up guide
GettingstartedwithyourMedimi.2011‐03‐11 Page1of7
Medimistart‐upguide
Thisguideisintendedforeasyset‐upofMedimithefirsttimeMedimiisused.Allsettingsare
availablefromtheMedimimenuunderthe“Tools”heading.Tochangesettingsandperformmore
advancedsettings,pleaserefertotheUserGuide.
Packagecontents
③
②
①
1. Medimi
2. TwoAlkalinebatteriestypeAAA
3. Twopillcartridges(Cartridgesare
availableintwosizes:Onewith
roomfor7largetabletsandone
withroomfor15smallertablets)
Medimicomponentparts
1.Lightindicator6.Slidingcover
2.Ejectorbutton7.Housingcover
3.Display8.Cartridgemodule
4.Navigationkeys9.Pillcollectioncup
5.USBconnector
Note:Donotinsertthe
batteriesyet
1.Cartridgefittedinto
cartridgemodule
3.Cartridgeejectbutton
2.Cartridgeenteringthe
cartridgemodule
4.Pillcollectioncupthat
mustberemovedtogain
accesstothecartridge
1. Medimi™
2. Two Alkaline batteries type AAA
3. Two pill cartridges (Cartridges are available in two sizes:
One with room for 7 large tablets and one with room for
15 smaller tablets.)
1. Light indicator
2. Eject button
3. Display
4. Navigation keys
5. USB connector
6. Sliding cover
7. Housing cover
8. Cartridge module
9. Pill collection cup
1. Cartridge tted into cartridge module
2. Cartridge entering the cartridge module
3. Cartridge eject button
4. Pill collection cup that must be removed to
gain access to the cartridge
Note: Do not insert the batteries yet!
4
GettingstartedwithyourMedimi.2011‐03‐11 Page7of7
Takingyourmedication
Whenitistimetotakeyourmedication,Medimiwillalertyouwithlight,soundandvibration.To
dispensemedication,presstheblinkingejectorbuttontwice.
KeepMedimiuprightwhenejectingmedication.
Medicationisejectedintothepilcollection
cup.Checkthatthedoseiscorrect.
Totakethemedication,pullthecupdown
onenotchandslantyourMedimiuntilthe
pillsfallintoyourhand(seepicture).
Followingeachdoseejection,Medimichecksifthereissufficientmedicationforthenextdose.If
Medimialertsyouthatitisoutofmedication,opentheslidingcoverandcheckthedisplaytosee
whichmedication(s)areabouttorunout.Toavoidincorrectmedication,fillupwithmedication
immediately.
Refillingmedication
Removethepillcollectioncup.
Takeoutthecartridge(s)toberefilled.RememberwherethecartridgewassetinMedimi.Refillthe
cartridgeinthesamewayasdescribedatstart‐up.
WhenthecartridgeisreinsertedinyourMedimi,atextmessagethedisplaywillconfirmwhich
cartridgewasenteredandwhichmedicationMedimiexpectshasbeeninserted.Medimiwillaskhow
manypillsareinthecartridge.Ifthecartridgewasemptywhenitwasremoved,asuggestionfora
fullcartridge,i.e.7or15,ismade.Ifthecartridgecontainedpillswhenitwasremoved,the
suggestionwillbethesamenumberaswhenthecartridgewasremoved.Thenumbercanbe
changedwith�▼.Confirmbypressing●.
Note:Ifawrongnumberisentered(e.g.toomany),thiscanleadtoincorrect
dosages.
Entering text
▲▼◄ ► Scrolls between letters and functions. In the example above, the letter C is highlighted.
● Selects the highlighted letter and enters it in the text window at the bottom of the display.
In the example above, the letter C is entered in the text window.
Aa Switches between upper and lower case letters.
←
Deletes one letter.
_ Enters a space.
Concludes text entry and returns to the menu.
Taking your medication
When it is time to take your medication, e-pill® Medimi™ will alert you with light, sound and vibration.
To dispense medication, press the blinking ejector button twice.
Keep e-pill®Medimi™ upright when ejecting medication.
Medication is ejected into the pil collection cup. Check that the dose is correct.
To take the medication, pull the cup down one notch and slant your e-pill® Med-
imi™ until the pills fall into your hand (see picture).
Following each dose ejection, e-pill® Medimi™ checks if there is sucient medica-
tion for the next dose. If e-pill® Medimi™ alerts you that it is out of medication,
open the sliding cover and check the display to see which medication(s) are about to
run out. To avoid incorrect medication, ll up with medication immediately.
Relling medication
Remove the pill collection cup.
Take out the cartridge(s) to be relled. Remember where the cartridge was set in e-pill® Medimi™. Rell
the cartridge in the same way as described at start-up.
When the cartridge is reinserted in your e-pill® Medimi™, a text message on the display will conrm which
cartridge was entered and which medication e-pill® Medimi™ expects has been inserted. e-pill® Medimi™
will ask how many pills are in the cartridge. If the cartridge was empty when it was removed, a suggestion
for a full cartridge, i.e. 7 or 15, is made. If the cartridge contained pills when it was removed, the sugges-
tion will be the same number as when the cartridge was removed. e number can be changed with ▲ ▼.
Conrm by pressing ●.
Note: If a wrong number is entered (e.g. too many), this can lead to incorrect dosages.
www.epill.com 1-800-549-0095

3
GettingstartedwithyourMedimi.2011‐03‐11 Page4of7
Medimiset‐up
ThefirsttimeMedimiisused,anumberofbasicadjustmentsmustbemade.
MakesuretherearenocartridgesintheMedimi.Removethepillcollectioncup.
Makesureyouhavethenecessaryinformationonadministrationofyourmedication(times
anddosage).
Completelyremovetheslidingcovertoexposethe
batterycompartment.Slidethecoverawayfromthe
ejectorbuttonbutton.
Insertthesuppliedbatteries.
Makesurethebatteriesareinsertedinthesame
orientationasshownatthebottomofthebattery
compartment.
Whenthebatteriesareinserted,Medimiwillpromptyoutoenteranumberofsettings.Perform
thesesettingsaspromptedbythedisplayusingthenavigationkeys.
1. Selectthelanguagebyscrollingwith▲▼.Press● toconfirm.
2. Selectthetimeformat,24hor12h.Scrollwith▲▼.Press● toconfirm.
3. Selectthedateformat.Scrollwith▲▼.Press● toconfirm.
4. Setthetime.Setthehourthroughbypressing▲▼.
Press►/●toselecttheminuteitem,thensettheminutes.Confirmbypressing►/●.
5. Setthedate.Confirmbypressing►/●.
Youwillnowbeaskedwhetheryouwanttoproceedtoascheduleguidetosetupyourmedicine
doses.Ifyouselectnottodothisnow,itisalwayspossibletolaterperformthissetupfromToolsin
themainmenu.Medimicanalsobesetupmanually.
Foradvancedadjustments,pleaserefertotheUserGuide.
When the batteries are inserted, e-pill® Medimi™ will prompt you to make a number of settings. Per-
form these settings as prompted by the display using the navigation keys.
1. Select the language by scrolling with ▲ ▼. Press ● to conrm.
2. Select the time format, 24 h or 12 h. Scroll with ▲ ▼. Press ● to conrm.
3. Select the date format. Scroll with ▲ ▼. Press ● to conrm.
4. Set the time. Set the hour by pressing ▲ ▼.
Press ►/ ● to select the minute item, then set the minutes. Conrm by pressing ►/ ●.
5. Set the date. Conrm by pressing ►/ ●.
You will now be asked whether you want to proceed to a schedule guide to set up your medicine doses.
If you select not to do this now, it is always possible to later perform this setup from Tools in the main
menu. e-pill® Medimi™ can also be set up manually.
For advanced adjustments, please refer to the User Guide.
1. Start the guide by highlighting Yes and press ●.
2. Select to erase previous schedules. Highlight Yes and press ●.
3. Conrm by pressing ●.
4. Enter the name of the rst medication. Enter the same name as the one written on the label.
See next page.
5. Enter the number of doses. Complete by pressing ►/ ●.
6. Enter the dose schedule. Complete by pressing ►/ ●.
7. Enter the number of pills to be taken in each dose. Complete by pressing ►/ ●.
8. Repeat steps 11 and 12 for each dose to be administered.
9. Once schedules have been entered for all doses, you will be prompted whether you want to enter other
medications. If yes, repeat steps 8-13.
10. Once all medications have been programmed, e-pill® Medimi™ will prompt you to insert the car-
tridge. Remove the pill collection cup by pulling it down from the e-pill® Medimi™. Insert car-
tridges with the rounded end rst. Start with the cartridge closest to the buttons and display. Make
sure each cartridge is correctly inserted and locks into place with an audible click.
If you make a mistake during the setup procedure, select Tools from the main menu and run the wizard
again. To change settings, please refer to the User Guide.
•
Completely remove the sliding cover to expose the battery com-
partment. Slide the cover away from the ejector button.
•
Insert the supplied batteries.
•
Make sure the batteries are inserted in the same orientation as
shown at the bottom of the battery compartment.
2
The keys and LCD are used when entering data in e-pill®Medimi™
Initiation
Prepare your medication and the cartridges. To avoid incorrect lling, ll up with one pill at a time.
Remove the cartridge cover. e cover is marked with “← OPEN HERE” to show where to open it.
Check that the pills t in the cartridge pill compartments.
Note: Do not force pills and capsules into the pill compartments.
Note: Only ll the compartments with pills and capsules.
e-pill®Medimi™ set-up
e rst time e-pill® Medimi™ is used, a number of basic adjustments must be made.
• Make sure there are no cartridges in the e-pill® Medimi™. Remove the pill collection cup.
• Make sure you have the necessary information on correct administration of your medication
(times and dosage).
GettingstartedwithyourMedimi.2011‐03‐11 Page2of7
ThekeyboardandLCDareusedwhenenteringdatainMedimi.
Up ▲
LCD display
OK (Enter) ●
Down ▼
Right (next) ►
Left (previous) ◄
GettingstartedwithyourMedimi.2011‐03‐11 Page3of7
Initiation
Prepareyourmedicationandthecartridges.Toavoidincorrectfilling,fillupwithonepillatatime.
Removethecartridgecover.Thecoverismarkedwith“←OPENHERE”toshowwheretoopenit.
Checkthepillsfitinthecartridgepillcompartments.
Note:Donotforcepillsandcapsulesintothepillcompartments.
Note:Onlyfillthecompartmentswithpillsandcapsules.
Fillupwithmedicationasshown.Fill
thecompartmentscounterclockwise.
Thepicturershowsacartridgewith7
compartments.Inacartridgewith15
compatments,thecompartmentsare
halfthesize.
Note:Onlyonepillpercomparment
andonlyonemedicationpercatridge.
Replacethecartridgecover.Makesure
itsnapsintoplace.
Turnthecartridgeoverandwritethe
nameofthemedicationonthelabel.
Repeatuntilallcartridgeshavebeenfilled.
Fill up with medication as shown. Fill the compartments counter-
clockwise. e picturer shows a cartridge with 7 compartments. In a
cartridge with 15 compatments, the compartments are half the size.
Note: Only one pill per comparment and only one medication per
catridge.
Replace the cartridge cover. Make sure it snaps into place.
Turn the cartridge over and write the name of the medication on
the label.
Repeat until all cartridges have been lled.
Other E-Pill Medical Equipment manuals

E-Pill
E-Pill MedTime SAFE User manual

E-Pill
E-Pill MedTime 991019 User manual

E-Pill
E-Pill MedGlider HOME PLUS User manual

E-Pill
E-Pill MedTime Station User manual

E-Pill
E-Pill MedSmart Voice Plus User manual

E-Pill
E-Pill MedTime Station Plus User manual

E-Pill
E-Pill 793405 Guide

E-Pill
E-Pill MedTime Station Plus User manual

E-Pill
E-Pill ALRT User manual

E-Pill
E-Pill MedTime Station Plus User manual