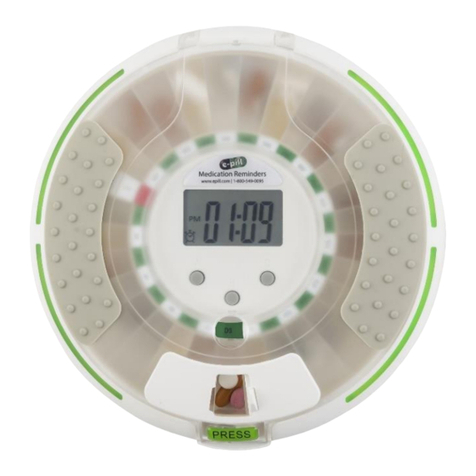
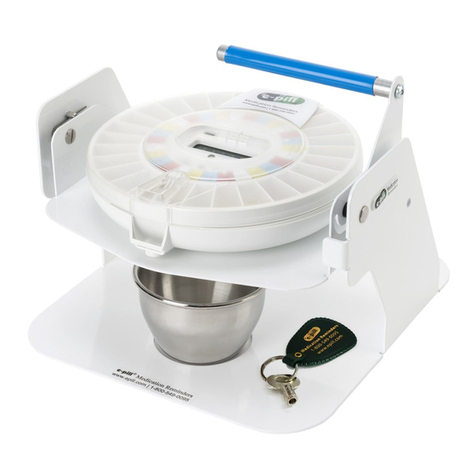
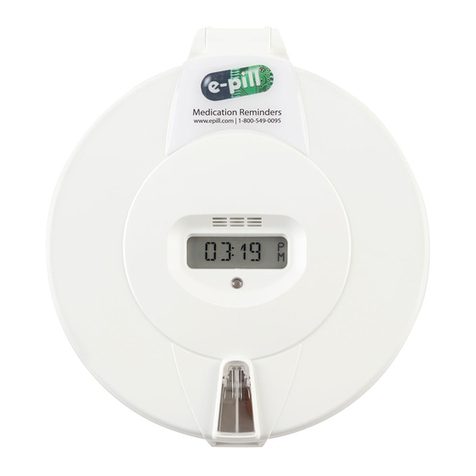
E-Pill MedTime SAFE User manual

1
Instruction Manual
e-pill®MedTime Safe
Tamper Resistant Automatic Pill Dispenser
Item: 998046 | Patent Pending
Carefully review and save this setup guide

2
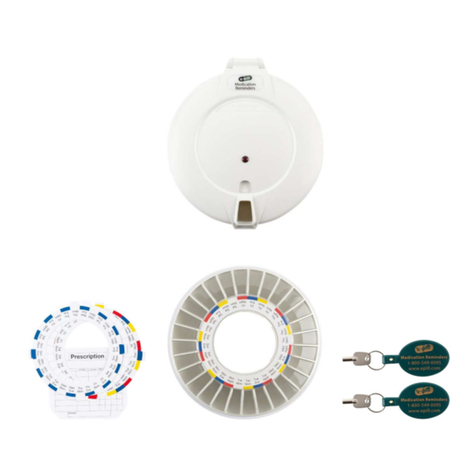
Dosage Template Set (x1)
Item: 996035
Locked Automatic Pill Dispenser (x1)
Item: Not available separately
Locked Metal Case (x1)
Item: Not available separately
Pill Dispenser Key (x2)
Item: 993026
Case, Padlock & Location lock Key Set (x2)
Item: Not available separately
AA Battery (x4)
Item: Not available separately
Medication Tray (x1)
Item: 996030
Case Padlock & Location Lock (x1)
Item: Not available separately
Important: Always keep e-pill MedTime Safe locked with all locks, including the location lock.
Two sets of four keys per set are included - one set for the caregiver and one backup set.
Components

3
e-pill® MedTime Safe
Tamper Resistant Locked Automatic Pill Dispenser
Introduction
The e-pill MedTime Safe is designed to remind and dispense pills according to
the patient’s dosing schedule; reminding by means of auditory alarm and
flashing light. The dispenser will make the correct dose available at the
correct time, keeping all other pills secure via 4 locks and a metal case.
Important: Some patients attempt to gain access to their medications by
shaking the dispenser. e-pill MedTime Safe has been designed to keep all un-
dispensed medications locked inside, even when shaken, but if excessive force
is applied, this action will damage the drive unit inside the dispenser and void
the warranty.
Always keep e-pill MedTime Safe locked with all locks, including the location
lock. The plastic pill dispenser must remain inside the locked metal enclosure
for the device to be tamper resistant.
How it Works
At dose time the alarm will sound, and the internal tray will rotate making the
correct dose available. Turn the dispenser over to release the correct dose and
silence the alarm. If the dispenser is not turned over the alarm will continue
for 1 hour. The dose in the dispensing spout will remain available to the
patient until the next dose time.

4
Carefully Go Through All Steps for Proper Setup
SETUP - STEP 1
Metal Case
Open the case and remove the pill dispenser.
1. Unlock the case by inserting the case key (round silver key with square
silver backing) into the case lock and turn to the left.
2. With the case unlocked, rotate the case’s lid to the left and lift up.
3. Remove the dispener from the case.
Open the Lid
1. Press your thumb on the front tab, then lift up the cover.
a. Display On: Button 3 will turn on the display. Turning the
dispenser over will also do this.
b. Display Off: Button 2 will turn off the display.
Setting the Clock and the Alarms
CLOCK MODE: Use either a 12-hour clock (AM/PM) or 24-hour clock.
1. If you do not see AM/PM and wish to use a 12-hour clock.
a. Press and hold button 2 and button 3 simultaneously to switch to
12-hour mode. “AM” or “PM” will be displayed.
CURRENT TIME:
1. Press and hold button 1 until the hours blink.
2. Tap button 2 or 3 to set the correct hours (note AM/PM).
3. Tap button 1 until the minutes blink.

5
4. Tap button 2 or 3 to set the correct minutes.
5. Press and hold button 1 for 5 seconds to save.
ALARM TIME: Alarms must be set in order starting with the earliest.
1. Tap Button 1. The hours and “A1” will begin to blink.
a. Tap button 2 or 3 to set the alarm’s hour (note AM/PM).
b. Tap button 1 until the minutes blink.
c. Tap button 2 or 3 to set the alarm’s minute.
d. Tap button 1 to save and to move to the next alarm.
e. Repeat a-d until all your alarms are set.
2. Delete an Alarm: Once on the alarm you want to delete.
a. Tap button 2 or 3 to change the hour until --: -- is displayed.
3. Tap 1 until the current time is displayed.
ALARM TONE: Tones A, B, C and None (blank) are available. Set Tones with
the current time displayed.
1. Press and hold button 1 & 3 simultaneously for a few seconds.
2. After the tone changes let go of both buttons completely.
3. Repeat 1 & 2 to rotate through the different tones.
a. After tone C, no text is shown, indicating a light only alarm.
SETUP - STEP 2
Filling the Tray
1. With the lid still open, remove the tray that is inside the dispenser.
Important: Never force the tray to rotate.
2. e-pill MedTime Safe comes with six different dosing templates. The
template identifies the number of alarms per day and, very importantly,
the time of the day that you are filling the tray.
3. Fill compartments counterclockwise using the dosing template as a
guide. Note: If you take medications 3 times per day, the last
compartment will be left empty.
Begin to Use
1. Place the tray into the dispenser. The next dose will be the first
compartment to the right of the slot located directly at 6 o’clock. At each
alarm time the try will rotate clockwise 1 compartment. Important:
Never force the tray to rotate.
6
2. Close the lid.
3. Turn the dispenser over and lock the dispenser. Important: The
dispenser’s lock should only be turned ¼ of a turn. Overturning the key
will cause the lock to break.
4. Place the dispenser into the case and lock the case.
5. Attach and lock the padlock.
6. Attach and lock the location lock.
Congratulations
Your e-pill MedTime Safe is now 100% setup.
Error Handling
Error Type 1: Medications Will Not Dispense
Solution:
1. Check all compartments and the dispensing spout for stuck pills.
a. Gel-caps: Adding a thin coating of standard baking flour to the
compartments can help prevent blockage.
b. Tablets: Splitting larger tablets into smaller pieces using a pill
splitter can help prevent blockage.
Error Type 2: Dispensing Will Not Silence the Alarm
Solution:
1. The batteries are near depletion. Look for the low batter icon
Replace all 4 AA batteries immediately. Only use alkaline.
Note: If replacing the batteries does not solve the error, then the
dispenser has been misused and is therefore not covered under
warranty.
Error Type 3: Error Message/Rotation Issue
There has been an attempt to access medications which has caused damage to
the dispenser. This is often due to the patient shaking the unit in order to gain
access to their medication(s). This error message/issue occurs when the
dispenser has been misused and is therefore not covered under warranty.
Solution:
1. We offer repair services. Give us a call at 1-800-549-0095.
X

7
General Information
Blank Screen
The dispenser will turn off its display in order to increase battery life.
Medications will still be dispensed at alarm time. To wake up the display, turn
the dispenser over or press button 3.
Lock
The dispenser’s lock is designed to only be turned a ¼ of a turn to either lock
or unlock. Overturning the key will cause the lock to break.
Low Battery Alert
Indicates the batteries are running low. Replace immediately.
Battery Replacement
The dispenser’s clock and alarm times are saved when replacing the batteries,
but this is only true if replacement is done prior to the batteries reaching
100% depletion. The new batteries should be inserted within 5 minutes of the
old batteries being removed so the dispenser’s clock and alarm times stay
saved. After replacing the batteries, do check the clock and alarm times to
verify their accuracy.
Cleaning
Remove the medication tray from the dispenser and wipe down the tray with
a damp cloth. Important: Never force the tray to rotate.
X

8
Follow us on:
e-pill, LLC
49 Walnut Street, Bldg. 4
Wellesley, MA 02481, USA
United States: 1-800-549-0095
International: +1-781-239-2941
Disclaimer
Organizing medications correctly, setting and assigning alarm/dose times and determining what medications go into each
slot is the responsibility of you, your caregiver, and/or your health care provider. This e-pill Medication Reminder is only a
supplement to any memory system that you currently use to remind yourself to take medications. The user maintains full
responsibility to administer medication at the appropriate times and to keep the device secure and locked. e-pill, LLC
assumes no responsibility for any incidental or consequential damages, including without limitation, damages or injuries
resulting from malfunction of the product. e-pill, LLC’s liability shall under no circumstances exceed the amount paid by
the user for the dispenser.
Other manuals for MedTime SAFE
1
This manual suits for next models
1
Table of contents
Other E-Pill Medical Equipment manuals

E-Pill
E-Pill MedGlider HOME PLUS User manual

E-Pill
E-Pill MedTime Station Plus User manual

E-Pill
E-Pill MedTime Station User manual

E-Pill
E-Pill MedSmart Voice Plus User manual

E-Pill
E-Pill ALRT User manual

E-Pill
E-Pill Medimi 862101 User manual

E-Pill
E-Pill MedSmart User manual

E-Pill
E-Pill MedTime 991019 User manual

E-Pill
E-Pill 793405 Guide

E-Pill
E-Pill MedTime Station Plus User manual