manuals.online logo
Brands
  1. Home
  2. •
  3. Brands
  4. •
  5. EasyPro
  6. •
  7. Water Pump
  8. •
  9. EasyPro EXP3200 Manual

EasyPro EXP3200 Manual

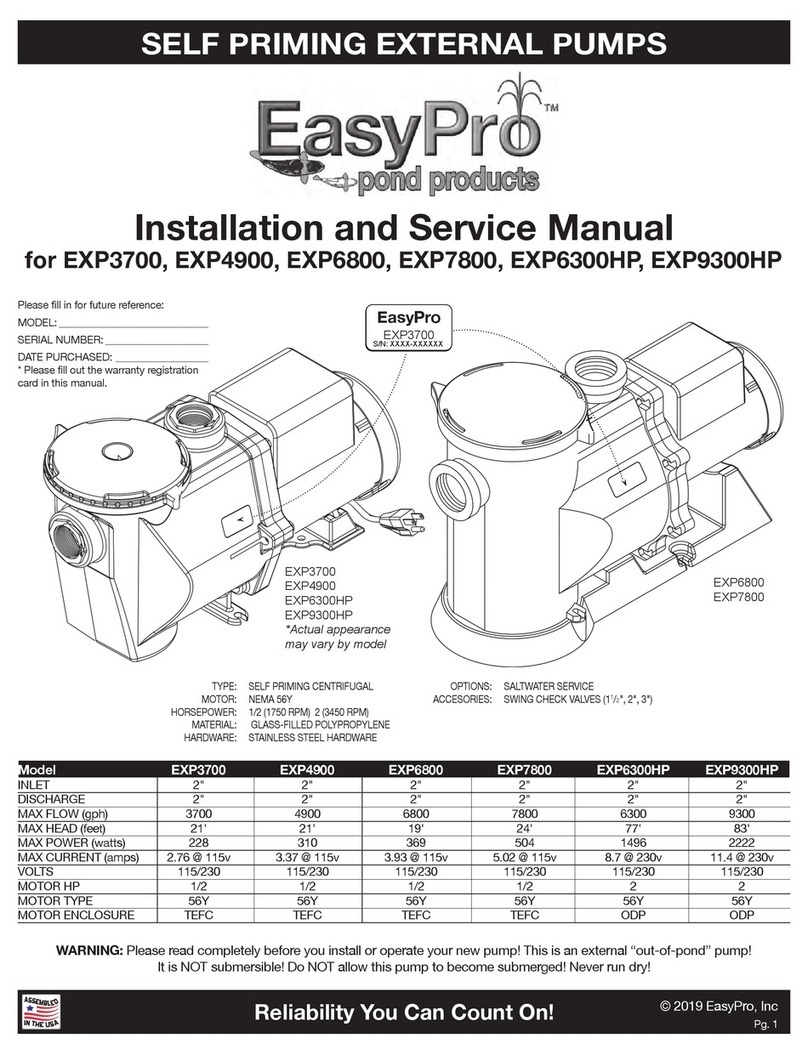
SELF PRIMING EXTERNAL PUMPS
Reliability You Can Count On! © 2021 EasyPro, Inc.
Pg. 1
I
N
T
H
E
U
S
A
A
S
S
E
M
B
L
E
D
Installation and Service Manual
for EXP3200, EXP5000, EXP6800, EXP7800, EXP6000HP
WARNING: Please read completely before you install or operate your new pump! This is an external “out-of-pond” pump!
It is NOT submersible! Do NOT allow this pump to become submerged! Never run dry!
TYPE: SELF PRIMING CENTRIFUGAL
MOTOR: NEMA 56Y
HORSEPOWER: 1/2 (1750 RPM) 2 (3450 RPM)
MATERIAL: GLASS-FILLED POLYPROPYLENE
HARDWARE: STAINLESS STEEL HARDWARE
OPTIONS: SALTWATER SERVICE
ACCESSORIES: SWING CHECK VALVES (1
1
/
2
", 2", 3")
Please ll in for future reference:
MODEL: _____________________________
SERIAL NUMBER: ____________________
DATE PURCHASED: __________________
* Please ll out the warranty registration
card in this manual.
S/N: XXXX-XXXXXX
EXP3200
EasyPro
*Actual appearance
may vary by model
Model EXP3200 EXP5000 EXP6800 EXP7800 EXP6000HP
INLET 2" 2" 2" 2" 2"
DISCHARGE 2" 2" 2" 2" 2"
MAX FLOW (gph) 3200 5000 6800 7800 6000
MAX HEAD (feet) 15' 18' 19' 24' 60'
MAX POWER (watts) 228 310 369 504 1416
MAX CURRENT (amps) 2.68 @ 115v 3.37 @ 115v 3.93 @ 115v 5.02 @ 115v 8.7 @ 230v
VOLTS 115/230 115/230 115/230 115/230 115/230
MOTOR HP 1/2 1/2 1/2 1/2 2
MOTOR TYPE 56Y 56Y 56Y 56Y 56Y
MOTOR ENCLOSURE TEFC TEFC TEFC TEFC ODP
SELF PRIMING EXTERNAL PUMPS
Reliability You Can Count On! © 2021 EasyPro, Inc.
Pg. 2
I
N
T
H
E
U
S
A
A
S
S
E
M
B
L
E
D
ELECTRICAL HOOK-UP
1. Check that supply voltages match the motor’s requirements.
2. Check motor wiring and connect, according to instructions on motor, to match supply voltage.
3. Power cord should be protected by conduit or by cable and be of proper gauge. It should be no longer than necessary.
4. Power should be drawn directly from a box with circuit breaker protection or with a fused disconnect switch.
We congratulate you on your choice of the EXP Self Priming Pump! It has been carefully designed using the advantages of today’s
technology and carefully constructed to give you the dependability of yesterday. To insure proper performance, we urge you to carefully
follow the instructions in this manual. If you have any questions, call your nearest distributor or EasyPro for assistance.
WARNING: ALWAYS SHUT OFF ELECTRICAL POWER BEFORE INSTALLATION AND / OR SERVICING THIS PUMP!
ALL ELECTRICAL WIRING SHOULD MEET STATE AND LOCAL ORDINANCES. IMPROPER WIRING MAY NOT ONLY BE A
SAFETY HAZARD BUT MAY PERMANENTLY DAMAGE THE MOTOR AND/OR PUMP!
INSTALLATION
Please read carefully! When properly installed this primer pump will provide dependable trouble-free service.
1. Locate pump as near the source to be pumped as possible. A ooded suction situation is preferred. This pump is self-priming, however, there must be
uid in the pump for it to function properly. A check valve is recommended for non-ooded suction. (Figure 2)
2. Mount motor base to a secure, immobile foundation.
3. Use only plastic ttings on both the intake and discharge ports. Seal pipe connections with Teon™ paste. These ttings should be self-supported
and in neutral alignment with each port. (i.e. Fittings must not be forced into alignment which may cause premature line failure or damage to the pump
volute.)
4. Never restrict the intake. Keep both input and discharge lines as free of elbows and valves as possible. Always use pipe of adequate diameter. This will
reduce friction losses and maximize output.
5. This pump must not be run dry! We recommend a ooded suction installation. Please read carefully! When properly installed, the EasyPro pump will
provide dependable, trouble-free service.
6. Before starting pump, the priming pot must be lled with water.
PRIMER
SWING CHECK VALVE
FLOODED SUCTION
WARNING: DO NOT RUN DRY!
BALL VALVE
SUCTION LIFT
(FIGURE 2)
SELF PRIMING EXTERNAL PUMPS
Reliability You Can Count On! © 2021 EasyPro, Inc.
Pg. 3
I
N
T
H
E
U
S
A
A
S
S
E
M
B
L
E
D
PUMP END ASSEMBLY
1. Clean and inspect all pump parts (0-ring, seal seats, motor shaft, etc.).
2. If replacing the seal, apply sealant in bracket bore hole and around seal case according to sealant instructions. We recommend using Gasgacinch®.
Silicone sealant can also be used.
3. Press seal into bracket while taking care not to damage seal face.
4. Place slinger (rubber washer) over motor shaft and mount bracket to motor.
5. If replacing the seal, carefully lubricate the boot around ceramic piece and press it into the impeller hub making certain that the ceramic is in evenly
- the sealing surface should be parallel with the impeller hub.
6. Apply clean water to the carbon-graphite and seal seat sealing surfaces. Do not use silicon lubricants or grease!
7. Mount bracket to motor face.
8. Thread impeller onto shaft and install o-ring and screw! If required, remove motor end-cap and use a screwdriver on the back of motor shaft to
prevent shaft rotation while tightening. Replace motor end cap.
9. Place diuser over impeller and tighten allen bolts used to hold diuser in place. Note: Be sure diuser is in an upright position. (The word “top”
appears on the diuser as an indicator).
10. Seat O-ring on diuser. Assemble diuser to bracket with two allen screws.
11. Seat O-ring in bracket slot and assemble casing to bracket.
12. Install drain plugs with its O-rings in casing drain holes.
DISASSEMBLY
1. Shut o power to motor before disconnecting any electrical wiring.
2. Close all necessary valves on inlet and discharge lines and drain the pump by removing both drain plugs. The water will drain faster if you loosen the lid.
3. Disassemble bracket-motor assembly from casing by removing the nuts and bolts. (The casing may be left in-line)
4. Unscrew the two allen bolts and remove diuser. Diuser may need to be pried o with a athead screwdriver.
5. Remove screw and O-ring from front side of impeller. Screw is a left-handed thread and loosens in a clockwise direction.
6. Remove cap covering shaft at back of motor. Unscrew the impeller by twisting counter clockwise while holding the shaft with a large screwdriver to
prevent shaft rotation.
7. Remove ceramic piece from impeller (if replacing the seal).
8. Detach bracket from motor.
Remove seal from bracket by pressing out from the back (if replacing the seal). Do not dig out from the front!
IMPELLER*
SEAL DRAIN PLUG
& O-RING
STRAINER
BASKET
HARDWARE
BRACKET
O-RING, CASING
TO BRACKET O-RING
(DIFFUSER)
DIFFUSER
LID
O-RING, LID
CASING
SLINGER
2" ADAPTOR
( 2
1
/
2
" UNION X 2" SOCKET)
DESCRIPTION P/N
SEAL 1000.0414
IMPELLER *DEPENDS ON MODEL
CONSULT FACTORY
O-RING, CASING TO BRACKET 9000.061
CASING 9000.070
DRAIN PLUG 1000.110
O-RING, DRAIN PLUG 805-0112
DIFFUSER 9000.120
O-RING, DIFFUSER 9000.121
DESCRIPTION P/N
LID 9000.779
HARDWARE KIT 9000.502
SLINGER 1000.010V
BRACKET 9000.030
O-RING, LID 9000.777
STRAINER BASKET 9000.778
2" ADAPTOR (2 1/2" UNION X 2" SOCKET)
9000.070-2
SELF PRIMING EXTERNAL PUMPS
Reliability You Can Count On! © 2021 EasyPro, Inc.
Pg. 4
I
N
T
H
E
U
S
A
A
S
S
E
M
B
L
E
D
MAINTENANCE
Lubrication
Motor - Permanently Lubricated ball bearings - no service required.
Rotary Seal - Requires no lubrication after assembly.
Symptom Problem Resolution
No Flow
Insucient Prime
Prime system with water and purge all air from suction piping.
Install check valve.
Insucient Power
Verify power supply and connection from panel to pump.
Verify proper voltage. Some models are dual voltage (115/230).
Flow Restriction
Ensure valves are open.
Ensure plumbing is clear, including suction strainers, check valves, etc.
Verify check valve orientation and direction of permitted ow.
Clean out leaves or other debris from basket strainer (if applicable).
Air leak
Fix air leaks at ttings, connections, strainer basket etc. This typically occurs on the intake side.
System Incompatibility
Verify hydraulic compatibility: i.e. pump & pipe are sized for the system.
Low Flow
Air leak
Fix air leaks at ttings, connections, strainer basket etc. This typically occurs on the intake side.
System Incompatibility
Verify hydraulic compatibility: i.e. pump & pipe are sized for the system.
Insucient Power
Verify power supply and connection from panel to pump.
Verify proper voltage. Some models are dual voltage (115/230).
Flow Restriction
Ensure valves are open.
Ensure plumbing is clear, including suction strainers, check valves, etc.
Clean out leaves or other debris from basket strainer (if applicable).
Insucient Prime
Prime system with water and purge all air from suction piping.
Cavitation
Verify airtight plumbing on the suction plumbing especially ttings!
Clean out leaves or other debris from basket strainer (if applicable).
Increase pipe size where possible.
Decrease suction pipe length, reduce the number of elbows, etc.
Verify hydraulic compatibility: i.e. pump and pipe are sized for the system.
Sporadic Operation Insucient Power
Verify power supply and connection from panel to pump.
Verify proper voltage. Some models are dual voltage (115/230).
Poor Ventilation
Ensure adequate air ow over motor to prevent overheating.
Excessive Noise
Cavitation
Verify airtight plumbing on the suction plumbing especially ttings!
Clean out leaves or other debris from basket strainer (if applicable).
Increase pipe size where possible.
Decrease suction pipe length, reduce the number of elbows, etc.
Verify hydraulic compatibility: i.e. pump and pipe are sized for the system.
Insucient Power
Verify power supply and connection from panel to pump.
Verify proper voltage. Some models are dual voltage (115/230).
Flow Restriction
Ensure valves are open.
Ensure plumbing is clear, including suction strainers, check valves, etc.
Verify check valve orientation and direction of permitted ow.
*The pump must be drained before servicing or if stored
below freezing temperatures. Periodic replacement of
seals may be required due to normal carbon wear.
EasyPro Pond Products
4385 East 110th, Grant, MI 49327
800-448-3873 • 231-834-5537 fax
www.EasyPro.com
Name:________________________________________
Address:______________________________________
City: _______________ State: _____ Zip: __________
Model: _______ Serial Number:__________________
Date purchased: ______Where purchased: ________
Gasgacinch®is a registered trademark of Porter Manufacturing. Noryl®is a registered trademark of the
General Electric Company. Teon®is a registered trademark of DuPont Company.
Activate your warranty by lling out this form and mailing to EasyPro Pond Products
9182 • 9/21
EasyPro Pond Products Limited Warranty
EasyPro Pond Products (“EasyPro”) warrants to the purchaser that this product ("Product") will be free from any mechanical
or material defects for a period of 3 years from the date of purchase. EasyPro specically does not guarantee chemical
compatibility, and expressly does not warrant units from any problems caused by chemical attack or failure due to incompatibility of
uid being pumped with pump materials of construction. This warranty only covers properly installed and maintained Products
sold by authorized EasyPro Sellers who are subject to and follow EasyPro’s quality control standards. Please note that
because EasyPro is unable to control the quality of Products sold by unauthorized sellers, unless otherwise prohibited by law,
this warranty does not cover Products purchased from unauthorized sellers.
This warranty does not cover normal wear and tear, nor any deterioration suered through overloading, improper use,
negligence, improper installation, acts of God or accident. Similarly, any modication made by the purchaser to the Product
will cause the warranty to be null and void. This warranty does not cover any cost associated with the installation or removal
of the Product subject to a warranty claim.
All returned items will be inspected to determine cause of failure before a warranty claim is approved.
The exclusive remedies provided hereunder shall, upon EasyPro’s inspection and option, be either repair or replacement of
the Product or parts covered under this warranty.
Making a Claim: A Return Authorization (“RA”) number must rst be obtained by calling EasyPro at 800-448-3873 or via email
at [email protected]. It is the purchaser’s responsibility to pay the return shipping charges. Be sure to include the RA
number, original receipt (in the form of an invoice or sales receipt), your name, your return address and your phone number
inside of the package. No warranty claims will be honored without the original receipt that shows that your purchase was
made from an Authorized EasyPro Seller. Ensure the product is properly packaged and insured for the replacement value.
Damage due to improper packaging is the responsibility of the sender.
ALL OTHER EXPRESS OR IMPLIED WARRANTIES INCLUDING MERCHANTABILITY OF FITNESS FOR A PARTICULAR
PURPOSE ARE HEREBY LIMITED IN DURATION TO THE DURATION OF THE WARRANTY AS DESCRIBED ABOVE. Some
States do not allow limitations on how long an implied warranty lasts, so the above limitations may not apply to you.
EasyPro shall not be held liable for any damages caused by defective components or materials of this Product; or for
loss incurred because of the interruption of service; or any consequential/incidental damages and expenses arising from
the production, sale, use or misuse of this Product. Some States do not allow the exclusion or limitation of incidental or
consequential damages, so the above limitation or exclusion may not apply to you.
EasyPro shall not be held liable for any loss of sh, plants or any other livestock as a result of any failure or defect of this
Product. This warranty gives you specic legal rights, and you may also have other rights that vary from State to State.
This manual suits for next models

4

Other EasyPro Water Pump manuals

EasyPro PCA75 Manual

EasyPro

EasyPro PCA75 Manual

EasyPro EX4500 Manual

EasyPro

EasyPro EX4500 Manual

EasyPro Tranquil Decor User manual

EasyPro

EasyPro Tranquil Decor User manual

EasyPro EXT Series Manual

EasyPro

EasyPro EXT Series Manual

EasyPro ESF1250 User manual

EasyPro

EasyPro ESF1250 User manual

EasyPro EXP8700-2 Series Manual

EasyPro

EasyPro EXP8700-2 Series Manual

EasyPro TB Series Operation and maintenance manual

EasyPro

EasyPro TB Series Operation and maintenance manual

EasyPro EX6750-2 Manual

EasyPro

EasyPro EX6750-2 Manual

EasyPro EPS650 Use and care manual

EasyPro

EasyPro EPS650 Use and care manual

EasyPro TM Series Use and care manual

EasyPro

EasyPro TM Series Use and care manual

EasyPro ETP05N Operation and maintenance manual

EasyPro

EasyPro ETP05N Operation and maintenance manual

EasyPro TB Series Operation and maintenance manual

EasyPro

EasyPro TB Series Operation and maintenance manual

EasyPro EXP4000 Manual

EasyPro

EasyPro EXP4000 Manual

EasyPro TM Series Use and care manual

EasyPro

EasyPro TM Series Use and care manual

EasyPro EX3600 Manual

EasyPro

EasyPro EX3600 Manual

EasyPro ES1250 User manual

EasyPro

EasyPro ES1250 User manual

EasyPro EXP3700 Manual

EasyPro

EasyPro EXP3700 Manual

EasyPro TM Series Use and care manual

EasyPro

EasyPro TM Series Use and care manual

EasyPro TH Series Operation and maintenance manual

EasyPro

EasyPro TH Series Operation and maintenance manual

EasyPro EP120 Use and care manual

EasyPro

EasyPro EP120 Use and care manual

EasyPro TS150 User manual

EasyPro

EasyPro TS150 User manual

Popular Water Pump manuals by other brands

MATO EP 100 operating instructions

MATO

MATO EP 100 operating instructions

ETT EPH-40 Reference manual

ETT

ETT EPH-40 Reference manual

DRIVERITE DR.11.012236 installation instructions

DRIVERITE

DRIVERITE DR.11.012236 installation instructions

ERKCO 100-D13 user manual

ERKCO

ERKCO 100-D13 user manual

Briggs & Stratton 073003-1 Illustrated parts list

Briggs & Stratton

Briggs & Stratton 073003-1 Illustrated parts list

Carrier 29D Operating and maintenance instructions

Carrier

Carrier 29D Operating and maintenance instructions

Maruyama MIP2534S Owner's/operator's manual

Maruyama

Maruyama MIP2534S Owner's/operator's manual

Teral LP instruction manual

Teral

Teral LP instruction manual

Alemite 9950-A1 Service guide

Alemite

Alemite 9950-A1 Service guide

Coopers 9014 instructions

Coopers

Coopers 9014 instructions

Pentair Flotec N4151060 owner's manual

Pentair Flotec

Pentair Flotec N4151060 owner's manual

Meec tools 731-108 User instructions

Meec tools

Meec tools 731-108 User instructions

Gardens Best Niro GB 1100 SPN manual

Gardens Best

Gardens Best Niro GB 1100 SPN manual

EINHELL GC-DP 6315 N Original operating instructions

EINHELL

EINHELL GC-DP 6315 N Original operating instructions

IPT ER 1134Y Operation and maintenance manual

IPT

IPT ER 1134Y Operation and maintenance manual

Simer 3963C Installation, Operation & Parts Manual

Simer

Simer 3963C Installation, Operation & Parts Manual

VARO Powerplus POWEW67920 manual

VARO

VARO Powerplus POWEW67920 manual

Wacker Neuson PDI 2A Operator's manual

Wacker Neuson

Wacker Neuson PDI 2A Operator's manual

manuals.online logo
manuals.online logoBrands
  • About & Mission
  • Contact us
  • Privacy Policy
  • Terms and Conditions

Copyright 2025 Manuals.Online. All Rights Reserved.