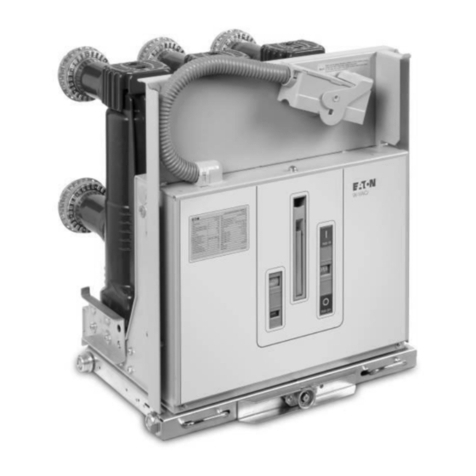
Eaton Cutler-Hammer VCP-W Programming manual

I.B. 3A74792H04
Effective 7/97
Cutler-Hammer
Instructions for Installation, Operation and Maintenance
of Type VCP-W 38kV Vacuum Circuit Breakers


I.B. 3A74792H04 Page iii
Effective 7/97
Cutler-Hammer
Power Distribution Components Division
Five Parkway Center
Pittsburgh, PA 15220
All possible contingencies which may arise during installation, operation or maintenance, and all details and
variations of this equipment do not purport to be covered by these instructions. If further information is
desired by purchaser regarding his particular installation, operation or maintenance of particular equipment,
contact a Cutler-Hammer representative.
IMPROPERLY INSTALLING OR MAINTAINING
THESE PRODUCTS CAN RESULT IN DEATH, SERI-
OUS PERSONAL INJURY, OR PROPERTY DAMAGE.
READ AND UNDERSTAND THESE INSTRUCTIONS
BEFORE ATTEMPTING ANY UNPACKING, ASSEM-
BLY, OPERATION OR MAINTENANCE OF THE CIR-
CUIT BREAKERS.
INSTALLATION OR MAINTENANCE SHOULD BE
ATTEMPTED ONLY BY QUALIFIED PERSONNEL.
THIS INSTRUCTION BOOK SHOULD NOT BE CON-
SIDERED ALL INCLUSIVE REGARDING INSTALLA-
TION OR MAINTENANCE PROCEDURES. IF FUR-
THER INFORMATION IS REQUIRED, YOU SHOULD
CONTACT CUTLER-HAMMER.
THE CIRCUIT BREAKERS DESCRIBED IN THIS
BOOK ARE DESIGNED AND TESTED TO OPERATE
WITHIN THEIR NAMEPLATE RATINGS. OPERATION
OUTSIDE OF THESE RATINGS MAY CAUSE THE
EQUIPMENT TO FAIL, RESULTING IN DEATH, BOD-
ILY INJURY AND PROPERTY DAMAGE.
ALL SAFETY CODES, SAFETY STANDARDS
AND/OR REGULATIONS AS THEY MAY BE
APPLIED TO THIS TYPE OF EQUIPMENT MUST BE
STRICTLY ADHERED TO.
!
WARNING
!
WARNING

I.B. 3A74792H04
Page iv
Effective 7/97
TABLE OF CONTENTS
Page
SECTION 1: INTRODUCTION
1-1 Preliminary Comments and Safety Precautions..................................................................................................1
1-1.1 Warranty and Liability Information..........................................................................................................1
1-1.2 Safety Precautions .................................................................................................................................1
1-2 General Information.............................................................................................................................................1
1-3 Type VCP-W Vacuum Circuit Breaker Ratings (Table 1.1).................................................................................2
1-4 Outlines and Dimensions ....................................................................................................................................3
SECTION 2: SAFE PRACTICES
2-1 Recommendations ..............................................................................................................................................4
SECTION 3: RECEIVING, HANDLING AND STORAGE
3-1 General ...............................................................................................................................................................5
3-2 Receiving.............................................................................................................................................................5
3-3 Handling..............................................................................................................................................................5
3-4 Storage ...............................................................................................................................................................6
3-5 Tools and Accessories........................................................................................................................................7
3-6 Type VCP-W Vacuum Circuit Breaker Weights (Table 3.1)................................................................................7
SECTION 4: INITIAL INSPECTION AND INSTALLATION
4-1 Introduction........................................................................................................................................................12
4-2 Manual Operation Check...................................................................................................................................12
4-3 Vacuum Interrupter Integrity..............................................................................................................................12
4-4 Insulation...........................................................................................................................................................12
4-5 Contact Erosion and Wipe.................................................................................................................................12
4-6 Primary Circuit Resistance................................................................................................................................12
4-7 Nameplate.........................................................................................................................................................12
4-8 Electrical Operation Check................................................................................................................................13
4-8.1 Circuit Breaker Insertion and Removal.................................................................................................13
4-8.2 Operation Check Performance.............................................................................................................14
4-9 Breaker/Structure Interfacing ............................................................................................................................14
4-9.1 Interface Interlocks...............................................................................................................................14
4-9.2 Interfacing Check .................................................................................................................................14
SECTION 5: DESCRIPTION AND OPERATION
5-1 Introduction........................................................................................................................................................16
5-2 Interrupter Assembly.........................................................................................................................................16
5-2.1 Vacuum Interrupter...............................................................................................................................17
5-2.2 Contact Erosion Indication ...................................................................................................................17
5-2.3 Loading Spring Indication.....................................................................................................................18
5-2.4 Contact Wipe and Stroke .....................................................................................................................18
5-3 Stored Energy Mechanism................................................................................................................................18
5-3.1 Operation of Stored Energy Mechanism ..............................................................................................18
5-3.2 Charging...............................................................................................................................................18

I.B. 3A74792H04 Page v
Effective 7/97
Page
5-3.3 Closing Operation.................................................................................................................................20
5-3.4 Tripping Operation................................................................................................................................20
5-4 Control Schemes...............................................................................................................................................20
5-4.1 Timing...................................................................................................................................................20
5-4.2 Secondary Disconnects........................................................................................................................20
5-4.3 Undervoltage Trip Device.....................................................................................................................23
5-5 Interlocks and Interfacing..................................................................................................................................24
5-6 Levering Mechanism.........................................................................................................................................24
5-7 Operations Counter...........................................................................................................................................24
5-8 Ground Contact.................................................................................................................................................24
5-9 MOC and TOC Switch Operations....................................................................................................................24
SECTION 6: INSPECTION, MAINTENANCE AND TROUBLESHOOTING
6-1 Introduction........................................................................................................................................................26
6-2 Frequency of Inspection and Maintenance .......................................................................................................26
6-2.1 Qualified Personnel..............................................................................................................................26
6-2.2 Helpful Tools and Accessory Items......................................................................................................26
6-2.3 General Torque Guidelines ..................................................................................................................26
6-3 Inspection and Maintenance Procedures..........................................................................................................29
6-4 Vacuum Interrupter Integrity Test......................................................................................................................30
6-5 Contact Erosion.................................................................................................................................................30
6-6 Contact Wipe.....................................................................................................................................................30
6-7 Insulation...........................................................................................................................................................31
6-8 Insulation Integrity Check..................................................................................................................................31
6-9 Primary Circuit Resistance Check.....................................................................................................................32
6-10 Mechanism Check.............................................................................................................................................32
6-11 Lubrication.........................................................................................................................................................32
6-12 Troubleshooting Chart.......................................................................................................................................33
SECTION 7: RENEWAL PARTS
7-1 General .............................................................................................................................................................36
7-1.1 Ordering Instructions............................................................................................................................36

I.B. 3A74792H04
Page vi
Effective 7/97
FIGURES
Figure Title Page
1-1 Type VCP-W 38kV Circuit Breaker Outlines and Dimensions......................................................................3
3-1 Circuit Breaker Shown Mounted with Ramp Still in Shipping Position..........................................................5
3-2 Circuit Breaker Shown Being Moved Carefully Down Attached Ramp.........................................................6
3-3 Optional Fifth Wheel Shown in Use..............................................................................................................6
3-4 Front View VCP-W 38kV Vacuum Circuit Breaker........................................................................................8
3-5 VCP-W 38kV Vacuum Circuit Breaker with Front Cover Removed..............................................................9
3-6 Rear View VCP-W 38kV Vacuum Circuit Breaker......................................................................................10
3-7 Typical VCP-W 38kV Escutcheon...............................................................................................................11
4-1 Type VCP-W Circuit Breaker Manual Charging Handle in Use..................................................................12
4-2 Type VCP-W Circuit Breaker (Bottom View)...............................................................................................15
5-1 Rear View Showing Pole Unit Enclosure....................................................................................................16
5-2 Plate Over Rear Truck Opening 2000A Breakers and Above.....................................................................16
5-3 Graphic Representation of Arc Interruption ................................................................................................17
5-4 Closing Cam and Trip Linkage....................................................................................................................19
5-5 Charging Schematic....................................................................................................................................21
5-6 Typical 38kV VCP-W “DC” and “AC” Control Schematics..........................................................................22
5-7 Secondary Circuit Breaker Plug Shown Mounted Lower Left.....................................................................23
5-8 Undervoltage Trip Device Configuration.....................................................................................................25
6-1 Lubrication Points .......................................................................................................................................28
6-2 Rear Measurement for Contact Erosion Being Made (Circuit Breaker Closed)..........................................31
6-3 Graphical Representation of Contact Erosion Measurement (Circuit Breaker Closed)..............................31
6-4 Side View of Loading Spring Indicator (Circuit Breaker Closed).................................................................32
6-5 Graphical Representation of Contact Wipe Measurement
of Loading Spring Indicator (Circuit Breaker Closed)..................................................................................32
TABLES
Figure Title Page
1.1 Type VCP-W Vacuum Circuit Breaker on Symmetrical Current Rating Basis..............................................2
3.1 VCP-W Circuit Breaker Weights...................................................................................................................7
5.1 Circuit Breaker Timing ................................................................................................................................23
6.1 Torque Guidelines.......................................................................................................................................27
6.2 Test Voltage................................................................................................................................................30
6.3 Typical Resistance Measurements.............................................................................................................33
7.1 Recommended Renewal Parts for ANSI Rated Breakers...........................................................................36

I.B. 3A74792H04 Page 1
Effective 7/97
SECTION 1: INTRODUCTION
1-1 PRELIMINARY COMMENTS AND SAFETY PRE-
CAUTIONS
This technical document is intended to cover most
aspects associated with the installation, application,
operation and maintenance of the VCP-W Vacuum
Circuit Breakers. It is provided as a guide for authorized
and qualified personnel only. Please refer to the specific
WARNING and CAUTION in Section 1-1.2 before pro-
ceeding. If further information is required by the pur-
chaser regarding a particular installation, application or
maintenance activity, a Cutler-Hammer representative
should be contacted.
1-1.1 WARRANTY AND LIABILITY
INFORMATION
NO WARRANTIES, EXPRESSED OR IMPLIED,
INCLUDING WARRANTIES OF FITNESS FOR A PAR-
TICULAR PURPOSE OF MERCHANTABILITY, OR
WARRANTIES ARISING FROM COURSE OF DEAL-
ING OR USAGE OF TRADE, ARE MADE REGARDING
THE INFORMATION, RECOMMENDATIONS AND
DESCRIPTIONS CONTAINED HEREIN. In no event will
Cutler-Hammer be responsible to the purchaser or user
in contract, in tort (including negligence), strict liability or
otherwise for any special, indirect, incidental or conse-
quential damage or loss whatsoever, including but not
limited to damage or loss of use of equipment, plant or
power system, cost of capital, loss of power, additional
expenses in the use of existing power facilities, or
claims against the purchaser or user by its customers
resulting from the use of the information and descrip-
tions contained herein.
1-1.2 SAFETY PRECAUTIONS
All safety codes, safety standards and/or regulations
must be strictly observed in the installation, operation
and maintenance of this device.
THE WARNINGS AND CAUTIONS INCLUDED AS
PART OF THE PROCEDURAL STEPS IN THIS DOCU-
MENT ARE FOR PERSONNEL SAFETY AND PRO-
TECTION OF EQUIPMENT FROM DAMAGE. AN
EXAMPLE OF A TYPICAL WARNING LABEL HEAD-
ING IS SHOWN ABOVE IN REVERSE TYPE TO
FAMILIARIZE PERSONNEL WITH THE STYLE OF
PRESENTATION. THIS WILL HELP TO INSURE
THAT PERSONNEL ARE ALERT TO WARNINGS,
WHICH MAY APPEAR THROUGHOUT THE DOCU-
MENT. IN ADDITION, CAUTIONS ARE ALL UPPER
CASE AND BOLDFACE AS SHOWN BELOW.
COMPLETELY READ AND UNDERSTAND THE MA-
TERIAL PRESENTED IN THIS DOCUMENT BEFORE
ATTEMPTING INSTALLATION, OPERATION OR
APPLICATION OF THE EQUIPMENT. IN ADDITION,
ONLY QUALIFIED PERSONS SHOULD BE PERMIT-
TED TO PERFORM ANY WORK ASSOCIATED WITH
THE EQUIPMENT. ANY WIRING INSTRUCTIONS
PRESENTED IN THIS DOCUMENT MUST BE FOL-
LOWED PRECISELY. FAILURE TO DO SO COULD
CAUSE PERMANENT EQUIPMENT DAMAGE.
1-2 GENERAL INFORMATION
The purpose of this book is to provide instructions for
unpacking, storage, use, operation and maintenance of
Type VCP-W 38kV Vacuum Circuit Breakers. They are
horizontal drawout, roll on the floor type removable
interrupting elements ideal for use in new metal-clad
switchgear, as well as for modernization and life exten-
sion of existing switchgear. Designed to ANSI Stan-
dards for reliable performance, ease of handling, and
simplified maintenance, VCP-W 38kV Vacuum Circuit
Breakers provide reliable control and protection for elec-
trical equipment and circuits. In addition, these techno-
logically advanced circuit breakers provide higher insu-
lation levels in less space, thus reducing the overall
switchgear size.
SATISFACTORY PERFORMANCE OF THESE CIR-
CUIT BREAKERS IS CONTINGENT UPON PROPER
APPLICATION, CORRECT INSTALLATION AND
ADEQUATE MAINTENANCE. THIS INSTRUCTION
BOOK MUST BE CAREFULLY READ AND FOL-
LOWED IN ORDER TO OBTAIN OPTIMUM PERFOR-
MANCE FOR LONG USEFUL LIFE OF THE CIRCUIT
BREAKERS.
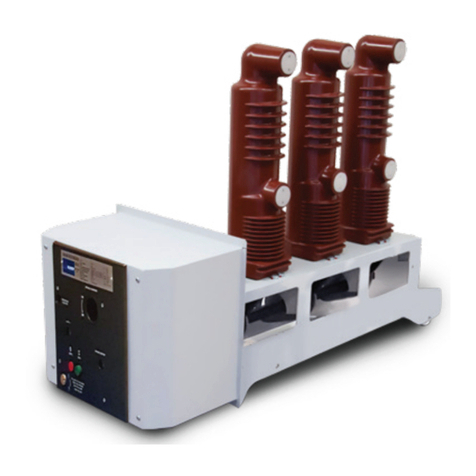
!
WARNING
!
CAUTION
!
WARNING

I.B. 3A74792H04
Page 2
Effective 7/97
THE CIRCUIT BREAKERS DESCRIBED IN THIS
BOOK ARE DESIGNED AND TESTED TO OPERATE
WITHIN THEIR NAMEPLATE RATINGS. OPERATION
OUTSIDE OF THESE RATINGS MAY CAUSE THE
EQUIPMENT TO FAIL, RESULTING IN DEATH, BODI-
LY INJURY AND PROPERTY DAMAGE.
ALL SAFETY CODES, SAFETY STANDARDS
AND/OR REGULATIONS AS THEY MAY BE APPLIED
TO THIS TYPE OF EQUIPMENT MUST BE STRICTLY
ADHERED TO.
Identification Rated Values
Circuit Nominal Voltage Insulation Level Current Inter- Maximum Transient Current Values
Breaker Voltage Maximum Voltage Withstand Test Continuous Short rupting Permis- Recovery Closing Low Out of Capacitor Switching Ratings
Type Class Voltage Range Voltage Current Circuit Time sible Voltage Latching Inductive Phase General Purpose Definite Purpose
Factor at 60 Hz Current ➃Tripping (TRV) Capability Switching Switching Overhead Cable Isolated Overhead Isolated Back to Back
Delay E2 T2 (Momen- Line Charging Shunt Line Shunt Capacitor Switching
Rise tary) Current Current Capac- Current Capac- Cable Capacitor
Time itor itor Charging Bank
Power Impulse 3 Second (2.7 K Bank Bank Current Current
Frequency ➂Short Times Current Current ➄
(1 Minute) Time Rated
Current Short
Carrying Circuit
Capability Current)
EK I Y
kV Class kV rms kV rms kV Peak Amperes, kA rms Cycles Seconds kV Peak µs kA Peak Amperes, kA Amperes, rms Amperes, rms
rms rms
380 VCP-W 16 34.5 38 1.0 80 170 600 16 5 2 71 125 43 15 4 5 50 100 5 250 50 250
➁1200 ➁
1600
2000
380 VCP-W 25 34.5 38 1.0 80 170 600 25 5 2 71 125 68 15 6.3 5 50 100 5 250 50 250
➁1200 ➁
1600
2000
380 VCP-W 32 34.5 38 1.0 80 170 600 31.5 5 2 71 125 85 15 7.9 5 50 100 5 250 50 250
➁1200 ➁
1600
2000
380 VCP-W 21 34.5 38 1.65 80 170 1200 21 5 2 71 125 95 15 5.3 5 50 100 5 250 50 250
➅2000 ➅
➀
KEMA tested to applicable ANSI Standards C37.04 - 1979, C37.09 - 1979, Proposed C37.06 - 199X, (operating duty, sequence
CO-15 seconds-CO). Typical operating time values: opening 45 ms, closing 75 ms, and reclosing 18 cycles.
➁
K=1.0, therefore E=E/K and I=KI, consult Application Data 32-265 for further information.
➂
The ANSI standard requires 150 kV BIL, all ratings tested to 170 kV BIL.
➃
3-cycle interrupting time capability is available.
➄
Tested at 20 kA, 4.4 kHz inrush current. Higher currents available, consult Cutler-Hammer.
➅
At Rated maximum voltage divided by K=23 kV rms, Rated maximum symmetrical interrupting capability=KI=35 kA rms.
1-3 TYPE VCP-W VACUUM CIRCUIT BREAKER RATINGS (TABLE 1.1)
Table 1.1 Type VCP-W Vacuum Circuit Breaker on Symmetrical Current Rating Basis ➀
!
WARNING

I.B. 3A74792H04 Page 3
Effective 7/97
DIMENSIONS ARE
TO BASE PLATE
THESE DIMENSIONS ARE
TO INTERMEDIATE PAN
21.00 [533]
17.3 [440]17.4 [441]
11.1 [283]
17.4 [441]
7.5 [191]
15.6 [397]
7.7 [195]
24.1 [611]
18.2 [462]
15.9 [405]
9.3 [236]
EARTH
CONTACTS
1.3 [33]
1.8 [46]
3.3 [85]
16.0 [407]
45.8 [1164]
47.1 [1197 REF]
27.6 [702]
1.0 [26]
1.70 [43] 7.7 [197]
600A - 1600A CONDUCTORS
OTHERWISE SAME LENGTH
AS 2000A CONDUCTORS
35.7 [908 REF]
17.8 [454]
11.8 [300] 11.8 [300]
64.6 [1641]
.6 [14]
11.1 [283 REF]
1.0 [26]
2.9 [75]
35.7 [908]
17.9 [454]
16.4 [417] 16.4 [417]
12.4 [314]
.2 [5]
9.88 [251]
5.4
[137]
1.7
[44]
CONTACT EROSION
INDICATOR FLAG
11.5 (TYP)
[293]
DETAIL PLAN VIEW
IN DIRECTION OF ARROW “X”
4.50 [114]
6.22 [158]
.63 [16] MIN TRAVEL
TO TRIP
1.938 [49]
1.563 [39.7]
OPEN/CLOSE
FLOOR TRIPPERS M.O.C. OPERATOR
SEE PLAN VIEW
IN DIRECTION OF
ARROW "X"
4.6
[117]
TOC Operator
Figure 1-1 Type VCP-W 38kV Circuit Breaker Outlines and Dimensions (inches and [mm])
1-4 OUTLINES AND DIMENSIONS

I.B. 3A74792H04
Page 4
Effective 7/97
SECTION 2: SAFE PRACTICES
2-1 RECOMMENDATIONS
Type VCP-W Vacuum Circuit Breakers are equipped
with high speed, high energy operating mechanisms.
They are designed with several built-in interlocks and
safety features to provide safe and proper operating
sequences. Cell interlocks used with drawout circuit
breakers are meant to interact with the appropriate cell
interface and levering mechanism.
TO PROTECT THE PERSONNEL ASSOCIATED WITH
INSTALLATION, OPERATION, AND MAINTENANCE
OF THESE CIRCUIT BREAKERS, THE FOLLOWING
PRACTICES MUST BE FOLLOWED:
• Only qualified persons, as defined in the National
Electrical Safety Code, who are familiar with the
installation and maintenance of medium voltage cir-
cuits and equipment, should be permitted to work on
these circuit breakers.
• Read these instructions carefully before attempting
any installation, operation or maintenance of these cir-
cuit breakers.
• Always remove the circuit breaker from its enclosure
before performing any maintenance. Failure to do so
could result in electrical shock leading to death,
severe personal injury or property damage.
• Do not work on a drawout circuit breaker with a sec-
ondary test coupler engaged. Failure to disconnect
the test coupler could result in an electrical shock
leading to death, personal injury or property damage.
• Do not work on a closed circuit breaker or a breaker
with closing springs charged. The closing springs
should be discharged and the main circuit contacts
open before working on the circuit breaker. Failure to
do so could result in cutting or crushing injuries.
• Do not use an open circuit breaker by itself as the sole
means of isolating a high voltage circuit. Remove the
circuit breaker to the Disconnect position and follow all
lock-out and tagging rules of the National Electrical
Code and any other applicable codes, regulations and
work rules.
• Do not leave a drawout circuit breaker in an intermedi-
ate position in the cell. Always have the circuit breaker
either in the Disconnect/Test or Connected position.
Failure to do so could result in a flash over and possi-
ble death, personal injury or property damage.
• Always remove the maintenance tool from the circuit
breaker after charging the closing springs.
• Circuit breakers are equipped with safety interlocks.
Do Not remove, interfere with or in any manner defeat
them. This may result in death, bodily injury or equip-
ment damage.
• Do not work on a circuit breaker suspended from a lift-
ing yoke or chains. Maintenance work should be per-
formed on a solid work surface, such as the floor.
!
WARNING

I.B. 3A74792H04 Page 5
Effective 7/97
SECTION 3: RECEIVING, HANDLING AND
STORAGE
3-1 GENERAL
Type VCP-W Vacuum Circuit Breakers are subjected to
complete factory production tests in accordance with
ANSI C37.09 and inspection before being packed. They
are shipped in packages designed to provide maximum
protection to the equipment during shipment and stor-
age and at the same time to provide convenient han-
dling. Tools and accessories, such as the maintenance
tool, are shipped separately.
3-2 RECEIVING
If the circuit breaker is not to be used immediately but is
to be placed in storage, maximum protection can be
obtained by keeping it packed as shipped.
Upon receipt of the equipment, inspect the containers
for any signs of damage or rough handling. Open the
containers carefully to avoid any damage to the con-
tents. Use a nail puller rather than a crow bar when
required. When opening the containers, be careful to
save any loose items or hardware that may be other-
wise discarded with the packing material. Check the
contents of each package against the packing list.
Examine the circuit breaker for any signs of shipping
damage such as broken, missing or loose hardware,
damaged or deformed insulation and other components.
File claims immediately with the carrier if damage or loss
is detected and notify the nearest Cutler-Hammer Office.
The VCP-W 38kV shipping container and pallet were
specifically designed to facilitate removal of the cir-
cuit breaker from its pallet and container. Before
proceeding, installation personnel should be famil-
iar with the procedures outlined in Paragraph 3-3
entitled “Handling.”
3-3 HANDLING
DO NOT USE ANY LIFTING DEVICE AS A PLAT-
FORM FOR PERFORMING MAINTENANCE, REPAIR
OR ADJUSTMENT OF THE CIRCUIT BREAKER OR
FOR OPENING, CLOSING THE CONTACTS OR
CHARGING THE SPRINGS. THE CIRCUIT BREAKER
MAY SLIP OR FALL CAUSING SEVERE PERSONAL
INJURY. ALWAYS PERFORM MAINTENANCE,
REPAIR AND ADJUSTMENTS ON A SOLID WORK
SURFACE CAPABLE OF SUPPORTING THE CIR-
CUIT BREAKER.
VCP-W 38kV Vacuum Circuit Breakers are shipped
mounted to a skid specially designed to facilitate
removal of the breaker. Refer to Figures 3-1 and 3-2
and proceed with the following steps:
AFTER REMOVING THE BRACKETS USED TO
HOLD THE CIRCUIT BREAKER SECURELY TO THE
SHIPPING SKID AND ALL DURING THE PROCESS
OF MOVING THE CIRCUIT BREAKER OFF OF THE
SHIPPING SKID AND DOWN THE RAMP TO THE
FLOOR, TAKE SPECIAL PRECAUTIONS TO INSURE
THAT THE CIRCUIT BREAKER IS MOVED SLOWLY
Figure 3-1 Circuit Breaker Shown Mounted with Ramp
Still in Shipping Position
!
WARNING
!
WARNING
NOTICE

I.B. 3A74792H04
Page 6
Effective 7/97
AND UNDER CONTROL TO AVOID ANY ACCI-
DENTS. THE CIRCUIT BREAKER IS A LARGE
DEVICE WHICH COULD CAUSE SERIOUS BODILY
INJURY IF IT IS TIPPED OVER OR PERMITTED TO
ROLL IN AN UNCONTROLLED MANNER.
Step 1: Remove the vertically mounted ramp from the
shipping skid and place it on the floor next to
the skid. It should be positioned with the high-
est part of the ramp next to the side of the skid
with the front of the circuit breaker.
Step 2: Remove the shipping brackets used to hold the
circuit breaker to the skid. Use the same ship-
ping brackets and hardware to attach the ramp
to the shipping skid.
Step 3: Slowly move the circuit breaker forward and
down the ramp. Make certain that the circuit
breaker moves down the ramp slowly and
straight in line with the ramp. Once the circuit
breaker is on the floor, it can be easily maneu-
vered via its integral wheels.
3-4 STORAGE
If the circuit breaker is to be placed in storage, maxi-
mum protection can be obtained by keeping it packed
as shipped. Before placing it in storage, checks should
be made to make sure that the circuit breaker is free
from shipping damage and is in satisfactory operating
condition.
The circuit breaker is shipped with its contacts open and
closing springs discharged. The indicators on the front
panel should confirm this. Insert the maintenance tool in
the manual charge socket opening (Figure 3-7). Charge
the closing springs by pumping the handle up and down
approximately 38 times until a crisp metallic “click” is
heard. This indicates that the closing springs are
charged and is shown by the closing spring “charged”
(yellow) indicator. Remove the maintenance tool. Push
the “manual close” button. The circuit breaker will close
as shown by the circuit breaker contacts “closed” (red)
indicator. Push the “manual trip” button. The circuit
breaker will trip as shown by the circuit breaker contacts
“open” (green) indicator. After completing this initial
Figure 3-2 Circuit Breaker Shown Being Moved
Carefully Down Attached Ramp Figure 3-3 Optional Fifth Wheel Shown in Use

I.B. 3A74792H04 Page 7
Effective 7/97
check, leave the closing springs “discharged” and circuit
breaker contacts “open”.
Outdoor storage is NOT recommended. If unavoidable,
the outdoor location must be well drained and a tempo-
rary shelter from sun, rain, snow, corrosive fumes, dirt,
falling objects and excessive moisture must be provid-
ed. Containers should be arranged to permit free circu-
lation of air on all sides and temporary heaters should
be used to minimize condensation. Moisture can cause
rusting of metal parts and deterioration of high voltage
insulation. A heat level of approximately 400 watts for
each 100 cubic feet of volume is recommended with the
heaters distributed uniformly throughout the structure
near the floor.
Indoor storage should be in a building with sufficient
heat and air circulation to prevent condensation. If the
building is not heated, the same general rule for heat as
for outdoor storage should be applied.
3-5 TOOLS AND ACCESSORIES
Several tools and accessories, both standard and
optional are available for use with the circuit breaker.
Maintenance Tool (Standard): Used to charge closing
springs.
Lifting Yoke (Optional): Used to lift circuit breaker with
overhead lifting device.
Fifth Wheel (Optional): Used to maneuver a circuit
breaker on a flat, hard surface (Figure 3-3).
Table 3.1 VCP-W Circuit Breaker Weights
➀
Rating Pounds
380 VCP-W 16 600 1070
1200 1080
1600 1090
2000 1140
380 VCP-W 25 600 1070
1200 1080
1600 1090
2000 1140
380 VCP-W 32 600 1070
1200 1080
1600 1090
2000 1140
380 VCP-W 20 1200 1080
2000 1140
3-6 TYPE VCP-W VACUUM CIRCUIT BREAKER
WEIGHTS (TABLE 3.1)
➀
Does not include shipping carton.

I.B. 3A74792H04
Page 8
Effective 7/97
Figure 3-4 Front View VCP-W 38kV Vacuum Circuit Breaker
Front Cover
Lift/Pull Handle
Contact Erosion Indicator Flags
Circuit Breaker Wheel
Secondary Contact Block
Alignment Rollers
3
4
1
2
5
6
1
2
5
4
3
6

I.B. 3A74792H04 Page 9
Effective 7/97
Figure 3-5 VCP-W 38kV Vacuum Circuit Breaker with Front Cover Removed
10
9
11
12
13
Shock Absorber
Shunt Trip Assembly
Spring Release (Close Coil) Assembly
Closing Cam
Open/Close Indicator
Operations Counter
L.H. Closing Spring
Motor Cutoff Switch
R.H. Closing Spring
Opening Spring
Manual Charge Socket
Ratchet Wheel
Charging Motor
1
2
5
4
3
6
1 2
5
4
3
6
7
8
10 9
11
12
13
7
8

I.B. 3A74792H04
Page 10
Effective 7/97
Figure 3-6 Rear View VCP-W 38kV Vacuum Circuit Breaker
Pole Unit
Primary Disconnect
Insulation Shroud
Opening to View Contact Erosion Mark
Circuit Breaker Wheel
Alignment Rollers
TOC Operator
1
2
5
4
3
6
1
2
5
4
3
67
7

I.B. 3A74792H04 Page 11
Effective 7/97
Figure 3-7 Typical VCP-W 38kV Escutcheon
Manual Charge Socket
Spring Charged/Discharged Indicator
Rating Nameplate
Manual Open Button
Manual Close Button
Open/Close Indicator
Operations Counter
1
2
5
4
3
6
7
1
2
54
3
6
7

I.B. 3A74792H04
Page 12
Effective 7/97
SECTION 4: INITIAL INSPECTION AND
INSTALLATION
4-1 INTRODUCTION
BEFORE PLACING THE CIRCUIT BREAKER IN SER-
VICE, CAREFULLY FOLLOW THE INSTALLATION
PROCEDURE GIVEN BELOW. NOT FOLLOWING
THE PROCEDURE CAN FAIL TO UNCOVER SHIP-
PING DAMAGE THAT MAY RESULT IN INCORRECT
CIRCUIT BREAKER OPERATION LEADING TO
DEATH, BODILY INJURY, AND EQUIPMENT DAM-
AGE.
Before attempting to put a circuit breaker in service, it
should be carefully examined and operated manually
and electrically. In addition, carefully examine the break-
er for loose or obviously damaged parts. The following
information is a guide for performing recommended
checks and tests.
4-2 MANUAL OPERATION CHECK
Refer to Figures 3-6 and 4-1 and then proceed by plac-
ing the maintenance tool into the manual charge socket
opening. Charge the closing springs with about 38 up
and down strokes of the handle. When charging is com-
plete the closing crank goes over center with an audible
CLICK and the springs Charged/Discharged indicator
shows “Charged.”
If the springs are to be charged on a closed circuit
breaker, no click is heard at the end of charging
operation. Discontinue charging and remove the
maintenance tool as soon as “Charged” flag is fully
visible. Continued attempts to charge further may
result in damage to the mechanism.
Remove the maintenance tool. Close and trip the circuit
breaker. Repeat several times.
4-3 VACUUM INTERRUPTER INTEGRITY
Using a dry, lint free cloth or paper towel, clean all the
accessible insulating surfaces of the pole units. Conduct
a vacuum interrupter integrity check as described in
Section 6.
4-4 INSULATION
Check the circuit breaker’s primary and secondary insu-
lation as described in Section 6.
4-5 CONTACT EROSION AND WIPE
Manually charge the closing springs and close the cir-
cuit breaker. Check contact erosion and wipe as
described in Section 6.
4-6 PRIMARY CIRCUIT RESISTANCE
Check the primary circuit resistance as described in
Section 6. The resistance should not exceed the values
specified. Record the values obtained for future refer-
ence.
4-7 NAMEPLATE
Compare the circuit breaker nameplate information with
switchgear drawings for compatibility.
Figure 4-1 Type VCP-W Circuit Breaker Manual
Charging Handle in Use
!
WARNING
NOTICE

I.B. 3A74792H04 Page 13
Effective 7/97
4-8 ELECTRICAL OPERATION CHECK
After having completed all previous checks and tests,
the circuit breaker is ready to be operated electrically. It
is preferred that this check be made with the circuit
breaker in a TEST position or by using a test cable, if
the circuit breaker is outside the cell structure.
BEFORE INSERTING THE CIRCUIT BREAKER EXAM-
INE THE INSIDE OF THE CELL STRUCTURE FOR
EXCESSIVE DIRT OR ANYTHING THAT MIGHT INTER-
FERE WITH THE CIRCUIT BREAKER MOVEMENT.
EXTREME CAUTION MUST BE EXERCISED TO
INSURE THAT PRIMARY CIRCUITS ARE NOT ENER-
GIZED WHILE CHECKS ARE PERFORMED IN THE
CIRCUIT BREAKER COMPARTMENT. FAILURE TO
DO SO MAY RESULT IN PERSONAL INJURY OR
DEATH.
The circuit breaker is normally tested electrically in its
cell structure in the TEST position. To achieve the TEST
position, the circuit breaker must first be placed in the
cell structure and the secondary contacts engaged. To
complete this testing procedure, the operator should first
be familiar with inserting and removing the circuit break-
er into and from the cell structure.
4-8.1 CIRCUIT BREAKER INSERTION AND
REMOVAL
The circuit breaker is designed to be in one of three dif-
ferent positions within the structure with the door closed,
DISCONNECT, TEST and CONNECTED. While in the
structure, the circuit breaker should never be allowed to
remain at an intermediate position between two of the
three above mentioned designed positions.
Position the circuit breaker squarely in front of the struc-
ture. Integrally mounted wheels facilitate circuit breaker
movement outside of and into the structure. Once the
side mounted circuit breaker alignment rollers are
aligned with structure mounted alignment rails, push the
circuit breaker into the structure as far as it will move.
The levering latch must be fully engaged or the circuit
breaker will not be able to be inserted. This first position
is the DISCONNECT position. Without moving the cir-
cuit breaker, manually engaging the secondary contacts
now makes this the TEST position.
To engage the secondary contacts, grasp the structure
mounted secondary disconnect cage handle located
below the left side of the circuit breaker, and pull it for-
ward as far as possible to make the secondary engage-
ment. As soon as control power is available, the motor
will charge the closing springs.
To move the circuit breaker to the CONNECTED posi-
tion, engage the levering crank with the structure mount-
ed levering shaft and begin turning the handle in a
clockwise direction. Keep in mind that the levering crank
cannot be engaged with the circuit breaker closed.
Structure mounted positive guidance rails interface with
the circuit breaker alignment rollers to insure proper pri-
mary and secondary connections.
The circuit breaker includes all necessary interlocks
that when interfaced with a compatible structure will
render the circuit breaker mechanism mechanically
and electrically trip-free during the levering process
into or out of the structure. For detailed information
pertaining to individual circuit breaker interlocks,
refer to Paragraph 4-9 in this section.
As the handle is turned, the circuit breaker will move
slowly toward the rear of the structure and the integrally
mounted floor movement wheels will be lifted from the
floor of the structure. Eventually, the integrally mounted
wheels are separated from the structure floor by approx-
imately 1/8 inch, and the circuit breaker is suspended in
the structure. This design insures positive primary and
secondary connections, even if the assembly’s mount-
ing conditions are less than ideal.
When the circuit breaker reaches the CONNECTED
position, it will become impossible to continue turning
the levering crank in the clockwise direction. The sec-
ondary contacts will automatically engage in the CON-
NECTED position, if not already engaged manually in
the TEST position.
To remove the circuit breaker from the structure,
reverse the procedure just described by turning the lev-
ering crank in a counterclockwise direction. Keep in
mind that safety interlocks may cause the circuit breaker
to open and/or springs discharge during the removal
procedure. It depends on what condition the circuit
breaker was in as removal began.
!
WARNING
!
CAUTION
NOTICE

I.B. 3A74792H04
Page 14
Effective 7/97
4-8.2 OPERATION CHECK PERFORMANCE
Move the circuit breaker to the TEST position and
engage the secondary contacts following the procedure
described in Paragraph 4-8.1. As soon as control power
becomes available, the motor will charge the closing
springs with this condition indicated by a Spring
Charged/Discharged Indicator on the front of the circuit
breaker (Figure 3-7). In addition, the status of the main
contacts, open or closed, is indicated on the front of the
circuit breaker.
Using the close and trip buttons on the front of the cir-
cuit breaker, close and trip the circuit breaker several
times to verify the closing and tripping operations.
Conclude the check by closing the circuit breaker.
4-9 BREAKER/STRUCTURE INTERFACING
Type VCP-W Vacuum Circuit Breakers are supplied with
a series of interlocks to insure safe and proper interfac-
ing between the circuit breaker and a compatible struc-
ture compartment. The specific interlocks are described
in the next paragraph to provide the proper familiariza-
tion. Once the interlocks are reviewed, an interfacing
check can be performed as described in Paragraph
4-9.2.
4-9.1 INTERFACE INTERLOCKS
Each circuit breaker is supplied with the following inter-
locks to insure safe and proper operation (Figure 4-2):
Code Plates
Code plates are mounted at the bottom of the circuit
breaker to prevent the insertion of a circuit breaker into
a structure of higher power rating. A set of two code
plates on the circuit breaker and two in the compartment
form this interlock.
Code plates do not block out control voltage or
scheme incompatibility.
Close and Trip Floor Trippers
Mounted on the bottom of the circuit breaker, these
interlocks interface with compatible structure interlocks
to render the circuit breaker mechanism mechanically
and electrically trip free during the levering process.
Anti-Close Interlock
This interlock prevents releasing the closing springs
electrically or manually if the circuit breaker is already
closed (Figure 5-5). On a closed circuit breaker, the
interlock lever moves toward the rear. In this position,
the movement of the spring release clapper does not lift
the lever and thus the spring release latch cannot be
moved.
4-9.2 INTERFACING CHECK
Keep in mind that an interfacing check will be made with
a compatible structure. As such, the instructions provid-
ed with the assembly will suggest other interfacing con-
ditions that should be observed and/or checked, such as
primary shutter operation, MOC/TOC operation and lev-
ering handle insertion. A complete, coordinated inter-
face check, therefore, will be a blend of the circuit
breaker instructions and those provided with the struc-
tural assembly. Together all required standards are met
and the ultimate in safety is achieved.
Insert the circuit breaker into the structure and lever it
into and out of each different position by following the
procedures described in Paragraph 4-8.1.
When the secondary contacts are manually engaged in
the TEST position, the motor will charge the closing
springs. Close the circuit breaker. Attempt to engage the
levering crank to begin moving the circuit breaker to the
CONNECTED position. It will first be noticed that the
levering crank cannot be engaged with the breaker
closed. In addition, charged springs will be discharged
as the circuit breaker starts to move.
Once in the CONNECTED position, remove the levering
handle, close the circuit breaker and the motor will begin
charging the closing springs if control power is available.
Once again engage the levering handle which can only
be accomplished with the circuit breaker open.
Lever the circuit breaker toward the TEST position. The
circuit breaker will be in a trip-free condition. Continue to
lever the circuit breaker all the way to the TEST position
and the secondary contacts will be disengaged, now
making it the DISCONNECT position
Manually engage the secondary contacts and the motor
will charge the closing springs. Close the circuit breaker
and begin to remove the circuit breaker to the WITH-
DRAWN position by lifting and pulling on the Lift/Pull
handle. The circuit breaker will trip, close and trip as it
moves from the TEST position.
NOTICE
This manual suits for next models
4
Table of contents
Other Eaton Circuit Breaker manuals

Eaton
Eaton TA602LD Manual

Eaton
Eaton Power Defense PDC2 Manual

Eaton
Eaton PKE12 Series User manual

Eaton
Eaton PFR-5 Manual

Eaton
Eaton PXS24 Series User manual

Eaton
Eaton CN13KN0 Manual

Eaton
Eaton EOP4MT07 User manual

Eaton
Eaton Power Defense 32-NF Manual

Eaton
Eaton PLSN-B16/2P2N Manual

Eaton
Eaton MSC-R Series Manual

Eaton
Eaton xComfort CSEZ-01/17 User manual

Eaton
Eaton NZM4-XS-L Manual

Eaton
Eaton T0 I2-NA Series Manual

Eaton
Eaton 150VCP-W Series User manual

Eaton
Eaton BREM1015 Instruction manual

Eaton
Eaton NHI-E PKZ0 Series User manual

Eaton
Eaton MSC-D XTSE Series Manual

Eaton
Eaton P1/I2 Series Manual

Eaton
Eaton P-SOL20 Manual

Eaton
Eaton VCP-W Instruction Manual