EDNord Magicolor 3300 User manual

magicolor 3300
User’s Guide
®
1800738-001A
EDNord - Istedgade 37A - 9000 Aalborg - telefon 96333500

Thank You
Thank you for purchasing a magicolor 3300. You have made an excellent choice. Your
magicolor 3300 is specially designed for optimal performance in Windows, Macintosh,
UNIX and other environments.
Trademarks
KONICA MINOLTA and the KONICA MINOLTA logo are trademarks or registered
trademarks of KONICA MINOLTA HOLDINGS, INC.
magicolor is a trademark or registered trademark of KONICA MINOLTA PRINTING
SOLUTIONS U.S.A., INC.
Proprietary Statement
The digitally encoded software included with your printer is Copyright © 2003
KONICA MINOLTA BUSINESS TECHNOLOGIES, INC. All Rights Reserved. This
software may not be reproduced, modified, displayed, transferred, or copied in any
form or in any manner or on any media, in whole or in part, without the express
written permission of KONICA MINOLTA BUSINESS TECHNOLOGIES, INC.
Copyright Notice
Copyright © 2003 KONICA MINOLTA BUSINESS TECHNOLOGIES, INC., Marunouchi
Center Building, 1-6-1 Marunouchi, Chiyoda-ku, Tokyo, 100-0005, Japan. All Rights
Reserved. This document may not be copied, in whole or part, nor transferred to any
other media or language, without written permission of KONICA MINOLTA BUSINESS
TECHNOLOGIES, INC.
Manual Notice
KONICA MINOLTA BUSINESS TECHNOLOGIES, INC. reserves the right to make
changes to this manual and to the equipment described herein without notice.
Considerable effort has been made to ensure that this manual is free of inaccuracies
and omissions. However, KONICA MINOLTA BUSINESS TECHNOLOGIES, INC.
makes no warranty of any kind including, but not limited to, any implied warranties of
merchantability and fitness for a particular purpose with regard to this manual.
KONICA MINOLTA BUSINESS TECHNOLOGIES, INC. assumes no responsibility for,
or liability for, errors contained in this manual or for incidental, special, or
consequential damages arising out of the furnishing of this manual, or the use of this
manual in operating the equipment, or in connection with the performance of the
equipment when so operated.
Registering the Printer
Mail (Americas only)—Fill out and send in the registration card enclosed in your
shipment.
Internet—Go to printer.konicaminolta.net/register and follow the instructions given
there.
CD-ROM—Follow the instructions on the Software Utilities CD-ROM.
EDNord - Istedgade 37A - 9000 Aalborg - telefon 96333500

Contents
Contents
1 Software Installation
Software Utilities CD-ROM ................................................................. 2
Automatic System Software Update 2
Drivers and Utilities 2
Drivers and PPDs 3
Utilities 3
Installing Printer Drivers and Utilities,
Windows Environments ............................................................................ 5
Installing Printer Drivers and Utilities, Macintosh Environments ......... 5
Some Notes to Consider 5
Macintosh—PPDs 6
Macintosh OS 9—PPDs and Utilities Installation 6
OS 9 Step 1. Software Installation 6
OS 9 Step 2. Creating a Desktop Printer 6
USB Connection 6
EtherTalk Connection 7
LPR Connection 7
OS 9 Step 3. System Software 8
EDNord - Istedgade 37A - 9000 Aalborg - telefon 96333500

Contentsii
Macintosh OS X—PPDs and Utilities Installation 9
OS X Step 1. Software Installation—Automatic 9
OS X Step 2. Creating a Printer Queue 9
OS X Step 3. System Software 10
UNIX, NDPS, NetWare .................................................................... 11
Linux .................................................................................................. 11
2 Using Media
Introduction ....................................................................................... 14
Media Storage and Handling ............................................................. 15
General Notes about Media 18
Media Trays 18
Media Sizes and Print Area ............................................................... 19
Page Margins 20
Image Alignment 21
Output Tray 21
Media ................................................................................................ 21
Plain Paper 24
Special Note about Custom (and Oversized) Media 25
Thick Stock 25
Envelopes 26
Glossy Media 27
Glossy Stock 27
Glossy Toner 27
Label Stock 27
Postcards (Japanese size) 28
Transparencies (Uncoated Only) 29
Loading Media .................................................................................. 31
Preparing the Media 31
Loading and Printing Media 31
Refilling an Upper or Optional Media Tray 31
Refilling a Multipurpose Media Tray 35
Using Media Other Than Plain Paper 36
System Memory (RAM) Requirements ............................................. 41
Basic Functionality 41
Maximum Performance 41
Duplexing .......................................................................................... 41
3 Color Printing
Introduction ....................................................................................... 46
Color Registration ............................................................................. 46
PRISMLASER™Technology ............................................................ 49
EDNord - Istedgade 37A - 9000 Aalborg - telefon 96333500

Contents iii
Color Management and Control ........................................................ 49
KONICA MINOLTA Color Technology .............................................. 49
Further Information ........................................................................... 50
4 Replacing Consumables
Introduction ...................................................................................... 52
Consumable Life Expectancies ......................................................... 52
Starter Toner Cartridges 54
Replacement Toner Cartridges 54
Transfer Unit 55
Imaging Unit 56
Fuser Unit and Media Feed Roller(s) 56
Replacing a Toner Cartridge ............................................................ 57
Replacing the Transfer Unit .............................................................. 60
Replacing the Imaging Unit .............................................................. 62
Replacing the Fuser Unit .................................................................. 66
5 Maintaining the Printer
Introduction ....................................................................................... 72
Handling the Printer .......................................................................... 72
Cleaning the Printer .......................................................................... 73
6 Troubleshooting
Introduction ....................................................................................... 80
Printing a Status Page ...................................................................... 81
Direct PDF File Printing .................................................................... 82
Adjusting Memory Clients for PDF Printing 82
Printing Preformatted Files Using CrownView 82
Troubleshooting PDF Direct Printing from CrownView 82
Preventing Media Jams .................................................................... 84
Automatic Jam Recovery .................................................................. 85
Understanding the Media Path ......................................................... 86
Understanding Media Jam Status Messages ................................... 87
Clearing Media Jams ....................................................................... 88
Media Jam Duplex 88
Media Jam Feed 89
Multipurpose Tray Jams 89
Upper Media Tray Jams 90
HCIF Media Tray(s) Jams 92
Output Tray Jams 93
EDNord - Istedgade 37A - 9000 Aalborg - telefon 96333500

Contentsiv
Media Jam Fuser 93
Near Imaging Unit 93
Near Fuser Unit 94
Media Jam Registration and Mismatch Jams 95
Solving Problems .............................................................................. 97
General Problems 97
Media Jams and Media Transport Problems 99
Other Problems 102
Printing Quality 108
Status, Error, and Service Messages .............................................. 114
Status and Error Messages 114
Service Messages 123
HP-GL Error Codes and PCL Error Codes 124
PostScript Errors 125
Additional Assistance ...................................................................... 126
7 Installing Accessories
Introduction ..................................................................................... 128
Antistatic Protection ....................................................................... 129
BuzzBox (Americas Only) ............................................................... 130
What's in the Kit? 130
Installing BuzzBox 130
Using the BuzzBox 131
Dual In-Line Memory Modules (DIMMs) ........................................ 131
Basic Functionality 133
Maximum Performance 133
Installation 133
Duplex Kit (Americas Only) ............................................................. 136
Emulations, Fonts, and Other Software .......................................... 136
Emulations 136
Downloading an Emulation via PageScope Net Care 136
CrownView 137
Downloading an Emulation via a Parallel Interface 137
Downloading an Emulation via an Ethernet Interface 137
Using an Optional Emulation 138
Fonts, Forms, and Signatures 138
KONICA MINOLTA Font & Form Center 138
QFORM 139
PlanetPress 139
Optional Fonts 139
CID Fonts 140
EDNord - Istedgade 37A - 9000 Aalborg - telefon 96333500

Contents v
High-capacity Input Feeder (HCIF) ................................................ 140
What’s in the Kit? 141
Installation 141
Internal IDE Hard Disk .................................................................... 145
What's in the Kit? 145
Installation 145
Media Trays ................................................................................... 147
SC-215 Color Convenience Copier ................................................. 147
Time-of-Day Clock ......................................................................... 147
Installation 147
Tray Cover ...................................................................................... 149
Installation 149
A Technical Specifications
Requirements .................................................................................. 152
Space Requirements 152
Location Requirements 152
Top View 152
Front View 152
Side View 152
Power Requirements 154
ENERGY STAR Compliance 155
Engine and Controller Specifications .............................................. 156
Print Speed 156
Engine 157
Controller 158
Electrical 159
Voltage and Power 159
Current 160
Environmental 160
Physical 161
Consumable Life Expectancies ...................................................... 162
Starter Toner Cartridges 162
Replacement Toner Cartridges 162
Transfer Unit 164
Imaging Unit 164
Fuser Unit and Media Feed Roller(s) 164
IPP .................................................................................................. 165
Document Option Commands ......................................................... 167
Header/Trailer Page Commands 167
HP-GL Emulation Commands 167
HP PCL 5e Emulation Commands 167
EDNord - Istedgade 37A - 9000 Aalborg - telefon 96333500

Contentsvi
Lineprinter Emulation Commands 168
Document Formatting 168
Job and Subjob Boundary Commands 169
PJL Command ................................................................................ 169
Menus ............................................................................................. 170
Configuration Chart Conventions 170
Security Menu 170
Operator Control Menu 171
Administration Menu 172
Administration/Communications/Resident NIC/CrownNet Menu 173
EtherTalk Menu 174
LAN Manager Menu 175
NetWare Menu 176
TCP/IP Menu ................................................................................... 177
Regulatory Compliance ................................................................... 178
FCC Compliance Statement 178
Canadian Users Notice 179
CE Marking (Declation of Conformity) 179
Laser Safety 179
International Notices 180
Power Cord 180
Voltage 180
Lithium Batteries 180
Warranty Considerations ................................................................. 181
Index.................................................................................... 183
EDNord - Istedgade 37A - 9000 Aalborg - telefon 96333500

Software
Installation
EDNord - Istedgade 37A - 9000 Aalborg - telefon 96333500

Software Utilities CD-ROM2
Software Utilities CD-ROM
If you followed all the steps in the Installation Guide that came with your
printer, then the printer is properly set up, connected to your computer,
plugged in, turned on, and ready to receive the system software, drivers, and
utilities on the Software Utilities CD-ROM.
Put the CD-ROM in your computer’s CD-ROM drive, and the AutoInstaller
begins the installation process.
Automatic System Software Update
The AutoInstaller provides the option to upgrade the printer firmware when
installing a printer driver. This option may also be accessed from the
Additional Software selection on the AutoInstaller’s Main Menu.
If you attempt to download a previous version of system software, an error
page prints stating “Low Release Level.”This prevents an older version of
system software from being downloaded over a newer version.
The system software update aborts without operator intervention if the
system software on the CD-ROM is the same as, or older than, the one
currently installed on the printer controller.
If you are installing new system software, you may have to wait up to
10 minutes for the update. Do not interrupt the process.
Drivers and Utilities
The printer driver and additional software on the Software Utilities CD-ROM
can be installed on PC, Macintosh, and other computers using any of the
following:
Windows Me
Windows 98
Windows 95 (B minimum)
Windows XP
Windows 2000
Windows NT4
Macintosh OS 9 (version 9.2.1 or
higher) or X (version 10.1.4 or
higher)
UNIX/Linux
NetWare (Versions 5 and 6)
NDPS
EDNord - Istedgade 37A - 9000 Aalborg - telefon 96333500

Software Utilities CD-ROM 3
Drivers and PPDs
Manual installation instructions are provided in the readme files on the
Software Utilities CD-ROM in case you need them.
Utilities
Drivers Use/Benefit Installation
Instructions
PostScript 2/3
Drivers
Windows
XP/2000
Windows
Me/98
Windows NT4
These drivers give you access to all of
the printer’s features, including finishing
and advanced layout
“Installing Printer
Drivers and Utilities,
Windows
Environments”on
page 5
PCL 6 Driver
Windows
XP/2000
This driver gives you access to all of the
printer’s features, including finishing and
advanced layout. It also includes
support for Arabic, Greek, and Hebrew
fonts and font sets.
“Installing Printer
Drivers and Utilities,
Windows
Environments”on
page 5
Macintosh PPDs PostScript Printer Description (PPD)
files allow you to configure options such
as memory and informs the computer
what options and features are available.
Readme on the
Software Utilities
CD-ROM
Windows PPDs These PPD files allow you to install the
printer for a variety of platforms, drivers,
and applications.
Readme on the
Software Utilities
CD-ROM
Linux PPDs These PPDs can be used with
third-party Linux print filters that use
PPDs.
Readme on the
Software Utilities
CD-ROM
Utilities Use/Benefit Installation
Instructions
Crown Print
Monitor + for
Windows
This Windows utility provides an efficient
method for transporting print jobs
directly to a KONICA MINOLTA printer
via the TCP/IP protocol.
Readme on the
Software Utilities
CD-ROM
Download
Manager
This utility provides the ability to
download fonts and overlays to the
printer’s hard disk. It also allows you to
download fonts to printer memory.
Readme on the
Software Utilities
CD-ROM
EDNord - Istedgade 37A - 9000 Aalborg - telefon 96333500

Software Utilities CD-ROM4
PANTONE Tables These tables allow you to match printed
colors to screen colors. Provided for use
with PostScript High resolution printing
(1200x1200 dpi).
Readme on the
Software Utilities
CD-ROM
ICC/ICM Profiles These color profiles provide support for
host-based color management systems
including Microsoft ICM 2 for Windows,
Apple ColorSync, CorelDRAW, Kodak
KCMS, Adobe Photoshop 5 and others.
Readme on the
Software Utilities
CD-ROM
Macintosh
Installer
This installer automatically places all
needed print-related components, such
as a PostScript Printer Description
(PPD) file, color profiles, screen fonts,
and registration information, in the
correct locations on your system and
allows you to use your printer with
Macintosh OS 9 (version 9.2.1 or higher)
or X (version 10.1.4 or higher).
Readme on the
Software Utilities
CD-ROM
PageScope
Net Care
This utility, designed with administrators
in mind, is a powerful tool, allowing
centralized management of network
printers. It is available for Windows and
UNIX platforms. Refer to the
PageScope Net Care Manual in PDF
format on the Documentation CD-ROM.
Readme on the
Software Utilities
CD-ROM
UNIX Host
Software
UNIX Host Software, compatible with a
variety of UNIX platforms, allows for the
customization of UNIX-based queues
and filters for the specific features of the
Crown printer.
Readme on the
Software Utilities
CD-ROM
KONICA MINOLTA
NDPS Gateway
The NetWare interface allows NetWare
users to manage printers from a central
location.
Readme on the
Software Utilities
CD-ROM
PageScope
Network Setup
Utility
This utility provides basic configuration
functions for network printers using
TCP/IP and IPX protocols.
Readme on the
Software Utilities
CD-ROM
Utilities Use/Benefit Installation
Instructions
EDNord - Istedgade 37A - 9000 Aalborg - telefon 96333500

Installing Printer Drivers and Utilities, Windows 5
Installing Printer Drivers and Utilities,
Windows Environments
Arabic and Hebrew versions of the drivers and utilities must be
installed manually. For manual installation instructions refer to the
readme file on the Software Utilities CD-ROM.
1Insert the Software Utilities CD-ROM in your CD-ROM drive.
If the CD-ROM does not start automatically, double-click setup.exe
in the root directory.
2In the first window, click Next.
3In the next window, click Printer Setup.
4Choose the method by which the PC and printer are connected.
5Follow the instructions on the screen.
6On the Printer Options screen, use the check boxes to print a test page,
make the new printer your default, set printer properties and printing
preferences, or update printer firmware (also called printer system
software).
Be sure the check the Update Printer Firmware box. It’s very
important to update the printer firmware the first time you install the
printer.
7On the last screen, choose Finish.
This returns you to the AutoInstaller’s Main Menu screen, where you can
register your printer, review driver or utility documentation, or purchase
supplies online. When you are finished, exit from the Installer.
8When the system software installation is complete, remove the CD-ROM
from your CD-ROM drive and store it in a safe place.
Installing Printer Drivers and Utilities,
Macintosh Environments
Some Notes to Consider
In the following sections, we assume that you are installing the software
for the first time.
The current version of Macintosh OS X has limited support for PPD
(PostScript Printer Description) files. Although KONICA MINOLTA printers
can be used with Macintosh OS X, not all advanced printing features are
EDNord - Istedgade 37A - 9000 Aalborg - telefon 96333500

Installing Printer Drivers and Utilities, Macintosh6
available. Advanced printing features are still available under Macintosh
OS 9.
You can connect to your printer by
A USB cable
A crossover Ethernet cable
Ethernet patch cables and an Ethernet hub
Macintosh—PPDs
KONICA MINOLTA developed a PostScript Printer Description (PPD) file for
the magicolor 3300. This PPD works with the Macintosh Operating System’s
PostScript printer driver (LaserWriter) to provide support for the features on
the magicolor 3300, such as print resolution and media sizes.
Macintosh OS 9—PPDs and Utilities Installation
OS 9 Step 1. Software Installation
aInsert the Software Utilities CD-ROM in your Macintosh’s CD-ROM
drive.
If the CD-ROM does not start automatically, double-click the
CD-ROM icon on your Macintosh desktop.
bDouble-click the Install icon.
cFollow the instructions on the screen to install the magicolor 3300
PPD and utilities.
dAfter the PPD and utilities installation is complete, choose Quit.
eWhen the system software installation is complete, remove the
CD-ROM from your CD-ROM drive and store it in a safe place.
OS 9 Step 2. Creating a Desktop Printer
USB Connection
aPlug one end of the USB cable into the Macintosh and the other into
the printer’s USB port.
bLocate the Desktop Printer Utility.
If you cannot locate it on your Macintosh hard disk, it can be
found on your Macintosh’s system CD-ROM.
EDNord - Istedgade 37A - 9000 Aalborg - telefon 96333500

Installing Printer Drivers and Utilities, Macintosh 7
cDouble-click the Desktop Printer Utility icon to open the application.
The first window prompts you to select the type of desktop
printer you would like to create.
dSelect Printer (USB), and select OK.
eChoose the Change button in the PostScript Printer Description sec-
tion. In the resulting window, select the magicolor 3300 PPD, and
choose Select.
fChoose the Change button in the USB Printer Selection section. In the
resulting window, select the magicolor 3300, and click OK.
EtherTalk Connection
aYou can connect via Ethernet in either of two ways:
Plug one end of a crossover Ethernet cable into the Macintosh and
the other into the printer’s Ethernet port.
Use Ethernet patch cables and an Ethernet hub. Plug one end of
each patch cable into the hub, then plug the other end of one into
the Macintosh and the other end of the second into the printer’s
Ethernet port.
bOpen the Chooser and select LaserWriter.
cWhen your printer boots up, it finds a default zone. If your network has
more than one zone and you want to use a different zone, use the
Interface/Ethernet/Ethertalk/Name and Zone menus on the printer
control panel to specify the new zone.
The Name and Zone menus allow you to identify 1 zone with a
name up to 32 characters long. (Up to 16 characters can be
entered in each of the two menus). You cannot use these two
menus to identify two zones. Trailing spaces are not consid-
ered part of the zone name. All standard printable ASCII char-
acters are valid except the @ and ' symbols. The names are
case sensitive.
dChoose Create and then Set-Up.
LPR Connection
aYou can connect via Ethernet in either of two ways:
Plug one end of a crossover Ethernet cable into the Macintosh and
the other into the printer’s Ethernet port.
Use Ethernet patch cables and an Ethernet hub. Plug one end of
each patch cable into the hub, then plug the other end of one into
EDNord - Istedgade 37A - 9000 Aalborg - telefon 96333500

Installing Printer Drivers and Utilities, Macintosh8
the Macintosh and the other end of the second into the printer’s
Ethernet port.
bLocate the Desktop Printer Utility.
If you cannot locate it on your Macintosh hard disk, it can be
found on your Macintosh’s system CD-ROM.
cSelect Printer (LPR), and select OK.
dType in the IP Address and use the same address for the Queue
name. Click OK.
eChoose Create.
fName the printer with the IP Address or a descriptive name.
OS 9 Step 3. System Software
aInsert the Software Utilities CD-ROM in your Macintosh’s CD-ROM
drive.
If the CD-ROM does not start automatically, double-click the
CD-ROM icon on your Macintosh desktop.
bDouble-click the Resources icon.
cDouble-click the System_Code folder, and then locate the system
software file (system.ps where system is the filename).
dDrag the system.ps icon and drop it on the magicolor 3300 printer icon
on your desktop to perform the system software upgrade.
If your printer’s system software version is later than the
version on the CD-ROM that you are downloading, an error
page will print on the printer. In this case, go to step e. You do
not need to upgrade the printer’s system software.
eWhen the system software installation is complete, remove the
CD-ROM from your CD-ROM drive and store it in a safe place.
EDNord - Istedgade 37A - 9000 Aalborg - telefon 96333500

Installing Printer Drivers and Utilities, Macintosh 9
Macintosh OS X—PPDs and Utilities Installation
OS X Step 1. Software Installation—Automatic
aInsert the Software Utilities CD-ROM in your Macintosh’s CD-ROM
drive.
If the CD-ROM does not start automatically, double-click the
CD-ROM icon on your Macintosh desktop.
bDouble-click the Install icon.
The installer uses the path Hard Disk Name/Library/Printers/
PPDs/Contents/ Resources/ for PPDs and the path: Hard Disk
Name/Library/Fonts/ for fonts.
cFollow the instructions on the screen to install the magicolor 3300
PPD and utilities.
dAfter the PPD and utilities installation is complete, choose Quit.
OS X Step 2. Creating a Printer Queue
aConnect the printer to the computer using a USB or Ethernet
connection.
For USB, plug one end of the USB cable into the PC and the other into
the matching printer port.
For Ethernet, you can connect in either of two ways:
Plug one end of a crossover Ethernet cable into the Macintosh and
the other into the printer’s Ethernet port.
Use Ethernet patch cables and an Ethernet hub. Plug one end of
each patch cable into the hub, then plug the other end of one into
the Macintosh and the other end of the second into the printer’s
Ethernet port.
bLocate and double-click the Print Center utility to open it.
cIn the Printer List window, choose Add Printer.
EDNord - Istedgade 37A - 9000 Aalborg - telefon 96333500

Installing Printer Drivers and Utilities, Macintosh10
dIn the resulting window, select from USB, AppleTalk, or LPR to match
your printer connection.
USB—The magicolor 3300 appears in the window.
AppleTalk (for Ethernet connection)—Select the zone and scroll
through printer choices. The magicolor 3300 appears in the choice list.
LPR—Enter the IP Address. If the “Use Default Queue on Server”box
is checked, click it to unselect it. Type in the IP Address again for the
Queue name.
eChoose the Printer Model popup menu to select the magicolor 3300
PPD, and choose Other.
fBrowse to Library/Printers/PPDs/Contents/Resources/en.lproj.
The first two letters of the folder name are an abbreviation for
the language. If you prefer another language instead of
English, you can pick a different .lproj folder.
gSelect the magicolor 3300 PPD. Click Choose and then click Add.
The Printer List opens again.
hDouble-click on the printer you just created to open the Print Queue
window.
OS X Step 3. System Software
aIf it’s not already there, insert the Software Utilities CD-ROM in your
Macintosh’s CD-ROM drive.
bDouble-click the CD-ROM icon to display its contents.
Unlike Macintosh OS 9, it is not necessary to install the
magicolor 3300 PPD and utilities before upgrading the printer
system software in Macintosh OS X.
cDouble-click the Resources icon.
dDouble-click the System_Code folder, and then locate the system
software file (system.ps where system is the filename).
eDrag the system.ps icon and drop it into the Print Queue window you
opened in Step 2, Letter H. This performs the system software
upgrade.
fWhen the system software installation is complete, remove the
CD-ROM from your CD-ROM drive and store it in a safe place.
EDNord - Istedgade 37A - 9000 Aalborg - telefon 96333500

UNIX, NDPS, NetWare 11
UNIX, NDPS, NetWare
For UNIX and NDPS installation, refer to the readme files on the Software
Utilities CD-ROM. For NetWare installation, check the Answer Base at
printer.konicaminolta.net/support.
Linux
For Linux PPD and PDQ installation, refer to the readme files on the Software
Utilities CD-ROM. This readme includes basic information about PDQ,
XPDQ, CUPS, and XPP connections and instructions for installing them.
EDNord - Istedgade 37A - 9000 Aalborg - telefon 96333500

EDNord - Istedgade 37A - 9000 Aalborg - telefon 96333500
Table of contents
Other EDNord Printer manuals
EDNord
EDNord PagePro 1300W User manual
EDNord
EDNord magicolor 2200 series Operating manual
EDNord
EDNord 2560 User manual
EDNord
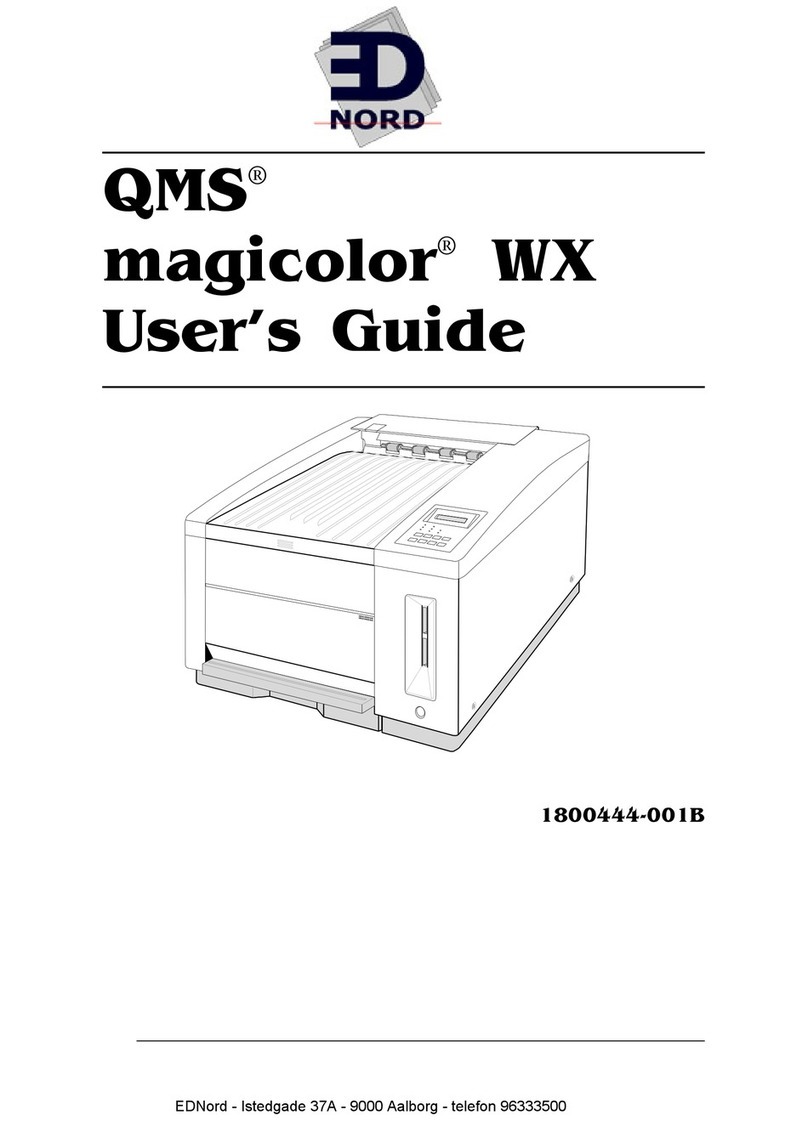
EDNord QMS magicolor WX User manual

EDNord
EDNord QMS magicolor User manual
EDNord
EDNord magicolor 7450 User manual

EDNord
EDNord magicolor 7300 User manual
EDNord
EDNord magicolor 2500W User manual
EDNord
EDNord magicolor 2450 User manual
EDNord
EDNord QMS 4060 User manual
