manuals.online logo
Brands
  1. Home
  2. •
  3. Brands
  4. •
  5. eks
  6. •
  7. Switch
  8. •
  9. eks 8TX/20FX User manual

eks 8TX/20FX User manual

Quick Start Guide
28-Port L2 Gigabit Ethernet Switch
EC 8TX/20FX –Order no. 27 1000 901E
eks Engel FOS GmbH & Co. KG
Schützenstraße 2-4
57482 Wenden-Hillmicke
Tel: +49 (0) 2762 9313-600
Internet: www.eks-engel.de
1. Unpack the Switch and Check Contents
I
Mounting Kit —2 brackets and 4 screws
Four adhesive foot pads
Power cord
Console cable —RJ-45 to DB-9
Documentation—Quick Start Guide (this
document) and Safety and Regulatory Information
2. Mount the Switch
a. Mounting in a Rack
1
2
1Attach the brackets to the front of the switch.
Use the screws and cage nuts supplied with the rack to
2secure the switch in the rack.
Caution: Installing the switch in a rack requires two
people. One person should position the switch in the
rack, while the other secures it using the rack screws.
Note: The switch can also be installed on a desktop or
shelf using the included adhesive rubber foot pads.
b. Mounting on a Wall
3
1
2
12
3
Caution: Wall mount the switch with the network ports
facing down.
Caution: Wall mount the switch using four brackets
(included) attached to the front and rear of the
switch.
Rotate the brackets 90 degrees and attach them to the front
1and rear of the switch. Use three screws for the front
brackets and two screws for the rear brackets.
In the required location, mark and drill eight holes in the wall
2for the wall anchors (not included).
Note: For a wood wall, drilling holes and using wall
anchors is not required.
Mount the switch on the wall and secure it in place using
3eight #12 wood screws (not included).
–1 –
3. Ground the Switch
2
1
1. Ensure the rack on which the switch is to be mounted
is properly grounded and in compliance with ETSI
ETS 300 253. Verify that there is a good electrical
connection to the grounding point on the rack (no
paint or isolating surface treatment).
2. Attach an 18 AWG minimum grounding wire (not
included) to the grounding point on the switch rear
panel, and then to rack ground.
Caution: The earth connection must not be removed
unless all supply connections have been
disconnected.
4. Connect Power
2
Quick Start Guide
1. The switch supports the option of connecting an external
-48 to -60 VDC power source to its DC terminal block.
2. Connect the -48 VDC power feed wire to the
DC plug “-” pin.
3. Connect the ground/return wire to the DC plug “+” pin.
4. Verify Switch Operation
1
Verify basic switch operation by checking the system LEDs. When
operating normally, the following LEDs should be on (green):
PWR
DIAG
5. Perform Initial Configuration
1
1. Plug the power cord into a 100-240 VAC, 50-60 Hz AC power
source.
2. Insert the other end of the power cord directly into the AC input
socket on the back of the switch.
1
2
Connect a PC to the switch console port using the included
1console cable.
Configure the PC’s serial port: 115200 bps, 8 characters, no
2parity, one stop bit, 8 data bits, and no flow control.
Log in to the CLI using default settings: Username “admin”
3and password “admin.”
Note: For further information on switch configuration,
refer to the Web Management Guide and CLI
Reference Guide.
–2 –
7. Connect Network Cables
Quick Start Guide
Hardware Specifications
3
1
2
For RJ-45 ports, connect 100-ohm Category 5, 5e or better
twisted-pair cable
For the SFP/SFP+ slots, first install SFP/SFP+ transceivers
and then connect fiber optic cabling to the transceiver
ports.
The following transceivers are supported:
10GBASE-CR
10GBASE-SR
1000BASE-SX
1000BASE-LX
1000BASE-T
Size (W x D x H)
Weight
Temperature
44.0 x 22.0 x 4.4 cm
(17.32 x 8.66 x 1.73 in)
2.82 kg
(6.22 lb)
Operating: -10°C to 65°C / 14°F to 149°F
Storage: -40°C to 70°C / -40°F to 158°F
As connections are made, check the port status LEDs
to be sure the links are valid.
On/Blinking Green —Port has a valid link. Blinking
indicates network activity.
Humidity Operating: 5% to 95% (non-condensing)
28T: 100-240 VAC, 50/60 Hz, 0.37-0.22 A
28P: 100-240 VAC, 50/60 Hz, 4.6-2.1 A
AC Input Power 28F/28F-I /28Fv2 : 100-240 VAC, 50/60 Hz 1 A
28Fv2-I : 100-240 VAC, 50/60 Hz 1.2 A
52T: 100-240 VAC, 50/60 Hz, 0.75-0.42 A
DC Input Power 28F: -48 –-60 VDC, 3.0 A
28T: 20 W
Max. Power
28P: 460 W
Consumption
28F/28F-I /28Fv2/28Fv2-I : 60 W
52T: 60 W
PoE Power
28P: 370 W
Budget
Regulatory Compliances
EN 55022:2010, Class A
EN 55032:2012+AC:2013, Class A
EN 61000-3-2:2014, Class A
EN 61000-3-3:2013
Emissions FCC Class A
VCCI Class A
CE Mark
CCC GB 9254-2008 Class A
EN 55024:2010
Immunity IEC 61000-4-2/3/4/5/6/8/11
UL (CSA 22.2 No 60950-1 & UL60950-1)
Safety CB (IEC 60950-1/EN 60950-1)
CCC GB 4943.1-2011
Taiwan RoHS
CNS 15663
–3 –

This manual suits for next models

1

Other eks Switch manuals

eks EL100-4U Series User manual

eks

eks EL100-4U Series User manual

eks e-light-1000-4G User manual

eks

eks e-light-1000-4G User manual

eks EL100-REG User manual

eks

eks EL100-REG User manual

eks EL-100-2 User manual

eks

eks EL-100-2 User manual

eks e-light2 EL100U2 Operating and installation instructions

eks

eks e-light2 EL100U2 Operating and installation instructions

eks e-light 2M User manual

eks

eks e-light 2M User manual

eks EL1000-2G User manual

eks

eks EL1000-2G User manual

eks EL-100-X User manual

eks

eks EL-100-X User manual

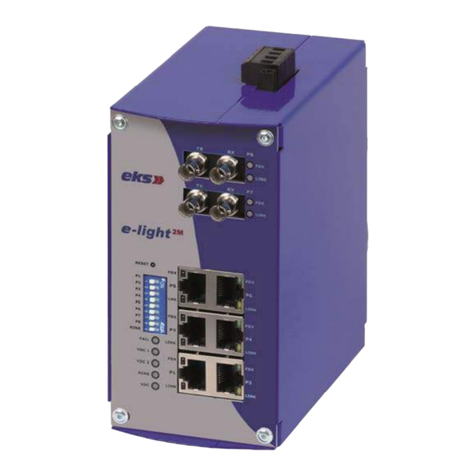
eks e-Light2 EL100-2U Series User manual
eks

eks e-Light2 EL100-2U Series User manual

eks e-light 2MA User manual

eks

eks e-light 2MA User manual

eks EL100X User manual

eks

eks EL100X User manual

eks e-light4 EL100-4U Series Operating and installation instructions

eks

eks e-light4 EL100-4U Series Operating and installation instructions

eks EL1100-4AC Series User manual

eks

eks EL1100-4AC Series User manual

eks e-light 2M User manual

eks

eks e-light 2M User manual

eks PE-LIGHT-2 User manual

eks

eks PE-LIGHT-2 User manual

Popular Switch manuals by other brands

Arista 7100T series quick start guide

Arista

Arista 7100T series quick start guide

Magnum M9-ILS2 Product installation guide

Magnum

Magnum M9-ILS2 Product installation guide

Airthings 281 operating manual

Airthings

Airthings 281 operating manual

Marmitek Connect TS21 user manual

Marmitek

Marmitek Connect TS21 user manual

Siemens RUGGEDCOM RSG2200 installation guide

Siemens

Siemens RUGGEDCOM RSG2200 installation guide

GeoVision GV-POE2401-V2 user manual

GeoVision

GeoVision GV-POE2401-V2 user manual

MicroNet SP676C user manual

MicroNet

MicroNet SP676C user manual

TC Communications TC3715 user manual

TC Communications

TC Communications TC3715 user manual

Briggs & Stratton 50A NEMA 3R Installation and operator's manual

Briggs & Stratton

Briggs & Stratton 50A NEMA 3R Installation and operator's manual

UniControl Cleveland Controls AFS-953 manual

UniControl

UniControl Cleveland Controls AFS-953 manual

NETGEAR SW518 - Switch installation guide

NETGEAR

NETGEAR SW518 - Switch installation guide

RFL 3000 ES42H Installation and user guide

RFL

RFL 3000 ES42H Installation and user guide

Siemens SIRIUS 3RT2 3 1 Series operating instructions

Siemens

Siemens SIRIUS 3RT2 3 1 Series operating instructions

Vanco Evolution EVMX88PRO manual

Vanco

Vanco Evolution EVMX88PRO manual

Honeywell MICRO SWITCH BX2 Series installation instructions

Honeywell

Honeywell MICRO SWITCH BX2 Series installation instructions

Robertshaw 8000 Series installation instructions

Robertshaw

Robertshaw 8000 Series installation instructions

Siemens SIRIUS 3SE53 Series operating instructions

Siemens

Siemens SIRIUS 3SE53 Series operating instructions

H3C S12500X-AF Series Configuration Examples

H3C

H3C S12500X-AF Series Configuration Examples

manuals.online logo
manuals.online logoBrands
  • About & Mission
  • Contact us
  • Privacy Policy
  • Terms and Conditions

Copyright 2025 Manuals.Online. All Rights Reserved.