Elba EAC-G6570RC(WH) User manual

1
AIR COOLER
MODEL: EAC-G6570RC(WH)
Please read this manual carefully
before operating your set.
Retain it for future reference.
Record model number and serial
number of the set.
See the label attached on the set
and quote this information to your
dealer when you require service.
Owner’s Manual
For The Warranty Terms & Conditions, Please Refer To Warranty Certificate.

2
IMPORTANT SAFEGUARDS
REMOVE ALL PACKING MATERIALS FROM THIS PRODUCT BEFORE USING IT.
THIS APPLIANCE MUST BE INSTALLAED ON A FLAT SURFACE. PLEASE
ENSURE THE ELECTRICITY SUPPLY TO THE APPLIANCE IS DISCONNECTED
BEFORE INSTALLING.
Please read this instruction carefully. It is advisable to keep this instruction manual in
a safe place for future reference.
1. Keep this appliance out of reach of children. Close supervision is necessary when the
appliance is operating near children or infirm persons.
2. This appliance is not intended for use by persons (including children) with reduced
physical, sensory or mental capabilities, or lack of experience and knowledge, unless
they have been given supervision or instruction concerning the usage of this
appliance by a person responsible for their safety.
3. Do not operate the appliance with damaged power cord or plug, after the appliance
malfunctions, or if it was dropped or damaged in any manner. Kindly return the
appliance to the nearest authorized dealer or after-sales service centre for
examinations, repairs, electrical or mechanical adjustments.
WARNING –to reduce the risk of fire, electrical shock or injury to persons or
property, please read and follow below instructions carefully.
Always operate the product from a power source of the same voltage, frequency and
rating as indicated on the product identification marking.
Always switch off and unplug the plug from outlet when not in use, before assembling
or disassembling parts and before cleaning. Assemble the product completely before
operating.
To protect against the risk of electrical shock, do not immerse the product, cord or plug
into water or any other liquid.
This product should not be used in the immediate vicinity of water, such as bathtub,
washbowls, swimming pool etc, where the likelihood of immersion or splashing could
occur.
Avoid contact with moving parts. Do not insert any object through the guard when the
product is operating.
Do not cover the guard or operate in close proximity to curtains.
This appliance is for household and indoor use only.
Do not operate it for purposes other than its intended use.
Always disconnect the product when relocating it.

3
PRODUCT DESCRIPTION
1. Control Panel
5. Ice Pad
2. Inner Louvers
6. Honeycomb Cooling Filter
3. Outer Louvers
7. Air Filter
4. Castor Wheels
8. Water Tank

4
INSTALLATION GUIDE
1. Remove all the packaging material from the product and place it on a flat surface.
2. Take out the castors and castor wrench to assemble. Lay unit upside down on a
flat surface with soft cloth or mat during assembly to prevent scratches on unit.
3. Rotate the turning knob below the water cover to a horizontal position to pull out
the water tank.
4. Pour clean water into the water tank. Observe the water level through the marking
printed and pay attention to the following:
a) Ensure that water is filled to the minimum level indicated.
b) Do not fill the water above the maximum level indicated.
c) Always ensure the turning knob is rotated back to vertical position once the
water tank is placed back.
5. Add ice pads into the water for extra cooling.
OPERATION GUIDE
1. Insert the plug into the suitable outlet and ensure it is fitted tightly. The power pilot
light will be illuminated.
2. ON/OFF Button: Press once to turn ON the unit. Whenever you want to stop the
cooler, press the button again, the unit will be under STANDBY mode. To
completely shut the unit off, turn all the controls to OFF and remove plug from the
socket-outlet.
3. Low/ Med/ High button: The fan will work according to the speed you select.
Press the “ON/OFF” button again to turn the cooler off.
4. Swing button: Press the “Swing” button once, the cooler’s inner louvers will
oscillate horizontally automatically. (The “Swing” light will be illuminated)
To stop the louvers from oscillating, press the “Swing” button once again, the
“Swing” light will turn off. Moving the outer louvers either up or down manually can
make further wind direction enhancements.
5. Timer button: Press the “Timer” button once to set the timer by 0.5 hours (min:
0.5 hours, max: 7.5 hours). The pilot light corresponding to the selected timing
5
level will be illuminated.
6. Breeze button: Press the “Breeze” button to maintain consistent fan speed. (User
will not be able to change modes when “Breeze” is on)
7. Mode button: The default setting is Normal wind when button is pressed once.
Press the “Mode” button again to choose your desired wind mode. The wind mode
selection will circulate whenever the button is pressed while the lights on top
indicate the current fan mode in operation.
8. Cool button: Before operating the unit in “Cool” mode, make sure the water in the
water tank is not OVER or UNDER FILLED.
a) Press the button after the water has been added and the unit will blow cooler air.
The light on top of the “Cool” button will illuminate.
b) If you find the air after Step (a) is not cool enough, you can add additional ice
blocks into the water tank directly. Be sure not to exceed the capacity otherwise
the unit will be damaged or electric shock may occur.
c) If you wish to use the ice pads instead, just place it directly into the water tank. It
will be a good cooling efficiency for at least 2 hours after you placed it in the
refrigerator and let the ice pads freeze.
d) If you wish to replace water in the water tank or drain it, remove the motor pump
from the housing inside the tank before removing the water tank. Make sure this is
done over a bucket, outside or somewhere whereby the water will not leak onto or
damage carpet or flooring.
NOTE: The function of the above items can be carried out with your remote
controller by pressing the corresponding function button.
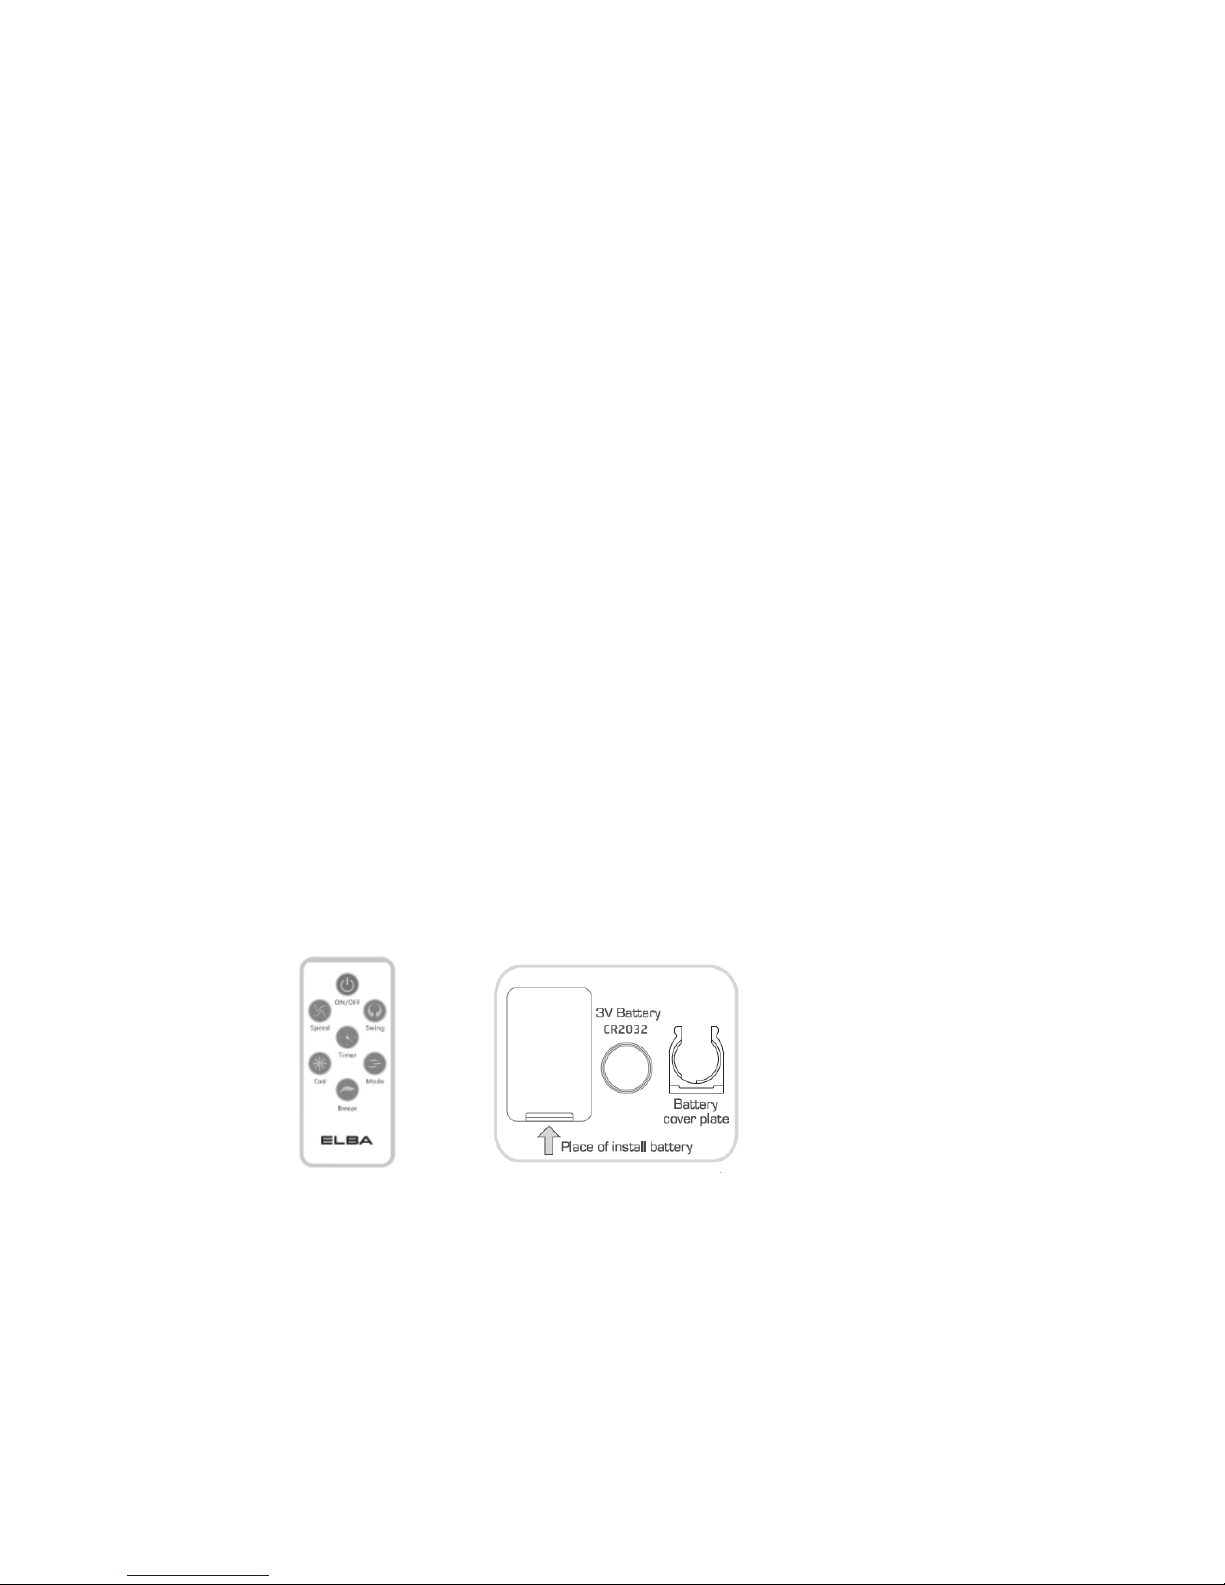
HOW TO REPLACE REMOTE CONTROLLER BATTERY
1. Remove the Battery Cover Plate from the bottom of the remote controller.
2. Replace the old battery with a new one onto the Battery Cover Plate.
3. Reinsert the Battery Cover Plate firmly into the remote controller.

6
CLEANING AND MAINTENANCE
1) Air Filter
To clean the air filter, use only clean water with soft brush to remove dust.
2) Water Tank
1) Ensure that the unit is switched off entirely.
2) Remove all water entirely from the water tank.
3) Clean the sediments and inner water tank with mild soap. Rinse off afterwards.
4) Ensure completely dry before placing the water tank back for use again.
3) Outer Body
To clean the outer body, use only mild soap with soft damp cloth (not dripping wet).
NOTE:
After extended periods of use, be sure to replace the water in the tank with fresh clean
water at least once per week. Cleaning of the air filter is recommended occasionally
and should be left to dry completely before it is reused on the unit again.
When the unit is not in use, ensure that it is unplugged from the wall socket, water is
drained thoroughly and placed back into its original box for storage until later use.
In any events of malfunction or doubt, do not attempt to repair by yourself, it may
result in a fire hazard or electric shock.
WARNING:
Always remove the plug from the socket-outlet and allow the fan blower to stop
completely before cleaning it.
Do not immerse the unit in water.
Do not use any cleaning chemicals such as detergents and abrasives.
Do not allow the interior (especially the PCB) to get in contact with water as it could
be dangerous.

7
MAIN SPECIFICATION
Voltage : 220-240V, 50/60Hz
Rated Power : 65W
Max. Water Tank Capacity : 7.0L
Motor : 3-Speed
NOTICE
This product must not be disposed together with domestic waste. It has to be disposed at an
authorized place for recycling of electrical and electronic appliances. By collecting and recycling
waste, you help to save natural resources and make sure the product is disposed in an
environmentally friendly and healthy way.

8
Table of contents
Other Elba Air Conditioner manuals
 User manual")
Elba
Elba EACI-D1051I(WH) User manual
 User manual")
Elba
Elba EPAC-A4010D(WH) User manual

Elba
Elba EPAC-A4215D User manual

Elba
Elba R410a User manual

Elba
Elba K Series User manual
 User manual")
Elba
Elba EAC-B1492RC(WH) User manual

Elba
Elba EWS-9001C User manual

Elba
Elba EAC-B1081RC User manual

Elba
Elba EWS-9001C User manual

Elba
Elba EPAC-D3910 User manual


Popular Air Conditioner manuals by other brands


 null")


CIAT
CIAT Magister 2 Series Installation, Operation, Commissioning, Maintenance

Bestron
Bestron AAC6000 instruction manual

Frigidaire
Frigidaire FFRE0533S1E0 Use & care guide

Samsung
Samsung AS09HM3N user manual

Frigidaire
Frigidaire CRA073PU11 use & care

Soleus Air
Soleus Air GB-PAC-08E4 operating instructions