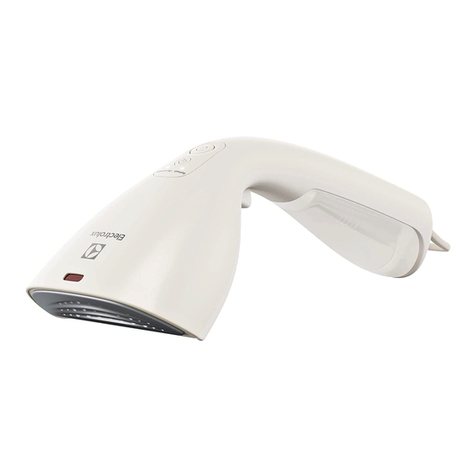
Electrolux EGS2103 User manual

Garment Steamer EGS2103

2
EN Instruction book ....... 3-10
Before using the appliance for
the rst time
CNT 說明書 ...................... 11-18
首次使用本電器前,請閱讀
安全建議
TH ........... 19-26

3
EN
Read the following instruction carefully before using machine for the first time.
• This appliance can be used by children aged from 8 years and above and persons with
reduced physical, sensory or mental capabilities or lack of experience and knowledge if
they have been given supervision or instruction concerning use of the appliance in a safe
way and understand the hazards involved. Children shall not play with the appliance.
Cleaning and user maintenance shall not be made by children without supervision.
• Children should be supervised to ensure that they do not play with the appliance.
• The appliance may only be connected to a power supply whose voltage and frequency
comply with the specifications on the rating plate!
• The garment steamer is not to be used if it has been dropped, if there are visible signs of
damage on the product or its cord or if it is leaking.
• The appliance must only be connected to an earthed socket. If necessary an extension
cable suitable for 10 A can be used.
• If the appliance or the supply cord is damaged, it must be replaced only by an authorized
Electrolux service centre in order to avoid hazard.
• The garment steamer must be used and rested on a stable surface.
• Never leave the appliance unattended while connected to the supply mains.
• The appliance must be switched off and the mains plug withdrawn each time after use,
before cleaning and maintenance.
• The plug must be removed from the socket outlet before the water reservoir is filled with water.
• The mains cable must not come into contact with any hot parts of the appliance.
• Do not immerse the appliance in water or any other liquid.
• Do not exceed the maximum filling volume as indicated on the appliance.
• This appliance is intended for domestic use only. The manufacturer cannot accept any
liability for possible damage caused by improper or incorrect use.
• Keep the garment steamer and its cord out of reach of children less than 8 years of age
when it is energized or cooling down.
• Do not bend the steam hose or block the steam outlet or else accidents may happen
because of overpressure.
• Do not pull the steam hose when the product is in use.
• Do not fill hot water into the water tank or else the water tank may deform.
• To avoid hot condensate dripping from the steam nozzle, do not move the product
horizontally but vertically.
Safety advice
4
EN
Components
1. Nozzle
2. Clothes rack
3. Support frame
4. Steam hose
5. Support locking ring
6. Steam inlet seat
7. Water tank
8. Switch button and steam selector
9. Four castor wheel
10. Brush
11. Line clip
12. Trousers rack
13. Extra garment clip
14. Static brush
15. Protective glove
16. Ironing board for collar and sleeve
(just for Taiwan)
17. Auxiliary ironing board (just for Taiwan)
18. Accessory bag (just for Taiwan)
15
16
17
18
14
13
12
11
10
1
2
3
4
5
6
7
8
9

5
EN
Getting started
Before rst use, remove all adhesive remains and gently rub with a dampened cloth. Rinse
water tank to remove foreign particles. When turned on for the rst time, temporary vapors/
odors may occur.
1. Take out the support frame and the clothes rack, press down to install the clothes rack
and lift it. If the clothes rack is stationary, it has been properly installed.
2. Press the clothes rack button, hold the clothes rack support with hands and unfold and
fold the clothes rack to adjust it.
3. Insert the support into the corresponding hole on the product and rotate the support
locking ring to lock the support.
4. Loosen the locking sleeves, lift the support, adjust it to the proper position and then
lock the support locking sleeves.

6
EN
5. Insert the steam inlet seat into the steam outlet along
the direction in the gure and then tighten it turning
clockwise.
6. Place the nozzle on the clothes rack hook.
7. Take out the water tank, unscrew the knob at its bottom, ll water into it. This product
is appropriate for use with tap water. It is recommended to use distilled water or a mix
of 50% distilled, 50% tap water. Never use distilled water only. Never put scented water,
vinegar or ironing aids in the water tank. This may cause brown spitting and staining.
8. Place the water tank in the main unit. Insert the plug into the power socket and then
select the appropriate steam output on the switch button.
9. The product has three gears, Silk , Cotton/Fiber , and Fur/Linen . It is
suggested to use the “Silk” gear for thinner clothes such as silk clothes and shirts.
The “Cotton/Fiber” gear for thicker clothes such as cotton clothes and chemical ber
clothes and the “Fur/Linen” gear for thicker clothes such as fur coats and linen coats.
Please choose the proper gears according to your actual needs.
10. The power light will be on and steam will be released soon. Hang clothes on the
clothes rack. Always steam the clothes from up to down.
11. The steam hose becomes warm during steaming. This is normal.
NOTE: Do not release steam toward people or animals.
Getting started
Steam hose
Steam inlet seat
Switch button

7
EN
Accessories
Brush: for removing u and hair from garments.
Static Brush: remove the slight dust/u by the special static strip on it.
Line clip: for perfect creases or crisp shirt cus and collars. Just clip it to the tab on the
underside of the nozzle. Place the garment between the nozzle and the line clip.
Trousers rack: Push up the trouser rack along the support, it is properly installed after its
locking knob hooks the support of the clothes rack. Evenly hang a pair of trousers in the
middle of the trousers rack and rmly clip the trousers with trousers clips.
Extra garment Clip: holds sleeves, dresses and other longer items in place for quick
steaming.

8
EN
Cleaning
1. After use, turn the product o by turning the switch button to 0. Unplug the appliance
and allow the product cool down for more than 30 minutes.
2. Remove the water tank from the steamer and drain the remaining liquid from the tank
and the cavity of the steamer.
3. Open the drain valve to thoroughly drain the surplus water in the heating body of the
main unit and then wipe the surplus water at the junction of the water tank and the
main unit to avoid scaling. After water drainage, close the drain valve.
Rinsing
This process has to be done after 5 times of usage.
1. Turn the product o, unplug the appliance and take both the steam hose and the
support out of the main unit.
2. After the product has cooled down to the room temperature, open the drain valve, put
the main unit under the tap.
3. Open the tap, slowly ll the water into the steam inlet seat, the water should not
overow from the product, last this rinsing process for 1min.
4. After water drainage, close the drain valve and wipe-dry the product.
5. Reassemble the accessories to continue using it.
Drain valve

9
EN
This process has to be done after every month of usage or if the volume of the released steam
is clearly less than before, or steam release stops soon. You can remove the scales such as
calcium carbonate and mineral substances on the heating body by following the steps below.
1. Turn the product o, unplug the appliance and take both the steam hose and the
support out of the main unit.
2. After the product has cooled down to the room temperature, take the water tank out
of the main unit and drain the surplus water in the product.
3. Mix a descaler agent and water at the specied ratio, prepare at least 300ml descaler
mixture. (Use recommended ratio for the mixture, if there is much scaling, properly
increase the proportion of descaler.) Recommended descaler for this operation is
MUD5F from Menalux.
4. Fill the mixture into the water tank, tighten the knob and then place the water tank in
the main unit.
5. Soak for one to two hours under room temperature (if there is much scaling, properly
increase the soaking time; however, the soaking time should not be longer than 8
hours).
6. Pour out the mixture from the water tank and the heating furnace.
7. Fill in clean water via the steam hose joint and into the water tank and then thoroughly
pour it. Repeat this step for several times until the scales in the product are removed
and there is no longer a descaler smell.
8. Reassemble the accessories to continue using it.
Descaling

10
EN
Troubleshooting
Problem Possible cause Solution
No steam is released and
the power light is o.
Connection problem. Check main power supply
cable, plug and outlet.
The appliance is not switched
on. Press the switch button.
No steam is released but
the power light is on.
The water level in the water tank
is too low. Fill water into the water tank.
The nozzle has water
leakage.
Inspect whether the nozzle has
cracked. Change the nozzle.
Place the product at in
operation. Move vertically.
Joint of the steam hose
has water leakage. The joint is loose. Tighten the joint of the
steam hose.
Water ows out of the
water tank.
The water tank has cracked or
has holes. Change the water tank.
Inspect whether the steam hose
is seriously bent. Straighten the steam hose.
The steam hose has been bent
for a long time.
Straighten the steam hose
and lift the nozzle up.
The water tank is
deformed.
Hot water has been lled into it.
Change the water tank.
Some chemical reagent has
been lled into it.
The steam volume is too
small.
The steam hose is blocked by
scales.
Remove the scales with a
special cleaning agent.
The voltage is too low. Install a voltage stabilizer
The switch or the heating body
is damaged.
Send to a professional for
repair.
There is a sound in the
steam hose.
The nozzle is lower than the
horizontal line in operation.
Straighten the steam hose
and lift the nozzle.
The brush and the
line clip cannot be
tightened.
The buckles are damaged. Change the accessories.

11
CNT
第一次使用本產品之前,請先詳閱以下指示。
• 不論是八歲以上孩童,或者是行動、感官或心理方面患有障礙、或是缺乏相關經驗和
知識的人士,只要經過適當指導並充分了解安全性方面的疑慮後,都可以安心使用本
產品。請勿任由孩童將本產品當作玩具使用。請勿讓孩童在未經家長監督之下清理或
修護本產品。
• 請務必避免兒童將本產品拿來玩耍。
• 請務必依照本產品所要求的規格,插上有提供相同電壓和頻率的電源插座!
• 蒸汽掛燙機若有摔壞、出現明顯瑕疵、電線脫落或漏水等情形時應停止使用。
• 本產品只能夠插在接地電源插座上。若有需要,可透過適合承載10A電流的延長線接
續使用。
• 倘若產品本身或電源線有損壞,請務必交由經伊萊克斯核准任可之維修商處理,以避
免發生危險。
• 蒸汽掛燙機必須在平坦且穩固的表面上放置、使用。
• 產品在插上電時,請不要轉移注意力去處理其他事情。
• 產品於每次使用後或是進行清理維護之前應確實關閉,並且將電源線從插座拔出。
• 每次使用時,應將電源線從插座拔出後,再把水注入貯水箱。
• 不要讓電源線接觸到產品上的任何發熱之處。
• 不要將本產品浸泡在水或是任何液體中。
• 注水時,請不要超過水箱所標示的限制。
• 本產品僅供家庭使用。本廠對於不當或是不正確使用所造成的損壞均不負責。
• 蒸汽掛燙機於接上電源或者由熱冷卻時,應避免8歲以下的孩童接近。
• 請務必避免將蒸汽管彎折或堵住出汽孔,否則可能會因為壓力超載而發生意外。
• 產品在使用狀態下,請勿拉扯蒸汽管。
• 請勿將熱水注入貯水箱,以避免發生變形。
• 為了避免蒸汽在凝結成水後由噴嘴滴出,熨燙時應上下垂直移動,請勿以水平方向
移動。
安全使用之建議

12
CNT
各項元件
1. 噴嘴
2. 衣架
3. 支架
4. 蒸汽管
5. 鎖環
6. 進汽口
7. 貯水箱
8. 開關及蒸汽調控鈕
9. 四腳輪
10. 衣物刷
11. 褶線夾
12. 褲架
13. 固定夾
14. 靜電刷
15. 防護手套
16. 衣領與袖口專用之燙衣板(僅限台灣
地區)
17. 輔助燙衣板(僅限台灣地區)
18. 配件收納袋(僅限台灣地區)
15
16
17
18
14
13
12
11
10
1
2
3
4
5
6
7
8
9

13
CNT
使用說明
第一次使用前,請先拿抹布沾濕後將產品表面上所殘留的黏著劑擦拭乾淨。沖洗貯水箱
內側,以避免異物進入。第一次使用時,可能有穢氣或異味排出。此為暫時現象。
1. 從包裝裡取出支架和衣架,並相互插入對應的插孔中,完成後再往外輕拉。如果
衣架仍固定不動,則表示安裝正確。
2. 用手抓住支架,再按下衣架調整鈕,即可調整角度。
3. 將支架插入對應的插孔中,再旋轉鎖環加以固定。
4. 將伸縮固定套轉鬆,將支架調整至適當高度後再轉緊。

14
CNT
5. 依圖所示,將進汽口與出汽孔連接並以順時針
方向轉緊。
6. 把噴嘴置放在衣架上的勾槽內。
7. 本產品適合使用自來水。推薦摻入使用蒸餾水、或50%蒸餾水加50%自來水。請勿
只用蒸餾水。請勿將香水、醋或熨燙添加劑注入貯水箱,因為這樣可能會在衣物上
留下褐色污漬。
8. 將貯水箱放入主機。插入電源,再利用蒸汽調控鈕選擇蒸汽輸出。
9. 本產品有提供三種不同的蒸汽強度,分別適合:絲質 、棉質人造纖維
和
皮革麻質 衣物。較薄衣物如T恤、絲質等建議使用「絲質」選項。至於棉質
和人造纖維等較為厚重之衣物,則應使用「棉質人造纖維」選項,而「皮革
麻質」則適用於皮製和麻布外套。請按照實際需求自行調整。
10. 此時,電源燈將會亮起,而不久後蒸汽便會噴出。把要熨燙的衣物掛在衣架上。
熨燙時,一律由上往下進行。
11. 隨著蒸汽流動,蒸汽管也會逐漸升溫。此為正常狀況。
註:請勿將蒸汽朝人或動物噴放。
使用說明
蒸汽管
進汽口
蒸汽調控鈕

15
CNT
週邊配備
衣物刷:用來清除衣物上的絨毛和毛髮。
靜電刷:利用刷子上所貼附的靜電氈,可清除較為細微的絨毛和灰塵。
褶線夾:用來熨燙平直褶線以及袖口、衣領等地方。只要將它夾在噴嘴上方,再把衣物
置於褶線夾和噴嘴中間,就可以燙出平直的褶線。
褲架:把依附在支架上的褲架向上推,直到鎖扣扣住衣架,即表示安裝正確。將褲子平
滑地攤放在褲架中央,再用夾子夾緊。
固定夾:用來固定長袖、禮服等較長衣物,以便快速熨燙。

16
CNT
清潔
1. 使用完畢後,將調控鈕轉到 0 的位置並將機器關閉。將電源線拔離插座,並且靜
候30 分鐘以上,以便讓產品冷卻。
2. 取出貯水箱,從貯水箱和掛燙機腹內把剩餘的水倒掉。
3. 打開機器下方的排水孔,讓裡面的殘留水分完全流出,再把貯水箱和機器的連接
處擦拭乾淨以避免產生水垢。水分排盡後,關閉排水孔。
排水孔

17
CNT
機器每使用五次就應該清除水垢,而使用時若發現蒸汽量明顯變少或消耗過快時更應立
即處理。您可以透過以下步驟將加熱槽內堆積的碳酸鈣等礦物質清除乾淨。
1. 首先將機器關閉並拔除電源,再把蒸汽管和支架拔出。
2. 待機器冷卻至室溫後,取出貯水箱並把多餘的水從機器內排出。
3. 將水垢清潔劑以 1:1 的比例與水混合(水垢情形嚴重時,應適度提高清潔劑的
比重)。
4. 從進汽口慢慢倒入調合液體。注意液體不應溢出。
5. 在室溫下靜置一至兩個小時(水垢情形嚴重者應適度延長靜置時間,但以不超過
八小時為原則)。
6. 把調合液體從機器內部和貯水箱中倒出。
7. 將清水分別由蒸汽管接口注入機器內部以及貯水箱之中,再全部倒出。重複此步
驟,直到水垢完全清除且沒有殘留清潔劑的餘味為止。
8. 只要把產品重新組裝便可再次使用。
清除水垢

18
CNT
故障排除
故障 可能原因 解決方法
沒有蒸汽噴出且電源
燈未亮。
電源連接有問題。 檢查電源線、插頭和插
座。
機器未開啟。 按下開關鈕。
沒有蒸汽噴出但電源
燈已亮。 貯水箱內沒有足夠的水。 把水注入貯水箱。
噴嘴有漏水情形。
檢查噴嘴是否有裂縫。 更換噴嘴。
使用時噴嘴與地面處於平行
位置。 垂直置放。
蒸汽管與主機連接處
有漏水情形。 進汽口未鎖緊。 把蒸汽管的連接處鎖緊。
水從貯水箱外殼流
出。
貯水箱可能有破洞。 更換貯水箱。
檢查蒸汽管是否有嚴重彎折。 把蒸汽管拉直。
蒸汽管長時間處於彎折狀態。 將蒸汽管拉直並提起噴
嘴。
貯水箱已變形。
使用時有注入熱水。
更換貯水箱。
使用時有放入化學藥劑。
蒸汽量過少。
蒸汽管被水垢堵塞。 利用特製清潔劑清除水
垢。
電壓不夠。 加裝穩壓器。
調控鈕或加熱元件發生損壞。 將產品送交專業技師維
修。
蒸汽管內有雜音。 使用時噴嘴的位置低於主機
的位置。
將蒸汽管拉直並把噴嘴
拿高。
衣物刷和褶線夾無法
固定。 鎖扣已損壞。 更換週邊配備。

19
TH

20
TH
15
16
17
18
14
13
12
11
10
1
2
3
4
5
6
7
8
9
Table of contents
Languages:
Other Electrolux Steam Cleaner manuals

Electrolux
Electrolux ERGORAPIDO User manual

Electrolux
Electrolux JETMAXX Steam User manual

Electrolux
Electrolux EGS2003 User manual

Electrolux
Electrolux E3GS1-13MN User manual

Electrolux
Electrolux Precision User manual

Electrolux
Electrolux 7000 User manual

Electrolux
Electrolux Enviro Multi Steamer Plus User manual

Electrolux
Electrolux LX15002 User manual

Electrolux
Electrolux Refine 500 User manual

Electrolux
Electrolux DOM404 User manual