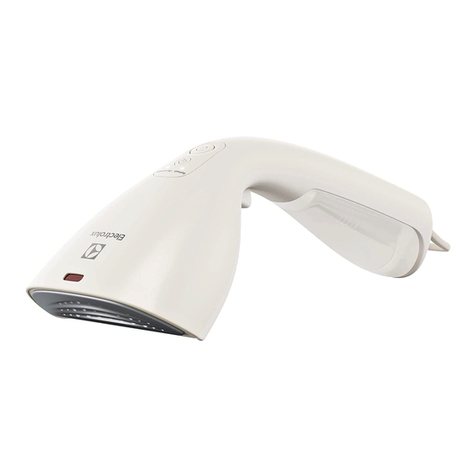
Electrolux E3GS1-13MN User manual

1. SAFETY INFORMATION
Before the installation and use of the appliance, carefully
read the supplied instructions. The manufacturer is not
responsible for any injuries or damage that are the result
of incorrect installation or usage. Always keep the
instructions in a safe and accessible location for future
reference.
•This appliance is not intended for use by persons
(including children) with reduced physical, sensory or
mental capabilities, or lack of experience and
knowledge, unless they have been given supervision
or instruction concerning use of the appliance by a
person responsible for their safety.
•Children should be supervised to ensure that they do
not play with the appliance.
•Keep all packaging away from children and dispose of
it properly.
•Keep children less than 8 years of age away from the
appliance and its cord when in use and when cooling
down.
•Cleaning and user maintenance shall not be made by
children without supervision.
•Care should be taken when using the appliance due to
the emission of high temperature steam to avoid the
risk of burns.
•Do not install or use a damaged appliance or
accessories. Do not change the specification of this
appliance. All service or repairs must be carried out by
the Authorised Service Centre.
•Turn off the appliance and disconnect it from the
mains after each use, before moving or carrying out
any maintenance.
•If the supply cord is damaged, it must be replaced by
the manufacturer, its service agent or similarly
qualified persons in order to avoid a hazard.
•Use only accessories, parts or tools recommended for
this appliance.
2

2. SAFETY INSTRUCTIONS
• This appliance is intended to be used
in household (indoors) and similar
applications.
• Do not use a damaged appliance.
• The appliance shall be installed in
accordance with local wiring
regulations.
• Make sure that the parameters on the
rating plate are compatible with the
electrical ratings of the mains.
• Always use a correctly installed
shockproof socket.
• Do not pull the mains cable to
disconnect the appliance. Always pull
the mains plug.
• Do not let the appliance stay
unattended while it is connected to
the mains.
• Do not immerse the appliance body,
cord or plug in water. Keep the mains
cable away from sharp objects and
heat sources.
• Always place the appliance on a flat
and stable surface.
• Do not hold the hose directly or twist
the hose connector when using the
appliance to avoid the risk of burns.
• Do not point the steam nozzle directly
at people, animals, or easily damaged
clothing (such as leather clothing)
during the use of the appliance.
• Do not pull the steam hose to move or
lift the appliance.
• Do not expose the appliance to very
high or freezing temperatures.
• Always use purified water to iron
clothes.
• Never use the appliance with the
empty water tank. Do not exceed the
maximum filling volume as indicated
on the water tank.
• During use, the indicator light is
turned off and then turned on, which
is caused by the startup of appliance
overheat protection and will recover
after a period of time.
• Concerning the lamp(s) inside this
product and spare part lamps sold
separately: These lamps are intended
to withstand extreme physical
conditions in household appliances,
such as temperature, vibration,
humidity, or are intended to signal
information about the operational
status of the appliance. They are not
intended to be used in other
applications and are not suitable for
household room illumination.
• Do not use harsh abrasive cleaners or
sharp metal scrapers to clean the
appliance to avoid damaging the
surface or water leakage.
• Refer to corresponding chapters for
details on filling, cleaning, and
descaling of the appliance.
• Store the appliance in a dry place to
avoid possible moisture condensation
inside the appliance.
• Before storing, let the appliance cool
down, empty the water tank, and wind
up the mains cable. Always place the
steam nozzle in an upright position on
the steam nozzle hook.
• Before disposal, disconnect the
appliance from the mains and cut off
the mains cable.
Environmental Concerns
This symbol on the product or on its
packaging indicates that the product
contains a rechargeable battery which
shall not be disposed with normal
household waste.
Recycle materials with the symbol .
Put the packaging in relevant containers
to recycle it. Help protect the
environment and human health by
recycling waste of electrical and
electronic appliances. Do not dispose of
appliances marked with the symbol
with the household waste. Return the
product to your local recycling facility or
contact your municipal office.
ENGLISH 3
3. PRODUCT DESCRIPTION
General description
Garment steamer uses high temperature steam for ironing. It is more effective with ironing
delicate materials or heavy fabrics and removing creases.
Accessories
Brush
To improve ironing
results. Align the
back of the brush
with the steam noz‐
zle and press the
bucket at the bottom
of the brush.
Glove
To avoid burns dur‐
ing ironing.
Trousers rack
To position bottom
parts of garments
before ironing.
Ironing board
To place the clothes
on a stable surface.
It can be used verti‐
cally or horizontally.
Available for models:
E5GS1-44MN,
E7GS1-74OW
4. BEFORE FIRST USE
Remove all the packaging, labelling and protective film.
Clean the product with hot water, mild detergent and a soft cloth.
Dry the product.
5. DAILY USE
Assembling
Step 1 Open the pole lock. Stretch the telescopic rod to fully unfold each section.
Step 2 Lock the rod lock.
Step 3 After the telescopic rod is fully extended, align the bulge of the telescopic rod
with the jack groove on the base unit.
Step 4 Press down the telescopic rods until they click.
Filling the water tank
4

Before filling the water tank, disconnect the power supply.
Step 1 Hold the water tank handle and lift it up.
Step 2 Unscrew the water tank cover.
Step 3 Fill the water tank.
Step 4 Screw back the water tank cover.
Step 5 Hold the water tank handle. Make sure the water tank cover points downwards.
Check the water quantity and ensure that there is no water leaking from the po‐
sition of the water tank cover.
Step 6 Place the water tank vertically on the base unit.
Do not use water containing additives (starch, spices, aromatic substances, softeners,
etc.).
Power on
Before using the product, always check if the appliance is not damaged.
Step 1 Plug the appliance.
Step 2 Press the power button.
Step 3 Press the adjustment button.
Step 4 After approximately 45-70 seconds, the steam nozzle will start to generate
steam.
Ironing the clothes
Never iron the clothes you are wearing.
Do not touch the high-temperature steam and the steam nozzle panel during ironing.
Pay attention to prevent the danger of steam splashing when using the appliance.
Avoid the steam nozzle aiming at people or animal.
Step 1 Hang the clothes on the hanger.
Step 2 Hold the steam nozzle and keep it vertical.
Step 3 Attach the steam nozzle to the clothes and iron down.
During use, part of the steam will condense in the hose, causing a "gurgling sound",
which is normal. If this happens, straighten the steam nozzle and hose upward to make
the condensate flow back into the water tank.
ENGLISH 5

Icon Function Application Steam
amount
ON/OFF To turn on and off the appliance.
-
ECO To steam with more efficient use of en‐
ergy.
Refresh To refresh the garments with light
steam.
De-wrinkle functions: To de-wrinkle the garments with steam.
Delicate To steam thinner and delicate clothes
with lower amount of steam.
Wool To steam thicker clothes made from
wool with more steam.
Cotton To steam thicker clothes made from
cotton with more steam.
Linen To steam thicker clothes made from
linen with more steam.
Steam button To regulate the amount of steam.
Press the button the add/remove
steam. -
6. HINTS AND TIPS
Tips to improve the effects of ironing
• Check the care label provided by the clothing manufacturer before ironing to choose
correct settings.
• Fasten the button on the shirts collar to prevent the clothes from slipping off during
ironing.
• When moving the steam nozzle, brush the clothes gently.
• Do not use the steamer for silk and velvet.
• The ironing effect on the reverse side of some clothes is better.
• Ironing heavy fabrics may take longer.
• When ironing the lower position of the clothes, straighten the steam nozzle and hose
upward from time to time to avoid steam condensation.
• Do not use a brush for plush materials.
6

7. CARE AND CLEANING
CAUTION: Before cleaning, wait until the product is cold.
DOs DON'Ts
• Clean the product surface with a damp
cloth or non-abrasive sponge.
• Always clean and dry the product
throughly.
• Use only white vinegar for descaling.
• Avoid aggressive cleaning agents.
• Do not clean the product with abrasive ma‐
terials.
• Do not soak the steam nozzle in water or
other liquids.
• Do not inject water through steam nozzle
hole or calcium removal port.
Storage
• After use, place the steam nozzle on
the steam nozzle hook.
• After winding up the power cord, tie it
with a tie tape.
• Let the steam nozzle cool down com‐
pletely.
• Before pulling out telescopic rod from
the appliance, it is necessary to fully
retract each telescopic rod.
• Do not lift or carry the appliance by holding
the ironing board or steam pipe.
• Do not bend the steam hose during stor‐
age.
Descaling
This appliance needs to be descaled regularly. For the descaling frequency, check the ta‐
ble below.
Step 1 Remove the water tank from the main unit.
Step 2 Fill the water tank.
Step 3 Shake the water tank gently and till it to drain the water.
Step 4 Pour the mix of 200 ml of water and 200 ml of white vinegar into the water tank,
place it on the base unit, and gently shake the main engine to fill the boiler with
water.
Step 5 Let the appliance stand for about 8 hours.
Step 6 Shake the main engine gently.
Step 7 Turn the calcium removal knob clockwise. Tilt the product and drain the solu‐
tion.
Step 8 Turn the calcium removal knob clockwise.
Step 9 Fill the water tank to its full capacity and load it into the appliance.
Step 10 Repeat the procedure from steps 5-9.
ENGLISH 7

Step 11 Turn on the power supply and start the appliance, so that it can continuously re‐
lease steam.
During this process let the product stand until the water in the water tank is
completely used up and no steam is sprayed from the steam nozzle.
Step 12 Turn off the host power and unplug the power plug.
Classification Hardness in
mg / L Hardness in
mmol / L Hardness in
dGH / °dH Descaling fre‐
quency
Soft 0 - 60 0 - 0.60 0.3 - 3.00 More than 1
year or unnec‐
essary
Moderately
hard 61 - 120 0.61 - 1.20 3.72 - 6.75 9 - 12 months
Hard 121 - 180 1.21 - 1.8 6.78 - 10.08 6 - 9 months
Very hard > 181 > 1.81 > 10.14 3 - 6 months
Descaling frequency is based on the using estimation of 2 tanks per week.
The recommended time of self-cleaning is around 36 hours (based on water hardness
more than 10 °dH).
• Detergent: 200 ml of white vinegar + 200 ml water or 380 ml of water + 20 ml of citric
acid.
8. TROUBLESHOOTING
Problem Possible cause Solution
No steam is released and
the power light is off.
Connection problem. Check the power supply ca‐
ble, plug, and outlet.
The appliance is not switch‐
ed on. Press the ON/OFF button.
No steam is released but the
power light is on. The water level in the water
tank is too low. Fill water into the water tank.
Water leakage from the
steam nozzle.
The steam nozzle cracked. Replace with a new set of
steam hose.
Condensation from the
steam hose. Lift the steam nozzle in up-
right position.
Water leaking out from the
water tank.
The water tank cracked. Replace with a new water
tank.
The steam hose is in U-
shape or bent for a long peri‐
od of time.
Lift the steam hose in up-
right position.
8

The water tank is deformed.
Filling up the water tank with
hot water. Replace with a new water
tank.
Chemical residue from inad‐
equate cleaning process.
The steam output is too little. The switch or the heating
unit is damaged. Contact an Authorized Serv‐
ice Centre.
There is a gurgling sound
when the appliance oper‐
ates.
Condensation from the
steam hose. Lift the steam nozzle in up-
right position.
The steam hose is in U-
shape or bent for a long peri‐
od of time.
Lift the steam hose in up-
right position.
9. ENVIRONMENTAL CONCERNS
Recycle materials with the symbol .
Put the packaging in relevant containers
to recycle it. Help protect the
environment and human health by
recycling waste of electrical and
electronic appliances. Do not dispose of
appliances marked with the symbol
with the household waste. Return the
product to your local recycling facility or
contact your municipal office.
Being ensured permissible content limitation of some toxic chemicals (RoHS
compliant).
ENGLISH 9

1. 安全信息
在安装和使用本机之前,请认真阅读提供的操作说明。对
于不当安装或使用本机而造成的任何伤害或损害,制造商
不承担任何责任。请妥善保管操作说明,并置于易于取用
的地方,供将来参考之用。
•本设备不供肢体伤残、感知障碍或精神障碍以及缺乏相
关经验和知识的人士(包括儿童)使用,除非他们在使
用时得到对其安全负责的人员的监督或指导。
•应对儿童加强看管,确保他们不将本电器当做玩具。
•请将包装远离儿童,并妥善处置。
•在使用和冷却时,请让 8 岁以下的儿童远离本家电及其
电源线。
•儿童不得在无人监管的情况下擅自清理或维修本机。
•使用本家电时应小心谨慎,以避免烫伤危险,因其会排
放高温蒸汽。
•请勿安装或使用破损设备。请勿更改本机规格。所有服
务或维修须由授权服务中心执行。
•每次使用后,移动或执行任何维护之前,请关闭本家电
并断开电源。
•如果电源线受损,必须由制造商、授权服务中心或具备
类似资质的人员进行更换,以免发生危险。
•仅允许使用针对本家电推荐的配件或零部件。
2. 安全说明
• 本设备旨在用于家用和类似应用场所。
• 请勿使用损坏的家电。
• 家电应当根据当地布线法规进行安装。
• 请确保铭牌上的参数与市电的额定值
相符。
• 始终使用正确安装的防震插座。
• 请勿拉电源线以断开设备的连接。务
必拔下电源插头。
• 请勿让本家电在连接到电源时处于无
人看管状态。
• 请勿将设备机身、电线或插头侵泡水
中。电源线应远离尖锐物体和热源。
• 始终将本家电放在平坦且稳定的表面
上。
• 使用本家电时,请勿直接握住软管或拧
动软管接头,以避免烫伤危险。
• 在使用本家电时,请勿将蒸汽喷嘴直接
对准人员、动物或容易损坏的衣物(例如
皮革衣物)。
• 请勿通过拉动蒸汽软管来移动或提起
本家电。
• 请勿将设备暴露在极热或极寒温度中。
• 始终使用纯净水熨烫衣物。
• 切勿将本机与空水槽一起使用。请勿
超过水槽上标示的最大注水量。
• 在使用过程中,指示灯会关闭,然后打
开,这是由于本机过热保护设置启动而
导致的,将在一段时间后恢复。
• 本产品内部的照明灯及备件照明灯均
单独出售:这些照明灯可承受家用电器
中的极端物理条件(例如温度、振动、
湿度),或者可用于传递关于电器操作
状态的信息。它们不可用在其他电器
中,也不适用于家庭房间照明。
• 请勿使用刺激性的擦洗剂或锋利的金
属刮刀来清洁本家电,以避免损坏表面
或漏水。
10

• 有关本刺激性的填充、清洁和除垢的详
细信息,请参阅相应章节。
• 将本机存放在干燥处,以避免其内部可
能产生水分凝结。
• 存放之前,先让本机冷却,排空水槽,
然后卷起电源线。始终将蒸汽吸嘴直
立挂在蒸汽喷嘴挂钩上。
• 丢弃本家电之前,请断开其电源连接并
切断电源电缆。
环境保护需求
产品或包装上的该标识意味该产品包
含可充电电池,可充电电池不得作一般生
活垃圾丢弃。
可回收材料带 标志。请将包装放入相
应容器以供回收利用。回收利用废旧电气
电子设备,共创美好环境,保护人类健康。
请勿将带有 标志的设备与生活垃圾一
同处理。请将产品送至当地回收机构或联
系所在地市政办公室。
3. 产品说明
一般说明
衣物熨烫机使用高温蒸汽进行熨烫。它对于熨烫精细面料或厚重面料,以及去除褶皱效果更
佳。
附件
熨烫刷
可改善熨烫效果。请
将熨烫刷背面与蒸汽
喷嘴对齐,并按下熨
烫刷底部的水箱。
手套
避免在熨烫过程中烫
伤。
裤子架
熨烫前,将衣物底部放
置。
熨衣板
将衣物放在平稳的表
面上。熨衣板可以垂
直或水平使用。适用
于以下型号:
E5GS1-44MN,
E7GS1-74OW
4. 首次使用前
取出所有包装、标签和保护膜。
用热水、温和的洗涤剂和软布清洁产品。
烘干产品。
中文 11

5. 日常使用
组装
步骤 1 打开杆锁。拉伸伸缩杆,使每个部分完全展开。
步骤 2 锁定杆锁。
步骤 3 伸缩杆完全伸出后,将其凸起与底座上的千斤顶凹槽对齐。
步骤 4 向下按压伸缩杆,直到发出咔哒声。
向水槽注水
在注水之前,请断开电源。
步骤 1 握住水槽手柄,将其抬起。
步骤 2 拧下水槽盖。
步骤 3 加满水槽。
步骤 4 将水槽盖拧回。
步骤 5 握住水槽手柄。确保水槽盖朝下。检查水量,确保水槽盖位置没有漏水。
步骤 6 将水槽垂直放置在底座上。
请勿使用含水的添加剂(淀粉、香料、芳香物质、柔顺剂等)。
开机
使用本产品之前,务必检查本家电是否未损坏。
步骤 1 家电插上电源。
步骤 2 按下电源按钮。
步骤 3 按下调节按钮。
步骤 4 大约 45-70 秒之后,蒸汽喷嘴将开始产生蒸汽。
熨烫衣物
切勿熨烫您正在穿着的衣物。
在熨烫过程中,请勿触摸高温蒸汽和蒸汽喷嘴面板。
使用本家电时应注意防止蒸汽溅出的危险。
避免将蒸汽喷嘴指向人员或动物。
12

步骤 1 将衣物挂在衣架上。
步骤 2 握住蒸汽喷嘴并保持垂直。
步骤 3 将蒸汽喷嘴附着在衣物上并向下熨烫。
在使用过程中,部分蒸汽会冷凝在软管内,产生“咕噜声”,这是正常现象。如果发生这种情
况,将蒸汽喷嘴和软管向上拉直,使冷凝水回流到水槽中。
图标 功能应用 蒸汽量
开 / 关 开启和关闭本机。
-
节能 以更有效的能源利用方式使用蒸汽。
翻新用少量蒸汽翻新衣物。
去皱功能: 用蒸汽去皱衣物。
精细衣物 对更纤柔、精细的衣物使用少量蒸汽。
羊毛 对更厚的羊毛制成的衣物使用更多蒸
汽。
棉质 对更厚的棉质制成的衣物使用更多蒸
汽。
亚麻对更厚的亚麻制成的衣物使用更多蒸
汽。
蒸汽按钮 调节蒸汽量。
按下添加/移除蒸汽按钮。 -
6. 提示和技巧
改善熨烫效果的小窍门
中文 13

• 熨烫之前,请查看衣物制造商提供的护理标签,以选择正确的设置。
• 固定衬衫衣领上的按钮,以防止衣物在熨烫过程中滑落。
• 移动蒸汽喷嘴时,轻轻涂刷衣物。
• 请勿使用熨烫机熨烫丝织品和丝绒。
• 一些衣物的反面熨烫效果更佳。
• 熨烫厚重面料可能需要较长时间。
• 熨烫衣物下部时,不时将蒸汽吸嘴和软管向上拉直,以避免蒸汽凝结。
• 请勿使用刷子清洁毛绒面料。
7. 保养与清洗
警告:清洁之前,请等待产品冷却。
注意 事项
• 用湿布或非研磨海绵清洁产品表面。
•始终要彻底清洁并烘干产品。
• 仅使用白色醋进行除垢。
•避免使用强力清洁剂。
• 请勿使用研磨材料清洁产品。
• 请勿将蒸汽喷嘴浸泡在水或其他液体中。
• 请勿通过蒸汽喷嘴孔或钙去除口注入水。
储存
• 使用后,将蒸汽喷嘴挂在蒸汽喷嘴挂钩
上。
• 缠绕电源线后,用系带系紧。
• 让蒸汽喷嘴完全冷却。
• 从本家电拔出伸缩杆之前,必须完全缩
回每个伸缩杆。
• 请勿通过握住熨衣板或蒸汽管来提起或搬运
本家电。
• 储存期间请勿弯曲蒸汽软管。
除垢
本家电需要定期除垢。要了解除垢频率,请查看下表。
步骤 1 从主机中取出水槽。
步骤 2 加满水槽。
步骤 3 轻轻摇晃水槽,直至将水排干。
步骤 4 将 200 ml 水和 200 ml 白醋的混合液倒入水槽中,将其放在底座上,并轻轻摇晃
主发动机以向烧水缸注水。
步骤 5 让本家电放置约 8 小时。
步骤 6 轻轻摇晃主发动机。
步骤 7 顺时针旋转钙去除旋钮。倾斜产品并排出溶液。
步骤 8 顺时针旋转钙去除旋钮。
步骤 9 将水槽注满,然后将其载入本家电。
14

步骤 10 重复步骤 5-9。
步骤 11 打开电源并启动本家电,以便其可以连续释放蒸汽。
在此过程中,静止放置产品,直到水槽中的水完全用完,且蒸汽喷嘴不再喷
出蒸汽。
步骤 12 关闭主电源并拔下电源插头。
分类 硬度(mg / L) 硬度(mmol /
L) 硬度(dGH /
°dH) 除垢频率
软0 - 60 0 - 0.60 0.3 - 3.00 超过 1 年或不必
要
较硬 61 - 120 0.61 - 1.20 3.72 - 6.75 9 - 12 个月
硬121 - 180 1.21 - 1.8 6.78 - 10.08 6 - 9 个月
非常硬 > 181 > 1.81 > 10.14 3 - 6 个月
除垢频率基于预估每周使用 2 个槽。
建议的自清洁时间约为 36 小时(基于大于 10 °dH 的水硬度)。
• 洗涤剂:200 ml 白醋 + 200 ml 水或 380 ml 水 + 20 ml 柠檬酸。
8. 排除故障
问题 可能的原因 解决方案
不释放任何蒸汽,电源指示
灯关闭。
连接问题。 检查电源线、插头和插座。
设备未启动。 Press the ON/OFF button.
不释放任何蒸汽,但电源指
示灯亮起。 水槽中的水位过低。将水注入水槽中。
蒸汽喷嘴漏水。 蒸汽喷嘴破裂。 更换成一套新蒸汽软管。
蒸汽软管冷凝。 将蒸汽喷嘴向上抬起。
水槽漏水。
水槽破裂。 更换为新水槽。
蒸汽软管呈 U 形,或长时间弯
曲。 将蒸汽软管向上抬起。
水槽变形。
向水槽中注入热水。
更换为新水槽。
清洁过程不当时留下的化学
残留物。
蒸汽输出量过少。 开关或加热装置损坏。 请联系授权服务中心。
当本机运行时,会有一声咕
噜声。
蒸汽软管冷凝。 将蒸汽喷嘴向上抬起。
蒸汽软管呈 U 形,或长时间弯
曲。 将蒸汽软管向上抬起。
中文 15

1. 安全資訊
請在安裝和使用本機之前,仔細閱讀隨附的說明書。對於
安裝和使用錯誤所造成的人身傷害或損害,製造商概不負
責。務必將說明書擺放在安全可觸及的地方,以便將來參
考。
•本機設計不適合肢體、感官或精神能力不健全,或者是
缺少經驗和知識的人員 (包括兒童) 使用,除非他們已透
過負責他們安全的人員獲得有關使用本機的監督或說
明。
•請監督兒童確保他們不會玩耍本機。
•請將所有包裝放在兒童不易觸及之處,並妥善丟棄。
•在使用本機以及在冷卻本機時,請讓 8 歲以下的兒童遠
離本機以及電線。
•不得在無人監督的情況下由兒童進行清潔與使用者維
護。
•由於本機會噴發高溫蒸汽,因此在使用本機時應該要小
心謹慎,以避免燙傷的危險。
•本機或配件若已受損,請勿安裝或使用。請勿變更本機
規格。請務必由「授權服務中心」進行所有服務或維修。
•在每次使用之後、在移動或進行任何維護之前,請關閉
本機,並將其從主電源上斷開電源。
•如果電源線已損壞,則必須要由製造商、其服務代理商
或類似的合格人員進行更換,以避免發生危險。
•僅限使用適用於本機的建議配件、零件或工具。
2. 安全指示
• 本機的設計專供一般家庭(室內)以及
類似的環境中使用。
• 在本機損壞時,請勿使用本雞。
• 在安裝本機時,應根據當地佈線法規進
行安裝。
• 確定額定銘牌上的參數相容於主電源
電功率額定值。
• 務必使用正確安裝的防電擊插座。
• 請勿拉拔電源線來斷開本機連接。務
必拔除插頭。
• 在本機連接到主電源時,請勿讓本機處
於無人看管狀態。
• 請勿將本機主體、電線或插頭浸入水
中。將電源線遠離尖銳物體和熱源。
• 務必將本機放置在平坦而穩定的表面
上。
• 在使用本機時,請勿直接握住軟管或擰
動軟管接頭,以避免燙傷的危險。
• 在使用本機時,請勿將蒸汽噴嘴直接對
準人員、動物或容易受到損壞的衣物
(例如皮革衣物)。
• 請勿拉動蒸汽軟管來移動或是提起本
機。
• 請勿將本機暴露在非常高溫或極寒的
溫度中。
• 務必使用純淨水熨燙衣物。
• 切勿在空水箱的情況下使用本機。請
勿超過水箱上標示的最大注水量。
• 在使用過程中,指示燈會關閉接著再開
啟,這是由於啟動本機的過熱保護而導
致,並且會在一段時間後回復。
16

• 關於此產品內部的燈和備用零件燈另
行販售:這些燈的作用是抵抗家電中的
極致物理情況 (例如溫度、振動、濕度),
或是顯示關於家電操作狀態的相關資
訊。這些燈設計並非用於其他應用程
式且不適用於家庭房間照明之用。
• 請勿使用磨蝕性的清潔劑或鋒利的金
屬刮刀來清潔本機,以避免損壞表面或
造成漏水。
• 有關本機的注水、清潔和除垢等方面的
詳細資訊,請參閱相應章節。
• 將本機存放在乾燥的地方,以避免可能
在本機內部發生濕氣凝結。
• 在存放本機之前,先讓本機冷卻、將水
箱清空,然後妥適捲繞電源線。務必將
蒸汽噴嘴直立放置在蒸汽噴嘴的掛鉤
上。
• 在棄置之前,請從主電源斷開本機的電
源連接,並拔下電源線。
環境關懷
這個在產品或其包裝上的標誌表明該
產品含有可充電電池,該電池不得與普通
家庭廢棄物一起棄置。
請回收有此標誌的材料 。將包裝放入
相關容器進行回收利用。請回收廢舊電器
和電子設備,幫助保護環境和人類健康。
請勿將標有此標誌 的電子設備與普通
家庭廢棄物一起棄置。請將產品送回當地
的回收機構或聯繫您當地的市政辦公室。
3. 產品說明
一般說明
衣物蒸汽熨斗使用高溫蒸汽進行熨燙。它對於熨燙精細材質或厚重織物以及去除衣物皺褶更
具效果。
配件
刷子
改善燙熨結果。請將
刷子背面與蒸汽噴嘴
對齊,並按下在刷子
底部的小桶。
手套
避免在熨燙的過程中
燙傷。
褲架
熨燙前,將衣物底部放
置好。
熨燙板
將衣物放置在平穩的
表面上。它可以採垂
直或者水平的方式使
用。適用於以下型
號:E5GS1-44MN、
E7GS1-74OW
4. 首次使用前
移除所有包裝、標籤和保護膜。
用熱水、溫和的清潔劑和軟布清潔產品。
將產品烘乾。
中文 17

5. 每日使用
組裝
步驟 1 打開桿鎖。將伸縮桿拉伸,以便完全展開每個部分。
步驟 2 鎖定桿鎖。
步驟 3 在伸縮桿完全拉伸之後,將伸縮桿的凸起處與底座裝置上的千斤頂凹槽對齊。
步驟 4 向下按壓伸縮桿,直到它們發出咔噠聲響。
在水箱注水
在水箱注水之前,請斷開電源。
步驟 1 握住水箱把手,並抬起水箱。
步驟 2 將水箱蓋旋下。
步驟 3 注滿水箱。
步驟 4 將水箱蓋旋入。
步驟 5 握住水箱把手。確認水箱蓋向下方。檢查水量,並確保沒有水分從水箱蓋的位置
滲漏。
步驟 6 將水箱垂直放置在底座裝置上。
請勿使用含添加劑(漿粉、調料、芳香物質、柔順劑等)的水(澱粉、香料、芳香物
質、柔軟劑等)。
開啟電源
在使用本產品之前,務必檢查本機是否未受到損壞。
步驟 1 將電源插頭插入電源插座中。
步驟 2 按下電源按鈕。
步驟 3 按下調整按鈕。
步驟 4 大約 45~70 秒之後,蒸汽噴嘴將會開始產生蒸汽。
熨燙衣物
18

切勿熨燙您正身著的衣物。
在熨燙過程中,請勿觸摸高溫蒸汽和蒸汽噴嘴面板。
使用本機時,應注意防止噴濺蒸汽的危險。
避免將蒸汽噴嘴對準人員或動物。
步驟 1 將衣物掛在衣架上。
步驟 2 握住蒸汽噴嘴並將其保持垂直。
步驟 3 將蒸汽噴嘴貼附在衣物上並向下熨燙。
在使用過程中,部分蒸汽會凝結在軟管中,導致「咕嚕聲響」,這是正常的現象。如果
發生這種情況,請向上拉直蒸汽噴嘴與軟管,使凝結的水分回流到水箱中。
圖示 功能使用 蒸汽量
開啟/關閉 開啟和關閉設備。
-
ECO 以更有效的能源利用方式進行蒸煮。
清新用輕量蒸汽清新衣物。
去皺功能: 用蒸汽將衣物去皺。
纖細衣物 用較少量的蒸汽對更纖柔的衣物進行蒸
煮。
羊毛 用更多蒸汽蒸煮用羊毛製成的厚衣物。
棉質衣物 用更多蒸汽蒸煮由棉質製成的厚衣物。
亞麻用更多蒸汽蒸煮由亞麻製成的厚衣物。
蒸煮按鈕 調節蒸汽量。
按下新增/移除蒸汽按鈕。-
6. 提示與技巧
改善熨燙效果的訣竅
中文 19

• 在熨燙之前,請查看衣物製造商提供的衣物處理標籤,以選擇正確的設置。
•將襯衫衣領上的鈕扣扣上,以防止衣物在熨燙過程中滑落。
• 在移動蒸汽噴嘴時,輕輕刷過衣物。
•請勿將蒸氣熨斗用於絲織品和絲絨織物。
• 燙熨某些衣物時,在反面熨燙的效果更佳。
• 熨燙厚重織物可能會需要較長時間。
• 熨燙衣物下部時,不時將蒸汽噴嘴和軟管向上拉直,藉此避免蒸汽凝結。
•請勿將刷子用於清潔毛絨材質。
7. 維護與清潔
注意:在清潔之前,請稍等到產品冷卻為止。
待辦事項 避免事項
• 使用濕布或是非磨蝕性的海綿清潔產品
表面。
•務必要徹底清潔並烘乾產品。
•僅限使用白醋進行除垢。
•避免使用磨蝕性清潔劑。
•請勿使用磨蝕性材質清潔產品。
•請勿將蒸汽噴嘴浸泡在水中或是其他液體
中。
•請勿透過蒸汽噴嘴孔或除鈣端口將水注入。
存放
• 在使用之後,將蒸汽噴嘴置放在蒸汽噴
嘴掛鉤上。
• 在將電源線纏繞完畢之後,用繫帶將電
源線繫緊。
•讓蒸汽噴嘴完全冷卻。
• 從本機拉出伸縮桿之前,必須完全縮回
每個伸縮桿。
•請勿握住熨燙板或蒸汽管來提起或搬運本
機。
• 在存放期間,請勿彎曲蒸汽軟管。
除垢
本機需要定期除垢。如需了解除垢頻率,請查看以下表格。
步驟 1 從主要裝置中取出水箱。
步驟 2 注滿水箱。
步驟 3 輕輕搖晃水箱,直到水箱將水排乾。
步驟 4 將 200 ml 水和 200 ml 白醋的混合液倒入水箱之中,將其放在底座裝置上,並輕
輕搖晃主發動機向鍋爐將水注入。
步驟 5 讓本機放置約 8 個小時。
步驟 6 輕輕地搖晃主發動機。
步驟 7 順時針旋轉除鈣旋鈕。將產品傾斜並將溶液排乾。
步驟 8 順時針旋轉除鈣旋鈕。
20
This manual suits for next models
2
Table of contents
Languages:
Other Electrolux Steam Cleaner manuals

Electrolux
Electrolux Precision User manual

Electrolux
Electrolux Enviro Multi Steamer Plus User manual

Electrolux
Electrolux MULTI-STEAMER Z370 Series User manual

Electrolux
Electrolux JETMAXX Steam User manual

Electrolux
Electrolux Refine 500 User manual

Electrolux
Electrolux Precision User manual

Electrolux
Electrolux ERGORAPIDO User manual

Electrolux
Electrolux Zanussi Professional N 700 User manual

Electrolux
Electrolux 350 Series User manual

Electrolux
Electrolux 7000 User manual