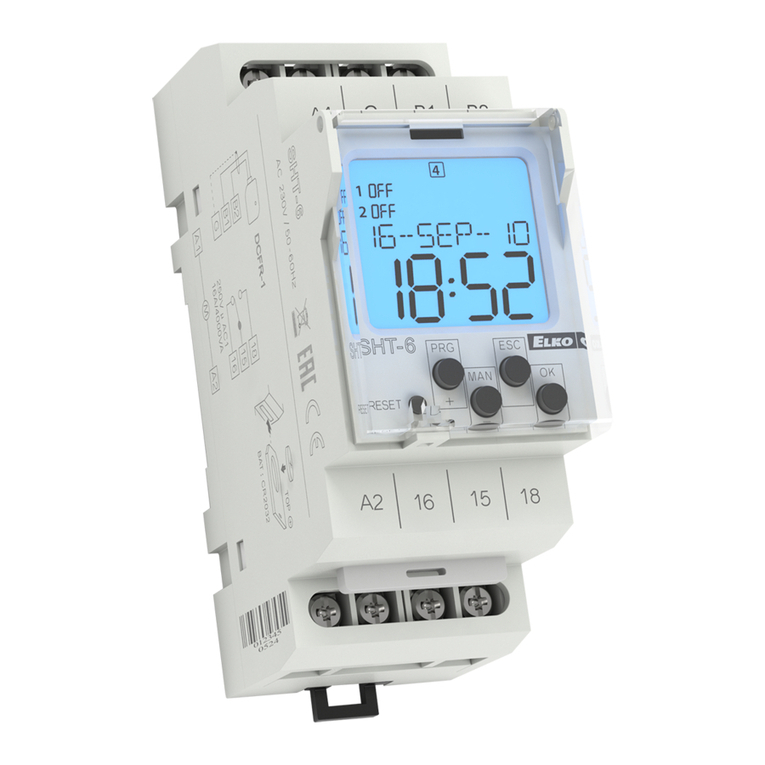
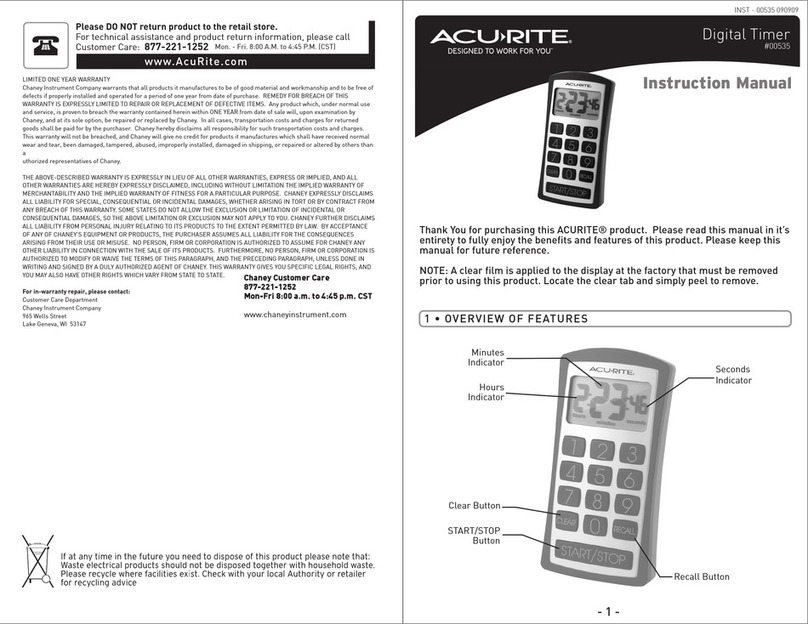
Elko SHT-13 User manual

SHT-13, SHT-13/2
02-71/2017 Rev.: 3
SHT-13/2
Un
A2 26 25 28
A1 16 15 18
Un
A2
A1 16 15 18
SHT-13
SHT-13 SHT-13/2
15 25
16
A2
A1 18 26 28
1 5
16
A2
A1 18
Made in Czech Republic
SHT-13/2
~~~~~~~~~~
1
2
3
4
5
6
7
8
9
10
11
12
13
14
15
16
17
18
19
20
22
24
21
25
23
26
27
ELKO EP, s.r.o.
Palackého 493
769 01 Holešov, Všetuly
Czech Republic
Tel.: +420 573 514 211
e-mail: [email protected]
www.elkoep.com Multifuntion digital time switch
with Wi-Fi connection
Characteristics
Description
Symbol
Connection
EN
1. Supply terminal (A1)
2. Backlight display
3. Reset
4. Sealing spot
5. Supply terminal (A2)
6. Output - 1. channel (16-15-18)
7. Transparent cover
8. Control buttons
9. Output - 2. channel (26-25-28)
10. Holiday program
11. Output indication
12. Pulse/cycle mode
13. Astro program
14. Manual control locked
15. Summer time
16. Battery indication
17. Sunrise indication
18. Days in week
19. Manual control
20. Random program
21. Time program
22. Time
23. AM/PM
24. Text line
25. Wi-Fi connection
26. Sunset indication
27. Bargraph
DISPLAY BACKLIGHT CONTROL
Powered: By default, the display is backlit for 90 seconds from the time of the last press of
any button. The display still shows: the date, time, day of the week, state of contacts, and
battery or the type of program in progress. The backlight is permanently switched on/o
by long press of MAN1, MAN2, and OK buttons at the same time. When activating / deacti-
vating the permanent backlight, the display will briey ash twice.
Backup mode: In the event of a power failure, the display will automatically switch to sle-
ep mode, during which time only the following will ash on the display: the date, time,
day of the week, and battery state. The time switch can then be woken up at any time by
pressing the OK button to the standard mode, e.g. for setting (without working Wi-Fi or
output contacts) - however, take into account that in this case the consumption from the
battery is signicantly increased, which aects its service life. It will return to sleep mode if
no buttons are pressed for 20 seconds.
A rst setup wizard will guide you through the initial conguration after inserting the
battery or after connecting to the power supply.
Each channel can be assigned a dierent program or operating switching mode, this
allows control of two independent circuits. In the event of a mains power failure, the
device will retain all the set values required for reliable switching after the power is
restored. After installation, it does not require any special service or maintenance.
The astronomical program does not need any optical sensors or other external de-
vices to function. Its operating principle is that during the year every day, based on
an algorithm and real-time (set in the time switch), automatically controls switching
on and o times of e.g. public lighting. This is because the sunrise and sunset times
change throughout the year. With the oset (deviation) function, the turning ON and
switching OFF times can be corrected within ± 120 minutes. The delay is xed for
each day but can be adjusted for each channel separately.
• Operation modes of switching: (congurable for each channel separately)
-(switches according to set time programs)
-(switches according to set holidays and time programs
-(switches according to the set astronomical and time pro-
gram)
-(switches according to set holidays, astronomi-
cal and time program)
-(switches randomly in an interval of 10-120 min)
-(xed output state that cannot be changed other than through
settings)
• Possibility to manually control the output contacts at any time (outside the opera-
tion mode, ).
• 200 memory locations for time programs (common for both channels).
• Up to 30 memory locations for holidays
• Programming can be done under power and in backup mode.
• Optional languages – CZ / EN
• Selection of summer/winter time transition:
- AUTO (changes automatically according to the entered time zone)
- OFF (permanently switched o winter/summer time transition)
• The time switch is backed up by a battery, which enables it to operate in backup
mode in the event of a power failure. All settings and programs are saved in me-
mory in the event of a power failure - they can thus be restored even in the event
of a power failure and a discharged battery. However, a time correction will need
to be made.
Prescribed minimum output protection: class B circuit breaker 16A.
• All programs in one device (daily, weekly, yearly and astronomical).
• UNIversal supply voltage in range of AC/DC 24 - 240 V (AC 50-60 Hz).
• Simple setting after the rst start-up.
• User replaceable battery to back up the set time.
• Built-in web server for setup and control via Wi-Fi connection.
• Time synchronization through NTP server (require internet connection).
• New well-arranged display with white backlight.
• ASTROnomic program: manual entry of coordinates or selecting one of the preset
cities.
• One/two channel design (each with an operating hours counter).
• Pulse/cycle output mode.
• Transition of summer/winter time - AUTO or OFF.
• Lead-sealing transparent front panel cover.
• PIN code protection against unauthorized changes.
• Wireless rmware update.

SHT-13 SHT-13/2
PRG
+_
+_
OK
ESC
ESC
cos φ ≥ 0.95 M M HAL.230V
KM M
AC12
x
DC14
x
AC1
250V / 16A
AC13
x
AC2
250V / 5A
AC14
250V / 6A
AC3
250V / 3A
AC15
250V / 6A
AC5b
1000W
DC5
24V / 2A
AC6a
x
DC12
24V / 16A
AC7b
250V / 3A
DC13
24V / 2A
01 -jul- 2
3
Technical parameters
A1-A2
AC/DC 24 – 240 V (AC 50-60 Hz)
Wi-Fi“OFF” 0.5 W/2 VA | “ON”1 W/3 VA
−15 %; +10 %
1× changeover (AgSnO2) 2× changeover (AgSnO2)
16 A/AC1*
4000 VA/AC1, 384 W/DC1
30 A/< 3 s
250 V AC/24 V DC
1.2 W 2.4 W
30.000.000 ops.
100.000 ops.
max. ±0.5 s/day at 23°C (73.4 °F)
1 s
min. 10 years
up to 120 days (CR 2032 - 3V)
200
daily, weekly, yearly, astro
LCD display with white backlight
by Wi-Fi (2.4 GHz)
−20 .. +55 °C (–4 .. 131 °F)
−30 .. +70 °C (–22 .. 158 °F)
AC 4 kV
AC 4 kV
any
DIN rail EN 60715
IP40 front panel / IP20 terminals
III.
2
max. 1× 2.5, 2× 1.5/
max. 1× 2.5 (AWG 14)
90 × 35 × 64 mm (3.5˝ × 1.4˝ × 2.5˝)
122 g (4.3 oz) 135 g (4.8 oz)
EN 61812-1
Supply terminals:
Supply voltage:
Consumption (max.):
Supply voltage tolerance:
Output
Contact type:
Rated current:
Switched power:
Inrush current:
Switching voltage:
Power dissipation (max.):
Mechanical life:
Electrical life (AC1):
Time circuit
Accuracy:
Min. switching interval:
Data retention time:
Set time backup:
Program circuit
Number of memory locations:
Program type:
Displayed data:
Settings via website:
Other information
Operating temperature:
Storage temperature:
Dielectric strength:
supply – output
output 1 – output 2
Operating position:
Mounting:
Protection degree:
Overvoltage category:
Pollution degree:
Cross-wire section – solid/
stranded with ferrule (mm2):
Dimensions:
Weight:
Standards:
Control description
Manual output control
Warning
* With a permanent maximum load on the relay contacts of 16 A/AC1 and ambient temperature
of +55 °C, the manufacturer recommends using a supply wire with insulation temperature
resistance (min.) up to +105 °C.
entrance into programming menu
browsing in menu
setting of values
quick shifting during setting of
values
entrance into required menu
conrmation
Wi-Fi activation/deactivation
(on main screen)
a step back
back to the main screen
Device diers short and long button press.
In the manual marked as:
- short button press (< 1s)
- long button press (> 1s)
After 120s of inactivity (from the last press of any button) the device will automatically return
into the main screen.
We have two types of manual controls available:
• Permanent (symbol glows)
The second highest priority of all control modes. The state of the output cannot then be
changed other than by manual change (e.g. by switching to temporary manual control
or by activating mode , which has a higher priority). The last option is to
deactivate this control mode.
• Temporary (symbol ashing)
Temporary manual control has the same priority as the previous, permanent one. Ho-
wever, it can be changed in the future, unlike permanent manual control, by one of the
programs with a lower priority (if congured in the time switch). With power supply
disconnection, temporary manual control is deactivated.
- controls 1st channel
- controls 2nd channel
(SHT-13/2)
output opensoutput closes
This device is constructed for connection in 1-phase network AC/DC 24 –240 V and must
be installed according to norms valid in the state of an application. Installation, conne-
ction, setting and servicing must be carried out by qualied electrician sta only, which
have perfectly understood the instructions and functions of the device. This device con-
tains protection against overvoltage peaks and disturbing impulses in the power supply
network. For the correct function of the protection of this device, there must be suita-
ble protections of higher degrees (A,B,C) installed in front of them and according to the
standards, interference of switching devices must be securely eliminated (contactors,
motors, inductive loads, etc.). Before installation, make sure that the device is de-ener-
gized and the main switch is in the “OFF” position. Don‘t install the device to sources
of excessive electromagnetic interference. Ensure correct installation by perfect air cir-
culation so that during continuous operation and a higher ambient temperature, the
device does not exceed the maximum allowed operating temperature. For installation
and setting use a screwdriver with a width of approx 2 mm. Keep in mind that this is a
fully electronic device and approach accordingly with the installation. Non-problematic
function of the device is also dependent on the previous method of transportation, sto-
rage, and handling. In case of any signs of damage, deformation, malfunction, or missing
parts, don‘t install this device and claim it at the dealer. The product must be treated as
electronic waste at the end of its life.
Type of load
Contact material
AgSnO2, 16A
Type of load
Contact material
AgSnO2, 16A
AC5a
uncompensated
230V / 3A (690VA)
DC1
24V / 16A
AC5a
compensated
230V / 3A (690VA)
to max. input C=14uF
DC3
24V / 3A
Modes priority
(symbol ashes on the display)
mode/program
symbol
locked - manual controlhighest priority
lowest priority
manual control
(temporary | permanent)
random
holidays
time
astronomic
and can work at the same time on a single channel.
01 -jul- 2
3
01 -jul- 2301 -jul- 23

OK
first setu
OK
+_
use web in
manually O
+_
+_
cancel set
OK
01 -jan- 23
OK
connect to
OK
OPERATION
OK OK OK OK
OK
ASTRO mode
ENGLISH
ON / OFF
OK
+_+_
OK OK
Now connect your conguration device (PC/Mobile/Tablet/....)
to Wi-Fi (2.4 GHz) of the time switch.
SHT-13 Wi-Fi access data (default):
SSID hostname: SHT-13_barcode number
Password: elkoep13
Web address for conguration: 192.168.1.1
Setup wizard will guide you through each step after opening
congurator.
If you need advice on the individual steps, follow the instruc-
tions below in the Wi-Fi connection headline.
cancel setup (you
can set up the device
later on)
CYCLE
OK
+_+_+_
+_+_
OK OK OK
ON TIME [Off TIME START-ON
START-OFF
START-ON
OK OK
PULSE
OK
+_
+_
+_
+_+_
PULSE TIME
OK OK OK
Location
CHANNEL
2
CHANNEL
OK
CHANNEL
2
CHANNEL
locked - M
random pro
ASTRO / TI
holiday /
TIME PROGR
SUNSET
SUNRISE
SUNSET
SUNRISE
SUNSET
SUNRISE
OK
OK
OKOK
+_
Coordinate
COUNTRY
CESKA REPU
OK
OK OK OK OK OK
PRAHA
+_
+_
+_+_
+_
+_
OK
l
ongitude
OK
latitude
date
YEAR MONTH DAY
time hour minute
OK OK OK OK OK OK
time forma first day
12h
+_
24h
+_
+_+_+_
sunday
saturday
friday
thursday
wednesday
tuesday
monday
summer/win OFF
+_
auto
+_+_
time zoneeurope prague
OKOK OK OK
01 -jul- 23
:
First setup
Wi-Fi connection
Display indication
THE BAR GRAPH reects only time programs or permanent manual control! If the segment of the given time is lit, it means that there is a scheduled time program for switching the output for at least
1 s at the given hour. If the segment of the given time is not lit, it means that no time program for switching the output is scheduled at the given hour.
A pictogram with side lines indicates the ashing of the corresponding symbol on the SHT-13 display.
A pictogram without side lines indicates a constant glow of the symbol.
To set up the time switch you have two options (including canceling it), please follow the steps below.
ASTRO SETTINGS :
First, make sure that you have a conguration device (PC/phone/...) with Wi-Fi of 2.4 GHz band
that supports a web browser and is close enough to SHT-13 that you want to connect.
The time switch does not support a 5 GHz band.
It is possible to connect directly to the web server for conguration via the Wi-Fi generated by
the SHT-13 (no router or internet connection required). If the time is to be synchronized, an
internet connection via a Wi-Fi router is necessary.
Activating the Wi-Fi of time switch:
After connecting the SHT-13 to the power supply, it is possible to activate/deactivate Wi-Fi by
briey pressing the OK button. If Wi-Fi is active and the conguration device is not connected,
it will automatically turn o after 90 seconds.
NOTE.: Wi-Fi can be activated permanently through the settings, once the setup wizard is
complete
Now connect your conguration device to the Wi-Fi of the
time switch (follow the instructions provided by the manu-
facturer of the conguration device).
SHT-13 Wi-Fi access data (default):
SSID hostname: SHT-13_barcode number
Password: elkoep13
After the connection is established, the Wi-Fi symbol starts
ashing on the display.
Open the web browser of the conguration device and enter
the IP address in the address bar: 192.168.1.1
active Wi-Fi is indicated
by an icon on the display
ASTRO SETTINGS:
Menus for ASTRO settings (mode, output type, oset, location)
will pop up only if you have selected one of the ASTRO programs
as operation mode for 1st or 2nd channel. If you have selected
the ASTRO program for both channels you will need to set up the
mode, output type and oset for both since each channel can
have a dierent setup.
ASTRO MODES:
(the output of the selected channel closes
at sunset and opens at sunrise)
(the output of the selected channel opens
at sunset and closes at sunrise)
(the output of the selected channel closes
at sunset and sunrise)
(the output of the selected channel
opens at sunset and sunrise)
OK
01 -jul- 23
- long press (>1s)
- short press (<1s)
- long press (>1s)
- short press (<1s)
+_
SUNSET-off
SUNSET-ON/
SUNSET-off
SUNSET-ON/
time program is active | time program is planned for future pulse program is active | cycle program is active
astro program is active | astro program is planned for future the device is connected via Wi-Fi to the conguration PC/
phone/...
random program is active the device has active Wi-Fi but is not connected to the con-
guration PC/phone/...
holiday is active | holiday is planned for future battery is discharged | 50% of capacity | not inserted
temporary | permanent manual control sunrise | sunset phase of astronomic program
20
01 -jul- 23

PRG +_OK OK
+_
+_
+_
+_
+_
+_
+_
+_
+_
+_+_
OK
OK
OK OK
OK OK
OK
OK OK OK
OK
OK OK
OK OK
OK OK OK
+_
+_
+_
+_
+_
+_
PRG
+_
+_
+_
+_
OK OK
+_
+_
+_
OK
OK
OK
+_
+_
+_
+_
+_+_
+_
+_+_
OK
OK
OK OK OK OK
OK OK
ESC
OK
OK
OK OK
OK
OK
OK
OK
+_
+_
+_
+_+_
+_
+_+_+_
+_+_
+_
OK
OK
OK OK
OK OK
OK OK
OK OK
OK
OK
01 -jul- 23
On
01 -jul- 23 01 -jul- 23
Astro settings
:
- long press (>1s)
- short press (<1s)
- long press (>1s)
- short press (<1s)
setting
the date
setting
the time
setting
the year
setting
the hours
select format
select format
AUTO: automatically according
to selected time zone
OFF: permanently deactivated
setting the
time zone select
region select
city
summer/winter
time switching
setting the
rst day of
the week
select the day
date
format
time
format
setting
the month
setting
the minutes
setting
the day
ASTRO MODES: F(the output of the selected
channel closes at sunset and opens at sunrise)
(the output of the selected
channel opens at sunset and closes at sunrise)
(the output of the selected
channel closes at sunset and sunrise)
(the output of the selected
channel opens at sunset and sunrise)
Date and time setting
dd /mm /yy
dd mm yy
dd-mm-yy date forma
12h
24h
ON / OFF
CYCLE
PULSE PULSE TIME
ON TIME [Off TIME START-ON
START-OFF
START-ON
ASTRO mode
ASTRO mode
ASTRO mode
SUNRISE SUNSET
SUNSET
SUNRISE
SUNRISE SUNSET
01 -jul- 23
OPERATION ASTRO mode
ASTRO SETT
Simulation
CHANNEL
1
OFF Simulation
CHANNEL
SUNSET-off
SUNSET-ON/
SUNSET-off
SUNSET-ON/
Location
Coordinate
COUNTRY
CESKA REPU PRAHA
l
ongitude
latitude
Location
Location
Simulate
CHANNEL
1
YEAR MONTH DAY Simulate
CHANNEL
OPERATION
time zone time zone
europe prague
summer/win summer/win
OFF
auto
first day
sunday
saturday
friday
thursday
wednesday
tuesday
monday first day
date forma
OPTIONS DATE/time date
YEAR MONTH DAY date
time hour minute time
time forma time forma

OK
PRG OK
+_+_
OK
OK OK
+_+_
+_
OK
OK OK OK
+_
+_
OK
OK
+_
OK OK
+_
OK OK
OK OK
+_
OK
OK
+_
+_
OK OK
OK
OK
OK
+_
+_
+_
+_
CR2032
+
+_
+_
+_
On
locked - M
To delete all time programs/holidays on a time switch simply press and hold the buttons as
shown in the pictures above and follow the options.
Other settings Delete all (programs/holidays)
OK OK
OK OK
PRG
OK
TIME PROGR
holidays delete all
delete all
+_
Location - preset locations
Battery change
You can replace the battery in a user-friendly way, without disassembling the device, with the
mains voltage on or o.
When replacing the battery, note that terminal A2, 26, 25, 28 may be under voltage.
When replacing the battery, the following three situations may occur:
a. The timer is connected to the mains supply = proceed according to steps #3 – 6.
b. The timer is not connected to the mains supply (battery supply) = proceed according to steps
#1 – 6
c. The timer is connected to the mains supply with a discharged battery = proceed according to
steps #2 - 6
1. Wake up the timer from the backup mode by short press of OK button, the main screen will
appear.
2. Press and hold the PRG button on the main screen, use +/- to navigate to , short press
OK, use +/- to navigate to , short press OK to conrm, this will bring you
to the option.
• If you are doing the replacement according to situation b., conrm the above option
again with the OK button. The display will show . Time data has now been saved for
the 30 seconds during which you replace the battery, continue with step #3.
• If you are doing the replacement according to situation c., conrm the above option
again with the OK button. The display will show . You can disconnect in the next 2
minutes supply voltage from the mains. When the supply voltage is disconnected, time data
are saved for 30 seconds, during which you replace the battery, continue with step #3.
NOTE: It is good to physically insert a new battery when the 30 second replacement interval is
running out, in order to minimize the deviation of the set time.
3. slide out the plug-in module with the battery
4. remove the original battery
5. insert the new battery so that the upper edge of the battery (+) is aligned with the plug-in
module
6. insert the plug-in module as far as it will go into the device - pay attention to the polarity (+
up)
If you did it right, the battery symbol on the display will go out after the replacement (if the
battery is fully charged) and there will be no or only a minimal deviation in the time data. To
achieve repeated and long-term running accuracy, use time synchronization via a Wi-Fi connec-
tion - see the Wi-Fi connection section.
select
channel TIME CORRECTION:
Steps of 1 minute/year.
The numerical value is relative
to minutes per year. The time
correction is set at the factory and
is individual for each product, so
that the current time clock runs
with minimal deviation. The time
correction value can be changer
arbitrarily, but after factory reset
the value will be set back to the
factory value.
correct time
(± 20 m/year)
select state
- long press (>1s)
- short press (<1s)
OK OK
OK OK
PRG
OK
TIME PROGR
holidays delete all
delete all
+_
Location - preset locations
Other settings
random pro
01 -jul- 23 OPERATION CHANNEL
2
OPERATION
OUT o
N
locked set OUT off locked set
Delete OPERATING
OPTIONS
LANGUAGE
Slovensky
POLSKI
ESPANOL LANGUAGE
DATE/time
CHANNEL
CHANNEL
2
CHANNEL
OPERATING show OPERATING
000000000H
TIME CORRE time corre TIME CORRE
permanent permanent
active
inactive
change pin new pin nu new pin nu
pin code
pin code
state pin code
CHANNEL
2
CHANNEL
01 -jul- 23 TIME PROGR
holidays delete all
01 -jul- 23
delete all
01 -jul- 23
MAGYAR
PYCCKNN
CESKY
ENGLISH
OFF
ASTRO / TI
holiday /
TIME PROGR

PRG
+_
+_
OK OK OK
+_
OK
+_
+_
+_
+_
+_
+_+_+_
+_+_
+_
+_
+_
+_+_
+_
OK OK OK OK OK OK
OK OK OK OK OK
OK
OK OK OK OK OK OK OK
OK
OK
OK
OK
+_
OK
OK
PRG OK
+_OK OK OK OKOK OKOK OK OK
OK
OK OK OK OK
OK
+_
+_
OK
OK
OK
OK
OK
OK
OK
+_
+_+_
+_
+_
+_+_+_+_
+_
+_+_+_+_
+_
+_
+_
+_
OK
SHT-13/2 SHT-13/2
Auto
SHT-13/2
ESC
OK +_OK +_
+_+_+_OK
+_OK
PRG OK OK OK OK OK OK OK OK ESC
OK OK OK OK OK
OK OK OK OK
+_+_
OK OK OK OK OK
+_+_
OK
Auto
:
inactive
inactive
active
active
active
active
daily
weekly
minute
hour minute
EDIT
Delete
Delete
- long press (>1s)
- short press (<1s)
SHT-13 programming example
Setting 1st channel to switch ON from the sunset to the sunrise with an oset (deviation) of +20 minutes for the sunrise and −10 minutes for the sunset with turning OFF from 11 p.m. to 3 a.m. every MONDAY FRIDAY.
Time program/holiday setting
select program **
**By shortly pressing OK , you can tog-
gle between the program number
and the display of its settings. Use
+_to toggle preset programs. By
holding OK you can proceed with
the required step -
. If you do not want to proceed,
press ESC to go to the main screen
without any change. Alternatively,
it will happen automatically after
90 seconds from the last button
press. If the program memory is
full, you will see on
the display.
If the programs memory is empty
and you want to change or erase a
program, the display will show
* Setting dashes (“--”or “----”) instead
of a numeric value will ensure
that the given program repeats
every year, month, day or every full
hour, minute, except for the cyclic
output type.
- long press (>1s)
- short press (<1s)
• Firmware update:
The web interface itself will guide you through the update process. After connecting to Wi-Fi
SHT-13 and opening the congurator in the browser, go to the Service menu, select the le
with the new rmware and click the update button.
The hidden RESET button has two functions depending on the length of the press:
• Factory reset:
It is performed by long pressing <5 with a blunt tip of the hidden RESET button (e.g. a pen or a
screwdriver with a diameter of max. 2 mm).
The display briey shows all display segments, then the device type and rmware version. The
following is a setup guide - i.e. the same state in which you received the timer from the factory.
Settings and all congured programs/holidays are erased by this step.
• Restart:
It is done by briey pressing <1 with the blunt tip of the hidden RESET button. The display briey
shows all display segments, then the device type and rmware version. This is followed by a
transition to the main screen - date, time, program activity, contact status, etc. This step will not
result in the loss of settings or congured programs/holidays.
Firmware update / factory reset / restart
inactive
inactive
active
active
active
daily
CHANNEL weekly
program hour minute
out on
daily out on out off
ASTRO SETT TIME PROGR ADD
program CHANNEL weekly hour minute
01 -jul- 23 OPERATION CHANNEL ASTRO / T
IOPERATION ASTRO SETT ASTRO mode CHANNEL SUNSET-ON/ ON / OFF SUNRISE SUNset ASTRO mode
updating ~~~~~~~~~~ ENGLISH
SHT - 13/2
01 /jul/ 23
start
holiday
holiday
end
end
start
YEAR MONTH DAY hour minute
YEAR MONTH hour minute
DAY
01 -jul- 23 OPERATION ADD
HOliday seholiday CHANNEL
OPERATION TIME PROGR ADD
EDIT
Delete
program CHANNEL
2
program
weekly
program
weekly
01 -jul- 23
Delete
yearly YEAR MONTH DAY hour minute
ON TIME [Off TIME hour
PULSE TIME
CHANNEL
TIME PROGR
ADD
START-ON
START-OFF
START-ON
active
active
inactive
inactive
inactive
active
active
active
active
active
out o n
cycle
out on
pulse
inactive
OUT oN
OUT off
inactive
OUT oN
OUT off
out off
out on
CHANNEL
~~~~~~~~~~
ENGLISH
01 -jul- 23
SHT - 13/2
active
active
01 -jul- 23
ADD
ADD
ADD
ADD
ADD
setting
the month *
setting
the year *
setting
the minutes *
setting
the minutes *
setting
the hours *
setting
the hours *
setting
the day *
0
This manual suits for next models
1
Table of contents
Other Elko Timer manuals
