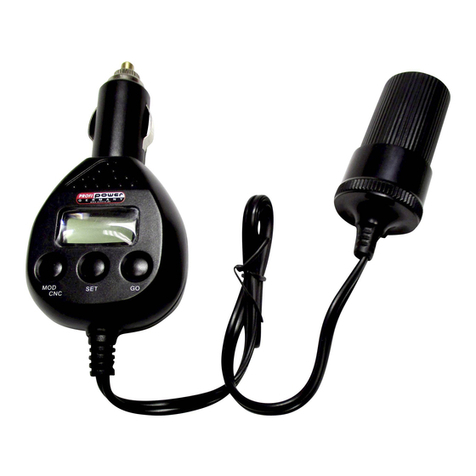
Elko EKO05986 User manual

NVE51532-00 11/16
Countdowntimer 16A with displayEKO05986,EKO05987, EKO05988, EKO05989© Schneider-Electric 2014NVE51532-0011/16
¼DANGER
Risk of serious damage to property and per-
sonal injury, e.g. from fire or electric shock,
due to incorrect electrical installation.
Safe electrical installation can only be ensured if
the person in question can prove basic knowl-
edge in the following areas:
• Connecting to installation networks
• Connecting several electrical devices
• Laying electric cables
These skills and experience are normally only
possessed by skilled professionals who are
trained in the field of electrical installation technol-
ogy. If these minimum requirements are not met
or are disregarded in any way, you will be solely li-
able for any damage to property or personal inju-
ry.
You can use the countdown timer 16A with display (re-
ferred to below as the timer) to switch loads on for an ad-
justable time. The device will switch the loads back off
once the set overtravel time has elapsed. The overtravel
time can range from one minute to eight hours.
A 2-pole switch can be used to switch off the timer and
the connected loads.
The operating keys are used for setting and operation.
You can also connect an external push-button. The ex-
ternal push-button can be used to start or end the over-
travel time from a different location.
Countdown timer 16A with display
Operating instructions
EKO05986, EKO05987, EKO05988, EKO05989
For your safety
Getting to know the timer
en
Wiring the timer
Mounting the timer
1Install the timer in a flush-mounted box.
2Place the frame on the insert.
3Press in the snap ring until it presses against the
frame.
4Press on the central plate until it audibly clicks into
place.
Removing the covers
1Using a suitable screwdriver, press on the marked
points to loosen the engagement of the central
plate.
2Tilt the central plate forward and remove it.
3Lift out the snap ring using a suitable screwdriver
and remove it.
4Remove the frame.
Mounting the timer
AExternal push-button
BLoad
L
N
N
AB
L
NL
no connection
Start
Use the push-button for two-pole switch-on of the timer.
Timer on / display in OFF status
|In order to be able to use an additionally connect-
ed external push-button, the function must be set
after commissioning. Afterwards, the overtravel
time can be started and ended externally (see
chapter "Changing settings").
Displays and operating elements
ASwitch
Top: Timer switched off
Bottom: Timer switched on
BOvertravel time
Display dimmed Overtravel time ended,
load off
-- 0 minutes
Display bright Overtravel time activated,
load on
01.; 02.; 03.; ...20. 1; 2; 3; ...20 minutes
20.; 30.; 40.; 50. 20; 30; 40; 50 minutes
1.0; 1.5; 2.0; ...8.0 1; 1.5; 2; ...8 hours
COperating keys
Press briefly: Overtravel time:
• "-" reduce in steps
• "+" increase in steps
Press and hold: Overtravel time:
•"-"reducesteplessly
• "+" increase steplessly
Press both push-
buttons (> 3 s): Enter settings menu
Commissioning the timer
ASwitch pushed down
BOvertravel time not activated,
display dimmed
B
A
C
B
A

NVE51532-00 11/16
Activating the display
Pressing an operating key activates the display.
The display lights up and the most recently set overtravel
time Ais displayed.
At the time of the first activation, "--" (overtravel time not
activated) is displayed.
Setting the overtravel time
1Alter the overtravel time:
a) In steps by briefly pressing "+" or "-" repeatedly
or
b) Steplessly by pressing and holding down either
"+" or "-"
The overtravel time displayed flashes for as long as you
continue to actuate the operating keys A.
2Complete your input with the desired overtravel
time.
If no input takes place within three seconds, the overtrav-
el time will start up automatically. The load is switched
on.
The status display Bflashes while the overtravel time
Ais running down step-by-step.
|You can change the value of the overtravel time
even when the overtravel time is activated. The
load remains switched on for as long as the over-
travel time displayed is greater than 0.
Ending the overtravel time
Once the overtravel time has expired, the load is auto-
matically switched off. The display switches into OFF
status (dimmed, overtravel time "--").
To switch off the load before expiration of the overtravel
time, set the overtravel time to "--".
Operating the timer via external push-button
The timer can be operated via an externally connected
mechanical push-button. This function is disabled by de-
fault. Activate the desired function of the external push-
button in the settings menu (see chapter "Changing set-
tings").
• Trigger function (ON): Pressing the external push-but-
ton starts the most recently set overtravel time. An al-
ready activated overtravel time is restarted.
The activated overtravel time cannot be ended with
the external push-button in this mode.
• Toggling function (OFF): Pressing the external push-
button starts one of two functions in rotation. The first
time the external push-button is pressed, the most re-
cently set overtravel time is started. The next time it is
pressed, the overtravel time is ended and the load is
switched off.
|After an external signal input, the timer disables
for 2 seconds.
Operating the timer
A
A
B
A
Changing settings
The maximum and minimum overtravel time and function
of the external push-button can be changed:
• Minimum overtravel time (LO):
1 Minute (01.) to 8 hours (8.0)
Default: 1 minute (01.)
• Maximum overtravel time (HI):
minimum overtravel time up to 8 hours (8.0)
Default: 4 hours (4.0)
• Function of external push-buttons (Input):
disabled (--), Trigger (ON), Toggle (OFF)
Default: disabled (--)
Adjust the settings one after the other.
|The menu is exited automatically if no input in the
settings menu takes place within one minute.
Changes that have been made are saved.
1Hold down "+" and "-" together for three seconds to
enter the settings menu.
2Press "+" or "-" to change the setting that is dis-
played.
3Press "+" or "-" simultaneously to confirm the input
and to switch to the next setting.
The menu is exited automatically when the last setting is
confirmed.
Error messages on the display
Connected load does not switch on:
• Observe the message on the display:
Switch timer off and back on again with "Error HEAt".
If the error message "Error HEAt” recurs, have cause
of error investigated by a specialist.
• Check the power supply.
• Switch the timer off and back on again.
• Check the load.
• Check wiring with external push-button.
No message on the display:
• Check the power supply.
• Switch the timer off and back on again.
What should I do if there is a problem?
Display Meaning
Internal overheating of the timer
Error Heat
ELKO AS, Sandstuveien 68, 0680 Oslo
Phone.: +47 67 80 73 00 - E-mail: elko@elko.no
Pb. 6598 Etterstad, 0607 Oslo
www.elko.no
Technical data
Nominal voltage: 230 V AC, 50 Hz
Nominal load (ohmic): 16 A
Nominal load (inductive): 1 A, cos φ= 0.6
Switching capacity:
Ohmic load: 3600 W
Fluorescent lamps with electron-
ic ballasts: 35 μF
LV halogen lamps with wound or
electronic transformer: 1000 VA
Motors: 500 VA
230 V halogen lamps: 1000 W
LED lamps: 100 W
Switch: 2-pole
Relay: 1-pole, 16 A
Adjustable overtravel time 1, 2, 3, ...20 min
30, 40, ...50 min
1, 1.5, 2, ...8 h
Type of housing protection: IP 20
Rated surge voltage: 4 kV
Connecting terminals: max. 2.5 mm²
Operating temperature: -10°C to +35°C
Overvoltage/
overheating protection: electronic
Accuracy of time specification: +/- 1.5%
Dispose of the device separately from house-
hold waste at an official collection point. Pro-
fessional recycling protects people and the
environment against potential negative ef-
fects.
ELKO
This manual suits for next models
3
Other Elko Timer manuals
Popular Timer manuals by other brands
Prince Castle
Prince Castle 740-T12 Specification sheet
Orbit
Orbit B-hyve user guide
Grasslin
Grasslin Towerchron QM1 Installation and user instructions
Intermatic
Intermatic ET1705C Installation and user instructions
hager
hager EG110 Instructions for use
Intermatic
Intermatic ET91615CR Installation and programming guide
