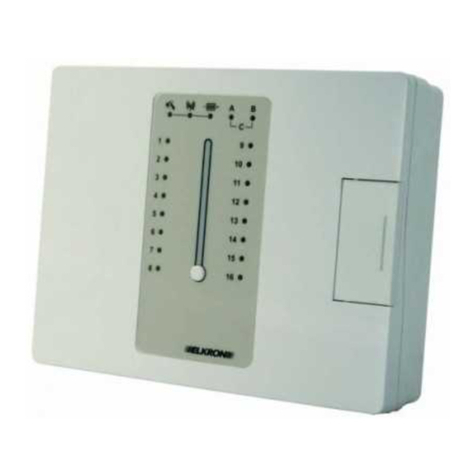
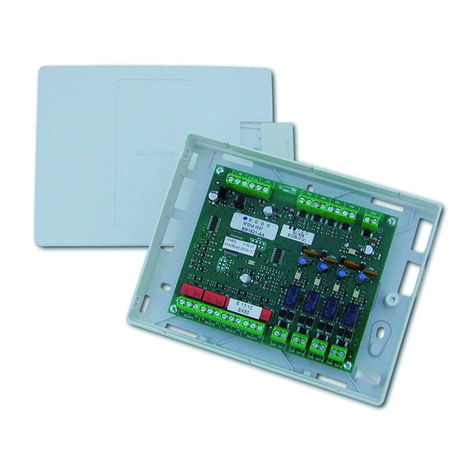
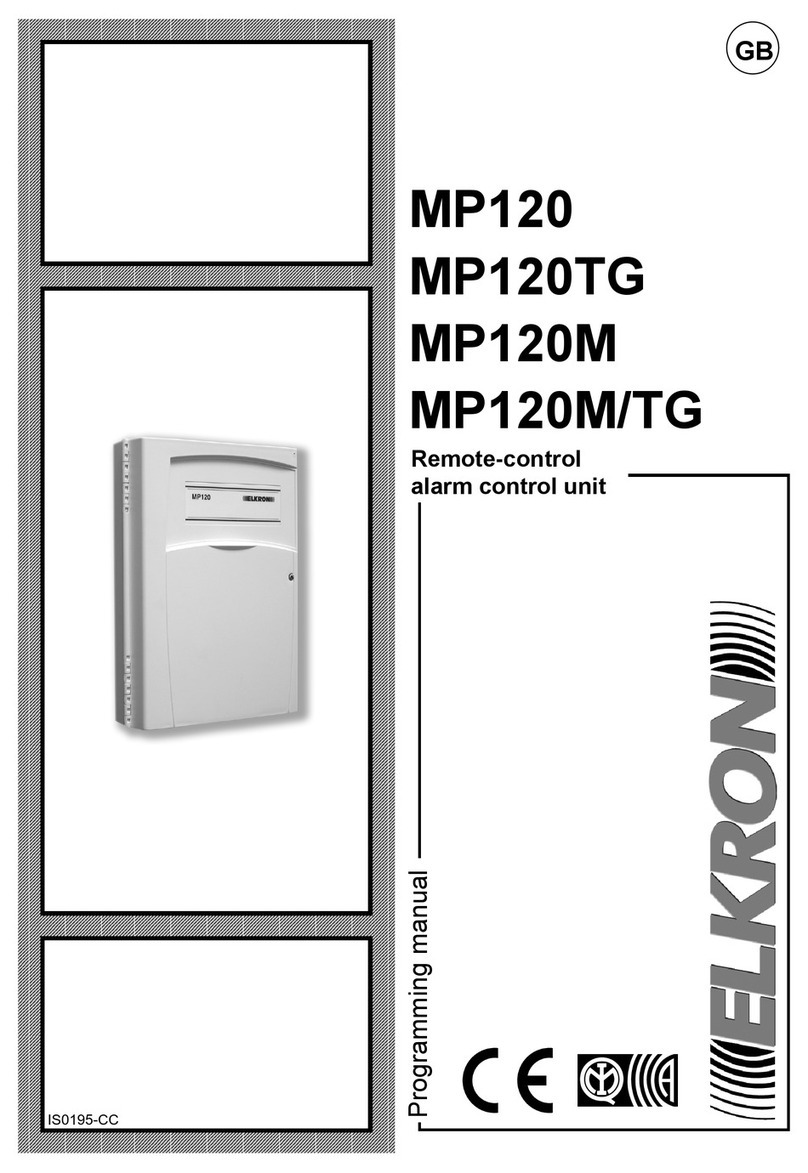
Elkron MP120 User manual

IS0175-CH
Installation manual
MP120
MP120TG
MP120M
MP120M/TG
Remote-control
alarm control unit
GB

The information contained in this document have been collected and checked very carefully. In any case,
Elkron S.p.A. will not be responsible for any errors or omissions.
Elkron S.p.A. reserves the right to make changes or improvements to the products described in this manual at
any time and without advance notice.
In addition, this manual may contain references to or information about products or services (i.e. hardware and
software items) that have not been marketed yet. Such references or information will in no case mean that
Elkron S.p.A. intend to market the aforesaid products or services.
Elkron is a registered trademark of Elkron S.p.A.
All the trademarks mentioned in this document are the property of their respective owners.
© Copyright Elkron S.p.A. 2006
All rights reserved. Full or partial printing or copying of this document is permitted only for the purpose of
installing the MP120 System.
Via G. Carducci, 3 – 10092 Beinasco (TO) – ITALY
Tel. +39 (0)11.3986711 – Fax +39 (0)11.3499434

3/32 MP120
INDEX
1 – MP120 SYSTEM.....................................................................................................................................................4
1.1 GENERAL DESCRIPTION .....................................................................................................................................4
1.1.1 System architecture......................................................................................................................................4
1.1.2 bus ................................................................................................................................................................4
1.1.3 INPUT AND OUTPUT ARRANGEMENT .....................................................................................................5
1.1.4 MAX. SYSTEM SIZE AND ITS RESPECTIVE EXPANSIBILITY .................................................................6
1.2 SYSTEM COMPONENTS...........................................................................................................................................8
1.2.1 MP120 CONTROL UNIT ..............................................................................................................................8
1.2.2 KP120D Remote keypad..............................................................................................................................8
1.2.3 DK2000M INSERTER ..................................................................................................................................9
1.2.4 DK3000M Proximity inserter.........................................................................................................................9
1.2.5 DK20 Programmable key .............................................................................................................................9
1.2.6 DK30 TRANSPONDER KEY........................................................................................................................9
1.2.7 EP100 EXPANSION.....................................................................................................................................9
1.2.8 ES100 EXPANSION.....................................................................................................................................9
1.2.9 UR1Z MODULE............................................................................................................................................9
1.2.10 ER20WL EXPANSION .............................................................................................................................10
1.2.11 PSTN ILT100 TELEPHONE INTERFACE ...............................................................................................10
1.2.12 SV108 Voice synthesis.............................................................................................................................10
1.2.13 KV100 SYNTHESIS KIT...........................................................................................................................10
1.2.14 TTL/RS232 INTERFACE..........................................................................................................................10
1.2.15 IT/USB INTERFACE.................................................................................................................................10
1.2.16 MR02 ........................................................................................................................................................10
1.2.17 Fast Link ...................................................................................................................................................10
2 – INSTALLING THE MP120 SYSTEM....................................................................................................................11
2.1 INSTALLATION PROCEDURE ............................................................................................................................11
2.2 FITTING OPTIONAL ITEMS AND ACCESSORIES ..........................................................................................11
2.2.1 INSTALLING THE PSTN TELEPHONE INTERFACE ...............................................................................12
2.2.2 INTEGRATING THE voice synthesis .........................................................................................................12
2.2.3 INSTALLING THE TTL/RS232 INTERFACE .............................................................................................13
2.3 FITTING THE CONTROL UNIT.........................................................................................................................14
2.3.1 InstallING THE MP120 – MP120TG...........................................................................................................14
2.3.2 InstallING THE MP120M – MP120M/TG....................................................................................................14
2.3.3 INPUT hardware CONFIGURATION .........................................................................................................15
2.3.4 OUTPUT hardware CONFIGURATION .....................................................................................................16
2.3.5 CoNNECTIONS..........................................................................................................................................17
2.4 INSTALLING THE KEYPAD.................................................................................................................................20
2.5 INSTALLING THE INSERTER .............................................................................................................................21
2.5.1 DK2000M INSERTER ................................................................................................................................21
2.5.2 DK3000M INSERTER ................................................................................................................................22
2.6 INSTALLING THE EXPANSION ..........................................................................................................................22
2.7 EXAMPLES OF CONNECTION DIAGRAMS ....................................................................................................22
2.7.1 Connection diagram FOR N.C. INPUTS ....................................................................................................23
2.7.2 Connection diagram FOR dual-balancing INPUTS....................................................................................24
3 – SYSTEM MAINTENANCE ...................................................................................................................................25
3.1 MAINTENANCE PROCEDURE .........................................................................................................................25
3.2 INTEGRATING OPTIONAL ITEMS OR ACCESSORIES..................................................................................25
3.3 INTEGRATING ADEVICE CONNECTED TO THE BUS ..................................................................................25
3.4 REMOVING ADEVICE CONNECTED TO THE BUS .......................................................................................25
3.5 REPLACING ADEVICE CONNECTED TO THE BUS........................................................................................25
3.6 RESTART BUS......................................................................................................................................................26
3.7 FULL RESET.......................................................................................................................................................26
3.8 REPLACING THE BATTERY ............................................................................................................................27
4 – TECHNICAL FEATURES.....................................................................................................................................28
APPENDIX A - DIMENSIONING................................................................................................................................30
CONNECTING CABLE DIMENSIONING................................................................................................................30
BATTERYDIMENSIONING.......................................................................................................................................31
POWER SUPPLY DIMENSIONING........................................................................................................................31

4/32 MP120
1 – MP120 SYSTEM
1.1 GENERAL DESCRIPTION
1.1.1 SYSTEM ARCHITECTURE
The MP120 system is an antitheft and safety alarm wire system suitable for individual users both in the residential,
industrial or service industry fields. The inputs can be configured as unbalanced (N.C.), single-balancing and dual-
balancing inputs.
The control unit, inserters, keypads and input/output expansions are connected with one another through a bus. The
detectors, sirens and other signalling devices are, on the contrary, connected to the inputs and outputs available in the
control unit and the other aforesaid devices. Using the bus makes cabling much easier and allows you to save money,
since not all the connections need be terminated directly to the control unit. For instance, if you wish to ensure the
antitheft feature as well as local actuation for an annexe (e.g. garage, warehouse, shot), you will just need to run the bus
cable to the annexed building, and the bus cable shall be connected to an inserter (or keypad) and an expansion to
which the alarm detectors will be linked.
The MP120 system may, if equipped with a communicator, send telephone, voice alarm messages with numeric
protocol (to remote surveillance agencies); moreover, it may also be controlled remotely through the telephone (incl.
mobile phones) and make use of remote assistance. The system is programmed through any of its keypads, and also be
connecting the control unit to a PC equipped with the Fast Link software, after the control unit has been equipped with
the interface with the RS232 port.
1.1.2 BUS
This is the connecting line that transmits, through four wires only, both the information and the 12 V- power supply
between the control unit, keypads, inserters and expansions (as far as expansions are concerned, the 12 V- power
supply, required to power the detectors connected to the expansions themselves, shall be provided separately).
This arrangement makes cabling much easier, since it allows you to use different types while reducing the number
of cables required for connections. Below are the types that can be used.
PERIPHERAL UNIT CONNECTION
The 4-lead bus cable (2 leads for the data, 2 leads for the 12 V- power supply) is enough only for the keypads and
inserters. As regards expansions, if they are not powered locally, two more leads for AUX 12 V- power supply shall
be run from the control unit +/- S terminals (in this case, take care that total absorption will not exceed the current
that can be delivered by the control unit power pack).
CASCADE
COMBINED
WYE

5/32 MP120
Below is the connection diagram for the four bus wires to the devices:
1.1.3 INPUT AND OUTPUT ARRANGEMENT
The individual system detectors are physically connected to inputs. One or several detectors may be properly
connected to each input (if several detectors - to be connected in series - are available, you will not be able to
identify the device that triggered the alarm). Yet, one single detector cannot be connected to several inputs.
The inputs may also be associated to predefined sectors, numbered 1 through 8. Each input may be associated to
one or several sectors: one input associated to several sectors will signal an alarm even though only one of the
associated sectors is ON. The sector is used to group all the inputs that perform the same task, in order to allow
such inputs to be controlled (the sectors - not the inputs - are switched ON and OFF). Let us consider a company,
by way of example: all the raw material warehouse inputs may be associated to a sector; the finished product
warehouse inputs may be associated to another sector; the manufacturing department inputs may be associated to
one further sector; and the office inputs may be associated to one additional fourth sector. By extending a similar
example to a residential building, the apartments may be associated to a sector, and the garage may be associated
to another sector.
Finally, another possible macro-group is available: the area, which makes it possible to group one or several
sectors and further facilitate system control. Three predefined areas (A, B and C) are available, which cannot be
renamed. In the company example above, the two warehouses and the manufacturing department may be grouped
within one single area, in order to be able to actuate the antitheft feature by means of one single command at the
end of the working day.
To sum it up:
•the inputs shall be associated to the sectors; they cannot be associated directly to the areas;
•one input may be freely associated to one or several sectors;
•8 predefined sectors are available (numbered 1 through 8);
•a number of inputs ranging from 0 to the total of the inputs available in the system may be associated to every
single sector;
•the sectors may be associated to the areas (each sector may belong to several areas);
•3 predefined areas are available (A, B and C).
The actuating devices (sirens, blinkers, solenoid valves, presence lights etc.) are connected to the outputs. The
outputs may be associated to the inputs, sectors and areas.
CONTROL UNIT
INSERTER
KEYPAD EXPANSION

6/32 MP120
Below is an example for a graphic representation of a system: it can be seen that, by way of example, input 6 is
shared by sectors 1 and 3, and sectors 4 and 5 have been grouped within an area.
EXAMPLE OF SYSTEM SPLITTING-UP
1.1.4 MAX. SYSTEM SIZE AND ITS RESPECTIVE EXPANSIBILITY
The system may include:
•up to 4 I/O expansions, regardless of the model (EP100, ES100 or ER20WL; they all may be found on the
same system);
•up to 4 inserters, regardless of the mode (DK2000M or DK3000M; both of them may be found on the same
system);
•up to 4 KP120D keypads (one of which is mandatory for system programming and control);
•up to 40 alarm wire inputs (8 in the control unit, 32 in the expansions);
•up to 21 auxiliary inputs (of the N.C. type) to the negative (1 in the control unit, 4 in the expansions, 8 in the
inserters, 8 in the keypads);
•up to 5 24-h inputs (1 in the control unit, 4 in the expansions) permanently ON, for safety sensors (gas leakage,
flooding, etc.);
•tamper inputs in the control unit, expansions and keypads;
•5 alarm outputs in the control unit (one of which of the relay type);
•up to 20 electric outputs (4 OC PNP/NPN in the control unit, 16 OC PNP in the expansions).
SYSTEM
SECTOR 1
INPUT 1
INPUT 2
INGR. 3 SECTOR 3
INPUT 6
INPUT 4
INPUT 5
SECTOR 2
INPUT 7
INPUT 8
AREA A
SECTOR 4
INPUT 9
INPUT 10
INPUT 12
SECTOR 5
INPUT 11
INPUT 13
INPUT 14
INPUT 15

7/32 MP120
LOCAL PC
REMOTE-CONTROL
V
OICE MESSAGE
REMOTE
SURVEILLANCE REMOTE
ASS
I
S
TAN
C
E
TTL/RS232
INTERFACE
PSTN
INTERFACE
8 alarm inputs
1 24-h input
1 mechanic key input
1 relay output
4 electric outputs
1 weekly time programmer
VOICE
SYNTHESIS
KP120D KEYPAD
(max. 4 keypads)
DK2000M INSERTER
DK3000M INSERTER
(max. 4 inserters)
EP100 EXPANSION
ES100 EXPANSION
ER20WL EXPANSION
(max. 4 expansions)
BUS
MP120 CONTROL
U
NIT
2
auxiliary
inputs
2
auxiliary inputs
no
auxiliary input
8 alarm inputs
1 auxiliary input
1 24-h input
4
e
l
ect
ri
c
outputs
8 alarm inputs
1 auxiliary input
1 24-h input
4
e
l
ect
ri
c
outputs
1 radio module
1 auxiliary input
1 24-h input
4
e
l
ect
ri
c
outputs

8/32 MP120
1.2 SYSTEM COMPONENTS
1.2.1 MP120 CONTROL UNIT
The MP120 multifunction control unit can manage separately the signals for six different
types of events: attempt at break-in, attempt at sabotage, fire start, technological alarms
(e.g. flooding), emergency and panic calls. Detectors can be divided up to a maximum of
8 sectors, which may be freely grouped within 3 areas.
The control unit is configured through programming by means of a system keypad or, for
your greater ease, a local PC connected to the control unit (the latter must be fitted with
the TTL/RS232 interface and the Fast Link software, which also allows for remote
programming).
To program by means of the keypad, an easy-to-use menu is available in eleven
languages (Italian, French, English, Spanish, Portuguese, German Swedish, Finnish,
Czech, Polish and Romanian).
The control unit features the following:
•8 inputs with uncoded naming;
•1 24-h input permanently ON (anti-tampering feature);
•1 input for mechanic actuation/deactivation key;
•1 relay output;
•4 OC PNP/NPN electric outputs.
The power for all internal circuits and devices is supplied by a 230 V~ - 12 V−power pack and a 12V−booster
battery. Both the current delivered by the power supply and the battery capacity vary depending on the control unit
version. Other control unit features include:
•protection against opening and removal;
•9 access codes able to be controlled;
•storing into the memory the latest 250 events occurred, e.g. break-in alarm, sabotage, system (or sector)
actuation and deactivation, with an indication of the event's date and time;
•direct connections can be made between the inputs and outputs (actuating an input will actuate the
corresponding output, too);
•weekly time programmer control.
The MP120 control unit capacity may be increased through:
•the EP100, ES100 and ER20WL expansions with auxiliary inputs and outputs;
•the remote communication options offered by the PSTN telephone interface (included in some versions);
•the SV108 voice synthesis card and the KV100 synthesis kit.
Versions available
Model Power supply Battery Telephone interface Case
MP120 1 A 12 V−/ 6,5 Ah preset Self-extinguishing thermoplastics
MP120TG 1 A 12 V−/ 6,5 Ah integrated Self-extinguishing thermoplastics
MP120M 2,2 A 12 V−/ 15 Ah preset Metal
MP120M/TG 2,2 A 12 V−/ 15 Ah integrated Metal
1.2.2 KP120D REMOTE KEYPAD
The KP120D is a keypad designed for indoor use. It features 8 LEDs for light signals, 20
alphanumeric keys, and a back-lit 16-character display. 4 alphanumeric keys are used to
recall information, whereas 4 other keys are used to scroll the menu items shown on the
display. The signals available on the keypad include the alarms, tampering events, failure
events, system status, open inputs and excluded inputs, power supply, time
programming, and maintenance. The key are protected and hidden by a lid inside which
the area memo label (supplied with the unit) may be put. The display contrast may be
adjusted by means of a trimmer, for better readability.
The keypad is connected to the system through a 4-wire bus; in the event that several
keypads are used, the desired type of connection can be used, i.e. cascade, wye or
combined. The max. distance between the control unit and the keypad is 500 m.
The keypad is fitted with 2 normally closed (N.C.) non-balancing alarm inputs, with reference to the negative, and a
tamper for protection against opening and removing. The keypad address configuration and tamper enable occur
by means of dip-switches. The 12 V−power supply is drawn from the connecting bus.
A MP120 system shall always include at least one keypad to program and control the system on the spot.

9/32 MP120
1.2.3 DK2000M INSERTER
The DK2000M is the inserter used for the DK20 programmable keys. The device
features 2 normally closed (N.C.) non-balancing alarm inputs, with reference to the
negative. Its front includes 4 signalling LEDs (one for the system status, three for the
area or sector status). The inserter address configuration takes place through jumpers.
By using special adapter frames, the DK2000M inserter may be included, as a core,
within the following civil networks: BTicino Living International, BTicino Light, BTicino
Living, Gewiss Playbus, Ave Habitat Sistema 45, Vimar Idea, Vimar 8000.
1.2.4 DK3000M PROXIMITY INSERTER
The DK3000M is the inserter used for the DK30 transponder keys. The device features 4
signalling LEDs (one for the system status, three for the area or sector status). The
inserter address configuration takes place through a rotary switch. The DK3000M
inserter does not control alarm inputs.
By using special adapter frames, the DK3000M inserter may be included, as a core,
within the following civil networks: BTicino Living International, BTicino Light, BTicino
Living, Gewiss Playbus, Ave Habitat Sistema 45, Vimar Idea, Vimar 8000.
1.2.5 DK20 PROGRAMMABLE KEY
The DK20 is a programmable key for full or partial system actuation and deactivation.
The code is generated at random by the control unit, with over 4 billion possible
combinations. Up to 16 keys can be programmed, and each key may be individually
enabled or disabled and assigned a descriptive name. To use the DK20 programmable
key, the DK2000m inserter shall be available in the system.
1.2.6 DK30 TRANSPONDER KEY
The DK30 is a transponder key for full or partial system actuation and deactivation. To
use the DK30 key, the DK3000M inserter shall be available in the system. Each key
features a univocal, factory-set code, with over 280,000 billion possible combinations.
1.2.7 EP100 EXPANSION
The EP100 is a parallel expansion module with 8 programmable alarm inputs (N.C.,
single balancing, or dual balancing), 1 auxiliary input, 1 balanced 24-h input, 1 tamper
input, and 4 freely programmable electric outputs. It allows detectors to be connected in
the traditional parallel fashion.
NOTE. The sensors connected to the expansion shall be powered by the control unit.
1.2.8 ES100 EXPANSION
The ES100 is a serial expansion module with 8 alarm inputs, 1 auxiliary input, 1
balanced 24-h input, 1 tamper input, and 4 freely programmable electric outputs. It
allows detectors to be connected in a serial fashion (they shall incorporate the UR1Z
interface module for connection to the secondary bus).
NOTE. The sensors connected to the expansion shall be powered by the control unit.
1.2.9 UR1Z MODULE
This is an interface module to be used with the ES100 expansion.

10/32 MP120
1.2.10 ER20WL EXPANSION
The ER20WL is an expansion module for connecting radio devices (MM20WL magnetic
contacts, IR20WL infrared detectors, HP20WL sirens). The module features 4 auxiliary
inputs, 1 balanced 24-h input, 1 tamper input, and 4 freely programmable electric outputs. Up
to 56 detectors and 8 sirens (all of which of the wireless type) can be connected to the
ER20WL through the radio.
1.2.11 PSTN ILT100 TELEPHONE INTERFACE
The ILT100 module is the telephone interface between the MP120 control unit and the
fixed telephone system (PSTN).
1.2.12 SV108 VOICE SYNTHESIS
The SV108 is a voice synthesis module that makes it possible to record and listen to
voice messages. This module must be accompanied by the synthesis kit.
1.2.13 KV100 SYNTHESIS KIT
The KV100 synthesis kit complements the SV108 voice synthesis device. It includes a
microphone and a loudspeaker, to be installed inside the control unit.
1.2.14 TTL/RS232 INTERFACE
The TTL/RS232 serial interface module makes it possible to connect, through the RS232
serial port, a PC with the MP120 control unit for local programming, through the Fast Link
software.
1.2.15 IT/USB INTERFACE
The IT/USB interface module makes it possible to connect, through the USB port, a PC with
the MP120 control unit for local programming, through the Fast Link software.
1.2.16 MR02
The MR02 module includes 2 free-exchange relays (1 A - 24 V) which may be controlled by
the electric outputs of the control unit or the expansions.
1.2.17 FAST LINK
Software for computerized local programming and remote control of the MP120 control unit.

11/32 MP120
2 – INSTALLING THE MP120 SYSTEM
2.1 INSTALLATION PROCEDURE
Installing an MP120 system involves the following steps:
1. laying the necessary connecting cables (bus, detectors, power supply, telephone connections, if any): refer to
the following paragraph for their features;
2. fitting the optional items and accessories into the control unit;
3. installing the control unit;
4. installing the keypads;
5. installing the inserters;
6. installing the input and output expansions;
7. installing the detectors and the alarm and signalling devices (not dealt with in this manual);
8. setting the dip-switches (refer to paragraph 2.3.3 INPUT hardware CONFIGURATION);
9. configuring and testing the system, as described in the programming manual.
This sequence minimizes the time required to commission an MP120 system, while ensuring optimum results.
2.2 FITTING OPTIONAL ITEMS AND ACCESSORIES
WARNING! The optional items and accessories must always be connected and disconnected when the
control unit is not powered.
To open the control unit, undo the screw placed on the front cover.
The figures below show the control unit when opened, as well as the position of connectors and holes for the pins
on the master card, including the position for the PSTN ILT100 interface.
PS108 Power Supply
1) SV108 voice synthesis card pin holes
2) SV108 voice synthesis card male connectors
3) TTL/RS232 interface card pin hole
4) TTL/RS232 interface card male connector
5) Tamper connector.
6) Voice synthesis microphone housing
7) Loudspeaker housing
8) Dip switch
9) RST pin
10) Electric output configuration jumpers
11) PSTN telephone interface pin holes
7 6
2
9
143
8510
11
PS515

12/32 MP120
2.2.1 INSTALLING THE PSTN TELEPHONE INTERFACE
Warning! The optional items and accessories must always be connected and disconnected when the control
unit is not powered.
Reminder. The control unit MP120TG and MP120M/TG versions incorporate the PSTN telephone interface.
To fit the PSTN telephone interface into the MP120 and MP120M control units, plug the interface female connector
into the corresponding male connector of the control unit master card.
2.2.2 INTEGRATING THE VOICE SYNTHESIS
Warning! To be able to use voice synthesis, the control unit shall be equipped with the telephone interface.
The functional character of the voice synthesis is ensured by two different components: the SV108 voice synthesis
card and the voice synthesis kit with a loudspeaker and a microphone. To fit the latter into the control unit, proceed
as follows:
1. secure the two nylon pins (supplied with the unit) into the special holes available on the voice synthesis card;
2. plug two female connectors of the SV108 voice synthesis card into the corresponding male connectors of the
control unit master card;
3. hook the two nylon pins to the special holes available on the control unit master card;
4. press-fit the loudspeaker by sliding it face down into the special housing obtained on the control unit cover;
5. connect the loudspeaker red cable to the voice synthesis card terminal "SP +";
6. connect the loudspeaker black cable to the voice synthesis card terminal “SP –“;
7. press-fit the microphone, face up, into the special housing obtained on the control unit base;

13/32 MP120
8. connect the microphone red cable to the voice synthesis card terminal "MIC +";
9. connect the microphone black cable to the voice synthesis card terminal “MIC –“;
10.The loudspeaker volume has been factory-set to an optimum level: to change the sound level, use the special
trimmer available on the voice synthesis card.
2.2.3 INSTALLING THE TTL/RS232 INTERFACE
Warning! The optional items and accessories must always be connected and disconnected when the control
unit is not powered.
Warning! In the event that electric outputs U2, U3, U4 and U5 (type: OC PNP/NPN, factory setting: PNP –
see paragraph
2.3.4 OUTPUT hardware CONFIGURATION for more information) have to be configured, do this prior to installing
the TTL/RS232 interface.
To fit the TTL/RS232 interface card, which makes it possible to connect a local PC to the control unit for
programming (the PC shall be equipped with the Fast Link software), proceed as follows:
1. secure the nylon pin (supplied with the unit) into the special hole available on the TTL/RS232 interface card;
2. plug the female connector of the TTL/RS232 interface card into the corresponding male connector of the control
unit master card;
3. hook the nylon pin to the special hole available in the control unit master card.

14/32 MP120
2.3 FITTING THE CONTROL UNIT
The control unit shall be installed on a dry, level wall, in a covered place (other than a passageway) protected by
the antitheft system.
WARNING!: In compliance with the law regulations on electrical safety, a dual-insulation cable (i.e. a cable
equipped with a dual sheath) shall be used for 230V~ power supply.
Moreover, a suitable disconnecting device (such as a two-pole magneto-thermal switch) shall be installed, in order
to protect the supply network.
2.3.1 INSTALLING THE MP120 – MP120TG
1) Slotted holes for wall fastening
2) Cable run provisions
3) Anti-removal tamper
4) Tamper adjusting screw (placed below
the tamper)
To install the MP120 and MP120TG control units, proceed as follows:
1. use a pencil to mark the positions of the three fastening holes on the wall, paying attention to the cable run;
2. drill the wall by using a bit at least 6 mm large, then fit the three dowels in;
3. tighten the screws down into the dowels, allowing them to protrude by approximately 7 mm;
4. let the cables run into the special passageways, then "hang" the control unit onto the screws protruding out of
the dowels;
5. tighten the screws down to secure the control unit;
6. adjust, if necessary, the tamper screw to compensate for wall unevenness (if any) and ensure that the tamper is
locked after the control unit is closed.
2.3.2 INSTALLING THE MP120M – MP120M/TG
1) Wall fastening hole
2) Cable runs
3) Anti-removal tamper
4) Tamper adjusting screw
3
4
2
1
1
12
3
5
4
Correct installation of wall removal control
PS515
Power
Supply

15/32 MP120
5) Cover fastening screw
To install the MP120M and MP120M/TG control units, proceed as follows:
1. use a pencil to mark the positions of the three fastening holes on the wall, paying attention to the cable run;
2. drill the wall by using a bit at least 6 mm large, then fit the three dowels in;
3. fit a dowel also below the hole just next to the tamper;
4. let the cables run into the special passageways, then secure the control unit by means of the dowel screws;
5. tighten a screw down below the tamper (into the dowel previously set) and adjust the screw, if necessary, to
compensate for wall unevenness (if any) and ensure that the tamper is locked after the control unit is closed.
2.3.3 INPUT HARDWARE CONFIGURATION
All the alarm inputs of the control unit (including 24-h) may be configured alternately as follows: N.C. (normally
closed), SB (single-balancing) and DB (dual-balancing). To choose the type of connection, use control unit master
card dip-switches 5 and 6 (see the figure of paragraph 2.2 FITTING OPTIONAL ITEMS AND ACCESSORIES for
the dip-switch position), according to the diagram below:
Dip-switch 5 Dip-switch 6 Connection mode
ON ON Normally closed
ON OFF Single-balancing
OFF Unimportant Dual-balancing
Warning! The type chosen will apply to all the control unit inputs, including 24-h.
All the control unit alarm inputs are referred to the positive.
Differences between the various types of inputs
The choice of the input type affects the way in which the detectors are connected and the alarm is distinguished.
N.C. inputs are the simplest ones and may signal opening only. Dual-balancing inputs are the most complete ones:
in fact, input opening can be distinguished from tampering. Single-balancing inputs are half-way, as illustrated on
page 21.
Types of physical connections that can be made with the different devices
Control unit Expansion Inserter Keypad
Normally closed (NC) ■■■■
Single-balancing ■■
Dual-balancing ■■
"KEY" INPUT (MECHANIC KEY) - TERMINAL 37
"KEY" input
The KEY input is used to connect a mechanic key and can, as far as actuation and deactivation are concerned, be considered
as a "main switch" for the system. Its behaviour depends on how it is configured through programming (system options):
•impulsive: it switches all the sectors ON and OFF, yet allowing the same to be able to be done with the keypads and
inserters, too;
•hold-on: it switches all the sectors ON and OFF. It takes priority over the other control elements (keypads and inserters),
which cannot actuate or deactivate the sectors any longer.
"KEY" input connection
If the KEY input is used, connect an external switch (for hold-on control) or a button (for impulsive control) to the negative (-
S). Either the switch of the button shall be key-controlled due to safety reasons, in accordance with the “IMQ CERTIFICATION
- SAFETY SYSTEMS” indications on the last page.

16/32 MP120
2.3.4 OUTPUT HARDWARE CONFIGURATION
Control unit outputs U2, U3, U4 and U5 are of the configurable Open Collector type, choosing from between PNP
(preset) or NPN. Each output must be configured individually, by moving the respective jumper placed on the
control unit master card (see the figure of paragraph 2.2 FITTING OPTIONAL ITEMS AND ACCESSORIES for
their positions).
The max. current that can be delivered is 100 mA (for output U2) and 10 mA (for each of outputs U3, U4 and U5).
Open Collector outputs
To put it in simple words, the Open Collector electric outputs can be considered as electronic circuit breakers”.
In case of PNP output, at rest, the electric output is +12 V, which will be missing in case of alarm.
In case of NPN output, at rest, the electric output is 0 V, which will turn into +12 V in case of alarm.
The Open Collector outputs can be used to control relays or signalling LEDs. The Elkron MR02 module features 2
free-exchange relays (1 A - 24 V) which can be controlled by the OC electric outputs.
OUTPUT CONFIGURATION
positive
command
negative
command

17/32 MP120
2.3.5 CONNECTIONS
F2 - F3A15/250V
F3 - F1A/250V
F1 - F1A/250V
Terminal Connection
LB Incoming telephone line
LA Incoming telephone line
PA Telephone line – output for other users
PB Telephone line – output for other users
+HPS Positive voltage for recharging the self-powered siren batteries (14.4 V−). Voltage is 0.6 V higher than the
one delivered by terminal +SIR. Warning!: In the event that the network supply is not available, HPS+ will
deliver no voltage; therefore, it shall be used only for connecting self-powered devices.
+ To the power supply positive pole
– To the power supply negative pole
C To the power supply pole C
– BATT+ Booster battery clamps
– SIR+ Output actuator power supply. The output is protected by a 3.15A quick-blow fuse (F2).
C Output 1 relay common (max 1 A - 24 V−)
NC Output 1 relay normally closed contact
NO Output 1 relay normally open contact
U2 Electric output 2 (protected against short-circuit, max. current: 100 mA)
U3 Electric output 3 (protected against short-circuit, max. current: 10 mA)
U4 Electric output 4 (protected against short-circuit, max. current: 10 mA)
U5 Electric output 5 (protected against short-circuit, max. current: 10 mA)
– SER+ Device power supply through the bus. The output is protected by a 1A quick-blow fuse (F3).
CK Bus clock output
D Data exchange bi-directional signal
– S
+ S
Power supply for the detectors connected in the control unit (and possible connection for the +/- 12V AUX power
supply for the ES100, EP100 and ER20WL expansions). The output is protected by a 1A quick-blow fuse (F1).
Z1 Alarm input 1
Z2 Alarm input 2
Z3 Alarm input 3
Z4 Alarm input 4
Z5 Alarm input 5
Z6 Alarm input 6
Z7 Alarm input 7
Z8 Alarm input 8
T/A 24-h input (for system self-protection)
KEY Mechanic key input (normally open, close to negative for switching)
F2 F1 F3
SIRENS SENSORS SERIAL

18/32 MP120
Connecting the alarm inputs (Z1-Z8)
Connect the detectors to the control unit alarm inputs Z1-Z8, in accordance with any of the diagrams below and
allowing for the type of input that has been configured through the hardware (dip-switch).
DUAL-BALANCING
-
+
TC
AL TA
AL TA
TC TA TA
TA TA
Zn
22K
22K
22K
ALL
24h1
22K
22K
24h2
In the event that N.O. (normally open) contacts have to be connected, you may use any of the connection diagrams
below, while allowing for the type of input that has been configured through the hardware (dip-switch). The N.O.
variants have been highlighted in grey.
Important! If a N.O. contact is used for antitheft protection, the IMQ certification will be lost.
All the balancing resistors (supplied with the unit) feature 22 kΩ, tolerance: 5%.
CONTROL UNIT
SIRENS OR OTHER AUXILIARY DEVICES
SENSOR
N.C. to positive SINGLE-BALANCING
CONTROL UNIT CONTROL UNIT
SENSOR SENSOR
Normally closed (N.C.) inputs
Single
-
balancing inputs
Dual
-
balancing inputs

19/32 MP120
Warning! Always close unused inputs: to the positive, if they are of the N.C. type, with a balancing resistor
(22 kΩ) if they are of the balancing type.
The specific input task (break-in, robbery, panic, technological, fire) will be subsequently specified through
programming.
Output connection
The control unit outputs can be reached by connecting alarm devices (sirens and blinkers), signalling devices
(LEDs or buzzers) as well as other devices made to operate automatically when a detector is actuated.
To connect the outputs, proceed as follows:
1. Connect the alarm devices (e.g. siren) to output U1 (potential-free relay, max. 1A - 24V) (such output cannot be
programmed freely):
Event Actuated system Deactivated system
Break-in ■
Tampering ■If programmed
Panic ■■
Fire If programmed If programmed
The relay rest status may be programmed as normally open (N.O.) or normally closed (N.C.).
2. Connect, if you wish so, other devices to programmable outputs U2, U3, U4 and U5, considering that:
•output U2 (max. 100 mA) is preset as a tampering output;
•outputs U3, U4 and U5 ensure a maximum current of 10 mA.
The output specialization (break-in, tampering, robbery, panic, technological, etc.) will be subsequently indicated
through programming.
Bus connection
Connect the bus 4-lead cable (which will make the control unit, inserters, keypads and any I/O expansions to
communicate) to the – SER, + SER, CK and D terminals.
Telephone line connection (optional)
In the event that the control unit is equipped with a PSTN telephone interface, connect the control unit to the
telephone line according to the diagram below:
The control unit shall be the first device connected to the incoming telephone line: any other device (fax, answering
machine, telephones) shall be downstream the control unit. This type of connection ensures that the control unit will
also be able to engage the telephone line in case of need, thus leaving out all the other connected devices.
Handle the duplex cable with care, since the telephone control unit supply voltage may be live! When connecting
the duplex cable to the interface terminals LA and LB, you need not allow for polarity.
The telephone interface is equipped with a protection suitable for standard needs, as laid down by the law
regulations. In the event that you operate in a place with a great risk of electric discharge on the telephone line, an
auxiliary protection (not supplied with the unit) may be optionally installed on the telephone line, upstream the
control unit.
DECLINATORY CLAUSE
Elkron S.p.A. decline all responsibility for non-availability, either temporary or permanent, of the PSTN
telephone line, which may affect making calls and sending programmed messages.
PSTN tele
p
hone line
+ answerin
g
machine, fax, etc.
auxiliary
protection

20/32 MP120
Booster battery connection
1. Connect the two cables equipped with Faston connectors to the BATT + (red cable) and BATT – (black cable)
terminals of the control unit master card.
2. Fit in and secure the battery into the relevant control unit housing, then connect the Faston connectors to its
terminals (red = +, black = –).
2.4 INSTALLING THE KEYPAD
The KP120D keypad may be installed both on a wall and onto an embedded box with three compartments. A hole
(3) is available to let the bus cable through: in the event that the hole is not compatible with the cable run or it is not
enough (e.g. because the keypad auxiliary inputs have to be used, too), you will be allowed to open the central
break-through hole (4).
1) Wall fastening holes
2) 3-compartment embedded box fastening holes
3) Bus cable run hole
4) Cable run break-through hole
5) Tamper spring hole.
The keypad is equipped with two inputs normally closed (N.C.) to the negative for connection of other detectors
or buttons (e.g. panic button).
Reminder: for easier use, the keypad should be installed at a height of approximately 160 cm.
To install the keypad, proceed as follows:
1. open the keypad by applying a slight pressure with a single-cut screwdriver at the point shown in the figure, so
as to disengage the closing tooth.
2. If the keypad is not installed on a 3-compartment box, use a pencil to mark the positions of the fastening holes (2
holes will be enough) on the wall, then make a drill by using a bit at least 5 mm wide and fit in the dowels (the latter
need not be used on wooden walls).
3. Allow the cables to run through the keypad bottom cover.
4. Secure the keypad bottom to the wall. If you do so on a 3-compartment box, use suitable screws; otherwise use
the dowel screws. Warning!: Prior to securing, check the position of the bottom: the tamper hole shall be down.
5. Select the address by means of the keypad dip-switches:
Displaying on keypads Dip-switch
Address Keypad Input Z1 Input Z2 Tamper 1 2 3
1 Keypad 1 B1 B2 BA ON ON ON
2 Keypad 2 B3 B4 BB OFF ON ON
3 Keypad 3 B5 B6 BC ON OFF ON
4 Keypad 4 B7 B8 BD OFF OFF ON
The chosen address will also determine the input and tamper addresses. Warning!: There must not be two or
several keypads with the same address.
6. Make sure that dip-switch 4 is OFF: if it is ON, the tamper will be disabled and the IMQ certification will be lost.
7. Connect the keypad to the bus by means of terminals +, –, CK and D (refer to paragraph 1.1.2 bus for more
information), then close inputs Z1 and Z2 to the negative, if they are not used.
21
3
5 1
4
Other manuals for MP120
1
This manual suits for next models
3
Table of contents
Other Elkron Control Unit manuals

Elkron
Elkron DK510M-P User manual

Elkron
Elkron IMG500/N User manual

Elkron
Elkron MP120 Owner's manual

Elkron
Elkron PRO MEDEA/32 User manual

Elkron
Elkron IO501 User manual

Elkron
Elkron T600 User manual

Elkron
Elkron IT500CLOUD User manual

Elkron
Elkron MR16 User manual

Elkron
Elkron MP 110 User manual

Elkron
Elkron IO500 User manual