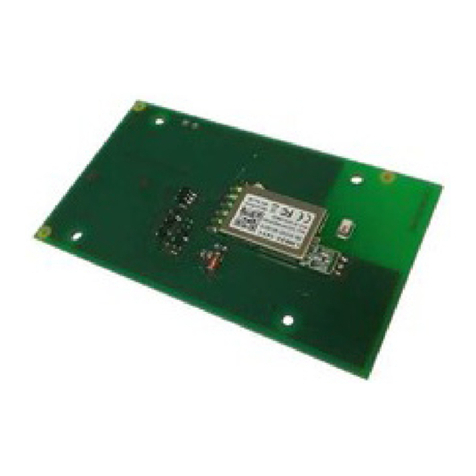
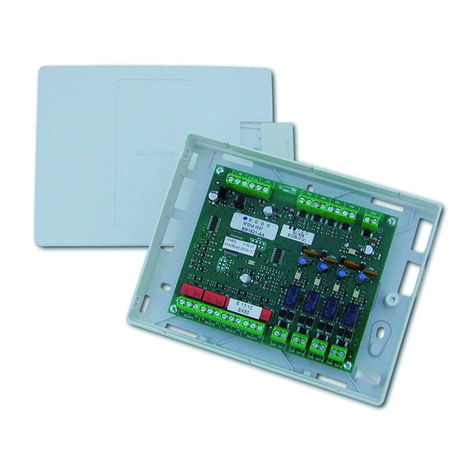
Elkron MR16 User manual

DS80IT19-004A LBT80725
MR16
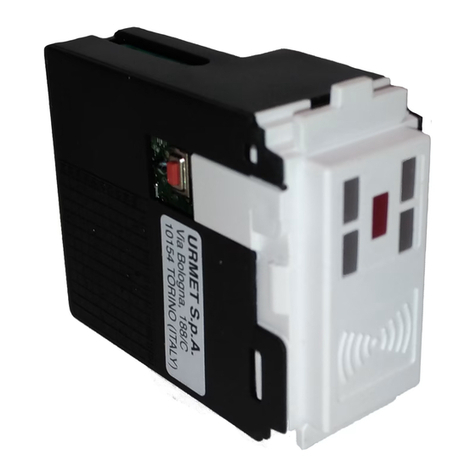
Relay radio module
Installation and user's Manual
GB

2 Installation and use MR16
All information in this document have been collected and carefully verified, nevertheless Elkron S.p.A. can
not be held responsible for any possible errors and omission.
Elkron S.p.A. reserves the right to modify or improve at any times and without notice the products
described in this manual.
Besides it is possible that this manual refers to any information about products (hardware or software) or
services not yet on the market. These references or information do not mean that Elkron S.p.A. intends to
release these products or services.
Elkron is a registered trade mark of Elkron S.p.A.
All trade marks mentioned in the document belong to their respective owners.
© Copyright Elkron S.p.A.
All rights reserved. Reproduction of this document is allowed only for MR16 system installation.
Via Cimarosa 39 – 10154 Torino (TO) – ITALY
Tel. +39 (0)11.398.67.11 – Fax +39 (0)11. 398.67.90

Installation and use MR16 3
SUMMARY
SUMMARY...................................................................................................................................................3
1 – GENERAL DESCRIPTION ....................................................................................................................5
1.1 SYSTEM ARCHITECTURE.................................................................................................................5
1.2 SYSTEM MAXIMUM DIMENSIONS....................................................................................................5
1.3 SYSTEM COMPONENTS...................................................................................................................6
1.3.1 Radio module MR16......................................................................................................................6
1.3.2 Micro contact DC500.....................................................................................................................6
1.3.3 Indoor IR detector IR500...............................................................................................................6
1.3.4 Indoor siren IS500.........................................................................................................................7
1.3.5 Outdoor siren HP500.....................................................................................................................7
1.3.6 Remote control RC500..................................................................................................................7
2 – USE........................................................................................................................................................8
2.1 ELEMENTS OF RADIO MODULE MR16............................................................................................8
2.2 VISUAL AND ACOUSTIC WARNING.................................................................................................9
2.2.1 Visual warning...............................................................................................................................9
2.2.2 Acoustic warning ...........................................................................................................................9
2.2.3 Details on visual warning.............................................................................................................10
2.3 WARNINGS FROM DETECTION DEVICES.....................................................................................11
2.3.1 Micro contact DC500...................................................................................................................11
2.3.2 Detector IR500 ............................................................................................................................11
2.4 WARNINGS FROM ACTUATION DEVICES (SIRENS)....................................................................12
2.4.1 Siren HP500................................................................................................................................12
2.4.2 Siren IS500..................................................................................................................................12
2.5 CONTROL DEVICE WARNINGS......................................................................................................12
2.6 ARM AND DISARM MODULE MR16................................................................................................12
2.6.1 From remote control....................................................................................................................12
2.6.2 From external control...................................................................................................................12
3 – SYSTEM DESIGN................................................................................................................................13
3.1 WARNINGS FOR CORRECT INSTALLATION.................................................................................13
3.2 OPERATING MODES.......................................................................................................................14
3.2.1 Detection devices alarm status....................................................................................................14
3.2.2 Physical sabotage .......................................................................................................................14
3.2.3 Radio sabotage or radio communications jammed .....................................................................14
3.2.4 Battery low condition ...................................................................................................................14
4 – INSTALLATION...................................................................................................................................15
4.1 RADIO MODULE MR16....................................................................................................................15
4.1.1 Fastening.....................................................................................................................................15
4.1.2 Connection to power supply........................................................................................................16
4.1.3 Connections to wired alarm control panel ...................................................................................17
4.1.4 Configuration of radio module MR16...........................................................................................22
4.1.5 Supervision function....................................................................................................................23
4.2 MICRO CONTACT DC500................................................................................................................23
4.2.1 Power supply...............................................................................................................................23
4.2.2 Acquiring detection devices.........................................................................................................23
4.2.3 Fastening.....................................................................................................................................24
4.2.4 Connection to external detectors.................................................................................................24
4.2.5 Configuration...............................................................................................................................25
4.3 IR INDOOR DETECTOR IR500........................................................................................................25
4.3.1 Power supply...............................................................................................................................25
4.3.2 Acquisition...................................................................................................................................25
4.3.3 Fastening.....................................................................................................................................26
4.3.4 Configuration...............................................................................................................................26
4.4 INDOOR SIREN IS500......................................................................................................................26
4.4.1 Power supply...............................................................................................................................26
4.4.2 Acquiring actuation devices.........................................................................................................27
4.4.3 Fastening.....................................................................................................................................27
4.4.4 Configuration...............................................................................................................................28
4.5 OUTDOOR SIREN HP500................................................................................................................28

4 Installation and use MR16
4.5.1 Power supply...............................................................................................................................28
4.5.2 Acquisition...................................................................................................................................28
4.5.3 Fastening.....................................................................................................................................29
4.5.4 Configuration...............................................................................................................................29
4.6 REMOTE CONTROL RC500 ............................................................................................................30
4.6.1 Power supply...............................................................................................................................30
4.6.2 Acquiring control device ..............................................................................................................30
5 – TEST ....................................................................................................................................................31
5.1 TEST DETECTION DEVICES...........................................................................................................31
5.2 TEST ACTUATION DEVICES...........................................................................................................32
5.3 TEST REMOTE CONTROL ..............................................................................................................32
5.4 USER TRAINING ..............................................................................................................................32
6 – MAINTENANCE...................................................................................................................................33
6.1 DEVICES...........................................................................................................................................33
6.1.1 Adding a device...........................................................................................................................33
6.1.2 Removing a device......................................................................................................................33
6.1.3 Replacing a device......................................................................................................................34
6.2 REPLACING BATTERIES.................................................................................................................34
6.2.1 Opening micro contact DC500 ....................................................................................................35
6.2.2 Opening IR detector IR500..........................................................................................................35
6.2.3 Opening the battery compartment of HP500 siren......................................................................36
6.3 RESET...............................................................................................................................................36
6.3.1 Reset radio module MR16...........................................................................................................36
6.3.2 Reset sirens.................................................................................................................................36
7 – TECHNICAL CHARACTERISTICS .....................................................................................................37
7.1 RADIO MODULE WITH RELAYS MR16...........................................................................................37
7.2 MICRO CONTACT DC500................................................................................................................38
7.3 INDOOR IR DETECTOR IR500........................................................................................................38
7.4 INDOOR SIREN IS500......................................................................................................................39
7.5 OUTDOOR SIREN HP500................................................................................................................39
7.6 REMOTE CONTROL RC500 ............................................................................................................39
8 – DEFAULT SETTINGS..........................................................................................................................40

Installation and use MR16 5
1 – GENERAL DESCRIPTION
1.1 SYSTEM ARCHITECTURE
MR16 system allows to add wireless devices to an anti-intrusion system, although not prearranged to
manage radio devices.
The system includes a bidirectional radio module interfacing to the inputs and outputs of any wired control
panel, and a range of detectors and wireless devices by which existing anti-intrusion system can be
extended.
Wireless communication is bidirectional and the system is provided with protection means against
physical sabotage and radio sabotage (jamming).
The constancy of radio communications between devices and radio module MR16 is controlled by
supervision function.
The system can be programmed and personalised according to individual needs.
The status of system and single detectors is displayed via LEDs.
Radio module MR16 takes power supply out of wired control panel it is connected to, while wireless
devices are supplied via lithium batteries.
1.2 SYSTEM MAXIMUM DIMENSIONS
Bidirectional radio module MR16 can manage up to:
•16 radio input devices (micro contacts DC500 and volumetric detectors IR500) on choice.
•2 sirens either indoor (IS500) or outdoor (HP500).
•8 remote controls RC500.
•8 output connections to wired alarm control panel for detectors warnings.
•4 alarm connections to wired alarm control panel.
•2 output connections per command and status repetition to wired alarm control panel.
•2 input connections from wired alarm control panel.

6 Installation and use MR16
1.3 SYSTEM COMPONENTS
1.3.1 Radio module MR16
Outdoor bidirectional radio module controls the whole wireless system and
processes information from peripheral units; it makes up the interface
between wired alarm control panel and wireless devices.
The module includes:
•8 outputs with solid state relays for warnings from wireless detectors;
•1 output with solid state relays for physical sabotage alarm warning;
•1 output with solid state relays for radio sabotage alarm warning;
•1 output with solid state relays for battery low warning;
•1 output with solid state relays for arming/disarming command via remote
control;
•1 output with solid state relays for radio module (arm/disarm) status
repetition;
•1 input for radio module tamper;
•1 input S to detect wired alarm control panel status;
•1 input BL to arm wireless sirens from wired alarm control panel.
The module takes power supply out of wired alarm control panel it is
connected to.
Other radio module characteristics are:
•protection against opening and removal;
•relays which can be biased via jumpers;
•status and warning LEDs.
1.3.2 Micro contact DC500
Magnetic detector to detect opening or closing status in door or window it is
mounted on. It is supplied by a lithium battery and communicates via radio
with radio module MR16 in bidirectional mode.
Microcontact DC500 has a programmable auxiliary input, to which there can
be connected either other NC (normally closed) detectors (e.g. magnetic
detectors) or a shutter detector; micro contact DC500 has also LEDs to warn
about radio communication. Programming is by jumpers. A tamper assures
protection against opening and removal.
The device has test, supervision and battery low warning functions.
The device is also available in version with colour brown.
1.3.3 Indoor IR detector IR500
Detector with passive infrared rays to detect movements in area supervised
by it. It is supplied by a lithium battery and communicates via radio with radio
module MR16 in bidirectional mode.
Detector IR500 has LEDs to warn about radio communication.
A tamper assures protection against opening and removal.
The detector can be mounted in angular position by provided support.
The device has test, supervision and battery low warning functions.

Installation and use MR16 7
1.3.4 Indoor siren IS500
Siren for indoor installation acoustically warning about an alarm condition
when receiving alarm condition signal from radio module MR16.
The siren is supplied by alkaline batteries and communicates via radio with
radio module MR16 in bidirectional mode.
Siren programming and ringing times are by DIP switch. A tamper assures
protection against opening.
The device has test, supervision and battery low warning functions.
1.3.5 Outdoor siren HP500
Siren suitable to outdoor installation acoustically and optically warning, by
strobe, about an alarm condition when receiving alarm condition signal from
radio module MR16.
The siren is supplied by alkaline batteries and communicates via radio with
radio module MR16 in bidirectional mode.
Siren programming and ringing times are by DIP switch. A tamper assures
protection against opening and removal.
The device has test, supervision and battery low warning functions.
1.3.6 Remote control RC500
Remote control allowing to arm and disarm module MR16.
The remote control is supplied by a lithium battery and communicates via
radio with radio module MR16 in bidirectional mode.
The device has both two-colour LEDs for command sent and battery low
warnings and a buzzer for warning about command received from radio
module.

8 Installation and use MR16
2 – USE
2.1 ELEMENTS OF RADIO MODULE MR16
Figure 1
1. LED for alarm warning
2. LED for identification of device typology
3. Status LED of corresponding input 1÷16
4. Control key

Installation and use MR16 9
2.2 VISUAL AND ACOUSTIC WARNING
2.2.1 Visual warning
Radio module MR16 front side is provided with LEDs displaying the status of system and its radio
devices.
LED Colour Meaning On Off
1÷16 Red Status of corresponding
radio detector Input open or movement
detected Input closed or no
movement
Red Physical sabotage Tampers of one or more
devices stressed (device
open).
LED blinking until user
examines alarm details
No sabotage to devices
Red Radio sabotage •One or more devices
did not reply to
supervision
•A radio transmission
tries to black out
communications
LED blinks until user
examines alarm details
No sabotage to devices
Yellow Battery status One or more devices are
in battery low condition Battery charger suitable
A Green Device type identification Indicating that the
device is a detector
(micro contact or IR
detector)
B Green Device type identification Indicating that involved
device is a siren
C Green Device type identification Indicating that involved
device is remote control
2.2.2 Acoustic warning
If enabled by programming, radio module MR16 buzzer sends out sound warnings in following cases:
•arm: 1 long beep;
•disarm: 3 long beeps;
•test on inputs: one beep whenever a detector (micro contact or IR detector) is stressed.

10 Installation and use MR16
2.2.3 Details on visual warning
Detection device open/closed status is immediately identified by its LED (there is one LED per input).
Physical sabotage warning ( )
1. Press once control pushbutton at the front side on radio module MR16: 3 beeps are sent out and
LED stops blinking and is lit steady.
2. Press control pushbutton and keep it pressed for 3 seconds:
•radio module MR16 sends out 3 beeps,
•LED Agoes on steady,
•one or more status LEDs 1÷16 go on to show which detection devices (micro contacts and IR
detectors) have had tamper open.
3. Press control pushbutton:
•radio module MR16 sends out 1 beep,
•LED Agoes off and LED Bgoes on steady,
•one or more status LEDs 1÷2 go on to show which actuation devices (sirens) have had tamper
open.
4. Press control pushbutton and keep it pressed for 3 seconds:
•radio module MR16 sends out 3 beeps,
•if the tampers of all wireless devices are closed, LED goes off and alarm memory is erased;
otherwise, the LED resumes blinking.
5. Radio module MR16 returns to normal operation.
Warning: physical sabotage memory is also erased at every radio module MR16 arming
operation, provided that cause generating the alarm is not still present.
Radio sabotage warning ( )
1. Press twice control pushbutton at the front side on radio module MR16: 3 beeps are sent out and
LED stops blinking and is lit steady.
2. Press control pushbutton and keep it pressed for 3 seconds:
•radio module MR16 sends out 3 beeps,
•LED Agoes on steady,
•one or more status LEDs 1÷16 go on to show which actuation devices (micro contacts and IR
detectors) have not replied to supervision.
3. Press control pushbutton:
•radio module MR16 sends out 3 beeps,
•LED Agoes off and LED Bgoes on steady,
•one or more status LEDs 1÷2 go on to show which actuation devices (sirens) have not replied
to supervision.
4. Press control pushbutton and keep it pressed for 3 seconds:
•radio module MR16 sends out 3 beeps,
•if all wireless devices replied to supervision, LED goes off and alarm memory is erased;
otherwise, the LED resumes blinking.
5. Radio module MR16 returns to normal operation.
Notes:
•if detail LEDs do not go on, radio sabotage is of jamming type;
•if both missing reply to supervision and jamming were enabled and both sabotage types
occurred, radio module MR16 will only show details relating to missing supervision.
Warning: radio sabotage memory is also erased at every radio module MR16 arming
operation, provided that cause generating the alarm is not still present.

Installation and use MR16 11
Battery low warning ( )
1. Press three times control pushbutton at the front side on radio module MR16: 3 beeps are sent out
and LED stops blinking and is lit steady.
2. Press control pushbutton and keep it pressed for 3 seconds:
•radio module MR16 sends out 3 beeps,
•LED Agoes on steady,
•one or more status LEDs 1÷16 go on to show which detection devices (micro contacts and IR
detectors) have battery low.
3. Press control pushbutton:
•radio module MR16 sends out 3 beeps,
•LED Agoes off and LED Bgoes on steady,
•one or more status LEDs 1÷2 go on to show which actuation devices (sirens) have battery low.
4. Press control pushbutton and keep it pressed for 3 seconds:
•radio module MR16 sends out 3 beeps,
•if the batteries of all wireless devices have a sufficient charge, LED goes off and alarm
memory is erased; otherwise, the LED resumes blinking.
5. Radio module MR16 returns to normal operation.
Caution: battery low warning goes off as soon as all wireless devices have batteries sufficiently
charged, although alarm details were not controlled.
2.3 WARNINGS FROM DETECTION DEVICES
2.3.1 Micro contact DC500
In normal operation conditions, micro contact DC500 does not warn about transmissions by LED.
Front LED blinks first red (signal sending) then green (reception confirmation from radio module MR16)
when:
•Micro contact is in battery low condition.
•The cover was opened or antiremoval (tamper) protection was anyhow armed.
•TEST key was pressed. When in Test mode, the LED will blink whenever the contact is armed.
2.3.2 Detector IR500
In normal operation conditions, detector IR500 does not warn about transmissions by LED.
Front LED blinks first red (signal sending) then green (reception confirmation from radio module MR16)
when:
•The detector is in battery low condition.
•The cover was opened or antiremoval (tamper) protection was anyhow armed.
•TEST key was pressed. When in Test mode, the LED will blink whenever the detector is armed.

12 Installation and use MR16
2.4 WARNINGS FROM ACTUATION DEVICES (SIRENS)
2.4.1 Siren HP500
In case of alarm command on corresponding MR16 input, siren HP500 is ringing for programmed time
duration (3, 5 or 10 minutes).
If alarm cause is still present after programmed time has elapsed, the siren does not repeat the alarm.
Siren also provides following indications when MR16 module changes its status (armed/disarmed):
Siren Flash lamp
Arm (DIP switch B8 = ON) 1 beep 2 blinking
Disarm (DIP switch B8 = ON) 2 beeps 2 sequential blinking
Disarm (siren battery low condition) 5 beeps 2 sequential blinking
Arm (siren tamper open condition) 5 beeps 2 sequential blinking
Disarm (siren tamper open condition) 5 beeps 4 sequential blinking
2.4.2 Siren IS500
In case of alarm command on corresponding MR16 input, siren IS500 is ringing for programmed time
duration (3, 5 or 10 minutes).
If alarm cause is still present after programmed time has elapsed, the siren does not repeat the alarm.
Siren also provides following indications when MR16 changes its status (armed/disarmed):
Arm (DIP switch B8 = ON) 1 beep
Disarm (DIP switch B8 = ON) 2 beeps
Disarm (siren battery low condition) 5 beeps
Arm (siren tamper open condition) 5 beeps
Disarm (tamper open siren condition) 5 beeps
2.5 CONTROL DEVICE WARNINGS
Remote control RC500 provides following warnings:
LED on The LED is lit:
•In colour red, if a key was pressed, or
•In colour green, if remote control battery charge level is low and the battery has to
be replaced.
Beep Radio module MR16 received and acknowledged command sent from remote
control.
Warning: beep sound level is very low and beep sound might be not heard in noisy
environments.
2.6 ARM AND DISARM MODULE MR16
2.6.1 From remote control
To arm the system:
1. Press key on remote control: remote control LED will be lit in colour red.
2. Remote control sends out a beep to confirm that radio module MR16 received the command. If it
did not, press key again to send the command again.
To disarm the system:
1. Press key on remote control: remote control LED will be lit in colour red.
2. Remote control sends out a beep to confirm that radio module MR16 received the command. If it
did not, press key again to send the command again.
2.6.2 From external control
Radio module MR16 can be armed or disarmed automatically by an external control, e.g. by wired alarm
control panel according to wired alarm control panel status.

Installation and use MR16 13
3 – SYSTEM DESIGN
3.1 WARNINGS FOR CORRECT INSTALLATION
Maximum distance in the connection between two radio sets is determined by the strength and cleanness
of signal from receiving set. A number of factors may either reduce the strength of received signal or
interfere with signal reception. With proper contrivances, these factors can be removed or minimised.
The strength of radio signal is affected either by the absorption of materials the signal is to run through or
by radio waves reflection phenomena. Below table shows how the different materials affect the power of
transmitted radio signal.
Low absorption Medium absorption High absorption Reflection
Wood (e.g. cabinets,
furniture), plastic,
synthetic materials (e.g.
plexiglas), glass, drilled
bricks (e.g. partition
walls).
Water(e.g. aquariums),
integer bricks, marble. Concrete, bulletproof
windows, metal
structures (e.g.
household appliances,
piping, railings)
Mirrors, metal surfaces
In some cases, the signal may practically extinguish, e.g. inside metal cabinets.
On the contrary, radio signal may be jammed by not sufficiently screened electronic equipment, electric
motors or other devices working in radio frequency.
For radio devices correct installation apply following precautions:
•position the devices far from sources of electromagnetic noise, such as electric motors, electric panels,
etc.;
•do not mount the devices on metal surfaces or close to large metal objects, or inside metal structures,
such as metal boxes or cabinets;
•should chosen position not allow suitable radio communication, try to displace the device to another
position to see if radio communication is improving.
Warning: always displace peripheral unit (detector, siren, etc.), not radio module.
To position the various devices, comply with following rules:
•Radio module MR16:
omust be mounted close to wired alarm control panel, possibly not on walls made of either concrete
or integer bricks;
oits position must allow to see warning LEDs easily;
oits position must as much as possible be a “middle” position with respect to the various radio
devices.
•Micro contact DC500:
omust be placed inside protected premises;
othe detector must be placed on door or window frame and the magnet must be placed on door or
window frame wing or leaf, as far as possible from pintles or hinges.

14 Installation and use MR16
•Indoor IR detector IR500:
othe detector must not be placed where dust might build up;
othe detector must not be placed near sources of heat or where it may be hit by direct sun light, or
in areas possibly subjected to sudden changes in temperature (e.g. under an air conditioner);
othe detector must be mounted on a rigid surface, free from vibrations, at height ranging between 2
and 2.2 metres;
ofor its positioning, refer to detection diagrams (the detector must be able to cover the area to be
protected);
oavoid that in protected area exist blind zones — because of furniture, shelves, plants etc. — within
which a possible intruder can move;
oproperly aim the detector at the area to be protected, especially if the detector is mounted at
height over 2.2 metres;
oif necessary, more detectors can be mounted in the same environment, without any fear of
interferences.
•Indoor siren IS500:
omount the siren on a flat surface, which cannot be easily reached by any stalkers.
•Outdoor siren HP500:
omount the siren in vertical position, on a flat surface;
omount the siren in a position which is clearly visible from the outside and from frequently walked
by places, and cannot be reached without a ladder.
3.2 OPERATING MODES
3.2.1 Detection devices alarm status
Should a micro contact detect door or window opening, or an IR detector identify a movement in controlled
area, then radio module MR16 will arm LED corresponding to the input; relating relay output will behave
according to programming performed. When the cause of alarm status dies down, the LED goes off.
For precise operating modes of relay outputs relating to inputs, see paragraph 4.1.4 Configuration of radio
module MR16.
3.2.2 Physical sabotage
Should a physical sabotage attempt be detected caused by the opening of the tamper of one or more
devices, then radio module MR16 will react as follows:
•LED will blink;
•PHYSICAL SABOTAGE relay output will be armed according to what decided in programming step.
At the closing of all tampers, relay output will be disarmed, while LED will blink until alarm details are
checked.
3.2.3 Radio sabotage or radio communications jammed
Should either a radio sabotage (jamming) attempt be detected or any one of the devices (detectors and
sirens) not reply to supervision message, then radio module MR16 will react as follows:
•LED will blink;
•RADIO SABOTAGE relay output will be armed.
At full recovery of radio communications (no jamming and/or supervision working with all devices), relay
output will be disarmed, while LED will blink until alarm details are checked.
3.2.4 Battery low condition
Should one or more devices be in battery low condition, then radio module MR16 will react as follows:
•LED will blink;
•BATTERY relay output will be armed.
When no device will warn about battery low condition, that is when all low batteries will be replaced, relay
output will be disarmed and LED stop blinking.

Installation and use MR16 15
4 – INSTALLATION
4.1 RADIO MODULE MR16
4.1.1 Fastening
1. Open radio module MR16 as illustrated in figure 2.
Figure 2
2. Prearrange passages for cables of connection to wired alarm control panel.
Radio module container base is prearranged with pre-fractured passages (figure 3): if rear
passages and not side passages are to be used, first remove the electronic board, taking off the
four screws that are placed at the corners (figure 4).
Figure 3 Figure 4
3. Secure radio module to a flat wall, using fixing plugs supplied. Figure 5 shows possible
alternatives:
•Hanging from slot Aand then blocked by holes Band C. In this case, the electronic board
has not to be taken off.
•Secured to an embedded box with 3 modules, using holes D.
•Secured to an embedded box with 2 modules, using two holes E.
Warning: to assure antiremoval protection to radio module, hole Cmust always be used too.

16 Installation and use MR16
Figure 5
4.1.2 Connection to power supply
Radio module MR16 takes power supply at 12 V— out of wired alarm control panel it is connected to.
Before making the connection, check for wired control panel to be able to provide current requested by
radio module, that is that overall absorption of control panel, devices, connected to control panel, and
radio module does not exceed the current which control panel power supply unit is able to supply.
Power supply cable must be connected at one side to pins + and – of radio module and at the other side
to wired alarm control panel 12 V— output. In connection, observe polarities!
Warning: wired control panel side connection must be downstream of control panel power supply
unit and backup battery to assure radio module MR16 power supply also in lack of network power
supply (230 V).
Figure 6
Note: should control panel not have a current reserve sufficient to supply radio module MR16 too, radio
module MR16 can also be supplied by an additional power supply unit provided with a backup battery,
such as AS02/6.

Installation and use MR16 17
4.1.3 Connections to wired alarm control panel
Relay output connection
Connect radio module relay outputs (figure 7) to wired alarm control panel inputs according to what
indicated in the table. Do not exceed voltages and currents accepted for solid state relays. The status of
the relay at rest (normally open or normally closed) is defined by DIP switches (see paragraph 4.1.4
Configuration of radio module MR16 configuration). The LED between the two DIP switch banks indicates
radio module MR16 armed/disarmed status.
Warning: the black dot identifies the pin, which, where the output is polarised to either 12 V or
0 V, switches over, following the input and its programming. The pin without a black dot has either
12 V or 0 V fixed potential independently of the status of associated radio device.
Where the radio output is not polarised, the two pins are similar to the ones of a circuit breaker.
Figure 7
Every wired alarm control panel follows specific conventions in naming its inputs and in the type of
connection (normal, balanced or with double balancing) to be made. In the table, for wired control panel
inputs, generic denominations are used. Refer to wired control panel instructions to identify correct inputs
and type of connection to be made.
Warning: where radio module is connected to a wired control panel, you are warned against
programming, on wired control panel, functions (e.g. “Insertion Block”) preventing the system from
being armed when inputs are open.

18 Installation and use MR16
Output Jumper Description
OUT1 ÷ OUT8 J1 ÷J8
Outputs directly associated to detection devices (micro contacts and IR
detectors). Each relay can be associated to two detectors (detectors 1 and 9
at output 1, detectors 2 and 10 at output 2, etc.).
When an input device warns about an alarm, the relay switches over
depending on radio module MR16 configuration. Table Operating modes
of output relays OUT1 ÷OUT8 shows possible output operating modes.
Outputs used are to be connected to wired control panel detector inputs.
SAB J9
If PHYSICAL SABOTAGE function is enabled by programming, the relay
switches over if at least one device warns about physical sabotage
(tamper open). The output can be connected in series to wired alarm
control panel tamper input.
RF SAB J10
If JAMMING DETECTION and/or SUPERVISION ENABLING functions
were enabled by programming, the relay switches over whenever radio
sabotage (jamming and/or missing supervision) is detected. The output
can be connected to wired alarm control panel sabotage input (or in
series to tamper input, where sabotage input is missing).
BATT J11
The relay is armed where one or more devices warn out that battery is
low. The output can be connected to wired alarm control panel faulty
input.
ON/OFF J12
The relay is managed with remote control RC500.
When, on remote control, you press radio module MR16 arm control, the
relay switches:
•first to OFF and remains OFF for 500 ms and then to ON and remains
ON for 400 ms, if it is configured as NC,
•first to ON and remains ON for 500 ms and then to OFF and remains
OFF for 400 ms, if it is configured as NO.
When, on remote control, you press radio module MR16 disarm control,
the relay switches:
•first to OFF and remains OFF for 1000 ms and then to ON and
remains ON for 400 ms, if it is configured as NC,
•first to ON and remains ON for 1000 ms and then to OFF and remains
OFF for 400 ms, if it is configured as NO.
The output can be used to arm and disarm wired alarm control panel,
connecting the output to the “mechanical key” input of wired control
panel, if it is provided with it.
SYS ST J13 Relay output follows radio module MR16 armed or disarmed status.
This output can be used to display radio module MR16 status, e.g. by
connecting an external LED.
The polarisation of each output can be changed by modifying the position of corresponding jumper.
Figure 8

Installation and use MR16 19
DIP switch A5 = OFF
Outputs OUT1÷OUT8 Free from potential Positive polarisation Negative polarisation
at rest Closed contact 12 V 0 V
in alarm condition Open contact - -
DIP switch A5 = ON
Outputs OUT1÷OUT8 Free from potential Positive polarisation Negative polarisation
at rest Open contact - -
in alarm condition Closed contact 12 V 0 V
Operating modes of output relays OUT1 ÷ OUT8
Relay operation mode Subordinated to radio
module status Operating mode
Enabled
(DIP switch B1 = OFF) When radio module MR16 is armed, the output
follows associated detection device.
Detection device 1 open -> relay 1 armed
Detection device 1 closed -> relay 1 disarmed
Bistable
(DIP switch A4 = OFF)
Disabled
(DIP switch B1 = ON) The output always follows associated detection
device.
Detection device 1 open -> relay 1 armed
Detection device 1 closed -> relay 1 disarmed
Enabled
(DIP switch B1 = OFF) When radio module MR16 is armed, the output is
armed and remains armed for about 1 second at
every opening operation on associated detection
device
Monostable
(DIP switch A4 = ON)
Disabled
(DIP switch B1 = ON) The output is armed and remains armed for about 1
second at every opening operation on associated
detection device
Tamper MR16 connection
Terminal blocks TMP are a support to radio module MR16 tamper connection and must be taken back to
wired anti-intrusion control panel.
Figure 9

20 Installation and use MR16
Connecting inputs
Radio module MR16 is provided with inputs through which it can learn wired system status and receive
commands from the system. Input polarity (reference to either positive or negative polarisation) is defined
by DIP switch B6 (see paragraph 4.1.4 Configuration of radio module MR16).
Below table shows connections to be made:
Input Description
S This input must be connected to an output of wired control panel which follows
control panel status.
The value of voltage depends on input polarity chosen:
•positive polarity (DIP switch B6 = ON): by applying 12 V voltage, the module, if
armed, is disarmed; taking off the voltage, the module, if disarmed, is armed.
•negative polarity (DIP switch B6 = OFF): by applying 0 V voltage, the module, if
armed, is disarmed; taking off the voltage, the module, if disarmed, is armed.
BL This input is used to drive wireless sirens, by acknowledging a voltage at its pin.
This input must be connected to an output of wired control panel which is armed
when the sirens are armed. By applying 12 V voltage to the pin, radio sirens are
silenced; taking off the voltage, the sirens ring.
Table of contents
Other Elkron Control Unit manuals

Elkron
Elkron IMG500/N User manual

Elkron
Elkron PRO MEDEA/32 User manual

Elkron
Elkron MP120 User manual

Elkron
Elkron IT700-WIFI User manual

Elkron
Elkron IT500CLOUD User manual

Elkron
Elkron MP120 Owner's manual

Elkron
Elkron MP 110 User manual

Elkron
Elkron T600 User manual

Elkron
Elkron IO500 User manual

Elkron
Elkron DK510M-P User manual