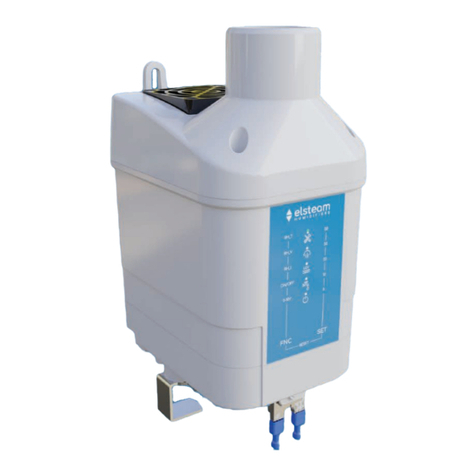
Elsteam VEH Series Installation and operating instructions

VEH SERIES
ELECTRODES STEAM HUMIDIFIER
FOR AIR HANDLING UNIT
INSTALLATION, USE AND MAINTENANCE GUIDE
Rel. 20.2.EN
Control
Unit
Kettle body to be
installed in the AHU

AHU Electrodes Humidifier - VEH 20.2.EN 2
Elsteam S.r.l - via E. Fermi, 496 - 21042 Caronno Pertusella (va) - Tel.+39 02 9659890 - Fax +39 02 96457007
E-mail: info@elsteam.it - Web: http://www.elsteam.com
TOC
1SAFETY RULES.........................................................................................................................................................3
1.1 GENERAL RULES ......................................................................................................................................................... 3
1.2 CONDITIONS THERMO HYGROMETRIC (INSTALLATION) .............................................................................................. 3
1.3 POWER SUPPLY ........................................................................................................................................................... 3
1.4 WATER CONNECTIONS ................................................................................................................................................ 3
1.5 WASTE DISPOSAL ....................................................................................................................................................... 3
1.6 WARRANTY ................................................................................................................................................................. 4
2MANUFACTURER DATA .........................................................................................................................................4
4GENERAL CHARACTERISTICS OF THE HUMIDIFIER .......................................................................................5
5STRUCTURE OF VEH HUMIDIFIER.......................................................................................................................5
6WORKING PRINCIPLE ............................................................................................................................................6
7CHARACTERISTICS ................................................................................................................................................7
8HUMIDIFIER INSTALLATION ................................................................................................................................8
8.1 WATER CONNECTION .................................................................................................................................................. 8
8.2 DRAINING CONNECTION .............................................................................................................................................. 8
8.3 ELECTRICAL CONNECTION .......................................................................................................................................... 8
8.4 ENABLE CONTACT ....................................................................................................................................................... 9
8.5 DRAINING BLOCK MANUAL CALIBRATION ................................................................................................................... 9
9WORKING PRINCIPLE ......................................................................................................................................... 11
10 MENU AND PARAMETERS ............................................................................................................................. 11
10.1 ON/OFF MODE .......................................................................................................................................................11
10.2 LANGUAGE.................................................................................................................................................................11
10.3 HUMIDITY SELECTION...............................................................................................................................................11
10.4 NOMINAL CURRENT ..................................................................................................................................................11
10.5 DRAIN TIME. .............................................................................................................................................................12
10.6 WATER FILL TIME......................................................................................................................................................12
10.7 PURGE TIME. ............................................................................................................................................................12
10.8 HEATING TIME ..........................................................................................................................................................12
10.9 TA COEFFICIENT. ......................................................................................................................................................12
10.10 LEVEL SENSOR ......................................................................................................................................................12
10.11 PRESSURE THRESHOLD.........................................................................................................................................12
10.12 MINIMUM 0-10V INPUT CALIBRATION..............................................................................................................12
10.13 WATER CHANGE INTERVAL ...................................................................................................................................12
11 ALARMS............................................................................................................................................................. 13
12 CONNECTIONS.................................................................................................................................................. 14
12.1 USED AND AVAILABLE CONNECTIONS IN VEH1112 ................................................................................................15
13 SCHEMATIC DIAGRAM................................................................................................................................... 18

AHU Electrodes Humidifier - VEH 20.2.EN 3
Elsteam S.r.l - via E. Fermi, 496 - 21042 Caronno Pertusella (va) - Tel.+39 02 9659890 - Fax +39 02 96457007
E-mail: info@elsteam.it - Web: http://www.elsteam.com
Read this manual carefully, observing all the safety measures listed in it for the correct use of the hu-
midifier. Keep the humidifier in good working condition. Look closely at all the tips for the installation and
use of your humidifier before operating it. It 'made absolute obligation for installers to go through the
installation manual of this unit: Elsteam srl declines any responsibility for damages caused to third par-
ties or to the product resulting from the missing or partial application of the rules contained in it.
Keep this manual and all the documentation that came with your humidifier in a safe place for future
reference further.
1Safety Rules
1.1 General Rules
People who are not familiar with this type of equipment or do not have carefully read this manual should
not be allowed to use the humidifier.
Your humidifier is designed to be used with AC 230V 50/60Hz. Do not attempt to use the humidifier with
a different kind of tension. Check that the mains voltage corresponds to the humidifier target value.
The humidifier must always be switched off before any maintenance operation.
All maintenance and repair work must be performed by the manufacturer, its service agent or qualified
personnel.
Do not scotch the output socket steam humidifier and do not insert any object into any opening.
1.2 Conditions thermo hygrometric (installation)
Make sure that the environmental conditions of the place where the installation is carried out are al-
ways compatible with the requirements of the product as required in this manual. Each Elsteam product
cannot be installed in places exposed to weather conditions or frost, unless different terms are explicitly
expressed in documents countersigned.
1.3 Power supply
The Elsteam equipment must be connected to the power supply strictly following the regulations and
specifications stamped on equipment labels.
In particular, it is mandatory that the supply lines are of the correct section and equipped in accordance
with safety switch (RCD) that can protect user.
1.4 Water connections
Elsteam equipment may need to be connected to the water network. In this case it is necessary to strictly
comply with the regulations and make sure that any fault or water leakage resulting from the installation
or by the equipment cannot cause harm to the environment or to third parties. Do not install the unit on
walkways or above dangerous objects or susceptible to damage and always provide proper drainage
systems that can properly evacuate any water leakage.
1.5 Waste disposal
Directive 2002/96/EC of the European Parliament and the national rules impose an obligation not to
dispose of WEEE as unsorted municipal civil, but to set up a special collection of obsolete parts of the
humidifier.
The buyer has the option to return the humidifier into disuse at Elsteam srl in case of purchase of an
equivalent (o superior) humidifier. Elsteam will take care of disposal directly or through its agents.

AHU Electrodes Humidifier - VEH 20.2.EN 4
Elsteam S.r.l - via E. Fermi, 496 - 21042 Caronno Pertusella (va) - Tel.+39 02 9659890 - Fax +39 02 96457007
E-mail: info@elsteam.it - Web: http://www.elsteam.com
The disposal of electrical or electronic components in an abusive manner and not complying with the
legislation entails sanctions.
1.6 Warranty
ELSTEAM Srl recognizes on its products the legal guarantees in force at the time of sale of the product.
Incorrect use and lack of maintenance entail the automatic forfeiture of any form of guarantee.
2Manufacturer Data
Manufacturer
ELSTEAM Srl
Via ENRICO FERMI 496, 21042 CARONNO PERTUSELLA (VA) - ITALY
Contacts
Tel.: (0039) 029659890
Fax: (0039) 0296457007
Email: infocomm@elsteam.com
Web: www.elsteam.com

AHU Electrodes Humidifier - VEH 20.2.EN 5
Elsteam S.r.l - via E. Fermi, 496 - 21042 Caronno Pertusella (va) - Tel.+39 02 9659890 - Fax +39 02 96457007
E-mail: info@elsteam.it - Web: http://www.elsteam.com
4General characteristics of the humidifier
The VEH humidifiers series is a class of electrode humidifiers specifically designed for installation inside
air handling units.
Normally in these applications, the humidifier is installed externally to the AHU and the steam is conveyed
through special piping and steel distributors (which allow the mixing of the steam with the air) inside the
AHU.
The standard solution has numerous drawbacks and additional costs:
-The construction of a technical compartment exterior to protect the humidifier
-An antifreeze device which ensures that the water in the humidifier does not freeze in the ab-
sence of a request for production
-The use of expensive and bulky rubber tubes for the conveyance of steam-
-The use of steel distributors within the UTA
-The formation of condensation inside the tubes and distributors with decreased performance
-The need to install the pipes avoiding traps and depressions that would prevent the steam to
flow properly
-The loss of heat to the outside through both tubes, but especially in the humidifier itself exposed
to low temperatures.
The family of VEH humidifiers, as well as the REH (resistors) and SSH (steam heat exchanger) families, is
able to overcome all these problems, greatly simplifying the installation costs and increasing the per-
formance of the product compared to the corresponding humidifiers usually on the market.
5Structure of VEH humidifier
The VEH humidifier is constituted by two parts connected together electrically: the hydraulic part and
the control unit based on a microprocessor board. The hydraulic part is completely inserted into the
AHU, lying on the condensate drain tank immediately downstream of the cooling coil. The control unit
can be placed in the cabinet already aboard the AHU.
The hydraulic boiler is made up of plastic polypropylene “channel” having a section of 33 cm x 16 cm
height, and having a length proportional to the width of the AHU.
Inside the boiler are arranged longitudinally the stainless steel electrodes, connected to the power sup-
ply phases and easily removable
The lid is made of plastic sections with slope, so as to allow any condensation that falls by gravity into
the boiler in order to avoid power losses. Between the plastic sections is obtained a narrow longitudinal
slot which allows the output of the steam produced, that meets the air for the whole length of the AHU
section.
This solution prevents the formation of condensate in the pipes and also prevents any increase in steam
pressure in the boiler due to blockages in the pipes conveying steam.
Picture 1 - Electrodes

AHU Electrodes Humidifier - VEH 20.2.EN 6
Elsteam S.r.l - via E. Fermi, 496 - 21042 Caronno Pertusella (va) - Tel.+39 02 9659890 - Fax +39 02 96457007
E-mail: info@elsteam.it - Web: http://www.elsteam.com
On one side of the kettle (the easiest to access once installed) you have the body of hydraulic manage-
ment of the system:
-Maximum water level sensor
-Draining bloc
The draining bloc has been specially designed to empty the tank from water
and limestone pieces without having to block and having to be able to work
without pressure.
It is essentially constituted by a valve having a free passage of 32 mm in di-
ameter, closed by a damper operated by an electric motor and a cam. Grafted
rigidly on the pivot motor is an electronics rotation sensor, which, communi-
cating with the microprocessor control is able to manage the correct opera-
tion of the system and communicate any faults that appear in the display.
6Working Principle
At power the humidifier performs a complete cleaning of tank for cleaning the electrodes. This phase is
followed by a total emptying of water eventually contained inside the kettle, so as to secure an operation
with hygienically perfect water. The humidifier performs a current control in the electrodes to ensure
that the kettle is totally empty. In case presence of current is detected, control system will signal the
"clogged drain" alarm. If the humidistat requires production to the humidifier, the electronics inserts
the power control system and starts to fill the kettle with water to continue with the production phase.
The conductivity of the water varies a lot, not only depending on the hardness of the water itself, but also
on the temperature: cold water is poorly conductive, and its conductivity increases with temperature up
to a maximum of around 95°C before falling back slightly at boiling point. It is a good practice that the
electronics manages current values when the water is close to boiling to compare realistic values of
steam production.
At this point, the humidifier will start filling water at short intervals until reaching a production equal to
the required one.
Following, the control system will keep production at set values with programmed fill or drain of water.
If the production exceeds the required value or the maximum supplied by the setting, the control system
will start to choke the power, taking care, however, that the average value of the output current is al-
ways zero, to avoid excessive corrosion of the electrodes.
At regular intervals, the humidifier makes also small purges, so as to ensure that the salt content in the
water is not too high and thus avoiding an excessive deposit of limestone.
At much longer intervals (default value 4h) the control system will make complete draining of the boiler
to remove limestone deposits.
Picture 2 - Cover with slits for steam outlet

AHU Electrodes Humidifier - VEH 20.2.EN 7
Elsteam S.r.l - via E. Fermi, 496 - 21042 Caronno Pertusella (va) - Tel.+39 02 9659890 - Fax +39 02 96457007
E-mail: info@elsteam.it - Web: http://www.elsteam.com
7Characteristics
Models
VEH3 VEH5 VEH10 VEH20 VEH30 VEH40 VEH60 VEH80 VEH100
STEAM PRODUCTION
Steam Capacity
[Kg/h] 3 5 10 20 30 40 60 80 100
Max pressure
[mm H2O/
bar]
no limits under normal conditions within the AHU
ELECTRICAL DATA
Power
[kW] 2.5 4 7.5 15 22.5 30 45 60 75
Supply
[Vac, Hz] 230, 50 400, 50
Phases
[n] 1 2 3
Max Current per Phase
[A] 10 10 10 21 32 40 60 80 100
HYDRAULIC DATA
Input Water Quality
Complies with the microbiological requirements defined for drinking water by the reg-
ulations in force in the area of use, possibly partially demineralized
Input Water Conductibility
μS*cm 70…1250
Input Water Hardness
°Fr 5...50
Input Water Pressure
[MPa/bar] 0,02...1/0,2...10
Input Water Connection
M 3/4” G
Drain Water Connection
[mm] 42
GENERAL DATA
Control Unit Dimensions
WxHxD [mm]
400x350x150 450x400x200
Hydraulic Unit Dimen-
sions)
WxH [mm] 320x160
(Depth depending on required capacity and AHU size)
Standard
width 4 elec-
trodes
[mm] 580 580 580 730 930 1130 1330 / /
Standard width 7 elec-
trodes
[mm] / / / 580 730 730 930 1130 1330
Weight
[kg] 12 15 15 18 20 24 26 31 33
IP Hydraulic Unit
20
IP Control Unit
44
REGULATION
Control
Internal controller (4-20mA humidity probe), external signal (0-10V, ON-OFF)

AHU Electrodes Humidifier - VEH 20.2.EN 8
Elsteam S.r.l - via E. Fermi, 496 - 21042 Caronno Pertusella (va) - Tel.+39 02 9659890 - Fax +39 02 96457007
E-mail: info@elsteam.it - Web: http://www.elsteam.com
8Humidifier installation
The hydraulic part is simply placed inside the compartment of humidification of the AHU on the conden-
sate drain pan immediately downstream of the cold battery, with the control group placed on the sides
of the AHU where inspection is easier.
If the AHU is subjected to shock and transport, secure it with screws.
During the humidifier installation carefully follows these points:
•The opening and the closing of the power electronic control box takes place through 4 screws
•Since water is discharged at a temperature of 100 ° C, it is necessary to connect the drain with
a plastic tube of greater length possible (at least 1 meter)
•The model listed above are only for operation in OEM application within AHU
•As above said the humidifier of these families cannot be installed in direct contact with people
and objects
8.1 Water connection
The humidifier is connected to the water through a rubber pipe
that can withstand pressure surges, already included in the hu-
midifier, so as to allow a rapid disassembly for inspection and
cleaning of the filter on the solenoid. Connection type is ¾ inch
female
The supply water must not be demineralized water (not having
conductivity, the humidifier does not produce), preferably un-
sweetened, because generally softened water is corrosive for
the electrodes (even if made of stainless steel). Normal water
can be used to feed the humidifier. If the hardness exceeds 30
French degrees, you can provide a partial softening. However,
it can also be used without softening, providing some supplementary maintenance.
Input pressure must be between 2 and 10 bars.
8.2 Draining connection
If it is allowed, it is sufficient for letting the drain in the condensate drain pan of UTA who will then evac-
uated through its draining connection. In this case you have to connect a 90° bend to the draining block.
This connection assures us that the downloaded limestone cannot block the draining outlet
If you are asked to separate the two drain systems, connect the 40 mm humidifier drain pipe with a
sewer drain trap having at least the same cross section.
8.3 Electrical connection
You need to connect the control unit to the power supply making sure that the cables sections comply
with the regulations and that a circuit breaker is installed upstream.
You do not need the neutral and ground lines.
All operations related to electrical installation MUST be carried out
by qualified
personnel (eg electrician or staff with appropriate training). The customer is
responsible for the use of qualified personnel.
IF THE HUMIDIFIER IS PLACED IN AN ENVIRONMENT WITH STRONG INTAKE
THE 90°
BEND MUST BE DIRECTED IN THE AIRFLOW DIRECTION (otherwise the joined contri-
bution of the aspiration of the air flow on the water and the pressure
of the air
onto the draining will prevent a correct draining of kettle).

AHU Electrodes Humidifier - VEH 20.2.EN 9
Elsteam S.r.l - via E. Fermi, 496 - 21042 Caronno Pertusella (va) - Tel.+39 02 9659890 - Fax +39 02 96457007
E-mail: info@elsteam.it - Web: http://www.elsteam.com
Before starting ensure the following conditions:
◊The size of the power cables must be convenient to the maximum current that must pass
through them.
8.4 Enable Contact
This connection should be made only for humidifiers placed in centralized and ducted ventilation sys-
tems. It allows stopping the steam production each time the air ventilation in the channels stops. If pro-
duction is not stopped it would create a steam accumulation in the channels and a subsequent conden-
sation with water leaks.
To obtain this enable, you must bring a connection between the auxiliary contact of the fan contactor
(voltage free contact) to terminals J5-6 and J17-8 the humidifier electronic board.
If you do not use such enable, left the contact shorted (J5-6 and J17-8 terminals) as received from
Elsteam.
8.5 Draining block manual calibration
The drain block is calibrated in the best closed position during the testing phase. In case this position
were to vary with time (you see the high losses of the draining pipe), it should proceed to a new adjust-
ment of the closure of the draining block.
This procedure must be carried out with the full water kettle to allow the search of the optimal closed
position.
Please proceed as following:
1) Switch the humidifier OFF
2) Press and hold SET and OK simultaneously while providing voltage. The word "DISCHARGE SET-
TING" appears on the display.
3) 3) Press the + and - buttons to adjust the position of the drain block until you no longer see leaks
from the drain.
4) Press OK.
Before any maintenance and installation power connection should be dis-
continued and protected against any accidental connection.
Before performing the electrical connections make sure that the voltage
available is equivalent to that of the humidifier.

AHU Electrodes Humidifier - VEH 20.2.EN 10
Elsteam S.r.l - via E. Fermi, 496 - 21042 Caronno Pertusella (va) - Tel.+39 02 9659890 - Fax +39 02 96457007
E-mail: info@elsteam.it - Web: http://www.elsteam.com
ELSTEAM s.r.l.
HUMIDIFIER VEH1112
(Version 1.2)
Control System Programming

AHU Electrodes Humidifier - VEH 20.2.EN 11
Elsteam S.r.l - via E. Fermi, 496 - 21042 Caronno Pertusella (va) - Tel.+39 02 9659890 - Fax +39 02 96457007
E-mail: info@elsteam.it - Web: http://www.elsteam.com
9Working Principle
a) At power-up, the humidifier performs an emptying of the tank by opening the drain for the time
value set in "T. Emptying".
b) If the request for production is greater than zero, water is charged for the time value set in "T.
Load Water". If it is the first load of water, and then the tank is empty, the charging time will be
twice the set value.
c) Follows a period of waiting to heat water, the duration of which is set by the parameter "T.
Heating".
d) At the end of heating time, the system tries to balance production with the request, in the fol-
lowing way: if production is less than the request, it returns to step b. If, however, the produc-
tion is higher than the required heating phase continues until the output value becomes not
less than the requested value.
e) If, at the end of the heating period, the current is still zero, a lack of water alarm is set.
f) During normal operation, there is an active system for changing the water: after one hour of
operation, the system provides to the discharge of a small part of water and the relative refill-
ing. Every 4 hours, is, instead, a total change of the tank water.
g) If the demand of production remains at zero for a period of more than 1 hours, the tank will be
emptied, to avoid the formation of bacteria.
10Menu and Parameters
Pushing the "SET" button, you can access the configuration menu of the system. The buttons
"+" and "-" allow increasing and decreasing the parameter value. Click "OK" to confirm the new
parameter value and passes to the next. The modifiable parameters are:
10.1 ON/OFF Mode
During normal operation (not in alarm) by pressing the "RESET" button for 5 seconds, the hu-
midifier goes into OFF mode disconnecting the contactor. To resume operation press the "RE-
SET" button for 5 seconds (ON mode).
10.2 Language
Set the menu and messages language:
a. Italian (default).
b. English.
c. French.
d. German (not yet implemented)
10.3 Humidity selection
Set the source of humidity sensor:
a. Internal: in this case it is proposed to set the desired humidity value between 0 and
100%.
Internal controller uses a humidity probe 4-20mA connected at
J17.pin5 = +V
J17.pin4 = IN
J17.pin8 = GND (if needed)
b. External: in this case you have to select the type of used humidistat:
I. On-Off type
II. Proportional 0-10V type
III. Proportional 4-20mA type
Default: Extern humidistat. Proportional 0-10V type
10.4 Nominal Current
Set the rated current of the humidifier.
Default 20A

AHU Electrodes Humidifier - VEH 20.2.EN 12
Elsteam S.r.l - via E. Fermi, 496 - 21042 Caronno Pertusella (va) - Tel.+39 02 9659890 - Fax +39 02 96457007
E-mail: info@elsteam.it - Web: http://www.elsteam.com
10.5 Drain time.
Set the time during which the drain system remains open to allow emptying of the tank. The time
is in seconds, from 1 to 250.
Default 120”.
10.6 Water fill time
Set the time during which the inlet valve is open water. The time is in seconds, from 1 to 250.
Default 10”.
10.7 Purge Time.
Set the purge time during which the drain system remains open to allow a small discharge of
water. The time is in seconds, from 1 to 250.
Default 1”.
10.8 Heating time
Set the waiting time during which the water in the tank is heated by the passage of the current.
The time is in seconds, from 1 to 1200 (= 20min.).
Default 80”.
10.9 TA coefficient.
Set the coefficient for the TA mounted in the humidifier. It is a number from 10 to 9999, modified
in steps of 10.
Default 750.
10.10 Level sensor
Set the type of level sensor connected. Can be chosen among:
•HV Level switch (High Voltage). Input IN-DIG0
•Contact with float on input IN-DIG1 (jumper JP2 must be closed):
a. N.C. = normally closed.
b. N.O. = normally open.
Default HV Level switch
10.11 Pressure threshold
2000Pa
10.12 Minimum 0-10V Input Calibration
This parameter allows varying the minimum threshold for intervention in the case of using an
external controller with different voltages from 0-10V.
10.13 Water change interval
It indicates the interval between complete changes of water in the kettle.
(Default 4h)

AHU Electrodes Humidifier - VEH 20.2.EN 13
Elsteam S.r.l - via E. Fermi, 496 - 21042 Caronno Pertusella (va) - Tel.+39 02 9659890 - Fax +39 02 96457007
E-mail: info@elsteam.it - Web: http://www.elsteam.com
11Alarms
DISPLAY
Description
Resolution
A L A R M
LACK WATER
No water in the kettle Check the input solenoid
Check the electrical connections of the solenoid
A L A R M
DRAIN MOTOR
The drain motor is not closed within the
allotted time. (Timeout of closing)
Check the electrical connections of the motor
Check that there are no blocks of limestone or objects
blocking the closure
A L A R M
CLOGGED DRAIN
limestone blocks draining block Check the amount of scale in the kettle/draining block.
Perform manual cleaning of kettle/draining block

AHU Electrodes Humidifier - VEH 20.2.EN 14
Elsteam S.r.l - via E. Fermi, 496 - 21042 Caronno Pertusella (va) - Tel.+39 02 9659890 - Fax +39 02 96457007
E-mail: info@elsteam.it - Web: http://www.elsteam.com
12Connections
J17
Analogues
Inputs
J5
Digital
Inputs
J1 – TA inputs
J13 – Add-On supply
J6 – Motors with po-
tentiometers
J16 – TRIAC connec-
tions
J15 – HV opto input
J10 – RS485
J3
Proportional
Output 0-10V
J8 – Opto outputs
J4 – Relay outputs
J2 – Transistor out-
puts
Unit internal connections
J12 –AC input 11V
J9 – Keyboard con-
nector
User available connections

AHU Electrodes Humidifier - VEH 20.2.EN 15
Elsteam S.r.l - via E. Fermi, 496 - 21042 Caronno Pertusella (va) - Tel.+39 02 9659890 - Fax +39 02 96457007
E-mail: info@elsteam.it - Web: http://www.elsteam.com
12.1 Used and available connections in VEH1112
J17 Analogue
Inputs
1 Vcc –
2 +NTC0 –
3 –NTC0 –
4 – CLOOP –
5 + CLOOP –
6 IN-AN0 –
7 IN-AN1 –
8 GND –
Humidistat
0-10V
J1 –TA Input
1 Phase-R –
2 Com ---
3 Phase-S –
4 Com ---
5 PhaseT –
6 Com ---
TA
J2 – Transistor
Outputs
1 Out1 + -
2 GND –
3 Out2 + -
4 GND –
Inlet solenoid
valve
J16 –TRIAC
Connections
1 +R –
2 - R –
3 + S –
4 – S –
5 + T –
6 – T –
TRIAC - R
TRIAC - S
TRIAC - T
J15 –HV Opto
Input
1 IN-DIG0+ -
2 IN-DIG0- -
Boiler
HV Sensor
Phase R
•3 available analogue
inputs
•
1 available output
Humidistat
ON-OFF

AHU Electrodes Humidifier - VEH 20.2.EN 16
Elsteam S.r.l - via E. Fermi, 496 - 21042 Caronno Pertusella (va) - Tel.+39 02 9659890 - Fax +39 02 96457007
E-mail: info@elsteam.it - Web: http://www.elsteam.com
J12 –12V AC
Input
1 –
2 –
Supply
230/400 - 11Vac
J5 – Opto
Inputs
1 IN-DIG1+ -
2 IN-DIG1- -
3 IN-DIG2+ -
4 IN-DIG2 –
5 IN-DIG3 +
6 IN-DIG3 -
J17 Analogue
INputs
8 GND –
Float level sensor (N.C or N.O.).
Alternative to the HV sensor.
Jumper JP2 closed
J6 – Motor with
Potentiometer
1 – Mot1_A –
2 – Mot1_B –
3 – V_Aux + -
4 – In_Pot1 –
5- GND –
6 – Mot2_A –
7 – Mot2_B –
8 – V_Aux+ -
9 – In_Pot2 –
Drain motor
with position
potentiome-
ter.
- Mot
+ Mot
+ V pot
Pot
-
Pot
•2 available opto inputs
•1 available motor control with potenti-
ometer
J4 – Relays Out-
puts
1 – Relay 1 A –
2 – Relay 1 B –
3 – Relay 2 A –
4 – Relay 2 B –
5 – Relay 3 A –
6 – Relay 3 B –
7 – Relay 4 A –
8 – Relay 4 B –
9 – Relay 5 A –
10 – Relay 5 B –
•4 available Relays
Relay alarm signal.
Enable contact
(Active if closed)

AHU Electrodes Humidifier - VEH 20.2.EN 17
Elsteam S.r.l - via E. Fermi, 496 - 21042 Caronno Pertusella (va) - Tel.+39 02 9659890 - Fax +39 02 96457007
E-mail: info@elsteam.it - Web: http://www.elsteam.com
•Available 0 – 10V proportional output.
J3 - 0-10V
Proportional
Output
1 – Out + -
2 Gnd –
J10 – RS485
1 – A –
2 – B –
3 – Gnd –
J8 –Opto
Outputs
1 – Out 2 C –
2 – Out 1 E –
3 – Out 2 E –
4 - Out 1 C –
•Available RS485 line.
•2 available optocoupled outputs

AHU Electrodes Humidifier - VEH 20.2.EN 18
Elsteam S.r.l - via E. Fermi, 496 - 21042 Caronno Pertusella (va) - Tel.+39 02 9659890 - Fax +39 02 96457007
E-mail: info@elsteam.it - Web: http://www.elsteam.com
13Schematic diagram
Other manuals for VEH Series
1
This manual suits for next models
1
Table of contents
Other Elsteam Humidifier manuals

Elsteam
Elsteam HPN Series Installation manual
Elsteam
Elsteam VEH20 Series User manual
Elsteam
Elsteam KT Series User manual
Elsteam
Elsteam VEH Series User manual
Elsteam
Elsteam KT User manual
Elsteam
Elsteam HPN Series Operating instructions
Elsteam
Elsteam UH06-OEM Operating instructions

Elsteam
Elsteam AHU-VEH User manual
Elsteam
Elsteam ZEPHYR EHKT003M2 User manual

Elsteam
Elsteam REH4 Installation and operating instructions
