3
Optional parameters
(recommended factory setting for majority of applications)
Factory Field
Code
Parameter description & choices Min Max
Setting
Setting
uu Start valve opening (%) 10 100 50
u9 Start opening duration (second) 1 30 5
uL Low superheat alarm function 0 2 1
0 = disable (for ooded evaporator)
1 = enable auto reset 2 = enable manual reset
Cut-out at 1°F (if it maintains 1 min.); Cut-in immediately at 6°F
u5 Superheat set-point (°F)
If uL enabled (auto or manual) 5.4 54 10.8
If uL disabled 0.9 54 10.8
u2 MOP function 0 1 1
0 = disable 1 = enable
u3
MOP set-point (°F) saturation temperature
* * X
Factory setting is according to selected refrigerant (u0):
+55°F for R22 +59°F for R134a +45°F for R507
+45°F for R404A +59°F for R407C +59°F for R410A
+122°F for R124 +23°F for R744
5 Units conversion (only for u3, u5,
1) 0 1 0
0 = °C, K, bar 1 = °F, R, psig
(Psig values are divided by 10. Example: Display 12.5 is 125 psig)
1 Value to show 0 4 0
0 = Measured superheat (F) 1 = Measured evaporator pressure (psi)
2 = Valve opening (%) 3 = Measured coil-out temp. (°F)
4 = calculated evaporating temperature (°F) from the pressure
b1
Battery error management, when battery
0 3 2
is defective (EC3-X33 only), see below:
Alarm Reset possibility after
Value Display Alarm Relay Valve recovery/replacement
0 – – Regulating –
1 Ab – Regulating –
2 Ab Signalling Fully close Auto
3 Ab Signalling Fully close Manual
(blinking)
Main parameters (must be checked and modied if necessary)
Factory Field
Code
Parameter description & choices Min Max
Setting
Setting
H5 Password 1 199 12
u0 System Refrigerant 0 7 1
0 = R22; 1 = R134a; 2 = R507; 3 = R404A; 4 = R407C;
5 = R410A; 6 = R124; 7 = R744 (subcritical application)
uP Installed pressure sensor type 0 1 0
0 = PT4-07M (for R22/R134a/R507/R404A/R407C/R124)
1 = PT4-18M (for R410A)
2 = PT4-30M (for R744, subcritical)
ut Installed valve type 1 5 5
1 = EX4; 2 = EX5; 3 = EX6; 4 = EX7; 5 = EX8
* Min. and Max. setting values are dependant to selected type of refrigerant.
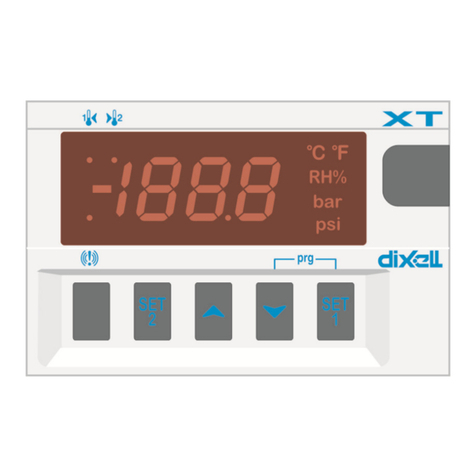
Mounting of ECD-002
ECD-002 can be installed at any time also during operation.
• ECD-002 can be mounted in
panels with 2.8x1.1 in cutout
• Push controller into panel cut-
out.(1)
• Make sure that mounting lugs are
ush with outside of controller
housing
• Insert allen key into front panel
holes and turn clockwise. Mount-
ing lugs will turn and gradually
move towards panel (2)
• Turn allen key until mounting lug
barely touches panel. Then move
other mounting lug to the same
position (3)
•Tighten both sides very carefully
until keypad is secured. Do not
over tighten as mounting lugs will
break easily.
Alarm Related Alarm Requires manual reset
code Description parameter relay Valve What to do? after resolving alarm
E0 Pressure transmitter error - Signalling Fully close Check wiring connection and measure the signal 4 to 20 mA No
E1 Temperature sensor error - Signalling Fully close Check wiring connection and measure the resistance of sensor No
A
EX4…EX8 electrical - Signalling - Check wiring connection and measure the resistance of winding No
connection error
AL Low superheat (<1°F) uL: 1 Signalling Fully close Check wiring connection and operation of valve No
AL blinking uL: 2 Signalling Fully close Yes
Ab b1: 1 - Regulating Battery potentially does not have enough charge to close valve in case -
Ab Battery error b1: 2 Signalling Fully close of main power supply interruption. May occur temporarily with new -
Ab blinking b1: 3 Signalling Fully close controllers or after long storage but should disappear when battery is Yes
charged sufciently. If Ab remains active even when battery is charged,
battery may be defective and should be replaced.
Er Data error display – - - - Data send to the display is out of range. Check temperature No
out of range and pressure sensor.
Note: When multiple alarms occur, the highest priority alarm is displayed until being cleared,
then the next highest alarm is displayed until all alarms are cleared. Only then will param-
eters be shown again.
Message
— No data to display
The display will show an “—” at start up and when no data is sent to ECD-002
Error/Alarm Handling
Checking system operating conditions
The data to be permanently shown on the display can be selected by the user
(parameter
1). It is possible to temporarily display these values. However,
this function is not available in an alarm condition. The display will show for
one second the numerical identier of the data (see
1 parameter) and then
the selected data. After 5 minutes, the display will return to the value selected
by parameter
1.
Service/Troubleshooting
Symptom Cause Action
Operating superheat is several degrees higher or Incorrect signal from pressure or 1- Check the sensors
lower than set-point temperature sensors 2- Make sure ECN-N60 temperature sensor is used
3- For optimum accuracy, please use:
PT4-07M for R22/R134a/R507/R404A/R407C/R124
PT4-18M for R410A
PT4-30M for R744
4- Make sure the sensor cables are not installed along
with other high voltage cables
Operating superheat is too low i.e. compressor wet running 1- Incorrect wiring of ECVs 1- Check the wiring
2- Defective sensors 2- Check the sensor
Valve is not fully closed 1- The digital input is ON (24V) 1- Valve is shut off only when the digital input is turned off (0V)
2- Wrong setting of parameter ut. 2- Check the setting of parameter ut
Instable superheat (hunting) Evaporator is designed to operate Increase the superheat set-point
at higher superheat
Valve opens when EC3 commands to close and vice versa Wrong wiring between EC3-X33 Correct the wiring
and valve
EX8 is not able to open at high differential pressure Wrong setting of parameter ut Check the parameter ut. (Larger valve requires higher torque
and higher current)
Superheat set-point is shifting after several months of Stepper motor driven valves
Do not apply permanent 24V digital input. Interrupt digital input
uninterrupted operation or permanent jumper of 24V require synchronization once every week for 5 seconds if compressor never stops.
digital input
