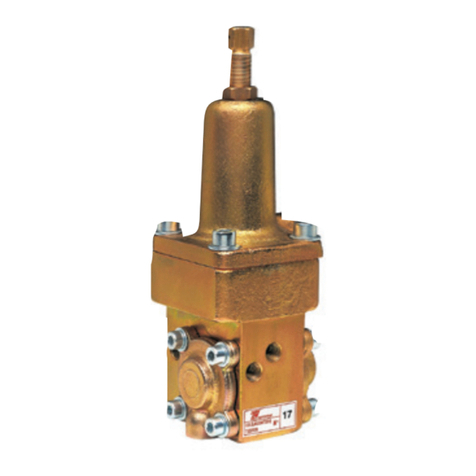
912N Series
3
If outlet pressure adjustment is necessary, monitor
the outlet pressure with a gauge while performing the
following procedures:
1. For units without a handwheel, unscrew the closing
cap (key 3) and insert a screw driver blade into the
adjusting screw (key 4).
2. Slowly turn the adjusting screw or handwheel
clockwise to increase or counterclockwise to
decrease the output pressure setting.
3. With the output pressure adjusted to the desired
value, replace the closing cap on units without
a handwheel.
Shutdown
Close the nearest upstream shut-off valve, then close the
nearest downstream shut-off valve, and vent pressure from
the outlet of the regulator.
Maintenance
Regulator parts are subject to normal wear and must be
inspected and replaced as necessary. The frequency of
inspection and replacement of parts depends on the severity
of service conditions or the requirements of local, state, and
federal rules and regulations.
!
WARNING
To avoid personal injury or equipment
damage, do not attempt any maintenance
or disassembly without rst isolating the
regulator from system pressure and relieving
all internal pressure from the regulator.
This procedure is to be performed if changing the control
spring for one of a different range, or for inspecting, cleaning,
or replacing any other parts. Key numbers are referenced
in Figures 2 and 3.
Note
If sufcient clearance exists, the regulator body
(key 1) can remain in the line during spring
replacement or other maintenance procedures.
Control Spring Replacement
Refer to Figure 2 on units without the handwheel, unscrew
the closing cap (key 3) and turn the adjusting screw out of
the spring case. Lift out the control spring (key 5).
Refer to Figure 3 on units with a handwheel (key 4), turn the
handwheel counterclockwise until the tension is relieved from
the control spring (key 5). Unscrew the nut at the base of the
handwheel and lift the handwheel off the spring case (key 2).
Lift out the adjusting screw (key 4) and the control spring.
Replace the control spring and complete the assembly
by replacing the adjusting screw and the closing cap or
handwheel. Adjust the spring tension as described in the
Startup section.
Diaphragm and Relief Valve Replacement
Remove cap screws (key 14) and separate the spring case
from the valve body. Remove the control spring (key 5) and the
diaphragm (key 15) along with the diaphragm head (key 10),
the relief valve seat (key 9) and the relief valve spring (key 6).
Separate these parts by removing the pin (key 8) and the spring
seat (key 7).
To reassemble the regulator, rst assemble the relief valve
spring assembly, then replace the relief valve spring assembly,
the diaphragm, the diaphragm head, and t the spring case
to the body. Install and tighten cap screws (key 14) in a
crisscross manner. Adjust the control spring tension as
described in the Startup section.
Parts Ordering
When corresponding with the local Sales Ofce about this
regulator, include the type number, date of manufacture, and
all other pertinent information from the labels. Specify the
eleven-character part number when ordering new parts from
the following parts list.
Parts List
Key Description Part Number
1 Body, Zinc
1/4 x 1/4 NPT
0.073-inch (1,9 mm) port diameter 3D377144042
1/4 x 3/8 NPT
0.073-inch (1,9 mm) port diameter 3B782444042
1/4 x 1/4 NPT
0.094-inch (2,4 mm) port diameter T4000544042
1/4 x 3/8 NPT
0.094-inch (2,4 mm) port diameter 3B892744042
2 Spring Case 3E294444042
3 Closing Cap
912N Series with handwheel, Brass 1C234414012
All others, Plastic T13269T0012
4 Adjusting Screw
912N Series with handwheel, Zinc/Steel 14B7140X022
All others, Plastic T1027706992
5 Regulator Spring, Steel See Table 1
6 Relief Valve Spring, Steel 1B784827012
7 Spring Seat, Steel 1B783425072
8 Pin, 302 Stainless steel 1B783535032
9 Relief Valve Seat, Zinc pusher (relieve valve post) 2B783044012
10 Diaphragm Plate, Zinc-plated Steel 1B783824132
11 Disc Holder GE19397X012
12 Fulcrum Rod, 302 Stainless steel 0U091435032
13 Machine Screw, Steel (2 required) T12748T0012
14 Machine Screw, Steel (6 required) 1V4131X0012
15 Diaphragm, Nitrile (NBR)
Spring Range: 3 to 24-inches w.c.
(7 to 60 mbar) 1B7837T0022
Spring Range: 0.5 to 5 psi
(0,03 to 0,34 bar) 1B783702012
16 Vent Screen, 304 Stainless steel 0W086343062
